Introduction to OkkProxy
OkkProxy is a proxy service provider that offers residential and other proxy solutions. It supports common proxy protocols such as HTTP(S) and SOCKS5.
OkkProxy Proxy Configuration
1.Log in to OkkProxy and Copy Proxy Information
- Log in to your OkkProxy account and open Use Proxies from the left navigation bar. Choose the proxy product, location, and connection settings you want to use. Then generate proxy information.
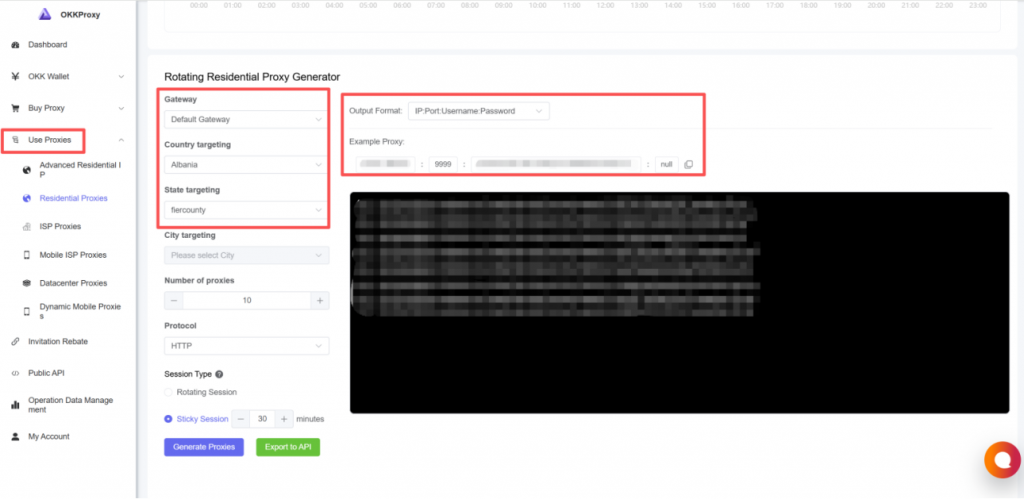
- Depending on the proxy type you select, the generated proxy information may include Proxy Type,Proxy Host,Proxy Port,Username,Password. Make sure to keep this information available, as you will need it when configuring the proxy in DICloak.
2.Configure OkkProxy Proxy in DICloak
Note: Internet connections within mainland China (excluding Hong Kong, Macau and Taiwan) generally cannot directly access foreign IPs. Therefore, if you are trying to configure an overseas IP proxy in DICloak within mainland China (excluding Hong Kong, Macau and Taiwan), you need to set up an overseas network through a VPS, a dedicated international line, or a VPN service first. Then you will be able to connect and access the overseas IP in DICloak properly.
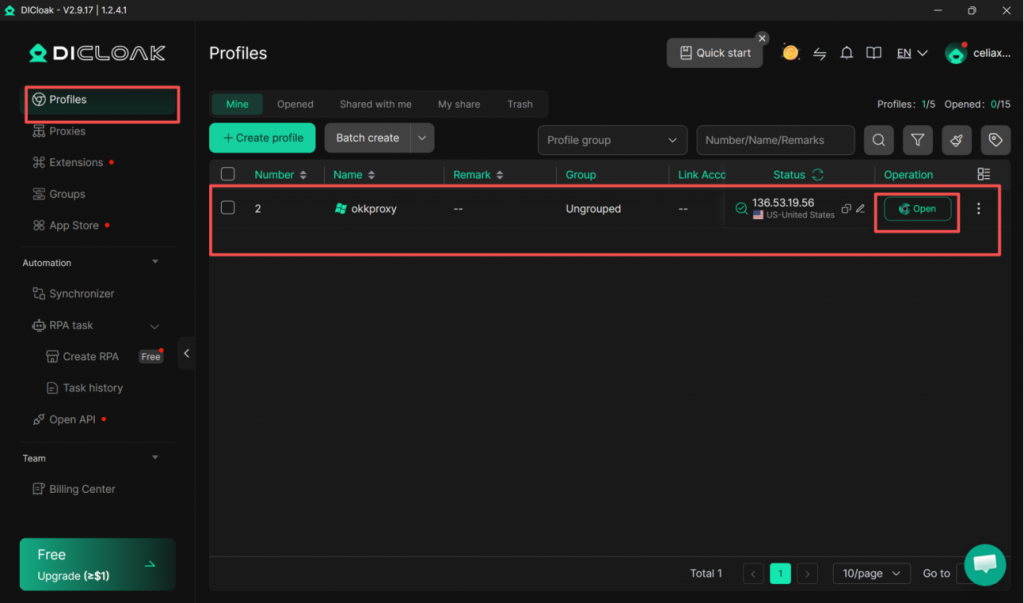
- Open DICloak and go to Profiles from the left navigation bar. Click Create Profile to open the Profile configuration page.
- Find Proxy Settings and select Custom Proxy. DICloak supports Quick input, which can automatically parse proxy information into the corresponding fields.
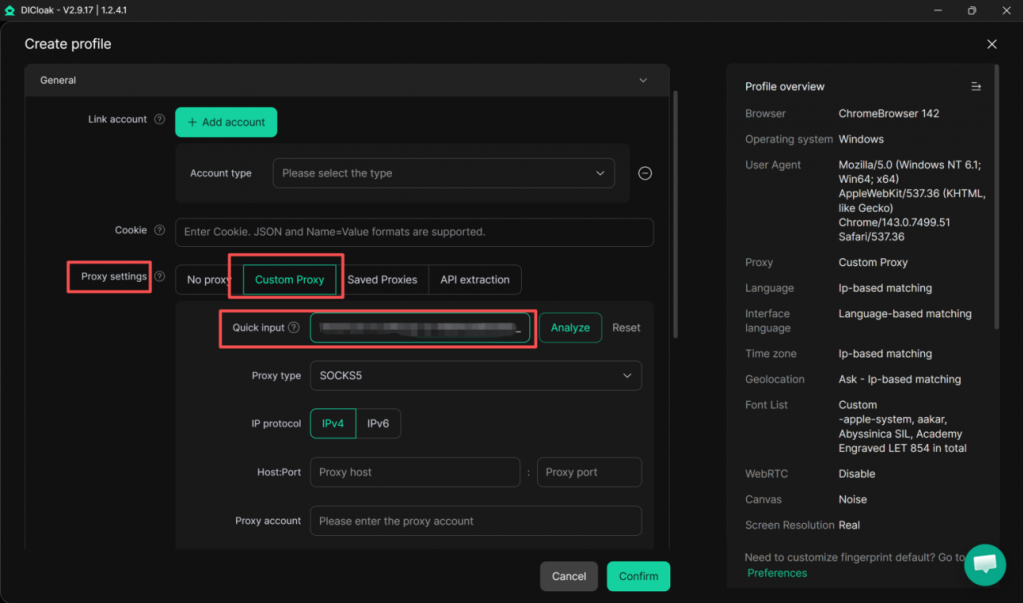
- Paste the OkkProxy proxy information into Quick input. Click Analyze.DICloak will automatically fill in the available proxy information, including the proxy host, port, account, and password.
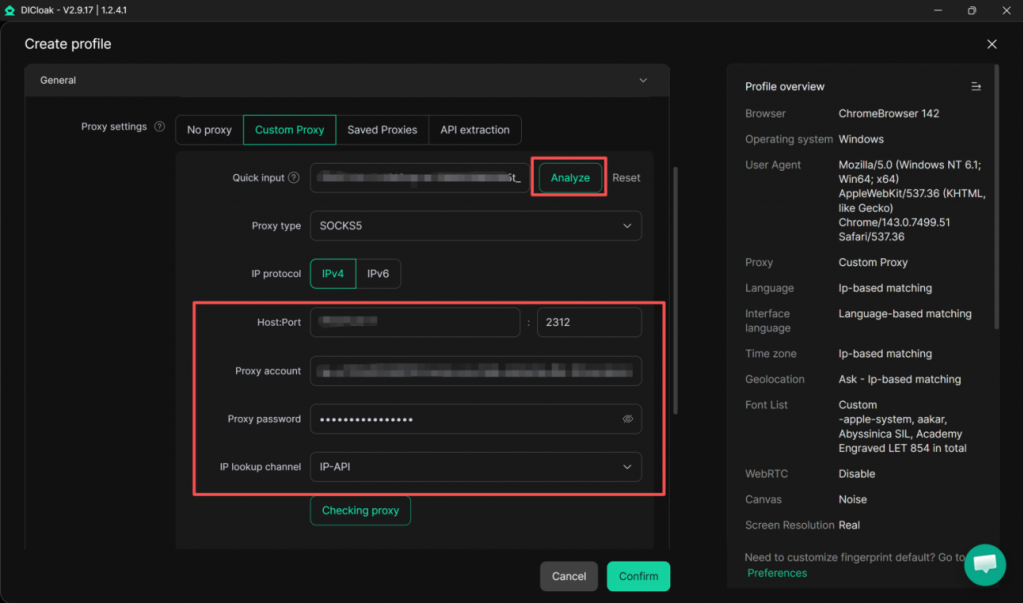
- Once the proxy details are correct, click Checking Proxy. Compare the detected IP and location with the proxy you selected in OkkProxy. Once the Profile is created, it will use the configured OkkProxy connection when opened.
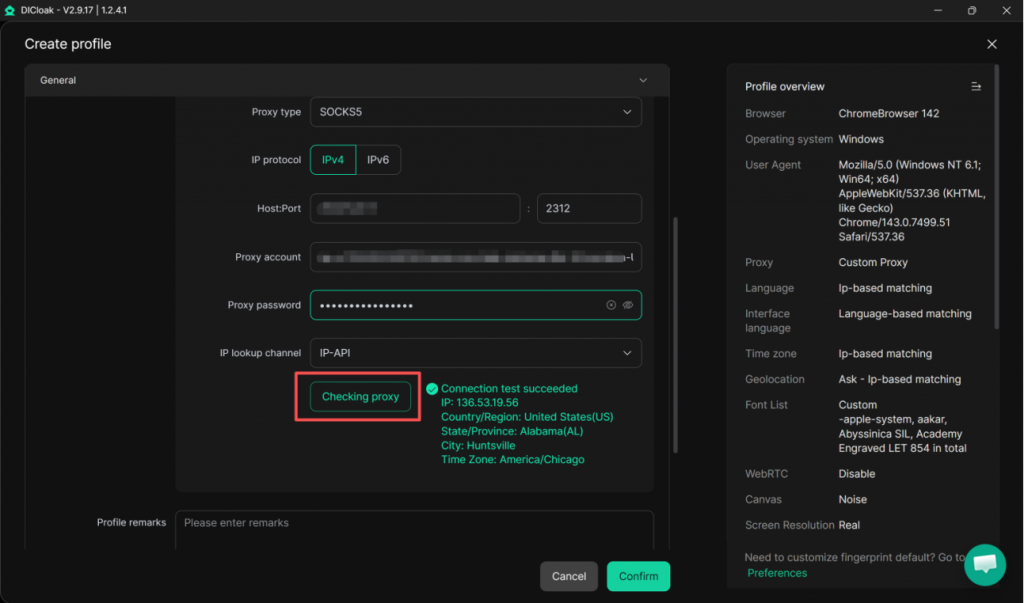
- If the proxy test succeeds, complete the remaining Profile settings and click Confirm. The new browser Profile will appear in the Profiles list. When you open it, the Profile will use the OkkProxy connection you configured.
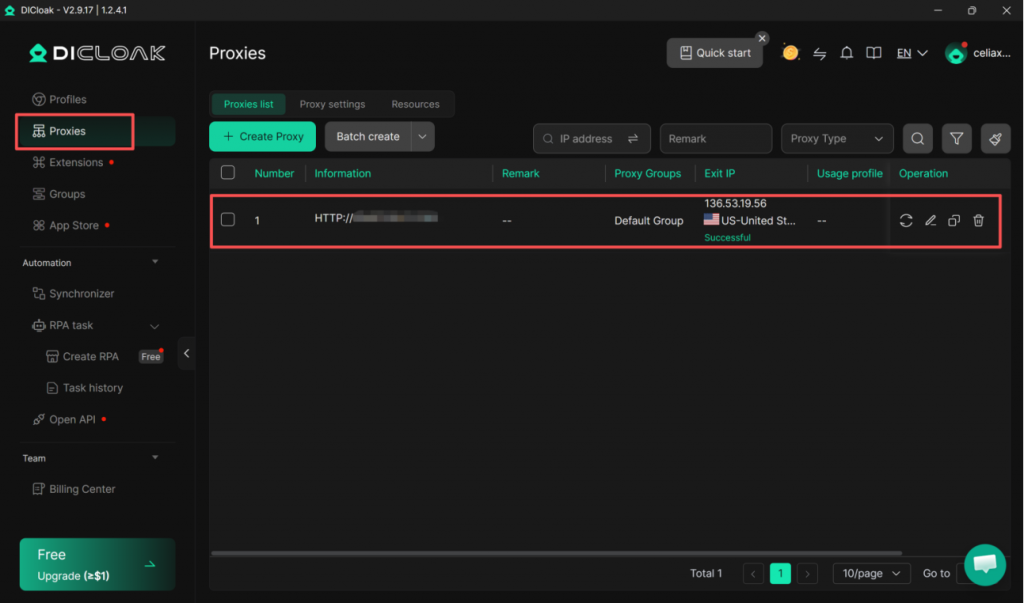
- Go to Proxies > Create Proxy, add and verify your OkkProxy connection, then save it. When creating a new browser profile, simply select the saved proxy instead of entering the details again. You can also use random proxy selection when managing multiple saved proxies.