PuraRoute is a proxy service providing dynamic residential, static residential, and static native proxies for businesses, developers, and data teams.
Dynamic residential proxies support rotating and sticky sessions, geo-targeted routing, and traffic-based purchasing, while static residential proxies provide dedicated fixed IPs for stable, long-running workflows. PuraRoute supports HTTP(S) and SOCKS5 protocols and provides ready-to-use integration options for Python, cURL, Node.js, PHP, Go, Java, and C#.
Common use cases include web scraping, ecommerce monitoring, market research, ad verification, brand protection, automated testing, AI data workflows, and account operations.
I. PuraRoute Proxy Configuration
1. Log in PuraRoute and Copy Proxy Information
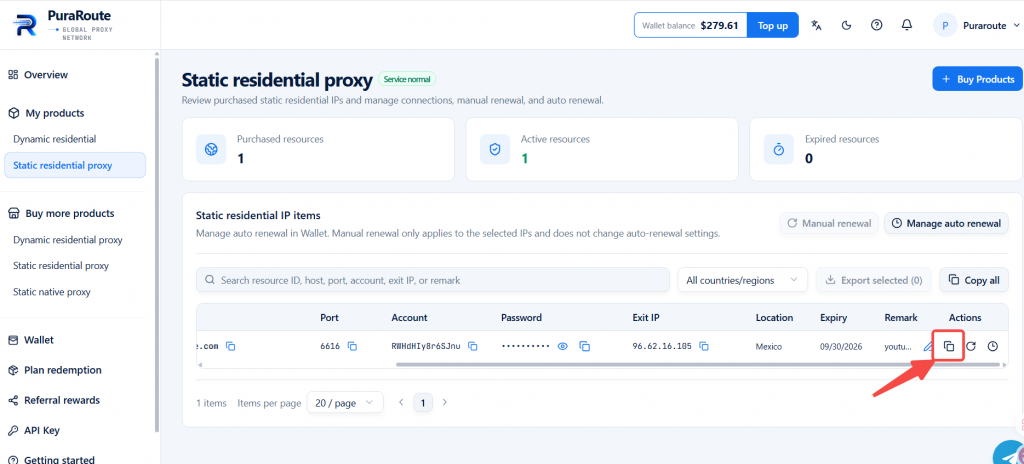
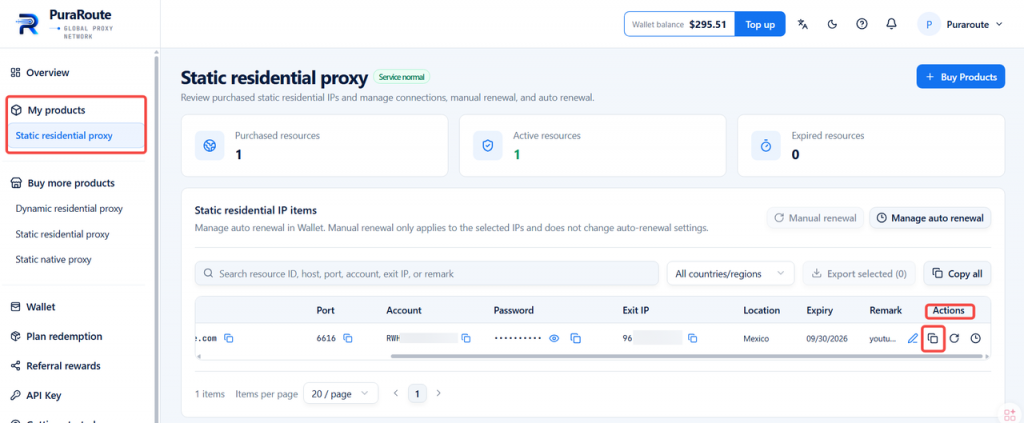
After completing the proxy purchase, navigate to [ My products ] on the left‑side dashboard to view your proxies’ information.
Tips: if you haven’t made a purchase, you need to buy a proxy first before proceeding to the next steps).
Select your purchased proxy, click the copy button under the [ action ] field to copy your proxy host, port, account, password in one go.
II. Configure PuraRoute Proxy in DICloak
1. Access the Proxies list
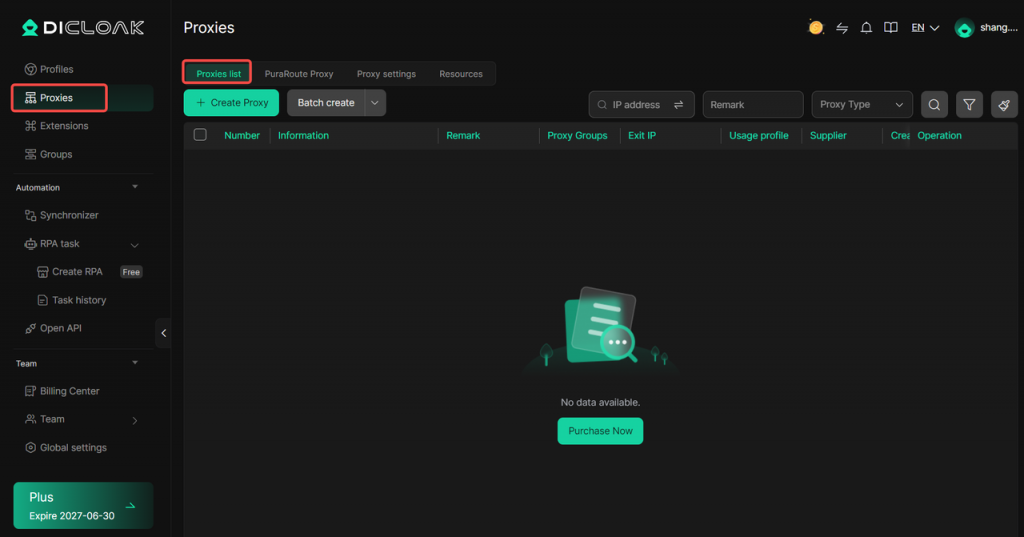
Open and log in to DICloak, locate [ Proxies ] on the left‑hand dashboard and open [ Proxies list ].
2. Fill in proxy information
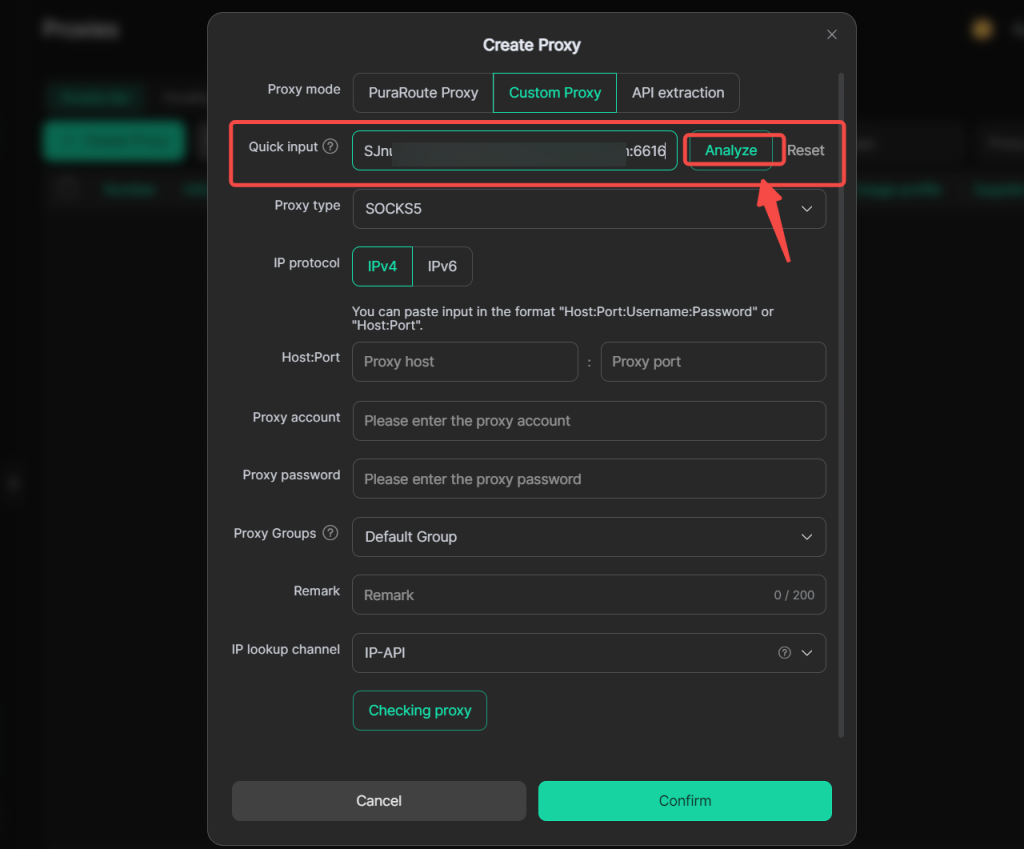
Click [Create Proxy] > [Custom Proxy]. Use DICloak’s Quick input feature to rapidly fill in the proxy host, port, account, password you copied from PuraRoute.
3. Proxy detection
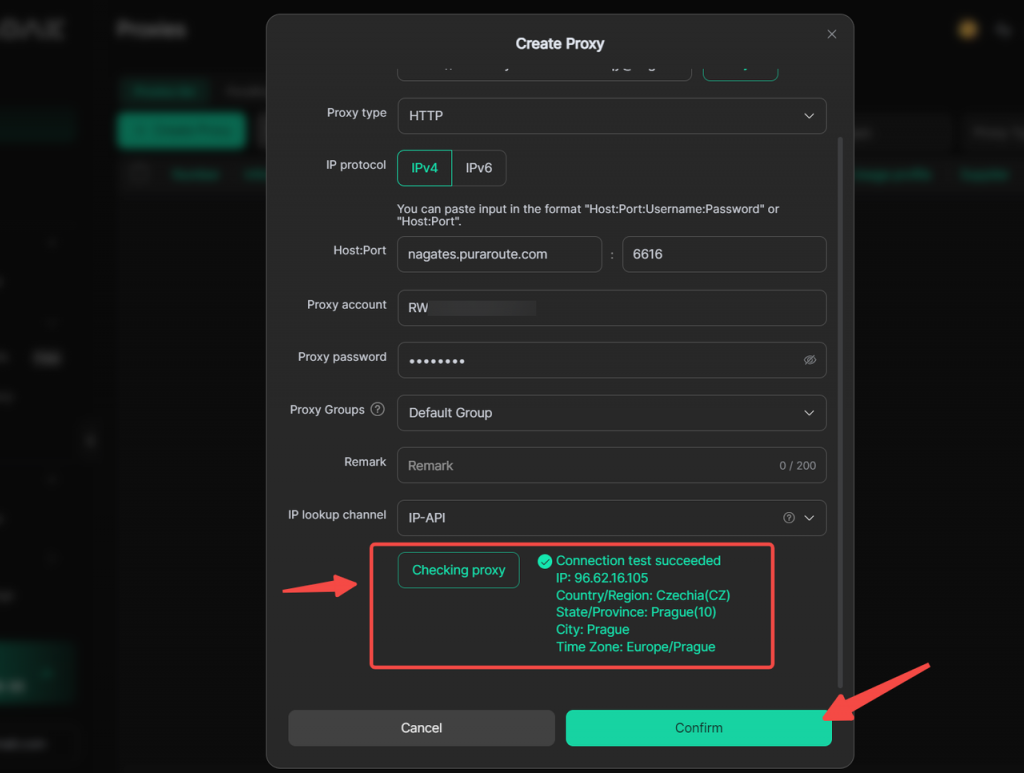
Select an appropriate IP lookup channel, click [Checking Proxy] to verify whether the proxy connects successfully. Upon successful connection, click the Confirm button to finalize proxy configuration.
III. Assign proxy to profile
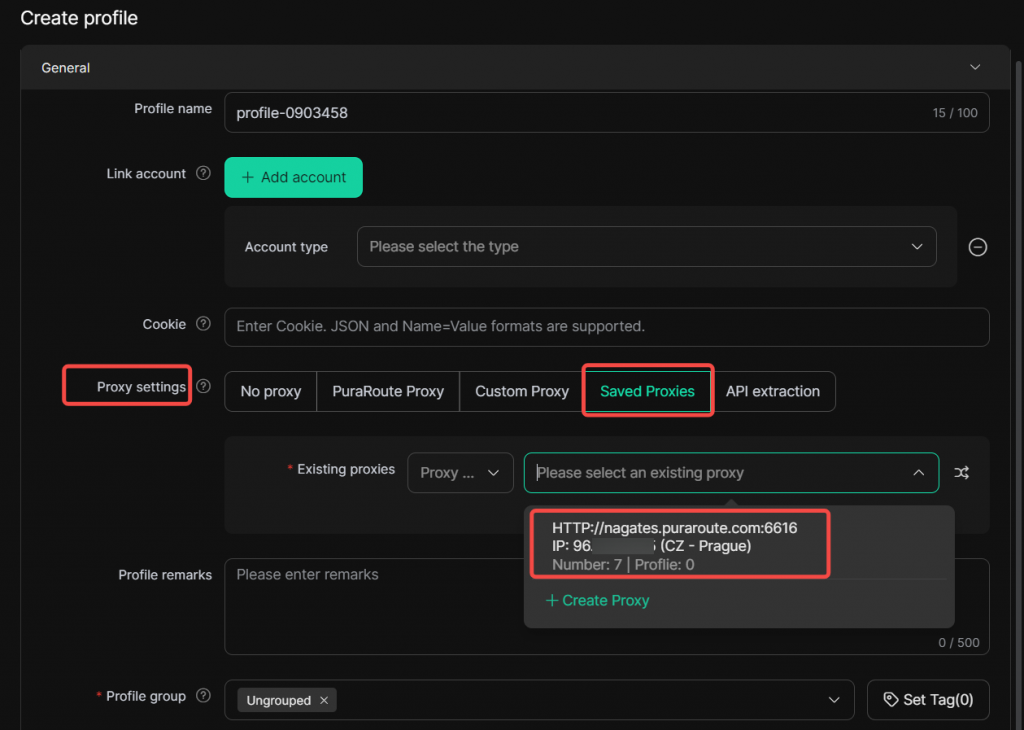
When creating or editing a profile, go to [General] > [Proxy settings] > [Saved Proxies], then select the imported proxy you just added.