Welcome to the quick guide of DICloak! In this step-by-step tutorial, we’ll walk you through the simple process of registering an account and creating a browser profile. Whether you’re a new user or need a refresher, this easy-to-follow instruction will ensure you can easily catch up. Let’s dive in!
1.Download DICloak
1.1. First, install DICloak on your computer. DICloak is now supported on Windows ,MacOS and Linux operating system.
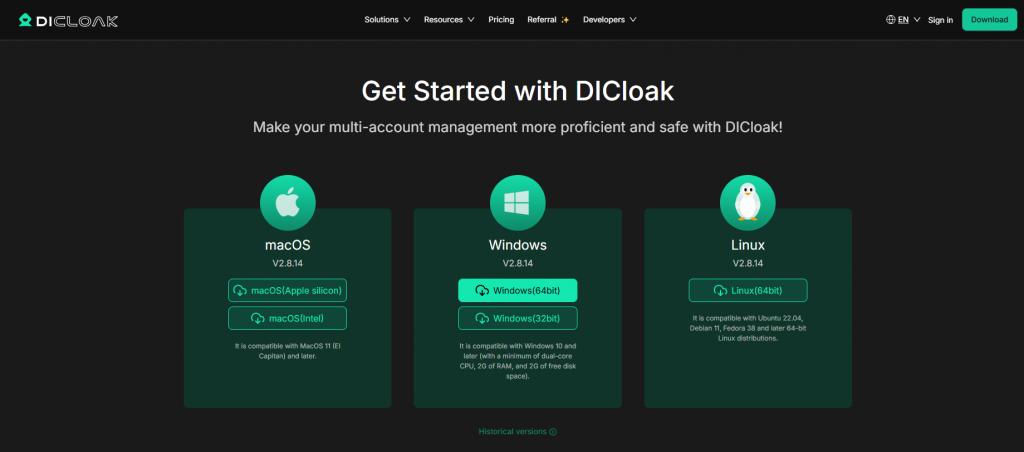
1.2. It is recommended to install DICloak on a non-system drive with a large capacity.
2.Registration
2.1. Sign up & Log in
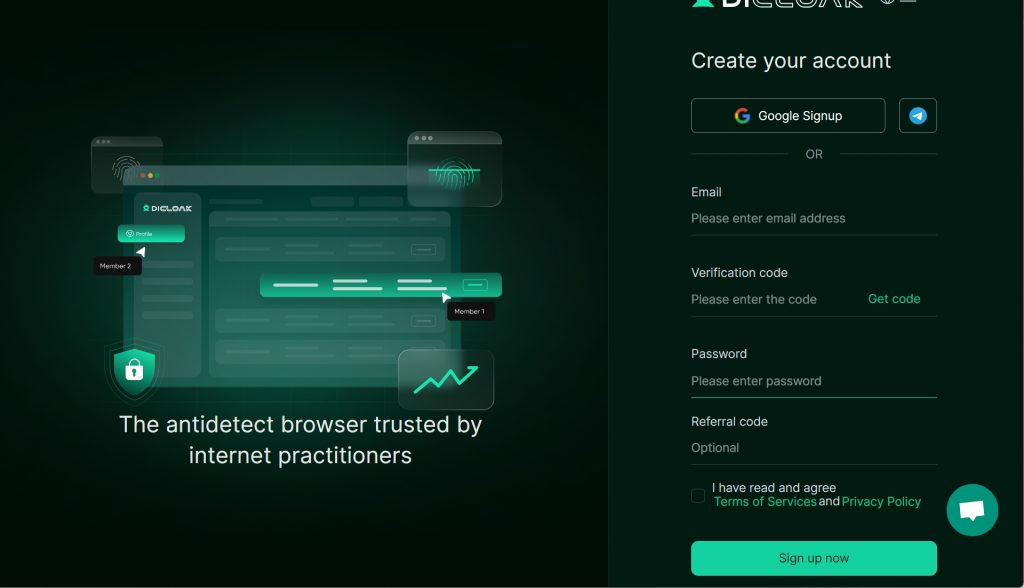
After installing DICloak, you need to run the program and register a new account. You only need to enter your email address and create a password, then a new account is ready for service!
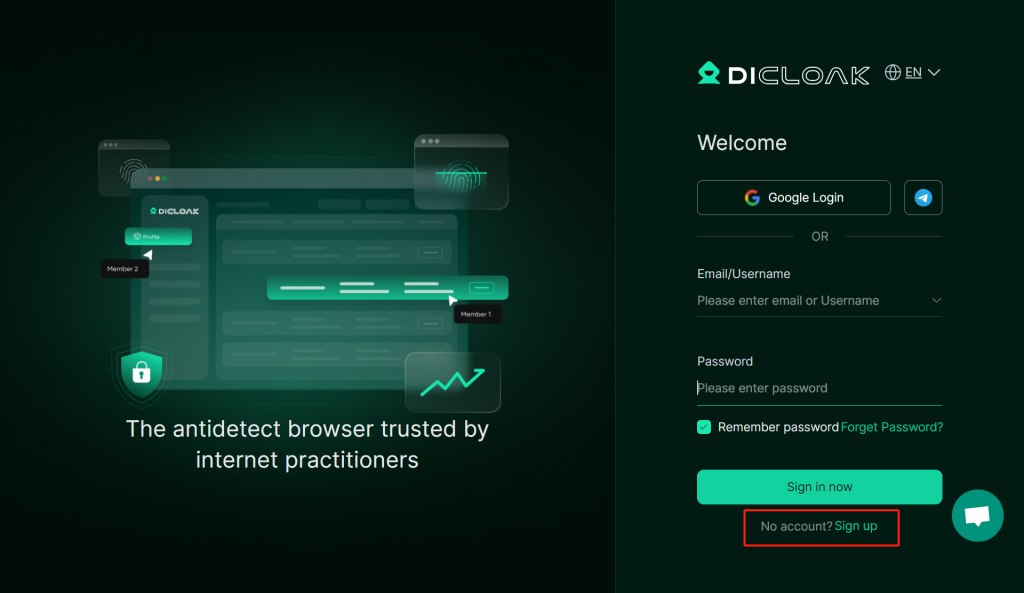
If you’ve already had an account, you can log in immediately. Passwords can be remembered by default for easier access during subsequent logins.
3.Browser Profiles Setting
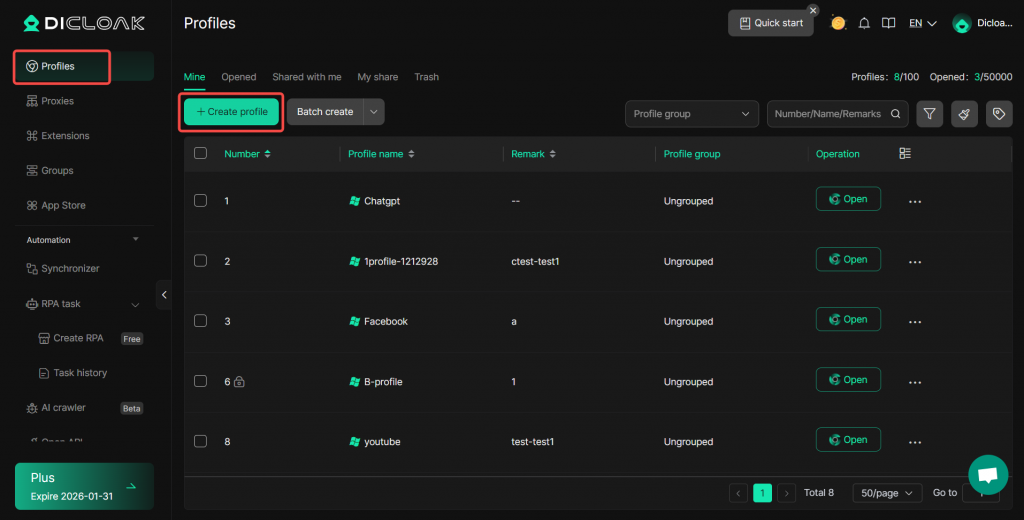
3.1.Create a Browser Profile
- Click “Profiles” – “Create profile“
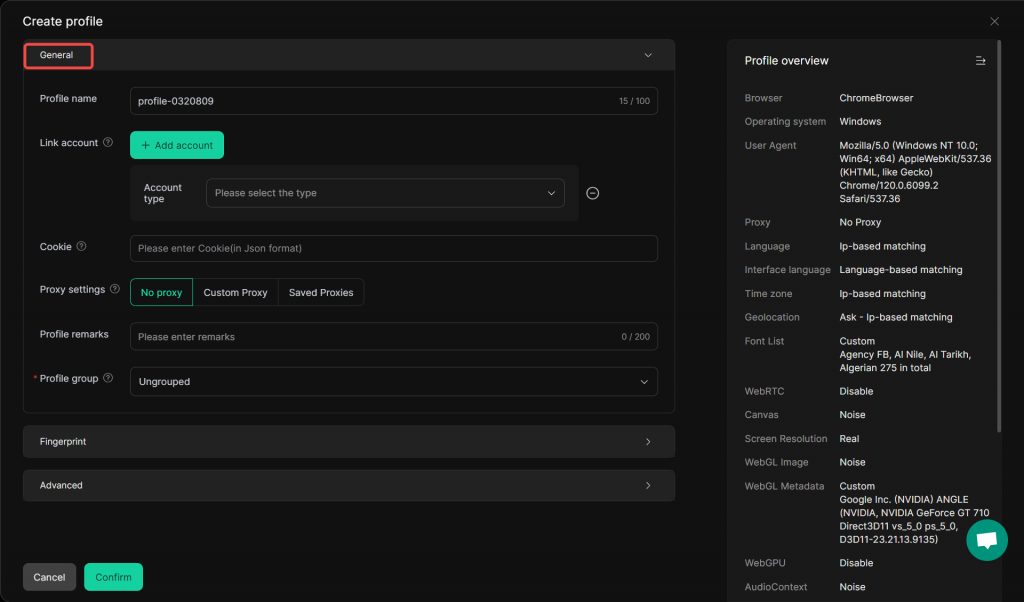
3.2.General Setting
- Profile name: Enter the profile name, which is required for easy management.
- Link account: You can add an account and need to select the account type.
- Cookie: Cookie information should be entered in JSON format.
- Proxy settings: For proxy configuration, you can choose “No proxy”, “Custom Proxy”, or “Saved Proxies”.
- Profile remarks: You can enter remarks for the profile, with a limit of within 200 characters.
- Profile group: The profile grouping, currently “Ungrouped”.
- Fingerprint and Advanced: Clicking on them can lead to detailed pages for fingerprint settings and advanced settings respectively.
3.3 Fingerprint Settings
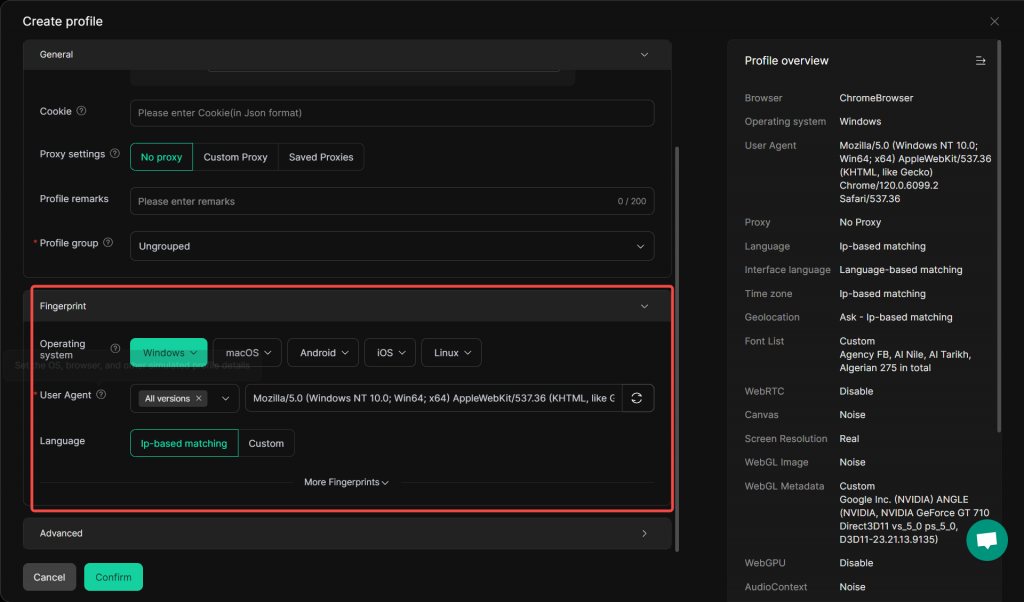
- Operating system: Allows you to select different operating systems to simulate, such as Windows, macOS, Android, iOS, and Linux, to suit various usage scenarios.
- User Agent: You can choose all versions or specify a particular user – agent string, which is used to inform websites about the simulated browser type, version, operating system, etc.
- Language: Supports automatically determining the language based on IP matching, or you can customize the setting. This affects the language in which web pages are displayed.
3.3.More Fingerprint Settings

- Interface language: You can choose to match it based on the language settings or customize it. This determines the language shown in the browser interface.
- Time zone: It can be set to match based on the IP address, or you can customize it. This affects time – related functions in the simulated environment.
- Geolocation: There are three options: “Ask” (prompt for location access), “Allow” (permit location access), and “Disable” (block location access). Additionally, it can be configured to match based on IP or be customized, influencing how web pages detect the location.
- Screen Resolution: You can set a custom resolution, use the real – device resolution, or a random one. This impacts how web pages are displayed in terms of layout.
- Font List: You can either use a custom – selected font list or the real one, which affects the appearance of text on web pages.
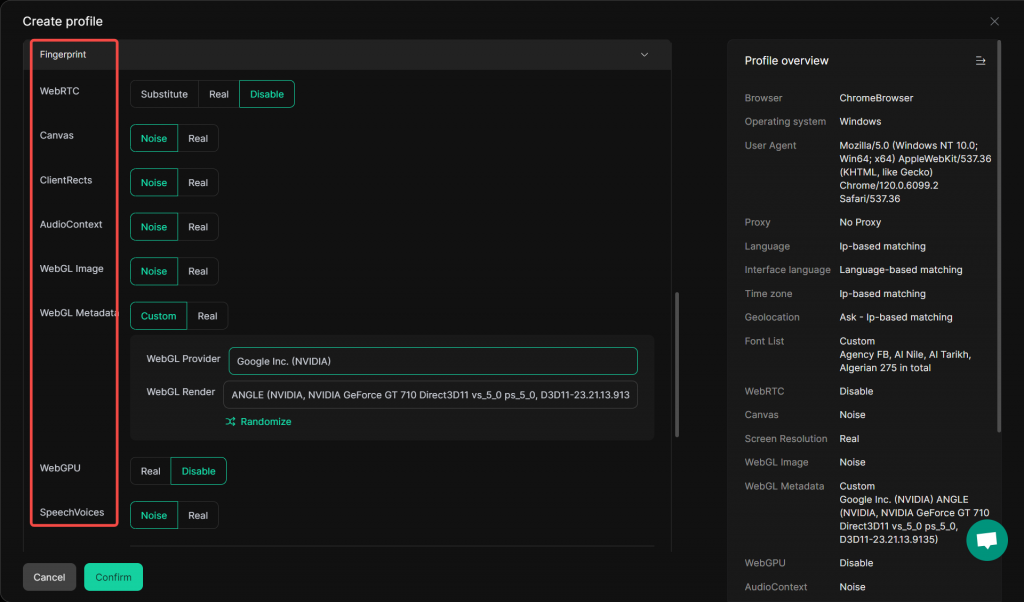
WebRTC (Web Real – Time Communication)
It has three options: “Substitute” (replace the default behavior), “Real” (use the real – time communication functionality as is), and “Disable” (turn off the WebRTC feature), which controls how real – time communication works in the simulated browser.
Canvas
The “Noise” and “Real” options affect how the Canvas element in the browser, used for drawing graphics, behaves. “Noise” might introduce variations or randomness, while “Real” uses the normal behavior.
ClientRects
Similar to Canvas, the “Noise” and “Real” settings for ClientRects determine how information about the size and position of elements (client rectangles) is presented. “Noise” can add some variability, and “Real” represents the standard behavior.
AudioContext
With “Noise” and “Real” options, it controls how the browser’s audio – related processing, such as sound playback and manipulation, is simulated.
WebGL Image
The “Noise” and “Real” choices here impact the rendering and characteristics of WebGL – based images. “Noise” can make the image rendering more variable, and “Real” makes it more standard.
WebGL Metadata
It can be set to “Custom” or “Real”. When set to “Custom”, users can define specific metadata related to the WebGL provider and renderer, like the “WebGL Provider” (currently set to Google Inc. (NVIDIA)) and “WebGL Render” details. The “Randomize” button can generate random metadata within a certain range.
WebGPU
It has “Real” and “Disable” options. “Real” enables the WebGPU (Web – based Graphics Processing Unit) functionality for advanced graphics operations, while “Disable” turns it off.
SpeechVoices
The “Noise” and “Real” options influence how speech synthesis voices are simulated in the browser environment.
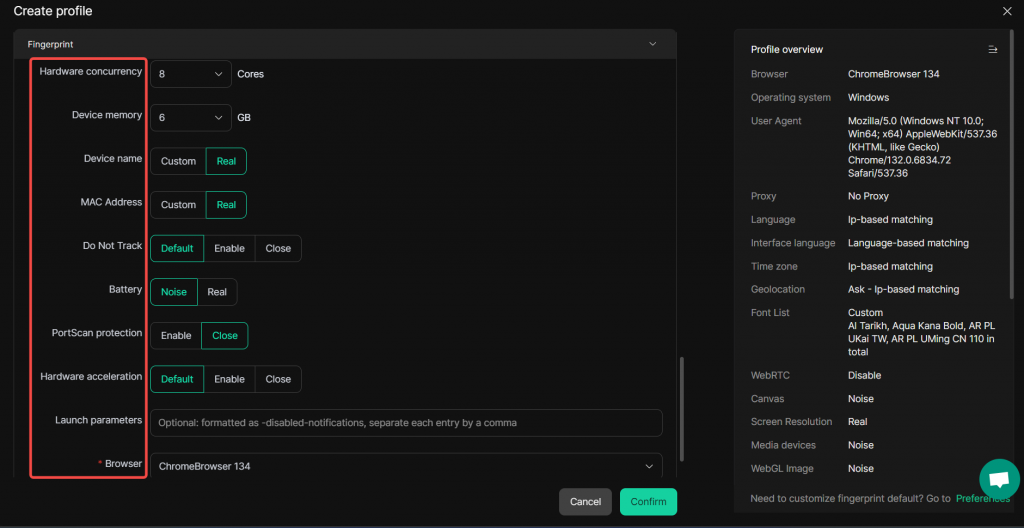
Hardware concurrency
It allows you to set the number of CPU cores (currently set to 10 cores in the example). This simulates the multi – core processing capability of the device, which can affect how the browser environment handles multi – threaded tasks.
Device memory
You can specify the amount of device memory (here set to 8GB). This setting impacts how the browser environment manages memory – intensive operations, such as loading large web applications or media files.
Device name
There are two options: “Custom” and “Real”. This is used to set the device name used in the simulation environment.
Do Not Track
There are three options: “Default” (uses the default browser behavior), “Enable” (sends a signal to websites asking not to track the user’s browsing activities), and “Close” (turns off this feature), giving users control over their privacy regarding tracking.
Battery
The “Noise” and “Real” options simulate the battery state of a device. “Noise” can introduce random variations in the reported battery information, while “Real” represents the actual – like battery status.
PortScan protection
You can choose to “Enable” or “Close” this feature. When enabled, you can specify “Allowed scan ports” (separated by commas), which helps protect the simulated environment from unauthorized port scans, enhancing security.
Hardware acceleration
It offers “Default” (uses the default browser – configured hardware acceleration settings), “Enable” (forces the use of hardware acceleration to improve performance for tasks like graphics rendering), and “Close” (disables hardware acceleration), allowing users to control how the browser utilizes the device’s hardware for better performance.
Browser
Here you can select the browser version, It is recommended to choose 134 or 142, as the newer kernel version has better compatibility with websites.
On the right side of the interface, the “Profile overview” section provides a comprehensive summary of all the configured settings for this profile, including details about the browser, operating system, and other fingerprint – related parameters, helping users quickly review the overall setup of the simulated environment.
3.4.Advanced Setting
You can choose between Global settings or Custom settings:
- Global Settings: Synchronize configuration options from Global Settings
- Custom: Customize settings for this profile
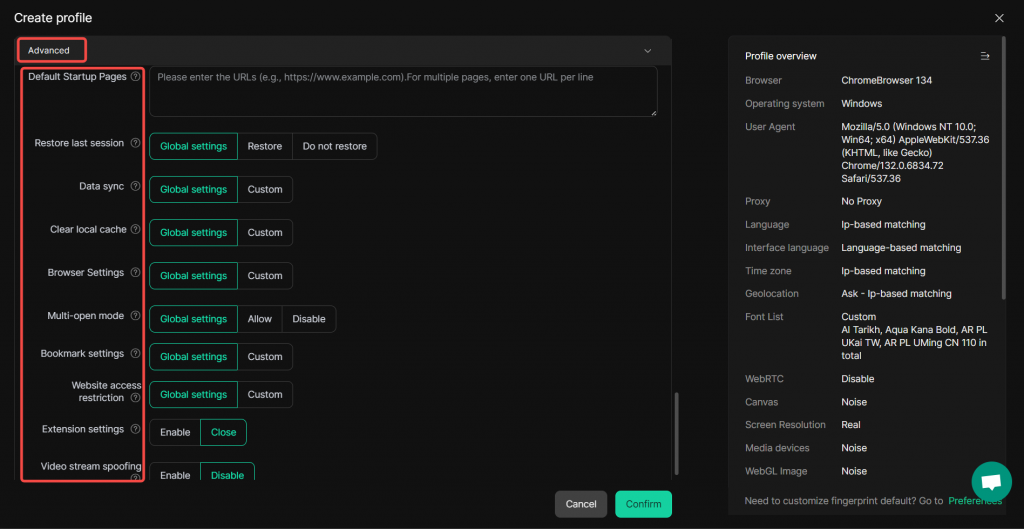
Default Startup Pages
You can enter the URL of the website that the browser will automatically open when this profile is launched. For example, you could input a frequently – visited work or personal site.
Restore last session
When you choose to “Restore”, the last opened tab will be saved and restored when you open the profile.
Data sync
There are two options: “Global settings” applies the overall data synchronization rules set for the system, while “Custom” allows you to configure specific data synchronization settings for this profile, determining how data is shared and updated across different sessions or devices.
Clear local cache
Similar to data sync, it offers “Global settings” and “Custom”. This setting controls whether and when the local cache of the browser is cleared. Clearing the cache can free up storage space and ensure that the browser loads the latest content from websites.
Browser Settings
It has “Global settings” and “Custom” choices. You can either use the standard browser configuration settings for all profiles or customize specific settings for this particular profile, such as privacy, security, and display preferences.
Multi-open mode
“Global settings” follows the overall system – wide rule for allowing or disallowing multiple instances of the browser environment to be opened simultaneously. The “Allow” and “Disable” options specifically control whether you can open multiple copies of this profile’s browser environment, which can be useful for multitasking or running multiple processes at once.
Bookmark settings
You can upload bookmark files to current profile with append or overwrite options.
Extension settings
You can choose to “Enable” or “Close” browser extensions for this profile. If you enable it, you can select an “Extension group”. Once selected, the enabled extensions within that group will be added to this profile, enhancing the functionality of the simulated browser environment, such as adding features like ad – blocking, password management, etc.
Video stream spoofing: Once enabled, you can upload video files in the browser webpage to bypass KYC on certain platforms. This function is currently supported by DICloak Windows software.
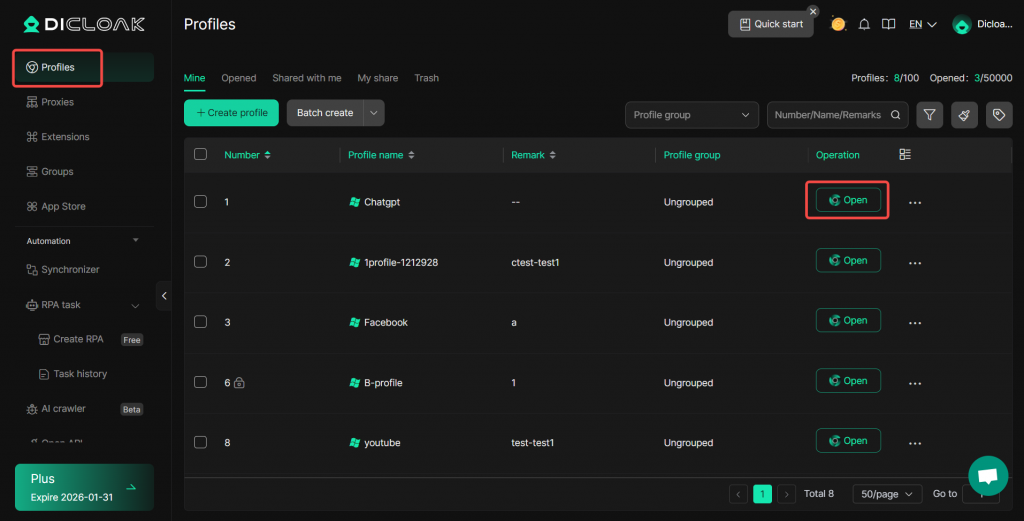
4.Open Browser Profile
On “Profiles” page, the newly created browser profiles will be displayed. Click to open a browser profile for better online experience!