The “Fingerprint” settings section in the DI Cloak “Edit profile” interface is used to customize the digital fingerprint of a profile, which helps in mimicking different browsing environments. Here’s a breakdown:
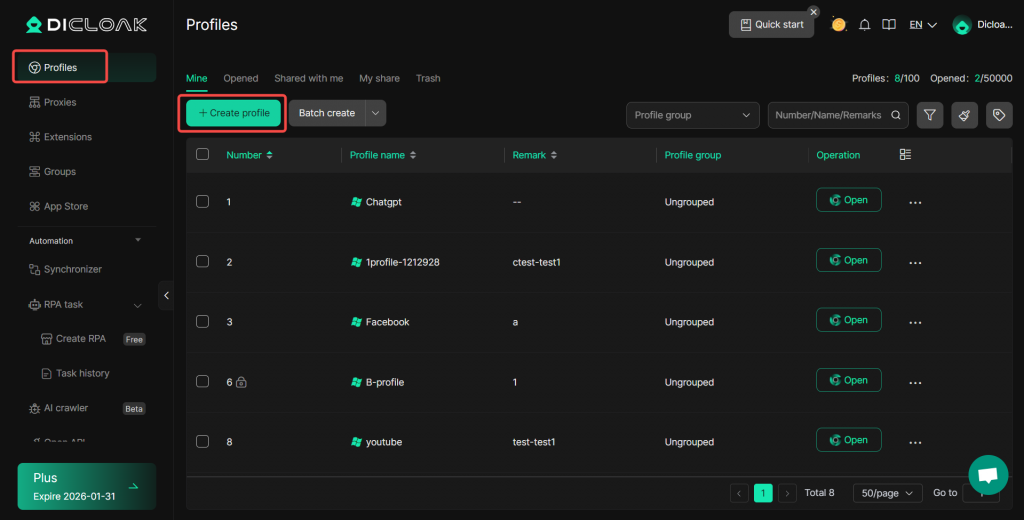
Profiles – Create Profile
Open and log in to the DICloak software. Find “Profiles” on the left navigation bar and click the “Create Profile” button to enter the profile creation page.Or click “Edit” to edit existing profile.
Create Profile – Fingerprint Settings
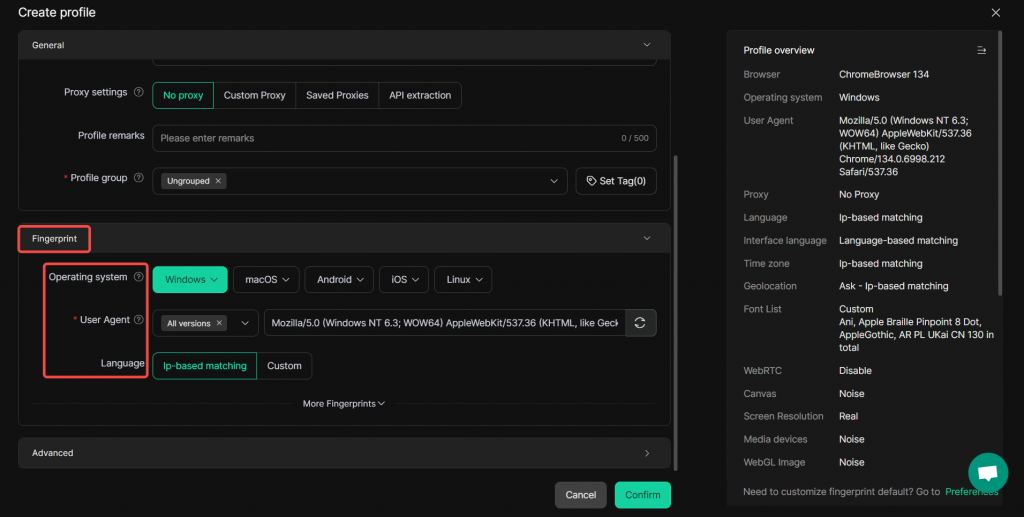
- Operating System:There’s a dropdown menu with options like “Windows”, “macOS”, “Android”, “iOS”, and “Linux”. This allows you to select the operating system that the profile will simulate.
- User Agent:The user agent field shows a specific string (in this case, a Mozilla – based one for a Windows 10 64 – bit system). The “All versions” option with a cross icon next to it likely allows you to manage which versions of user agents are considered. The refresh icon can be used to update or change the user agent string. The user agent is sent to websites and tells them information about the browser and the operating system of the device making the request.
- Language:There are two options here: “Ip – based matching” and “Custom”. “Ip – based matching” sets the language based on the IP address’s geolocation. The “Custom” option would allow you to manually select a specific language or language settings for the profile, enabling more precise control over how the profile interacts with websites in terms of language – related content.
“More Fingerprints” Dropdown
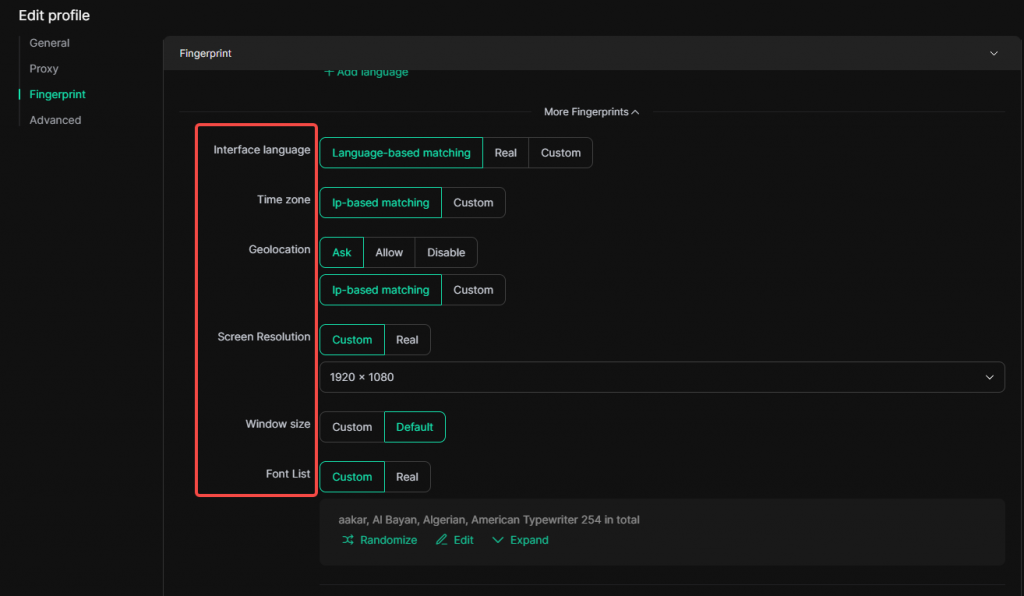
- Interface language: Browser interface language. Set based on language – matching rules or customize it manually.
- Time zone: Can be set to match IP-based location or customized manually to avoid detection issues.
- Geolocation: You can control access permissions (Ask, Allow, Disable) and set the location either by IP-based matching or custom input.
- Screen Resolution: Options include custom-setting a value, or using the real device resolution.
- Window size: “Custom” allows you to manually set a specific window size value; “Default” generates the window size according to certain rules based on the resolution setting.
- Font List: Choose between custom fonts or the real-world default to evade device identification via font fingerprints.
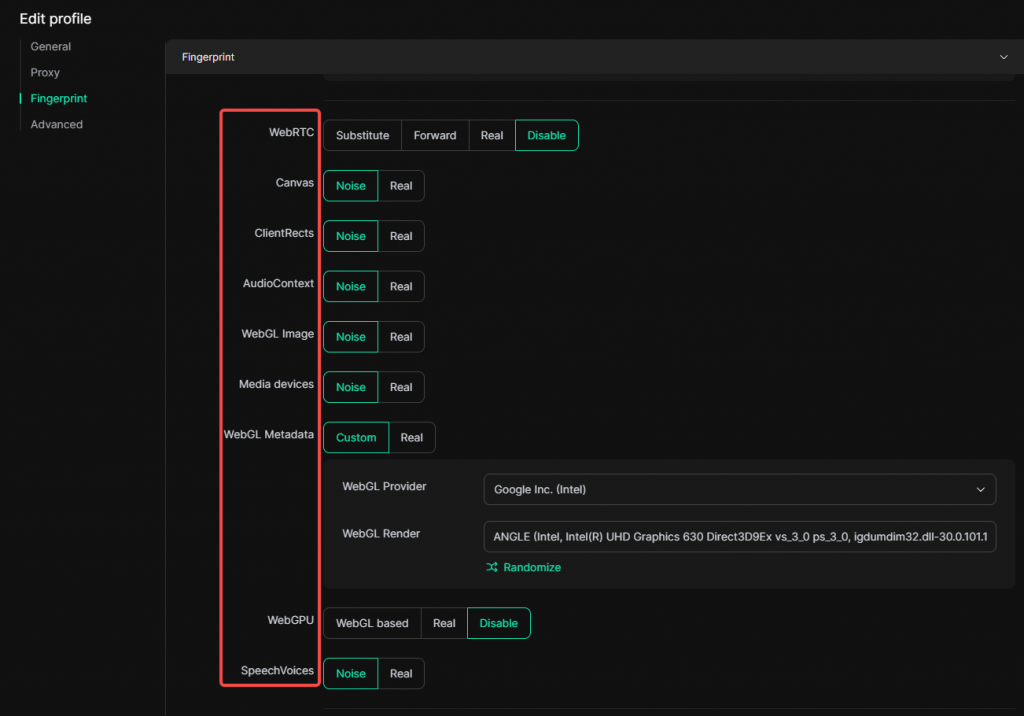
- WebRTC: Control WebRTC settings to prevent the disclosure of your real IP address. “Substitute” allows you to manually enter an IP address, use the network’s exit IP, or a random internal IP. “Forward” will forward WebRTC-related traffic through a proxy. “Real” uses the actual data from the device. “Disable” disables WebRTC, preventing websites from reading the current computer’s real IP address.
- Canvas, ClientRects, AudioContext, WebGL Image: Each has “Noise” and “Real” settings. “Noise” likely adds variability to avoid consistent fingerprinting, while “Real” uses the actual device-related values.
- WebGL Metadata: It can be set to “Custom” or “Real”. “Custom” allows manual configuration of WebGL provider and WebGL render information, while “Real” uses the actual data from the device.
- WebGPU: Can be set to “WebGL-based”, “Real”, or “Disable”. “WebGL-based” uses WebGPU capabilities that match the WebGL metadata, “Real” uses the actual values of the device, and “Disabled” prevents the website from using WebGPU capabilities.
- SpeechVoices: With “Noise” and “Real” choices, it controls how speech-related features are presented to websites, helping to obfuscate or present real device information.
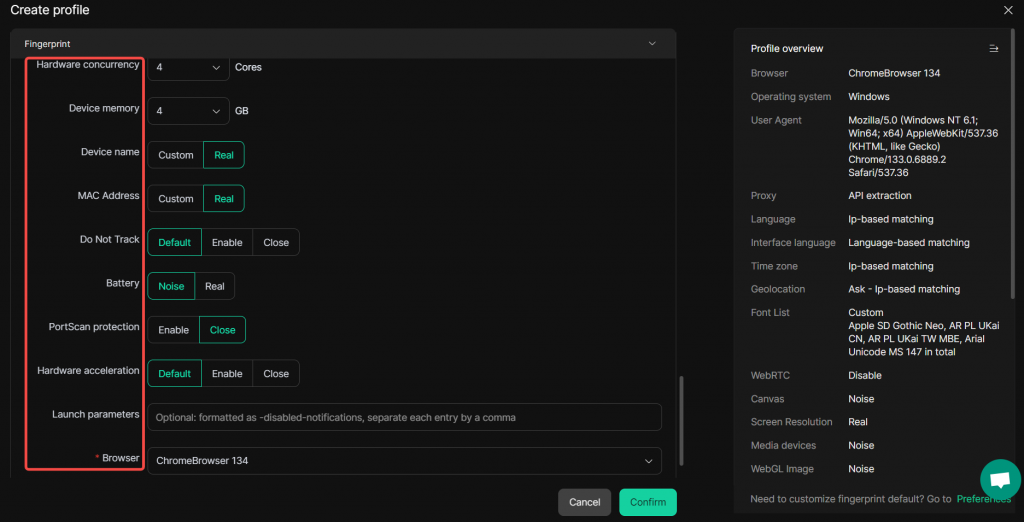
- Hardware concurrency: Sets the number of CPU cores the browser reports.
- Device memory: Specifies the amount of memory the device has.
- Do Not Track: Options like “Default”, “Enable”, and “Close” let you control whether the browser sends a “Do Not Track” signal to websites, affecting online tracking.
- Battery: “Noise” and “Real” settings manage how battery-related information is presented, with “Noise” adding variability.
- PortScan protection: “Enable” (selected) or “Close” controls port-scanning protection. When enabled, you can list allowed scan ports.
- Hardware acceleration: Can be set to “Default”, “Enable”, or “Close”, influencing how the browser uses hardware resources for better performance.
- Browser: Browser versions 120, 134, 142, 143 and 147 are currently supported. We recommend you choose a newer version, as it has better compatibility with websites.