DICloak allows users to create different groups within a team, each with customizable permissions to facilitate team management.
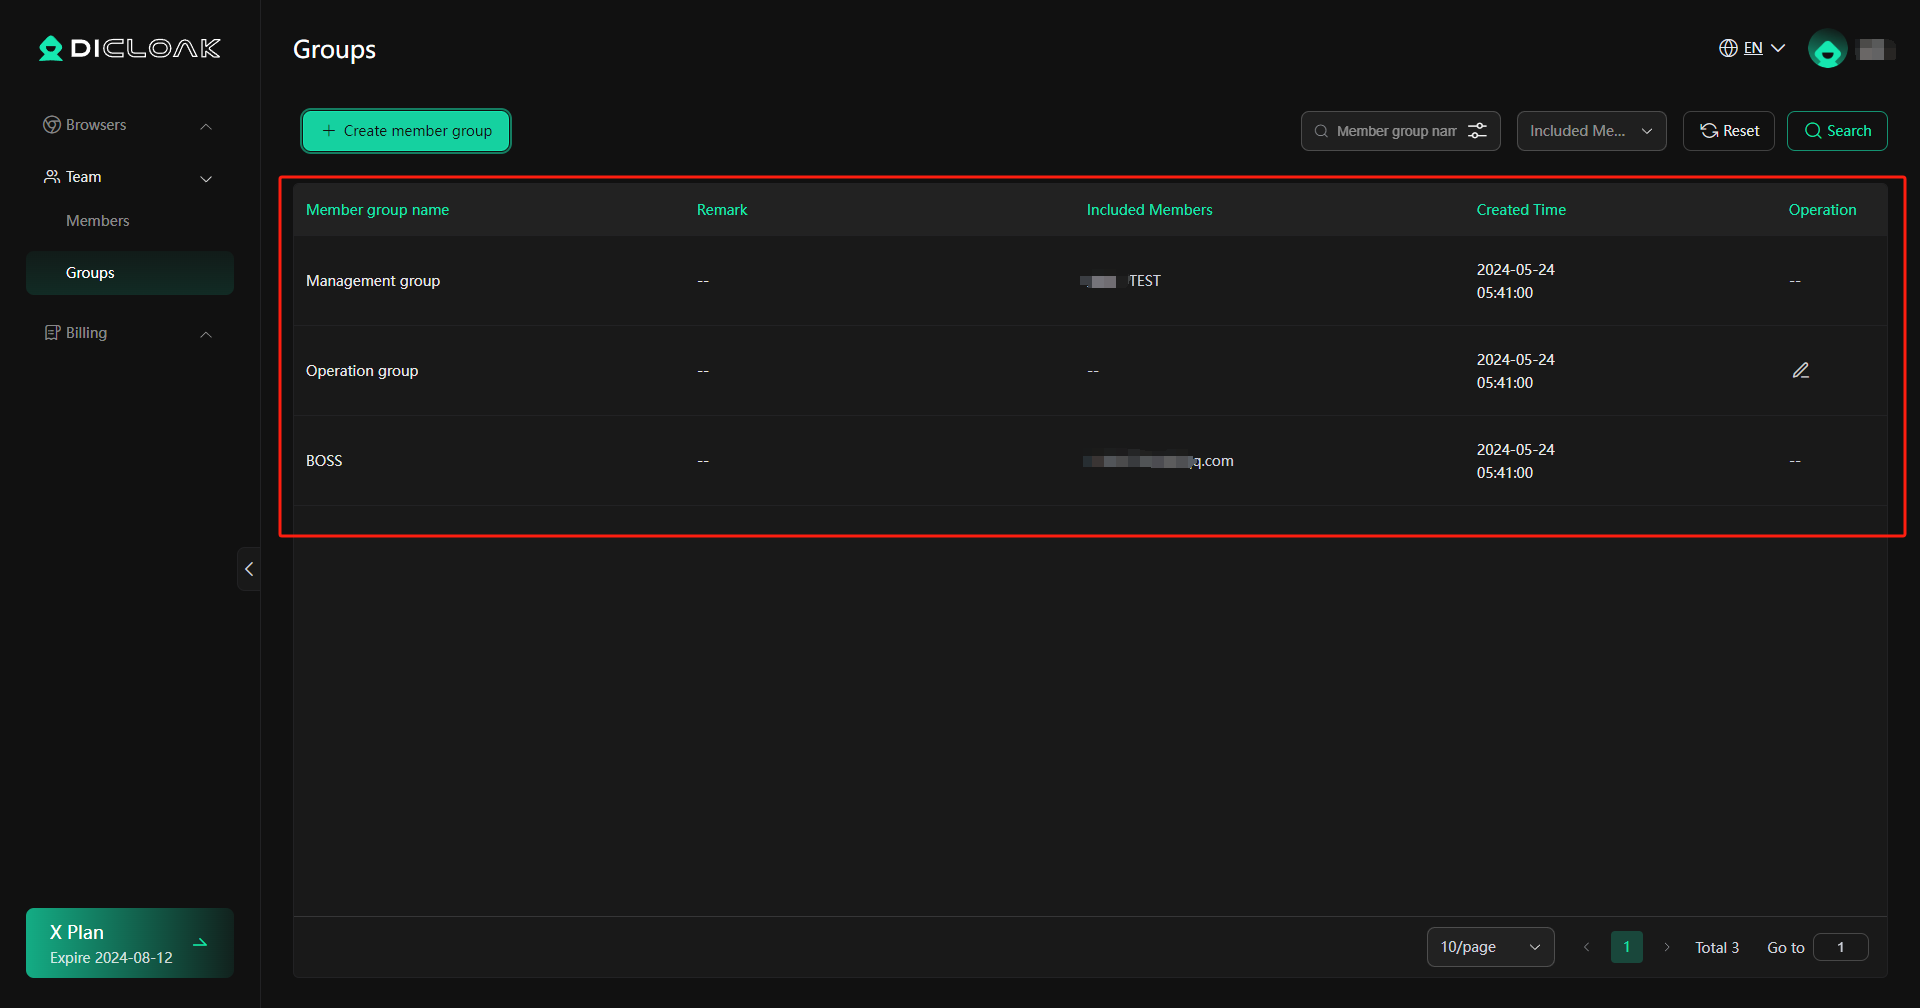
Each team automatically includes three initial groups: BOSS Group, Management Group, and Operation Group. The Super Admin account is assigned to the BOSS group and cannot be modified. The Management Group and Operation Group have default permissions based on the role of the group, which can be adjusted.
If you wish to create a new member group, please follow the tutorial below.
Operation Guide
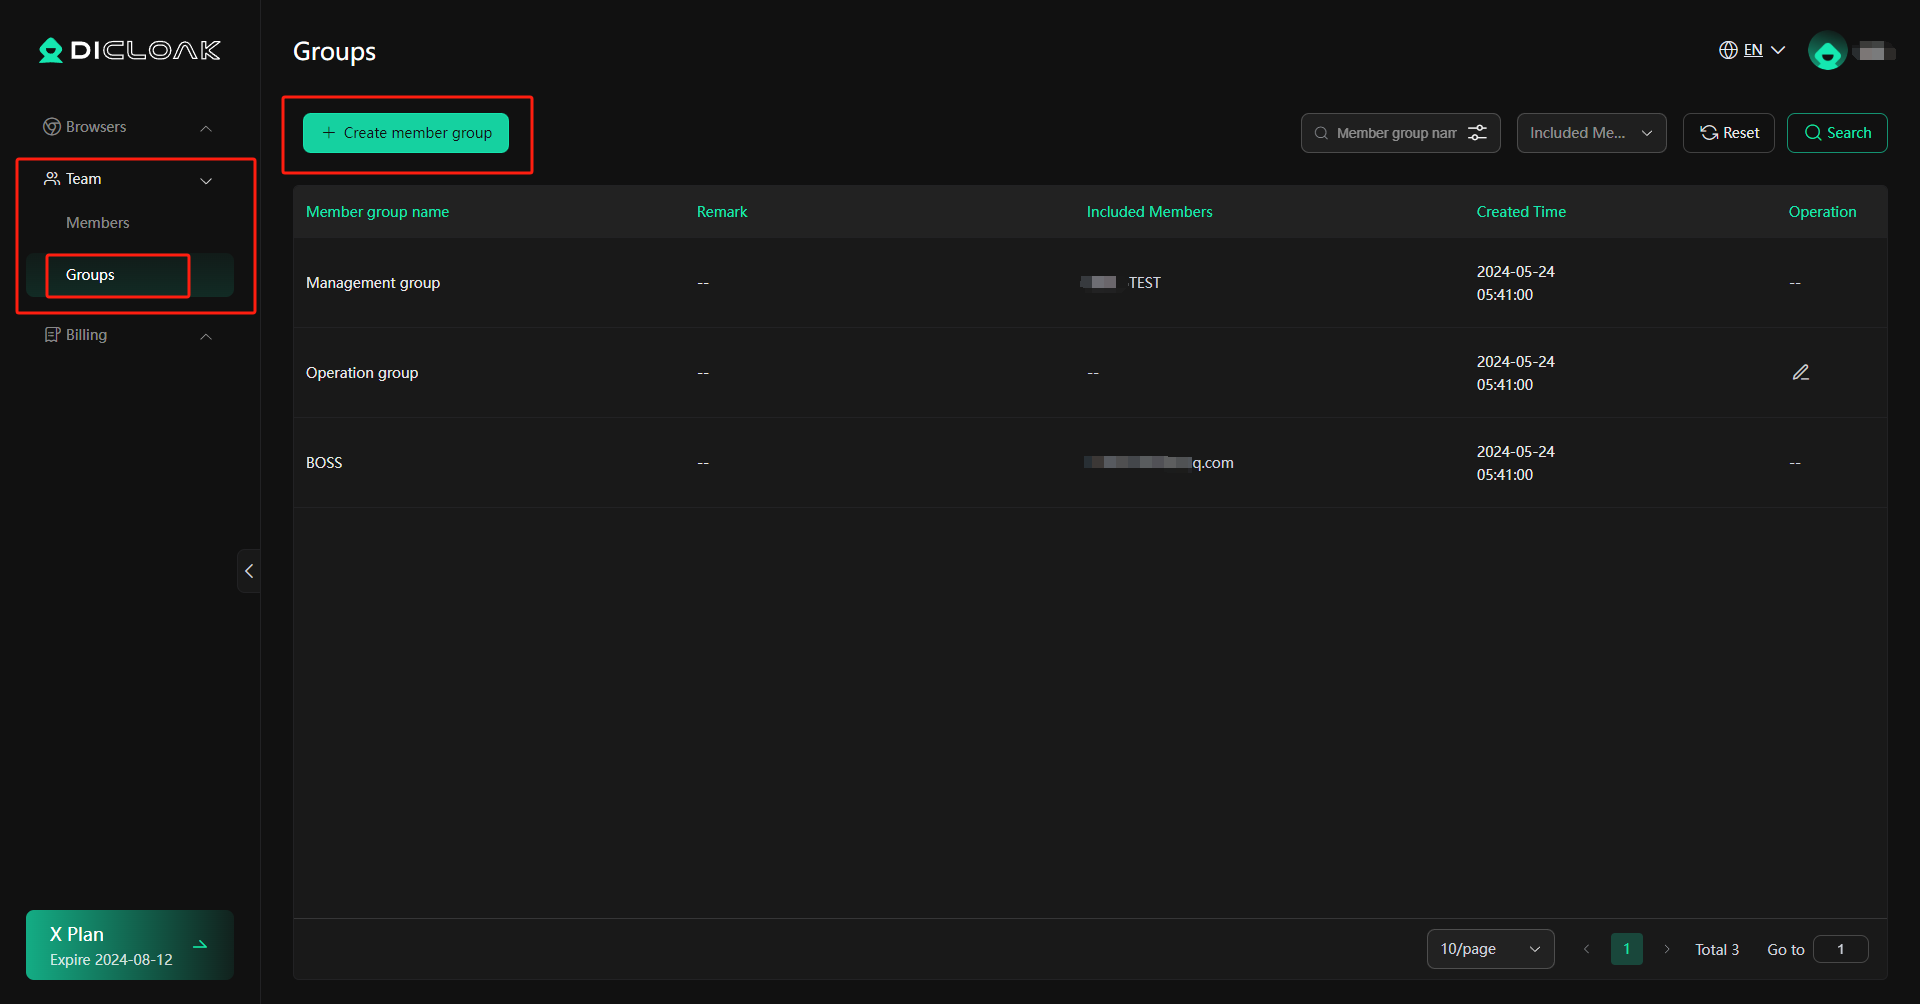
1.Click “Create Member Group“
- Open and log in to the DICloak software. Find “Team” on the left navigation bar and click “Groups“, then click “Create Member Group” to start the process.
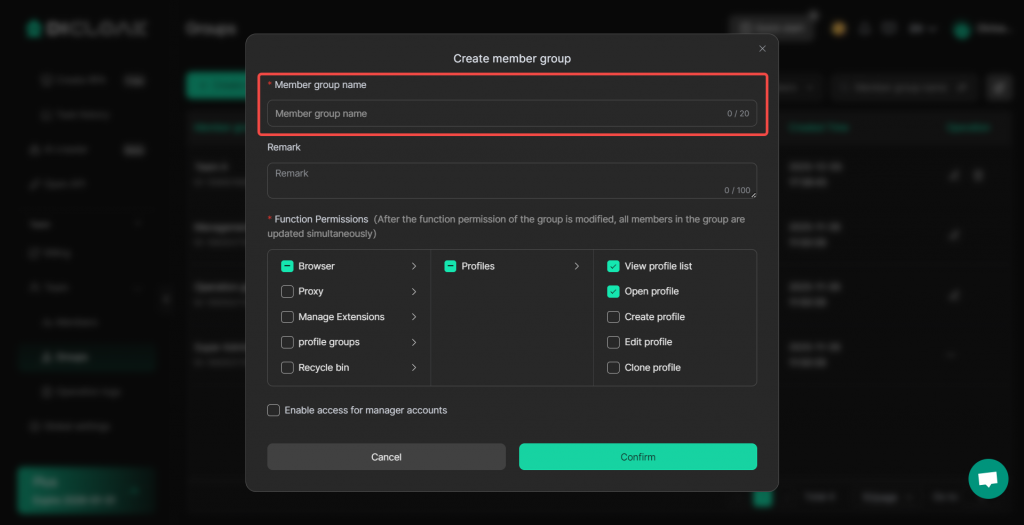
2.Enter Member group name
- Create a unique name for the new member group.
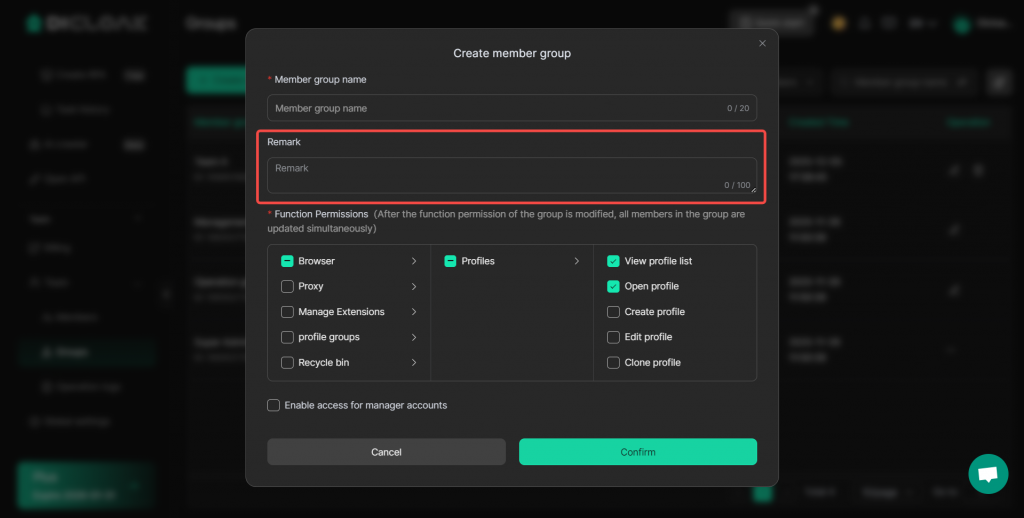
3.Enter Remarks
- Optionally, you can add detailed information about the group for better management.
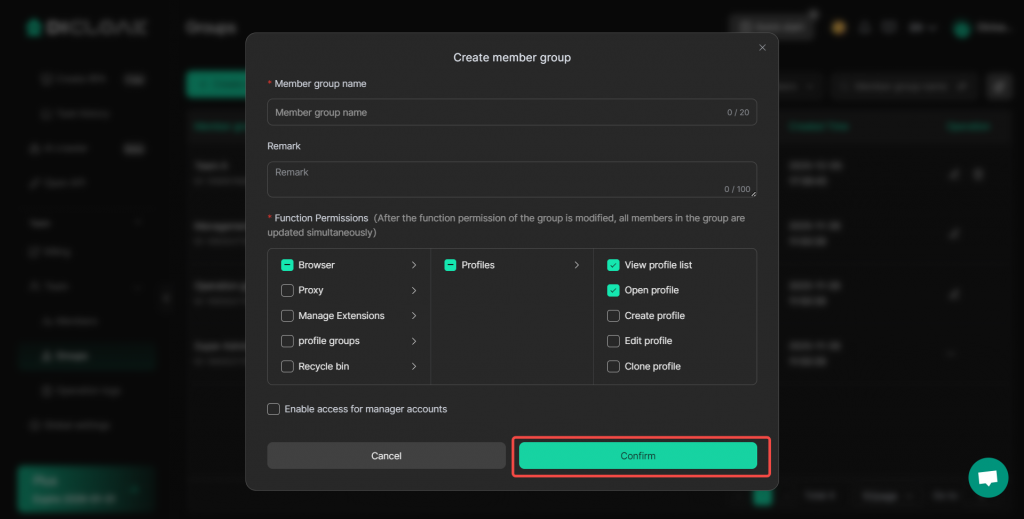
4.Configure Permissions
Assign the appropriate permissions for the group, including access to browser profile management, the billing center, and team management functions.
Selected permissions will be available to the group, while unselected ones will be restricted. After the function permission of the group is modified, all members in the group will be updated simultaneously.

5. Set Up Manager Accounts
You can choose whether to enable “access for manager accounts”. If unchecked, only accounts with Super Administrator or Administrator roles can view and manage this member group.
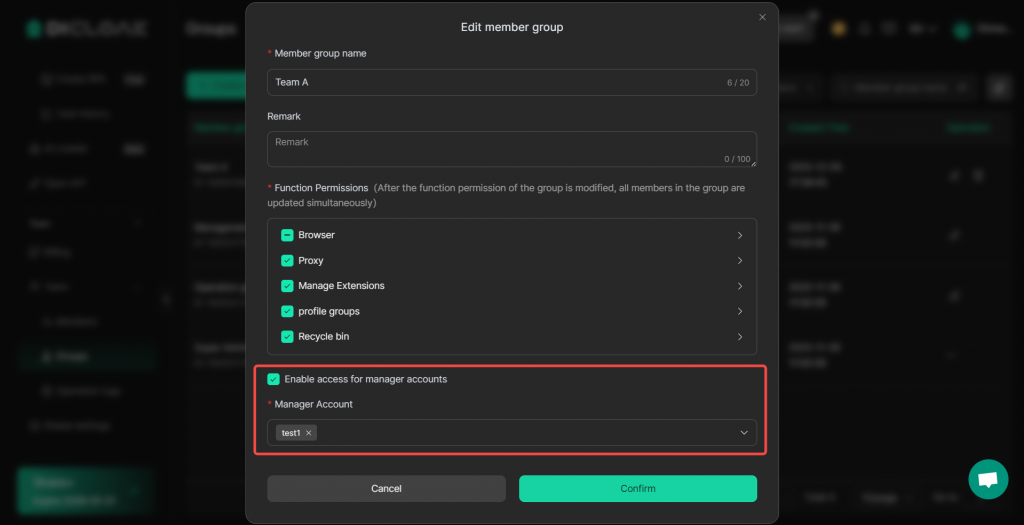
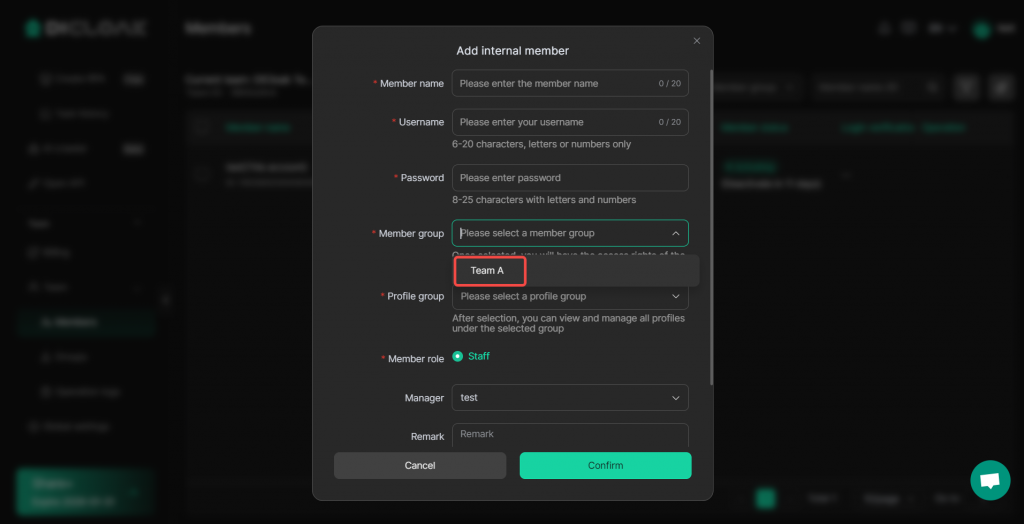
If enabled, the designated manager account(s) can view this member group and select it when creating new members.
Example:
If member group “Team A” is set to allow manager account “Amy” to use it, then “Amy” can:
- Select “Team A” when creating a member in the [Members].
- View the information of this group in [Groups].
Other member groups for which Amy has no permission will remain invisible.
6.Confirm to Create a New Member Group
- Click the “Confirm” button to finish the creation of the new group.
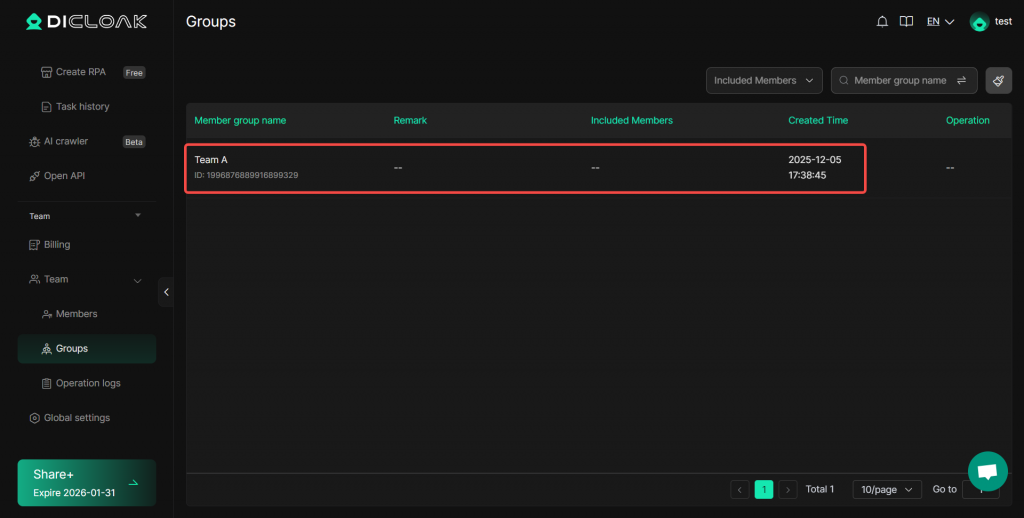
7.Find Created Groups
- The newly created group will appear on the group list.