Some proxy providers offer a client application that acts as an intermediary between the user’s computer and the internet, forwarding network requests through specific servers (i.e., proxy servers). This allows users to hide their real IP address, bypass regional restrictions, and enhance online security using these proxy servers.
Local proxy software is primarily used for configuring and managing proxy connections, helping users control network traffic more flexibly.
Using proxy software (such as 922proxy) can help users set up proxies on their local computer.
Benefits of configuring a proxy in this way include:
- Protect Proxy Account Information: Through local proxy software, users don’t need to input proxy account credentials directly in the fingerprint browser, effectively preventing the leak of sensitive information.
- Enhanced Security and Privacy: Local proxy software enables more refined control over network traffic, conceals the real IP address, enhances anonymity, and protects personal privacy.
- Simplified Proxy Configuration: By managing proxy settings within local proxy software, users only need to configure the 127.0.0.1 proxy host address once in the fingerprint browser, avoiding repeated input in each browser profile and improving operational efficiency.
- Flexible Proxy Switching: Local proxy software typically supports quick switching between different proxy servers, allowing users to adjust proxies dynamically according to various network environments and needs.
If you are using proxy software and want to configure 127.0.0.1 as the proxy host address in the DICloak fingerprint browser, refer to the following tutorial.
Tutorial (Using 922proxy as an Example)
1. Download and Install 922proxy
Download Link: https://922proxy.com/zh-tw/download Compatible Versions: Windows and macOS
2. Purchase a Proxy
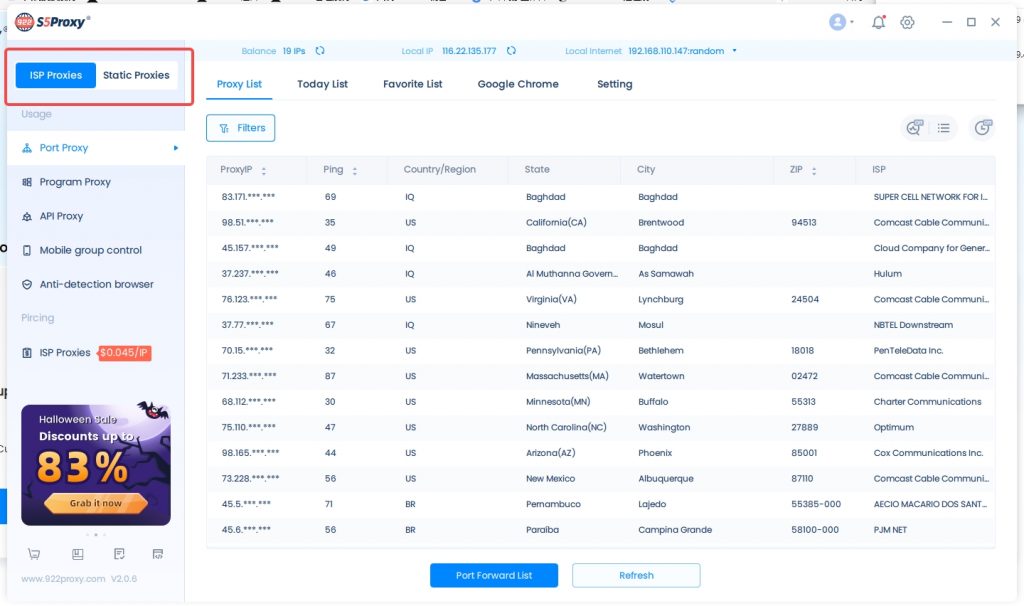
Open the 922proxy application and choose the type of proxy you want to purchase.
3. Connect to the Proxy and Choose a Proxy Port
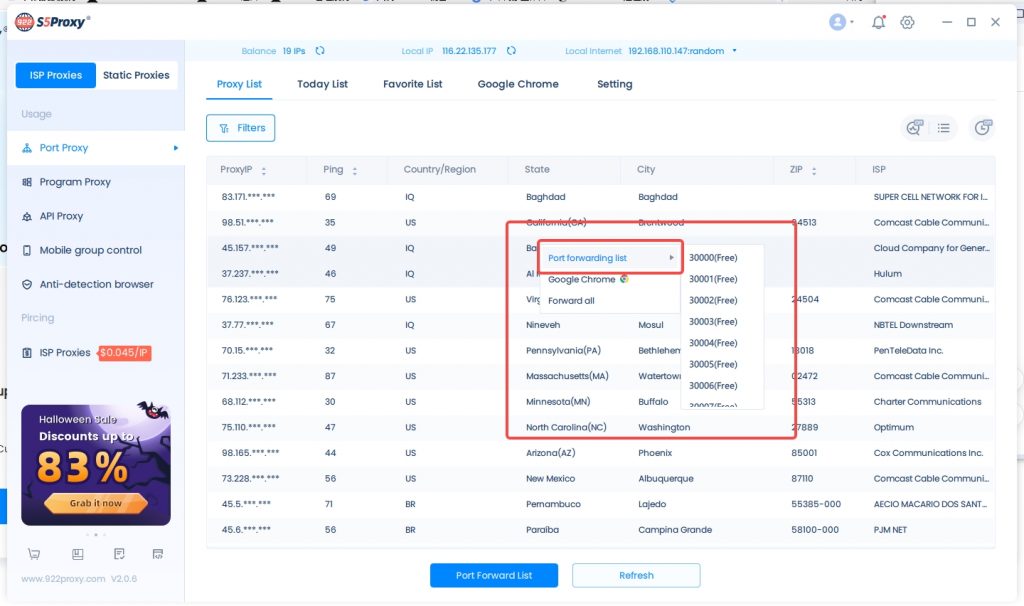
Right-click on the purchased proxy, select “Port Forwarding List,” and choose an available proxy port.
4. Switch Local Network Proxy Host
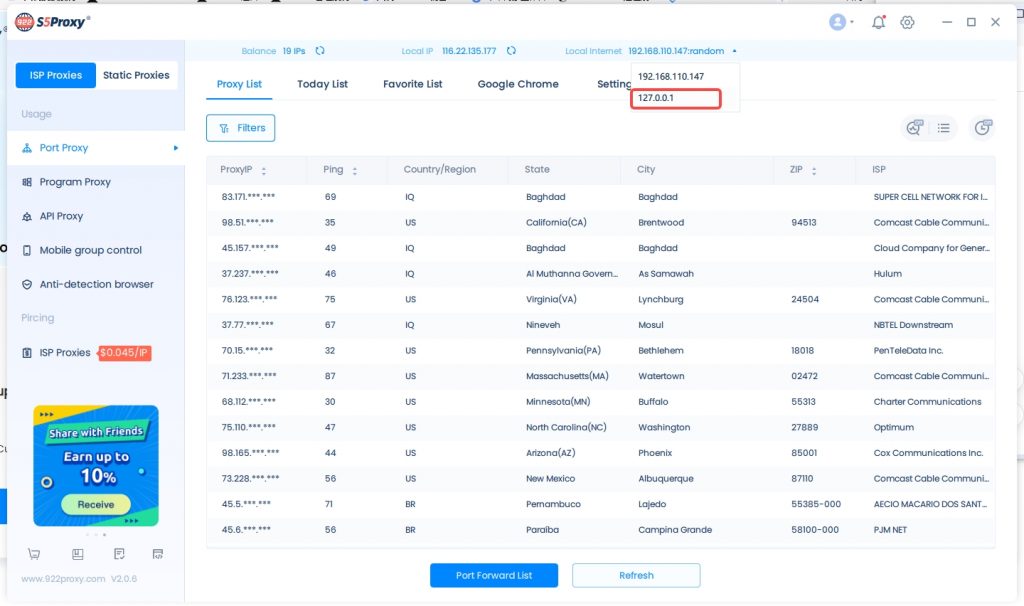
Click on “Local Network” and change the proxy host to 127.0.0.1.
5. Copy Proxy Information
1)Click on “Port Forwarding List.”
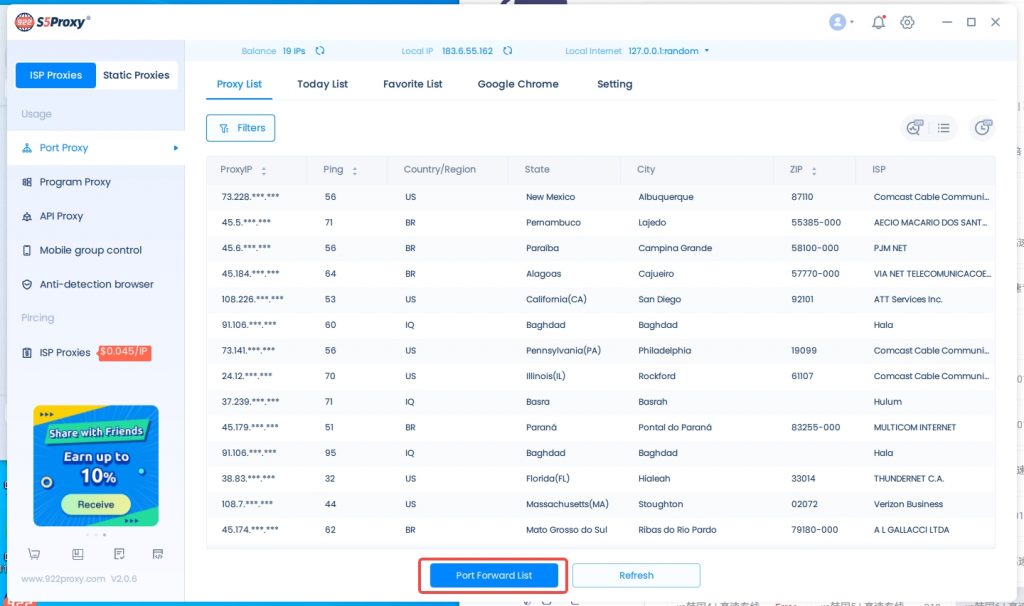
2)Click “Copy” to copy the proxy information.
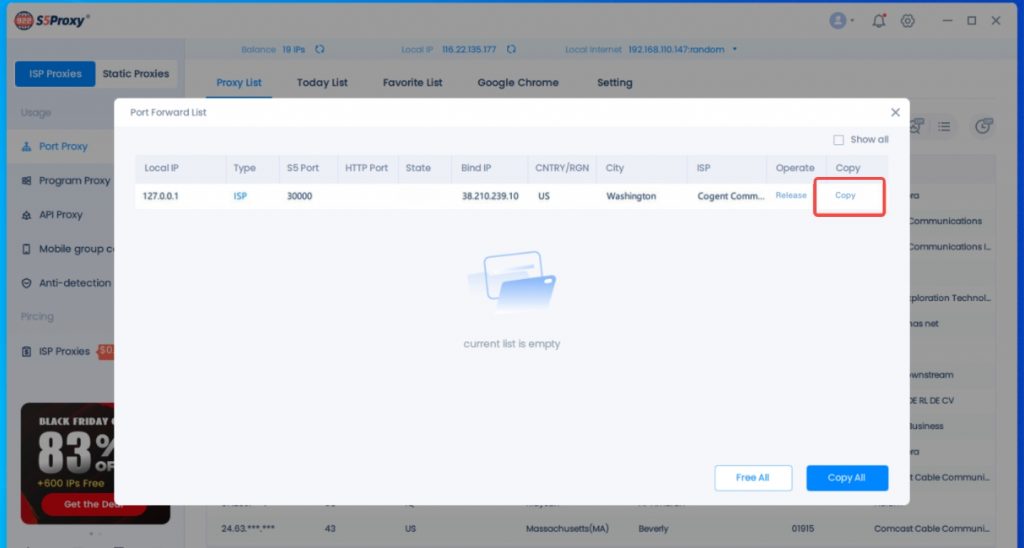
6. Configure the Proxy in DICloak
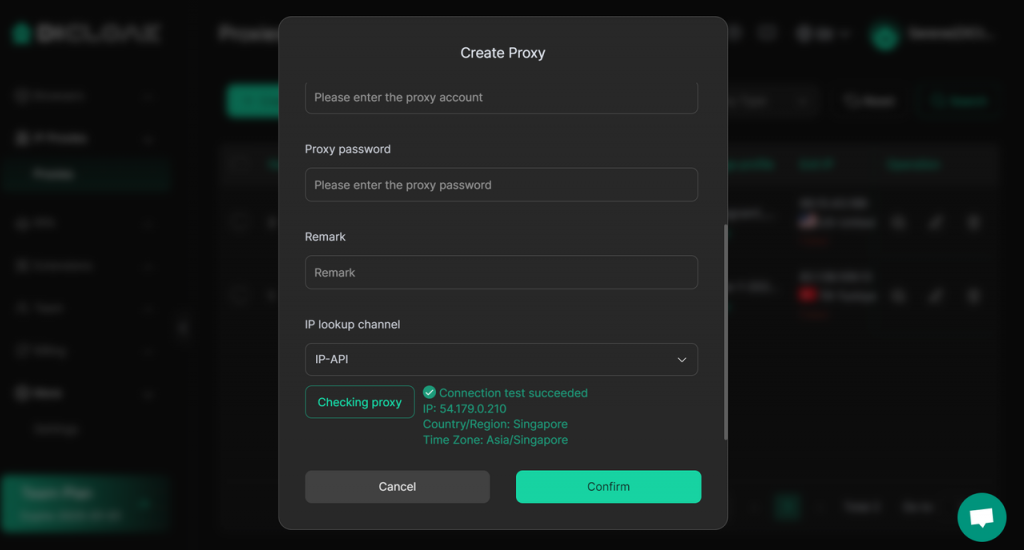
1)Open the DICloak fingerprint browser, find “Proxy List,” and click on “Create Proxy.”
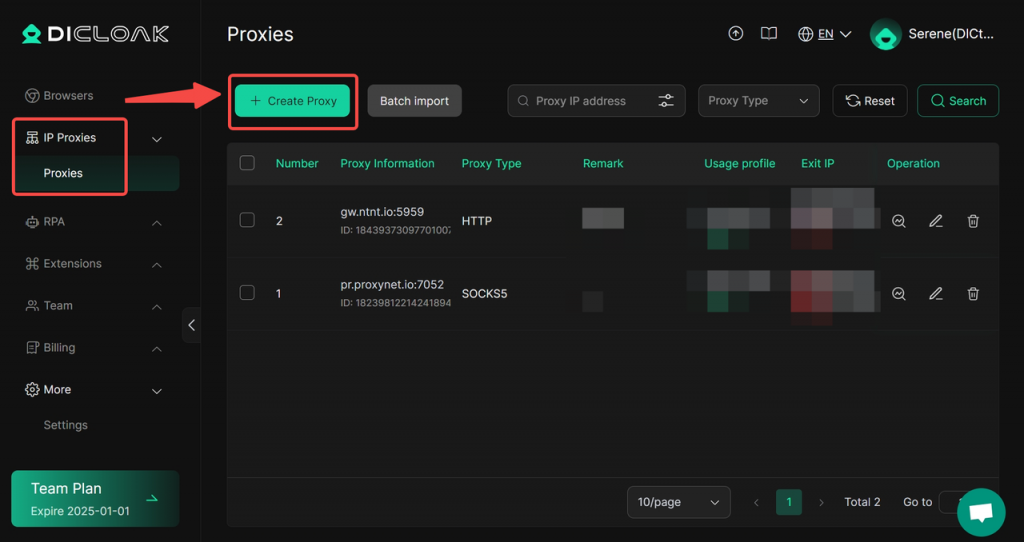
2)Select the proxy type and input the local proxy host and port information.
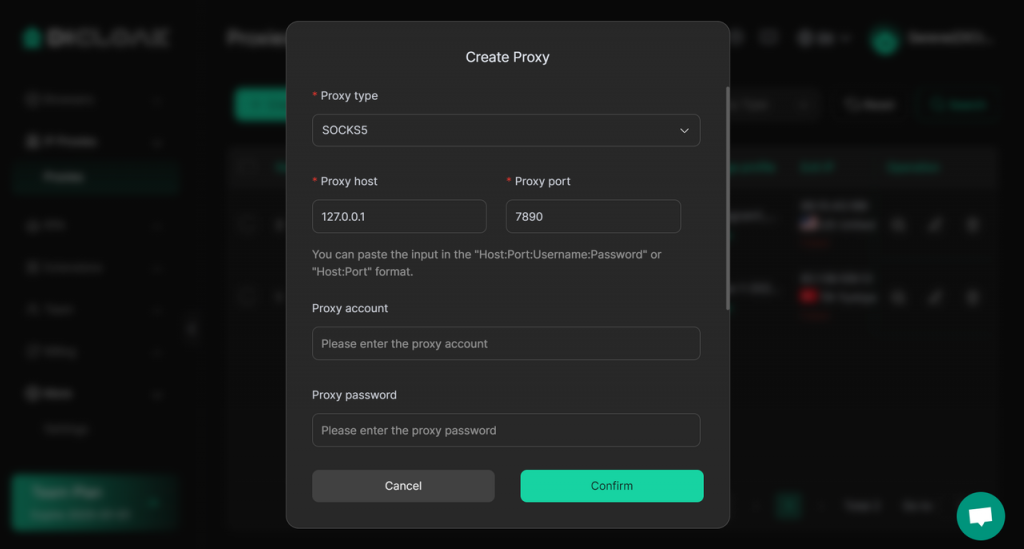
3)Click “Check Proxy” to test the connection, then confirm to complete the proxy configuration successfully.
