The API member creation feature is suitable for scenarios where automated member account creation is required. Without manual intervention, users can use the API to create member links, and through the online API interface, quickly and automatically create DICloak accounts for multiple new members, achieving efficient member account management.
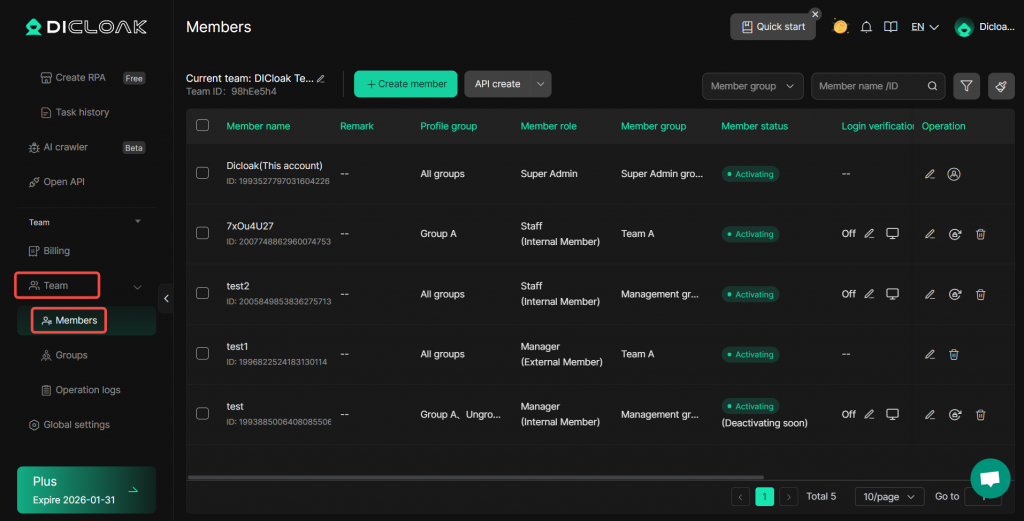
1. Open the [Members]
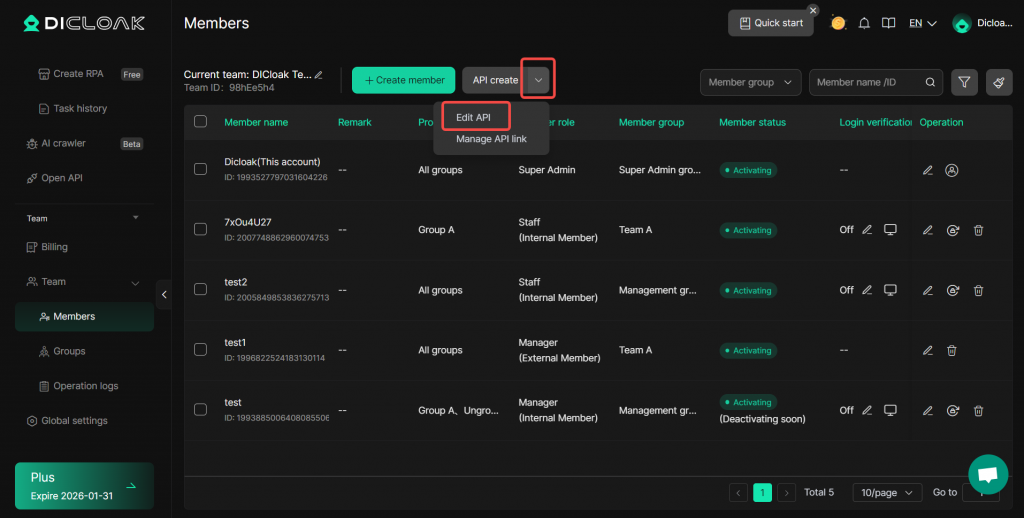
Open and log in to the DICloak software, find[Team]in the left navigation bar, enter the[Members]page.
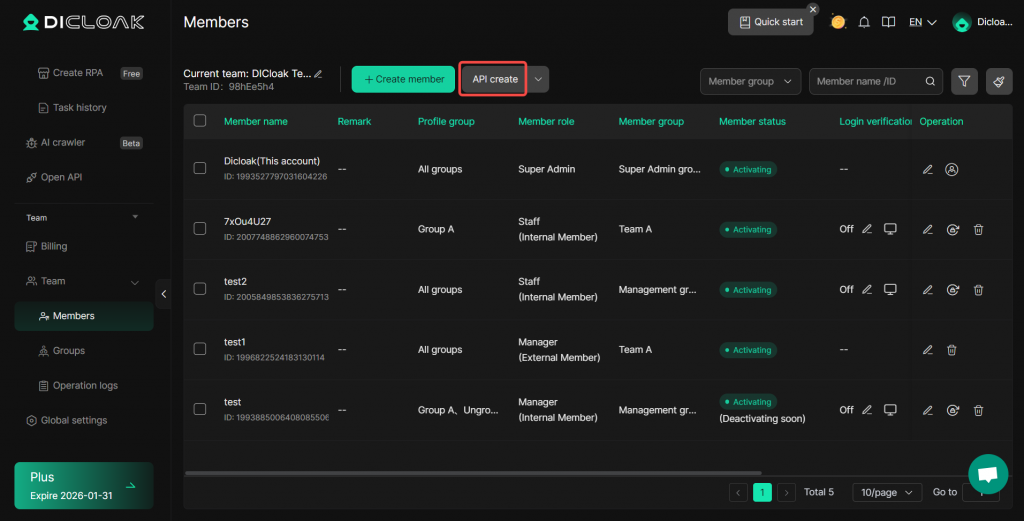
2. Create members using API link
Click “API create“.
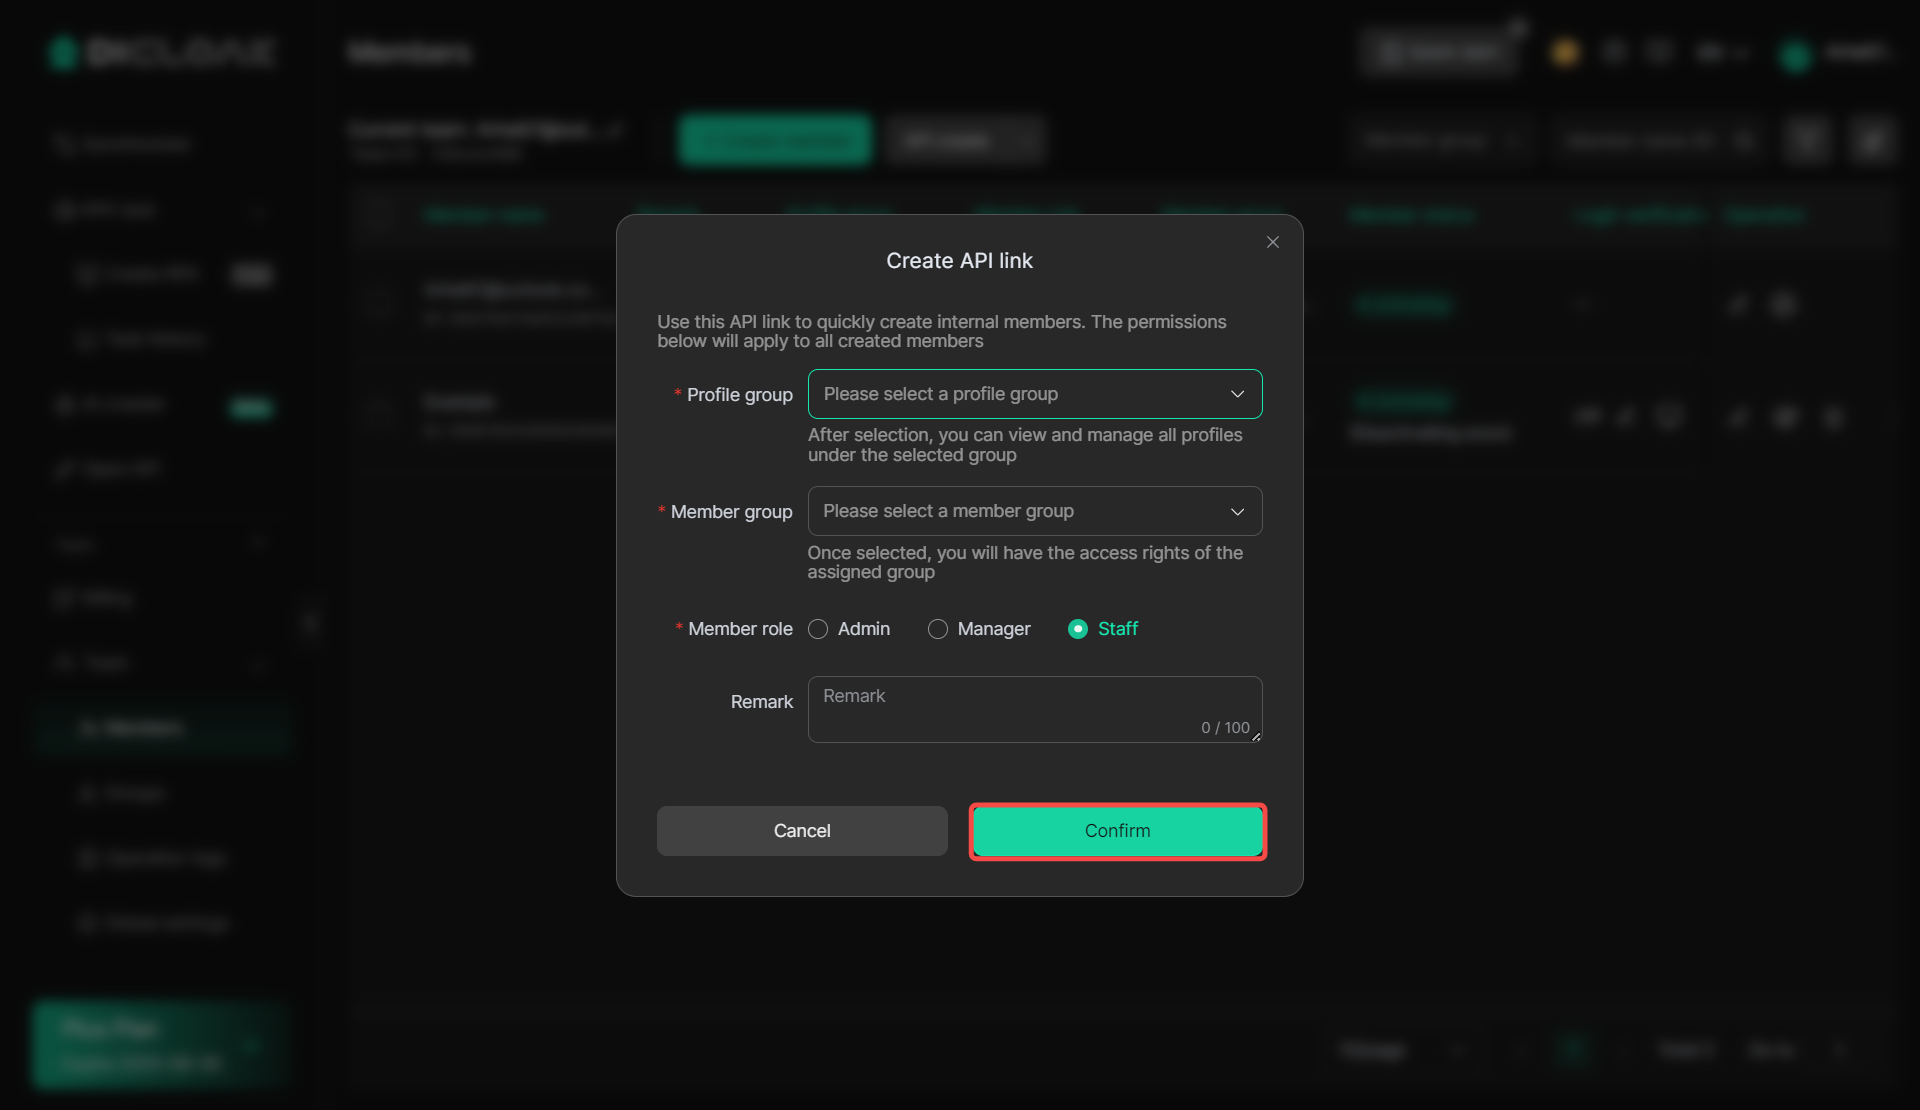
Set the permission settings for new members to use uniformly, you can view and operate the profile corresponding to the “Profile Group” , as well as the new member’s “Member Group” and “Member role” . After setting is completed, click “Confirm” .
As shown in the figure, it indicates that the API link has been successfully created, “Copy” the link to automatically create a member account via the online API interface.
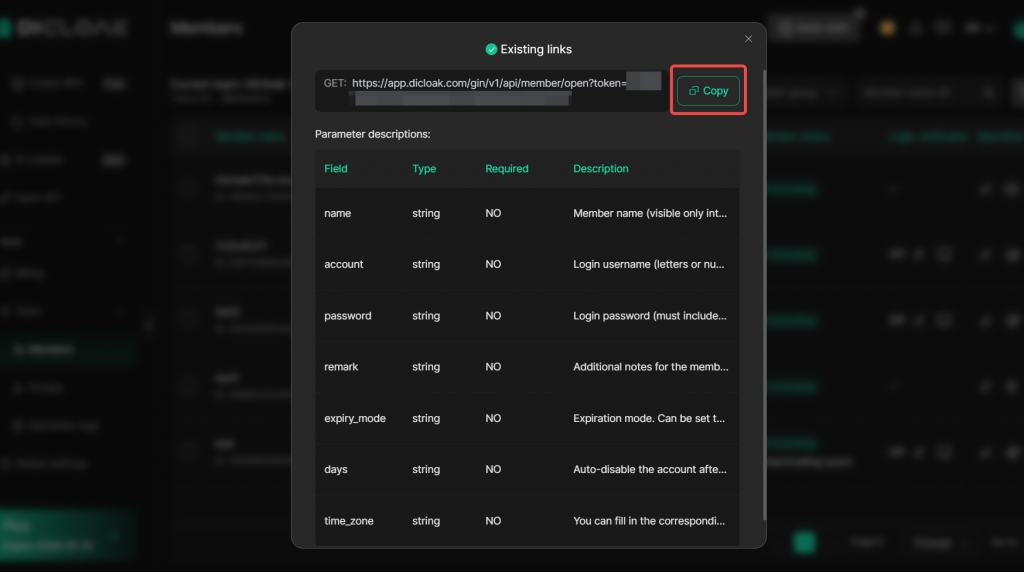
HTTPS API Request Example:
” https://dicloak.com/gin/v1/api/member/open?token=xxxxx-xxxxxxxxx&id=xxxxxxxxxxxxxxxxxxx&name=aaaaa&account=mcdl5569&password=M12345678&remark=%E5%A4%87%E6%B3%A8&days=30 “

- name: Member name (visible only internally); if not provided, a random name will be generated; No required;
- account: Logging username (letters or numbers, 6–20 characters); if not provided, one will be generated; No required;
- password: Logging password (must include both letters and numbers, 8–25 characters); if not provided, one will be generated; No required;
- remark: Additional notes for the member; No required;
- expiry_mode: Expiry Mode (string), optional, accepts INSTANT (to start the expiry timer immediately) or LOGIN_START (to start the expiry timer after the member’s first login); No required;
- days: Auto-disable the account after n days; leave blank to keep it active indefinitely; No required;
- time_zone: The time zone parameter (string). You can fill in the corresponding timezone; if left blank, Singapore timezone will be used by default (see the corresponding timezone list in the tutorial document when filling).
3. Edit members using API links
Click “Edit API”. You can edit individual member account information via API (this feature is currently only available to Admin).
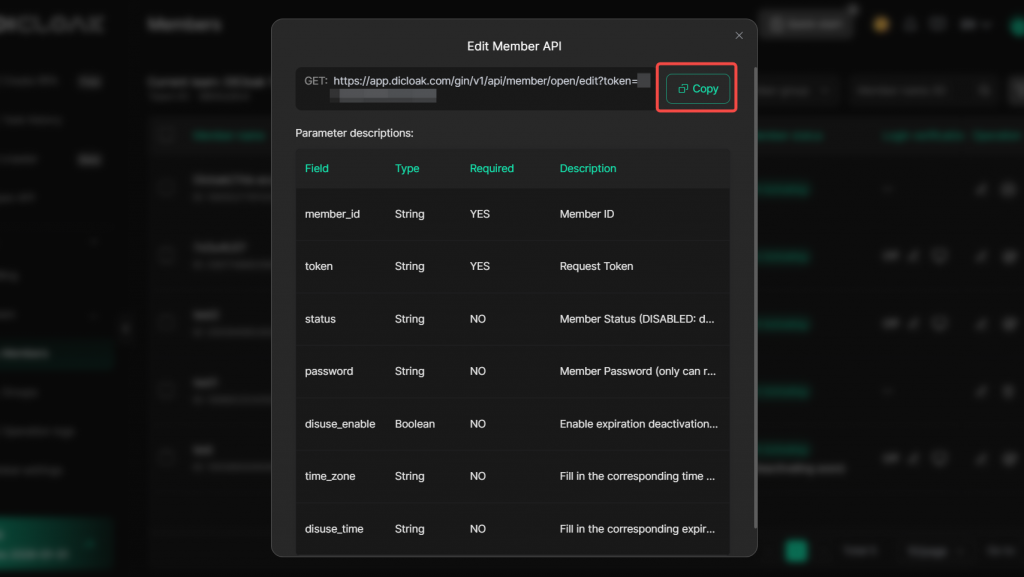
Usage Scenario: Taking a shared account scenario as an example, it supports programmatically calling the API. For instance, when a member renews a service, you can extend the usage duration of the DICloak member account by calling the API; when a member’s subscription expires, you can deactivate the member account via the API.
Specific requests are as follows:
- Request Interface:
https://gin-server.dicloak.com/gin/v1/api/member/open/edit - Request Method: GET.
- The specific editable parameters are shown in the following table:
| parameter | type | Required | Describe |
| member_id | String | Yes | Member ID (When creating a member through the API, the response result contains the member ID, or it can be seen in the DICloak software [Member List]) |
| token | String | Yes | token |
| status | String | No | Member status : ENABLED, DISABLED |
| password | String | No | Member password (Only internal members can reset password) |
| disuse_enable | Boolean | No | Whether to enable expiration deactivation true: Enable false: Disable |
| time_zone | String | No | You can fill in the corresponding timezone; if left blank, Singapore timezone will be used by default (see the corresponding timezone list in the tutorial document when filling). |
| disuse_time | String | No | When disuse_enable is true, enter the corresponding expiration time in the time format (YYYY-MM-dd HH:mm:ss) |
Example of a parameterized request:
{
“member_id”: “1866014140000000000”,
“token”: “xMMm12cG9BeG45bASDJKLGADHJKVkyVHZNalZjTjY4c”,
“disuse_time”: “2025-09-10 12:00:00”,
“time_zone”: “America/Adak”,
“disuse_enable”: true
“status”: “ENABLED”,
“password”: “Test12345678”
}
Corresponding response example:
{
“code”:0,
“msg”:”success”,
“data”:
{
“member_id”:”1866014140000000000″,
“disuse_enable”:true,
“disuse_time”:”2025-09-15 12:00:00″,
“time_zone”:”America/Adak”,
“status”:”ENABLED”,
“password”:null
},
“next”:null
}
Note that if the value of the relevant field in the returned result is Null, it indicates that the field has not been modified. You can use this to determine whether the member has been successfully edited, as shown in the following figure

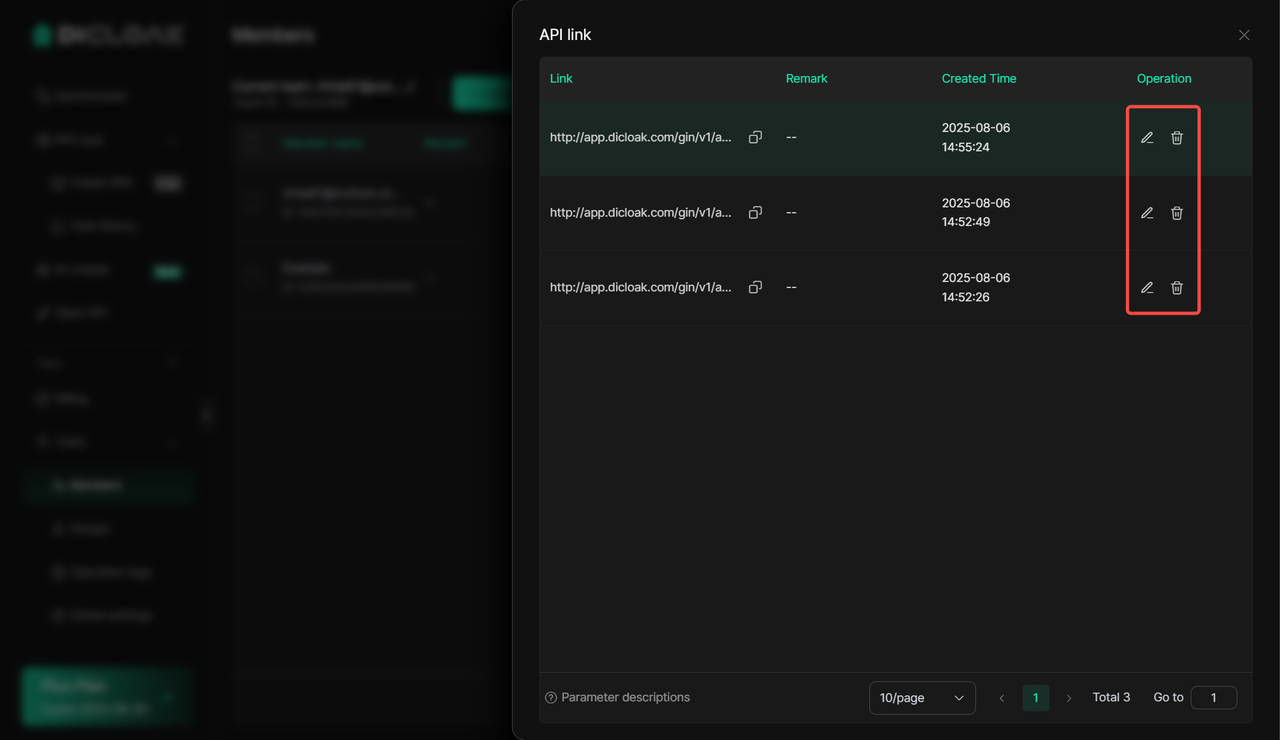
4. Management API Link
Click “Manage API Link”.
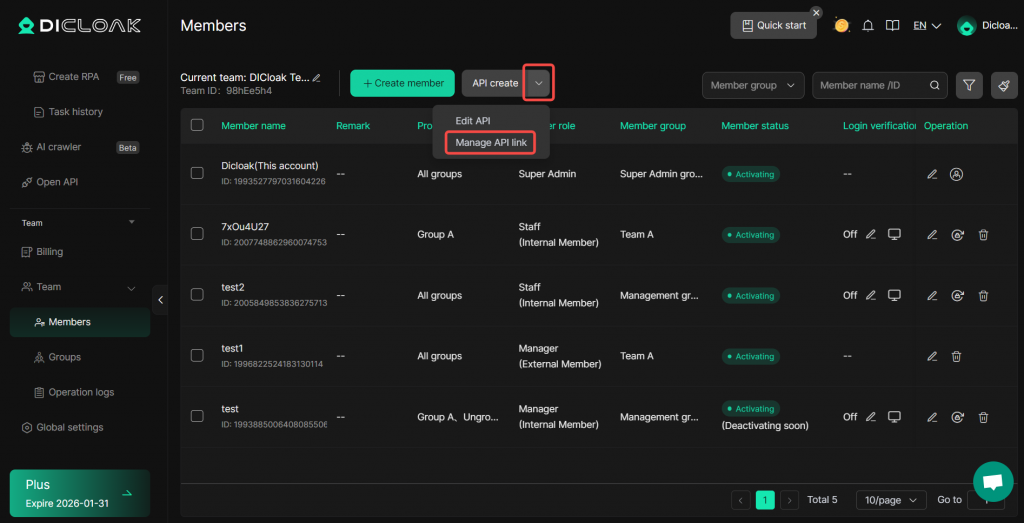
You can manage historically created API links, and supports copying, deleting, and editing API link settings.