Introduction of 922S5Proxy
922S5Proxy is the market-leading residential proxy provider, providing IP resources with purity up to 99.8% in 190+ countries/regions, allowing users to pinpoint the location of the desired target.
●Support SOCKS5 and HTTP(S)
●Country/city/zip code/ISP level targeting
●IP availability rate is 99.99%, no charge for invalid IP
●IP online time is 12 hours+, unlimited traffic and terminals
●Supports multiple usage methods such as proxy software/user authentication/API etc.
●Easy integration with fingerprint browsers, emulators and third-party tools
●Quick and easy to set up, deploy in just a few seconds
922S5Proxy configuration
Method 1: Port extraction IP
Applicable plans: ISP proxy and static residential proxy. Here ISP proxy is used as an example for demonstration.
First, please purchase ISP proxies as needed.
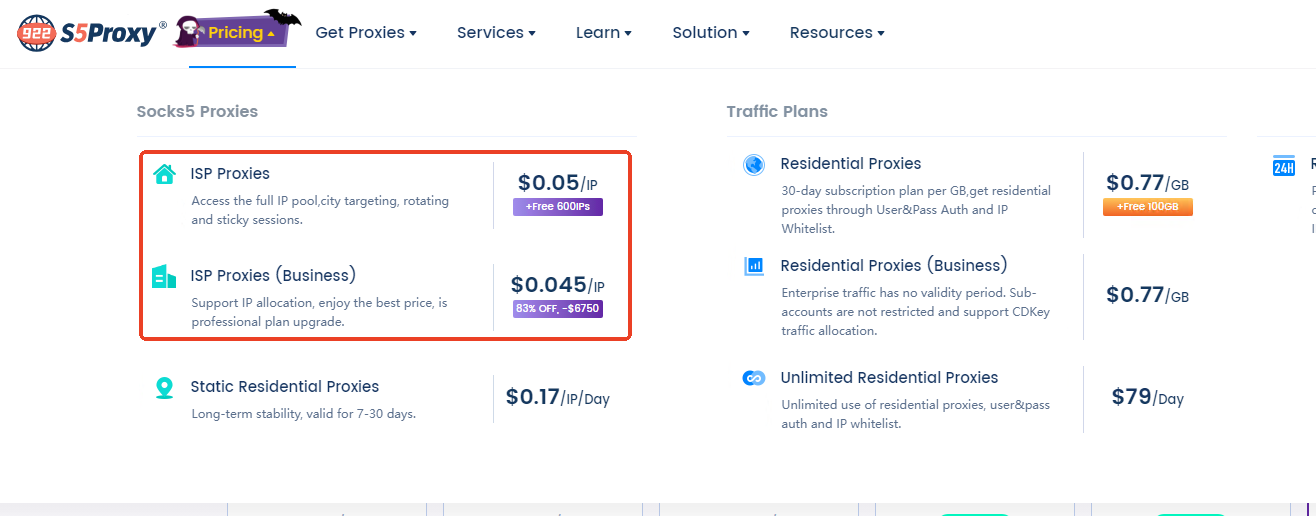
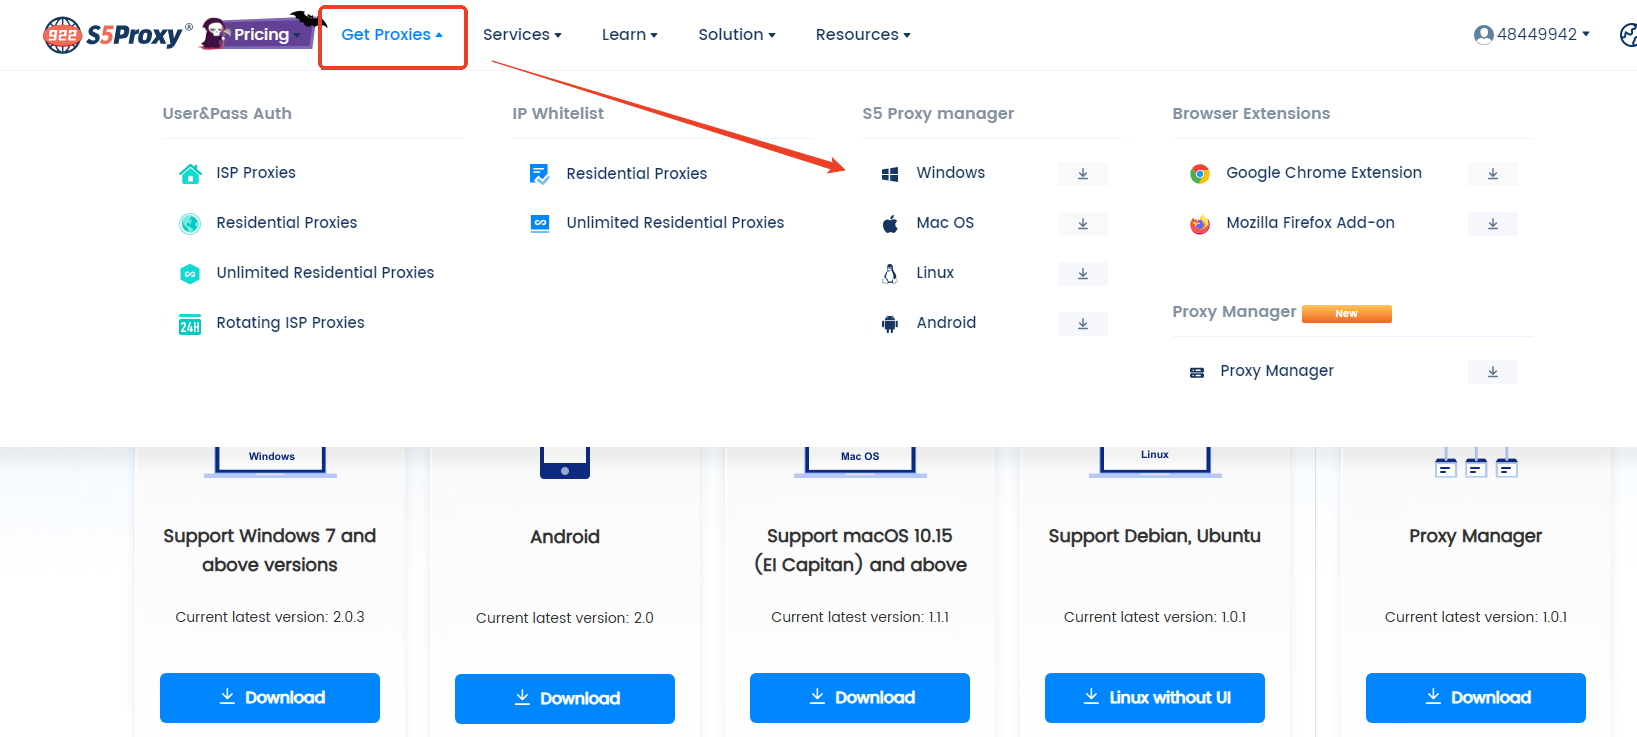
Step 1: Download and open 922S5Proxy software
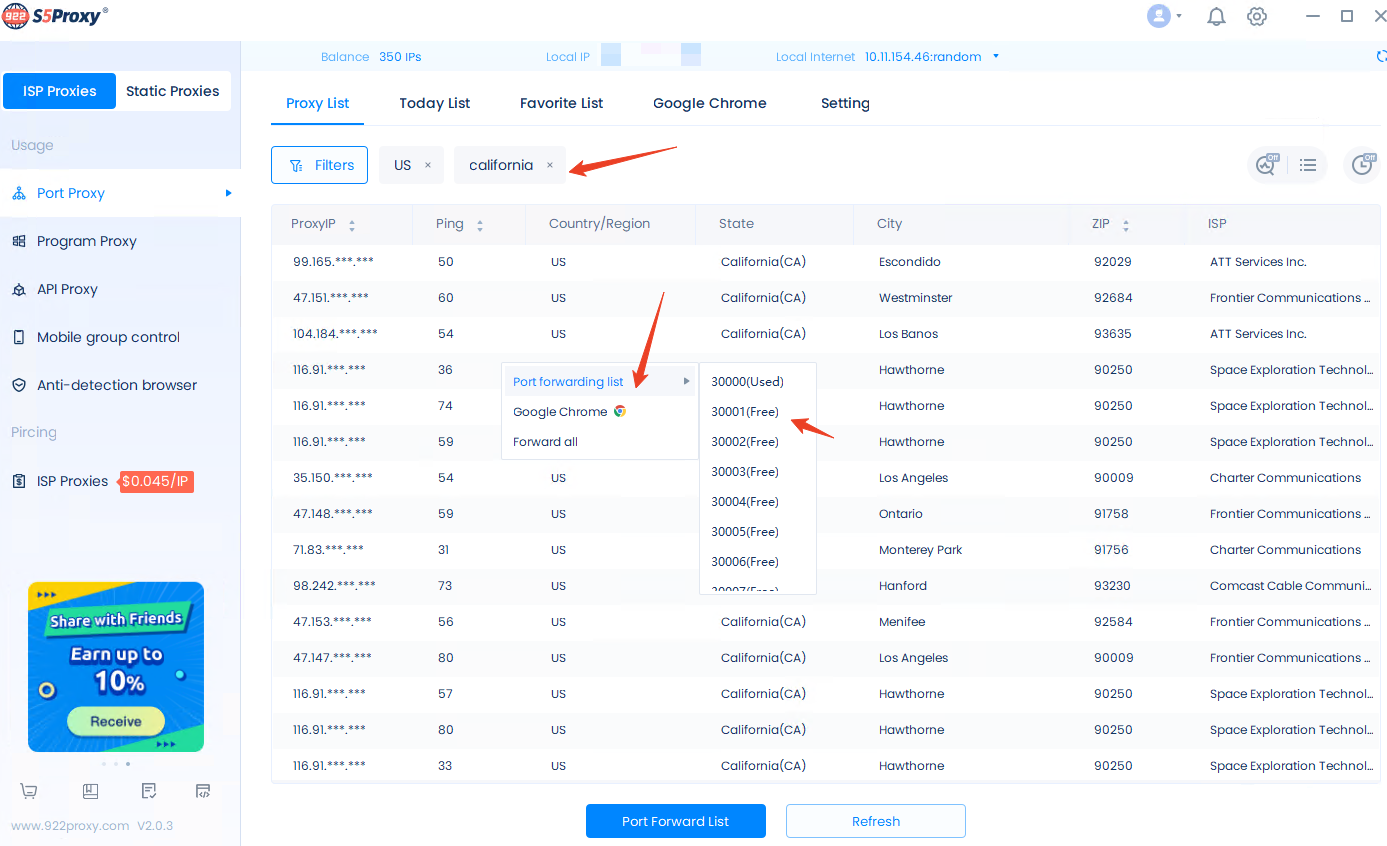
Step 2: Extract IP
1.Set the filter conditions, select the country/state/city/zip code, etc., click “Confirm” to obtain the proxy list of the target area, and then right-click to select the proxy IP and port;
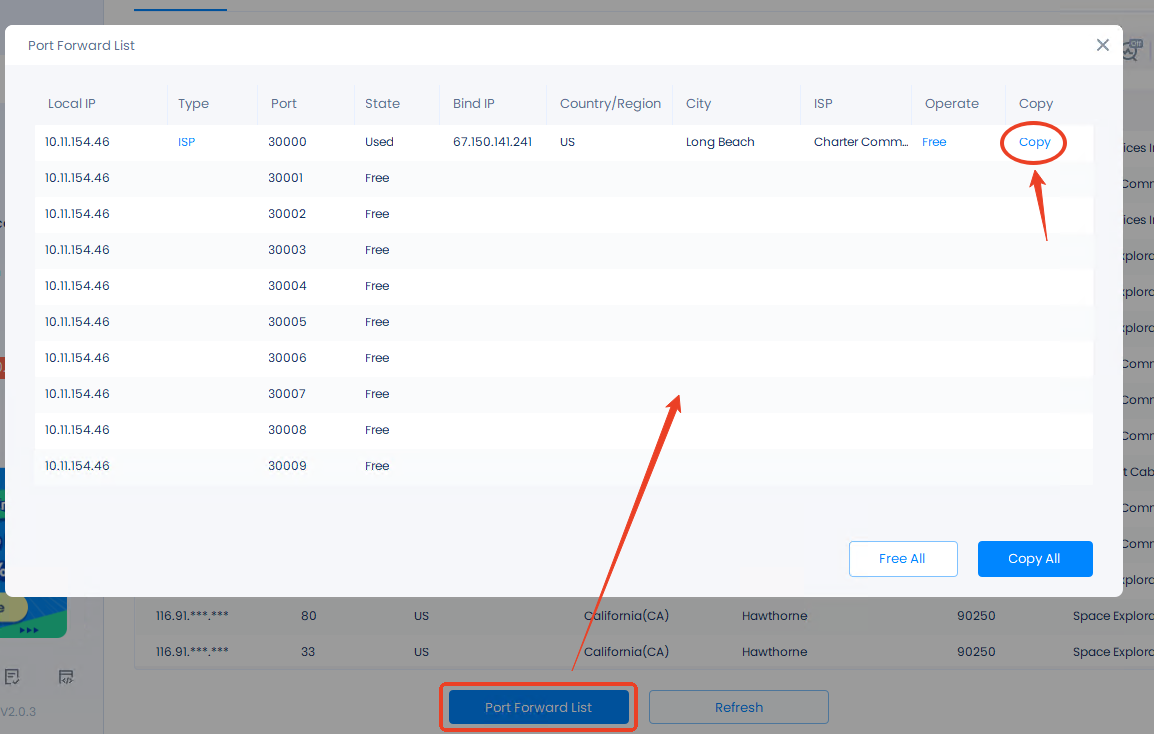
2.Then click on the port forwarding list and copy the IP just extracted
Step 3: Configure proxy to DICloak anti-detection browser
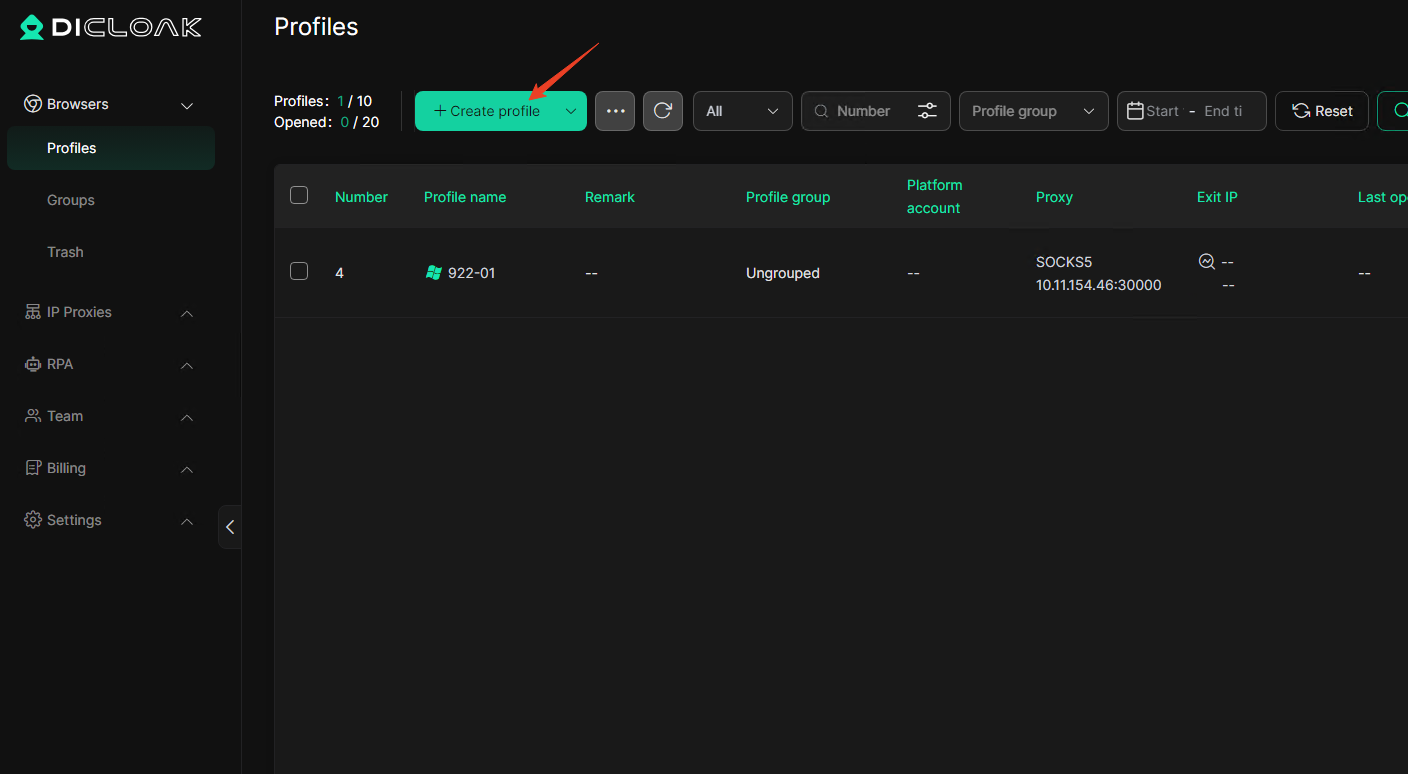
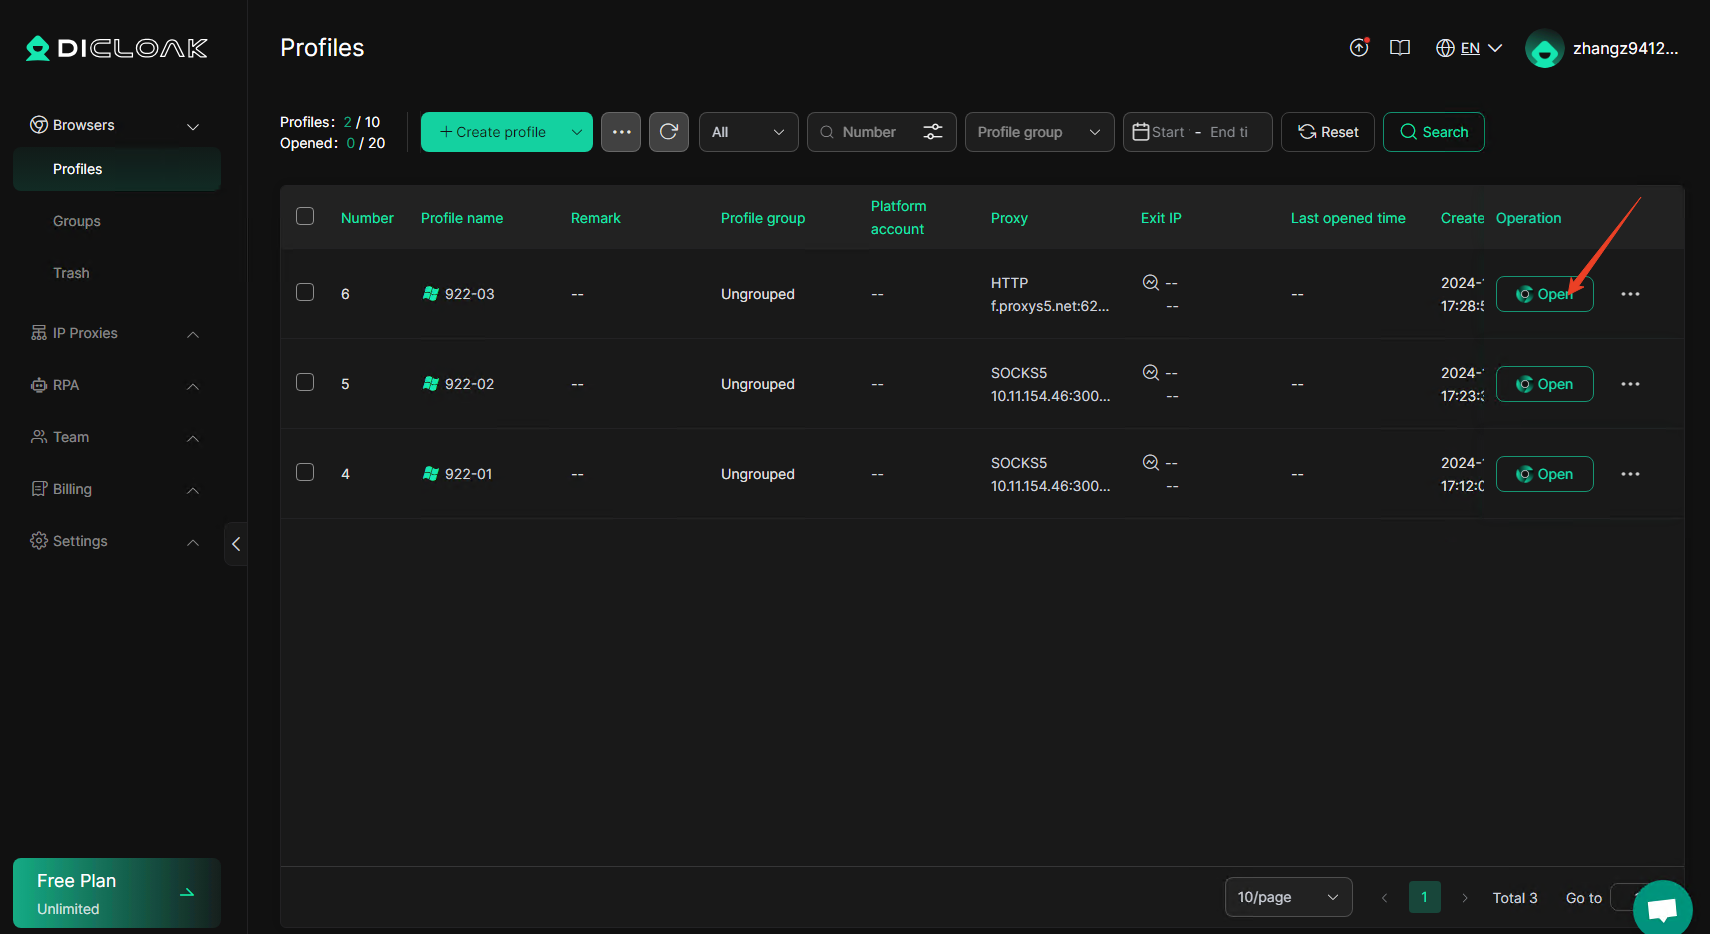
1.Open the DICloak anti-fingerprint browser and click the “Create profile” button on the “profiles” page
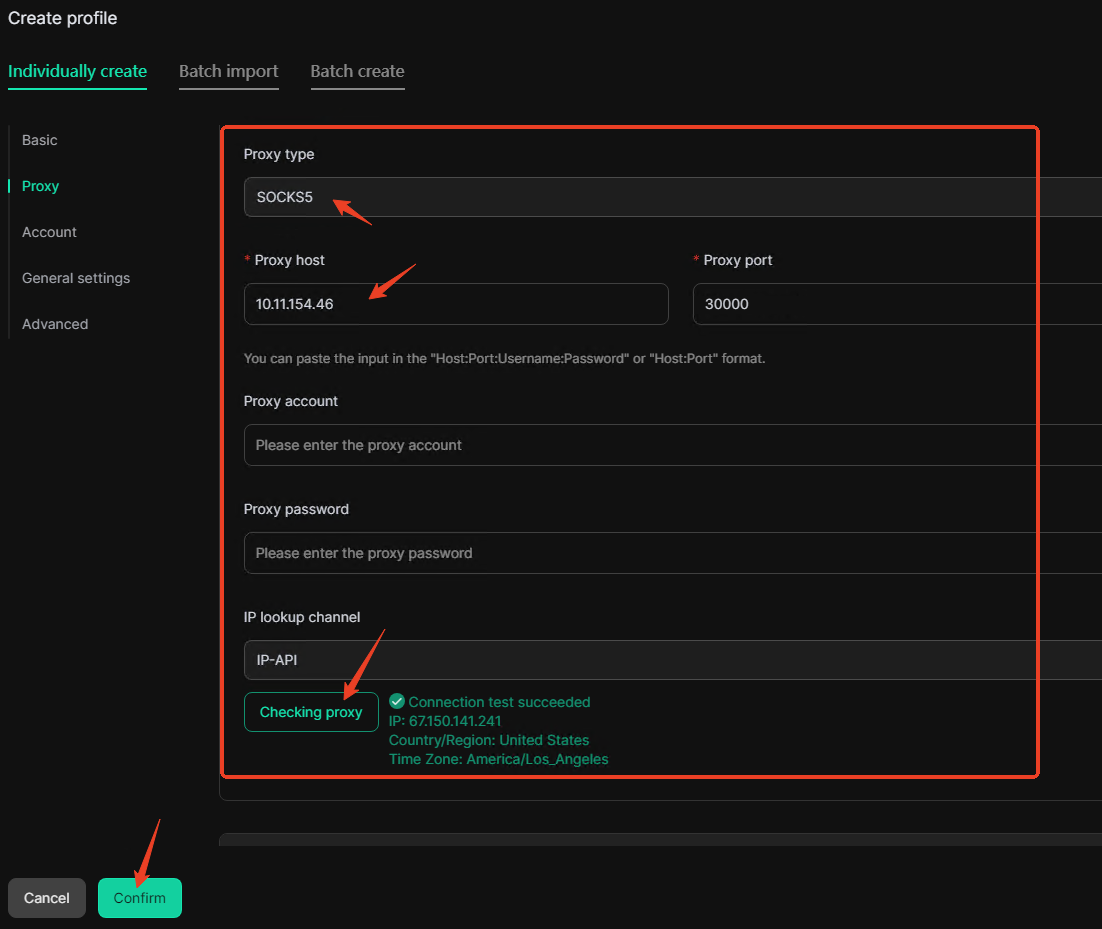
2.Then enter the profile name and other information, scroll down to the proxy setting module, select the proxy type: SOCKS5, paste the proxy IP and port just copied into “proxy Host” and “Proxy Port”, click “Check Proxy“, and click “Confirm”
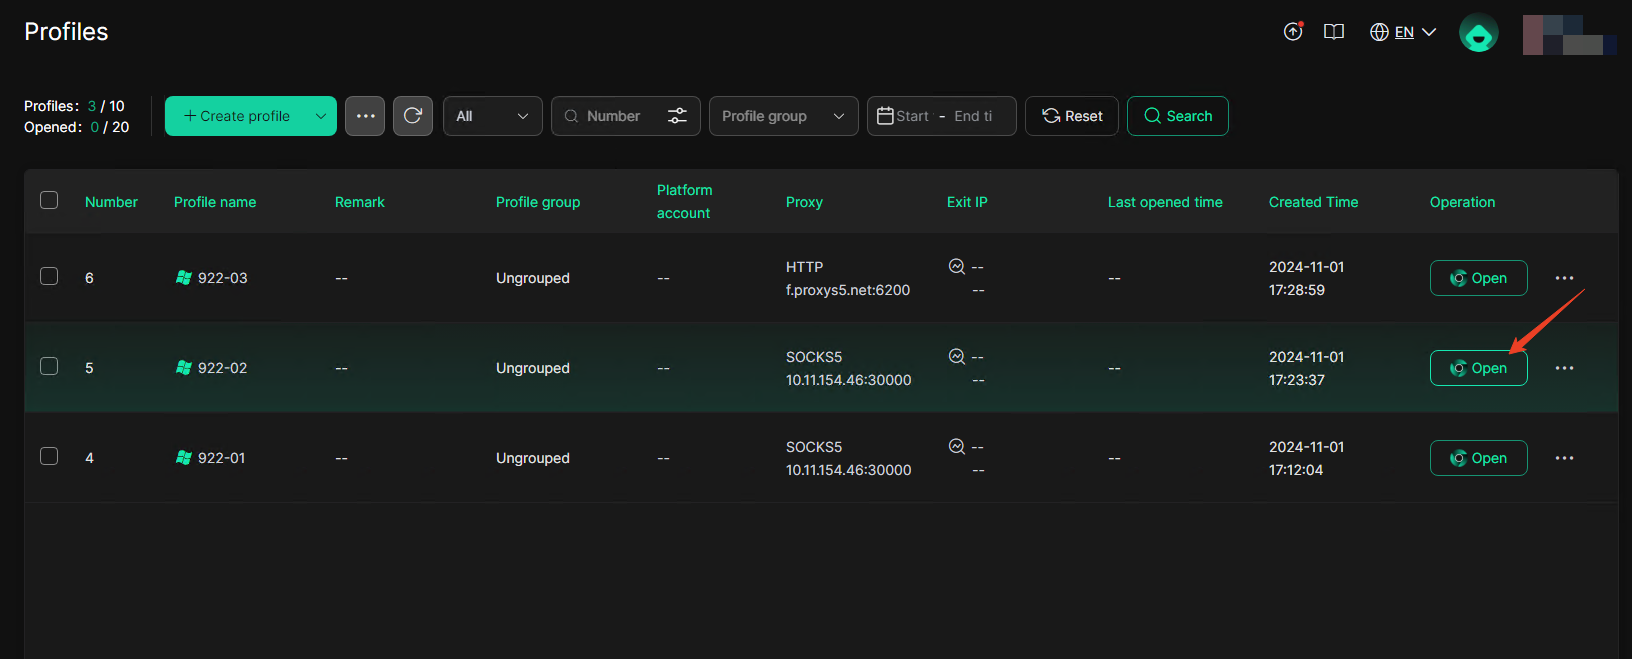
3.Click the “Open” button. If the IP address displayed on the browser page is consistent with the IP address extracted on the 922 client, it means the browser environment is created successfully.
Method 2: user&pass authentication to get proxies
Applicable plans: ISP proxy, residential proxy (traffic), static residential proxy.
Here, residential proxy (traffic) is used as an example to demonstrate the steps.
First, purchase Residential Proxies as needed.

Step 1: Get proxies
1.Enter the 922proxy personal center dashboard and enter the residential proxies-user&pass auth page. You can use the main account directly or create a sub-account for use.
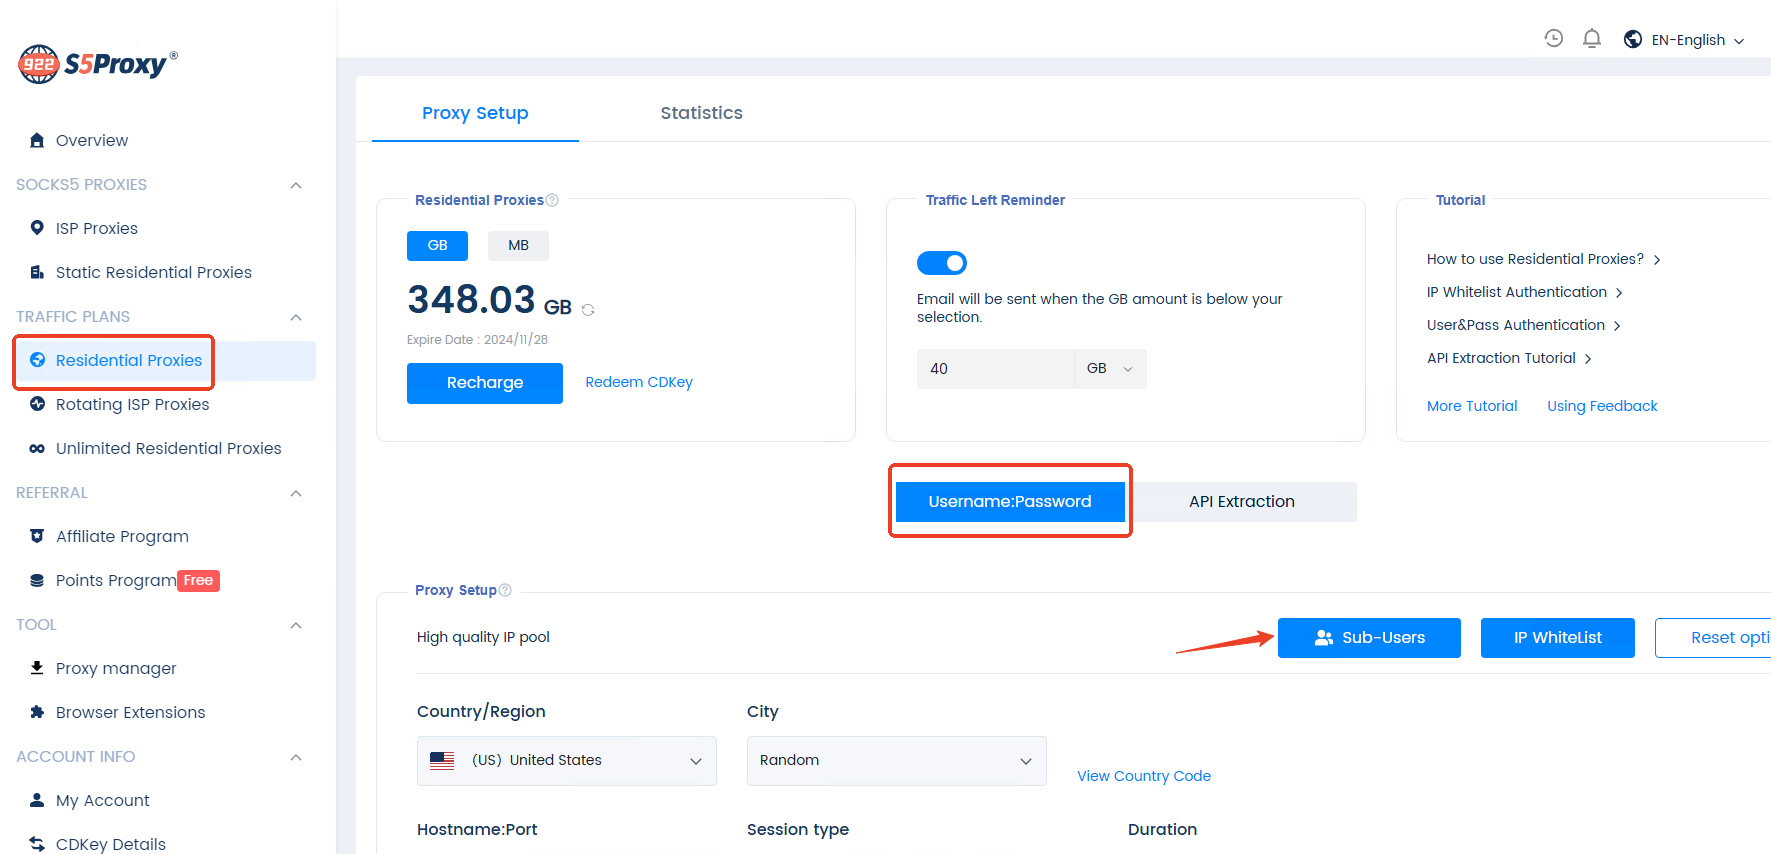
2.Basic settings
-Select country and city
-Select session mode. Rotating IP: Automatically replace IPs in the IP pool. Sticky IP: Fixed to 1 IP address within 1-120 minutes.
-Username: The main account is selected as the username by default, you can also select other accounts in the drop-down list if needed.
Password: To change your password, go to the sub-users page.
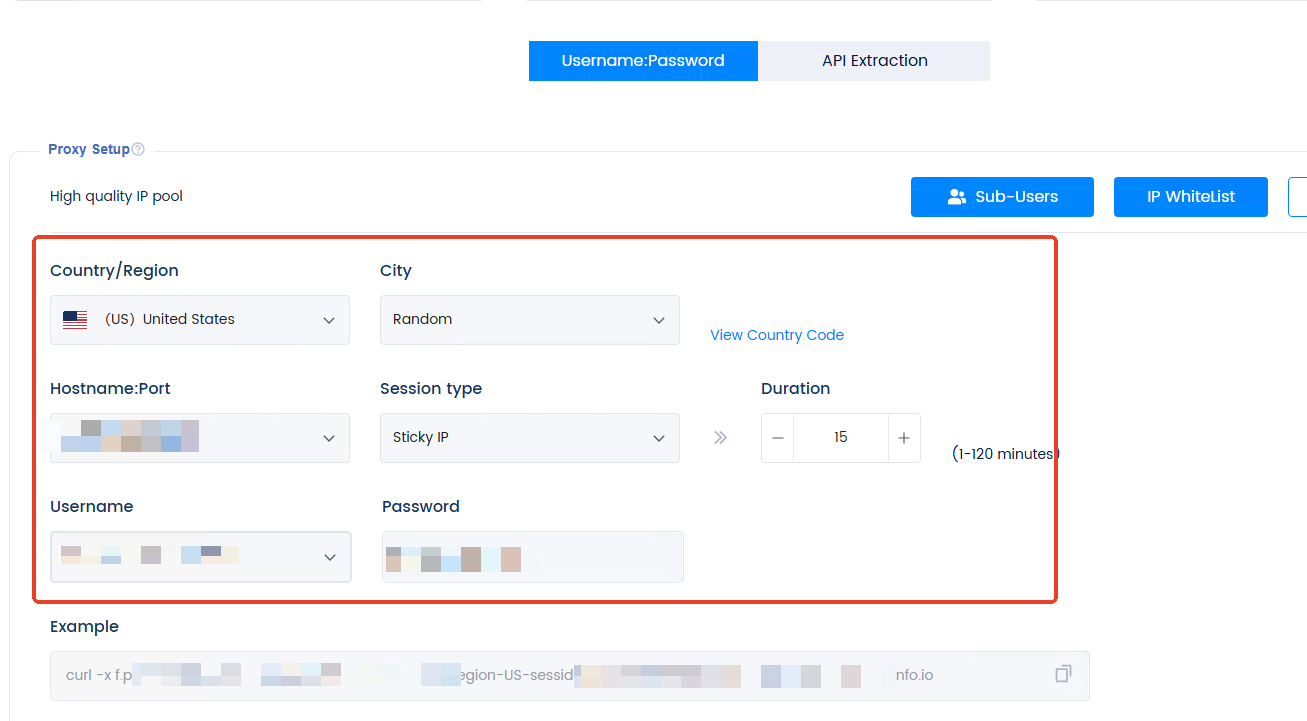
3.Generate proxies
-Choose the number to generate.
-Select username: password format.
-Click Generate: Copy the created proxy list to the clipboard
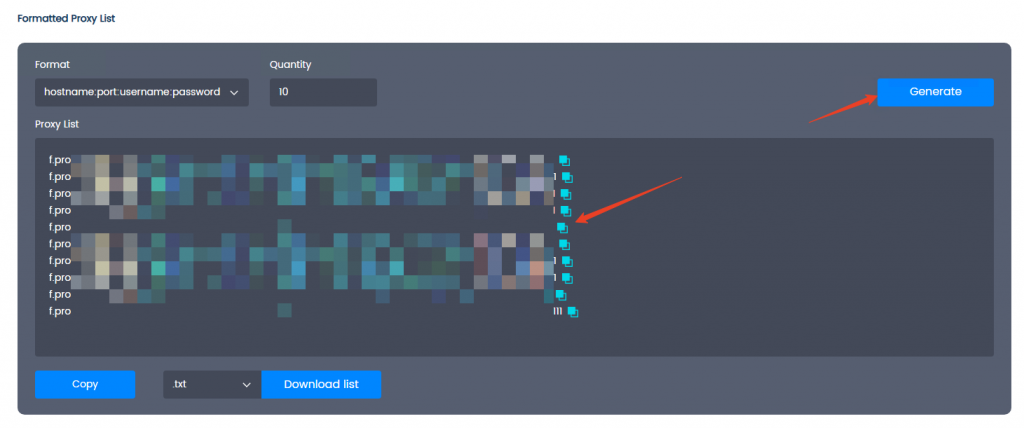
Step 2: Configure proxy to DICloak anti-detection browser
1.Open the DICloak anti-fingerprint browser and click the “Create Profile” button on the “Profiles” page
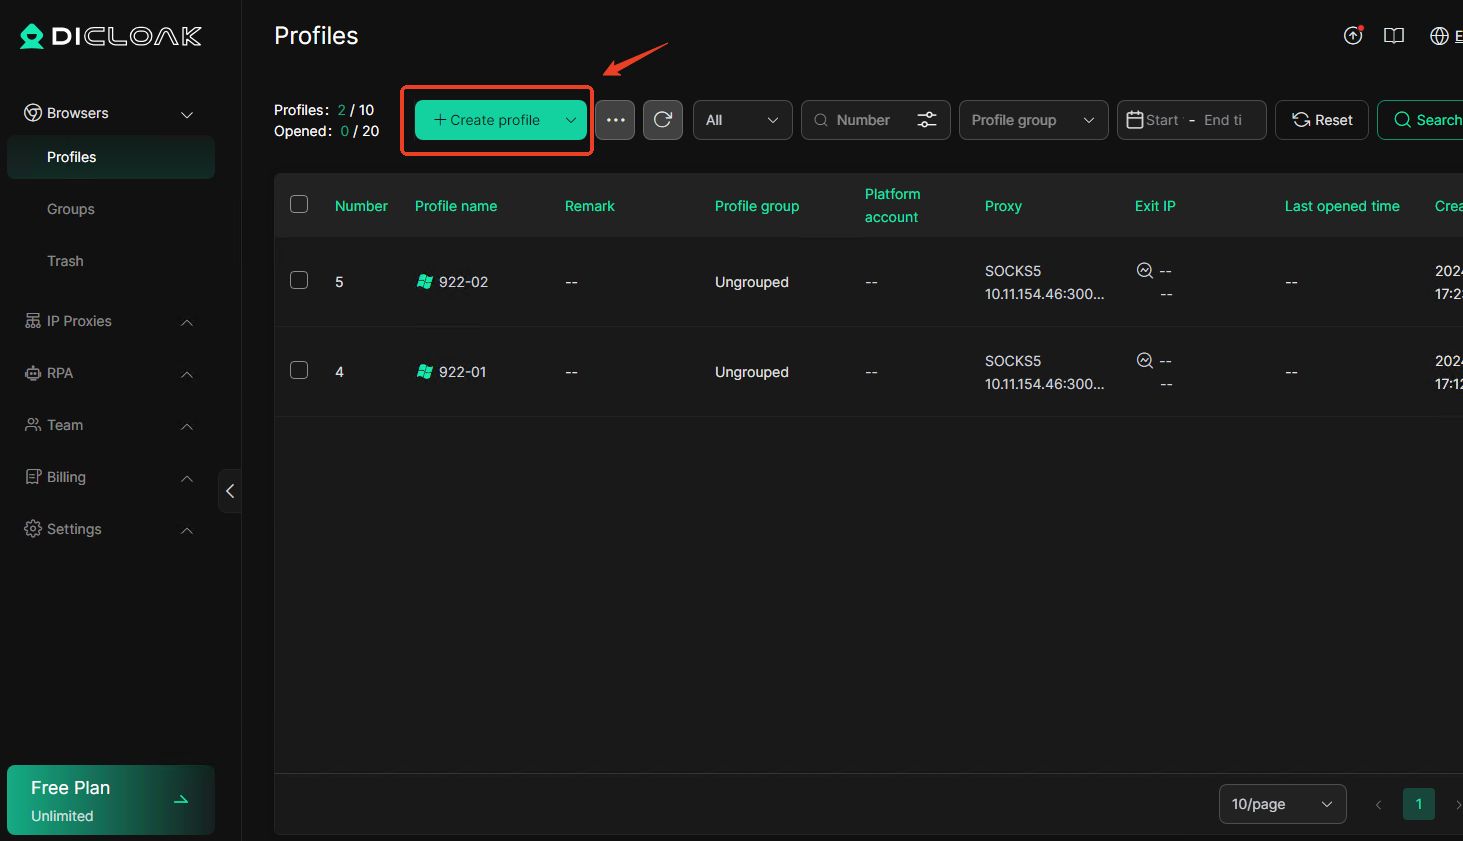
2.Then enter the profile name and other information, scroll down to the proxy setting module, select the proxy type: HTTP, and paste the proxy info you just copied into “Proxy host”. The proxy port, account and password will be automatically filled in. Click ” Check Proxy” and click “Confirm” when finished
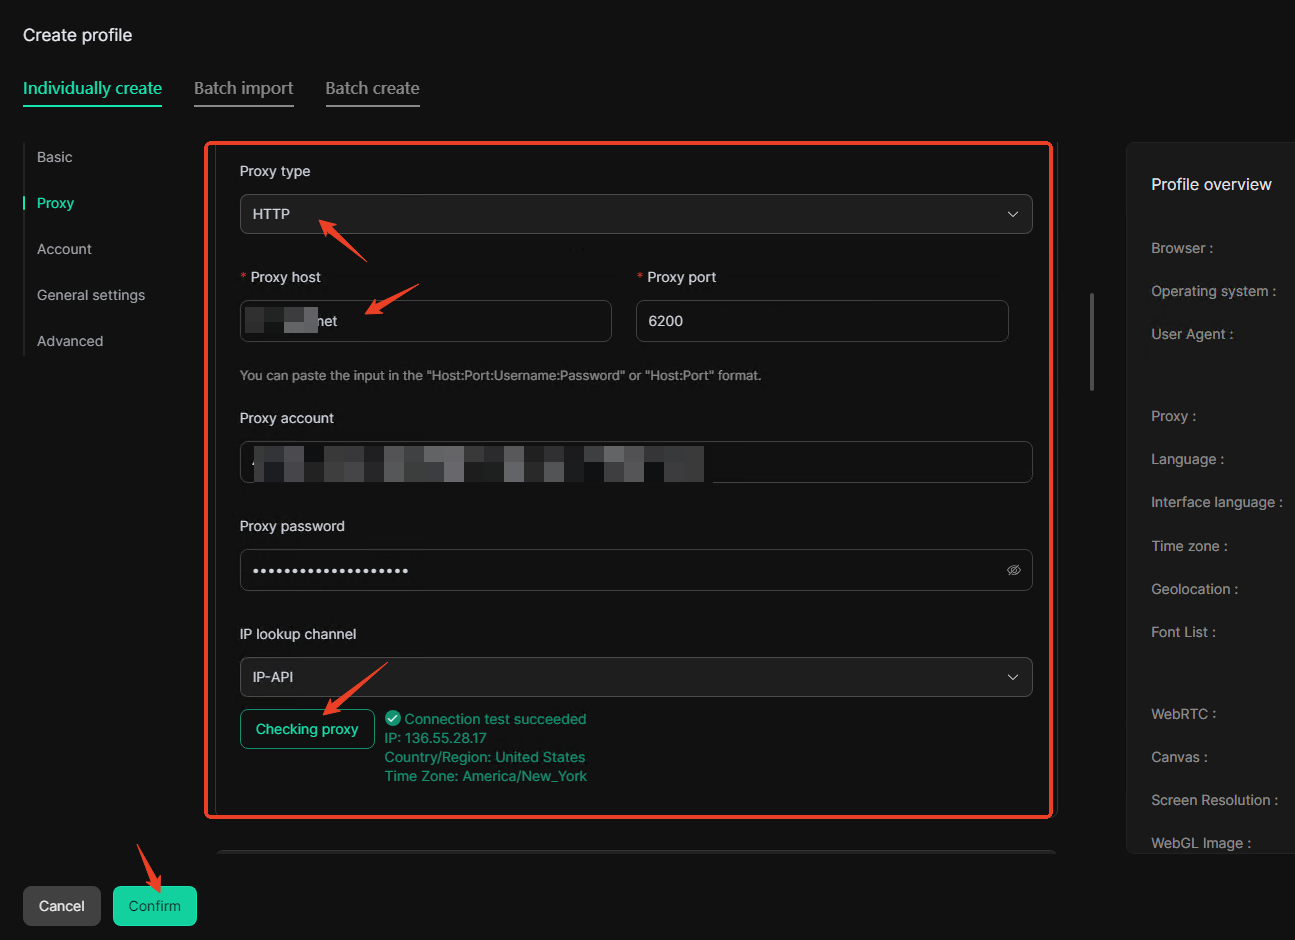
3.Click the “Open” button to start using it.
922S5Proxy latest promotional discount:
Exclusive for new users
-Buy 1000IP and get extra 600IP, single IP starts from only $0.045
-Buy 200GB and get extra 100GB, starting at only $0.77 per GB