In this guide, we’ll walk you through the steps to configure LightningProxies proxies within the DICloak browser. Follow the instructions below to ensure a smooth and secure integration.
Introduction of LightningProxies
LightningProxies is a fast, reliable proxy service offering over 10 million IPs across residential, datacenter, ISP, IPv6, and mobile proxies. Designed for web scraping, automation, and secure access, it supports geo-targeting (country, city, ISP), rotating or sticky sessions, and multiple protocols (HTTP/S, SOCKS5). With 99.9% uptime, low latency, and easy integration via API or browser tools, it’s ideal for data extraction, ad verification, social media automation, and more. Pricing is flexible, starting from $4.50/GB for residential and $10/day for datacenter proxies, with 24/7 live support and user-friendly dashboards.
LightningProxies Proxy Configuration
- Sign in to your LightningProxies account via the dashboard. Navigate to “Dashboard → Proxy Generator” or a similar section.
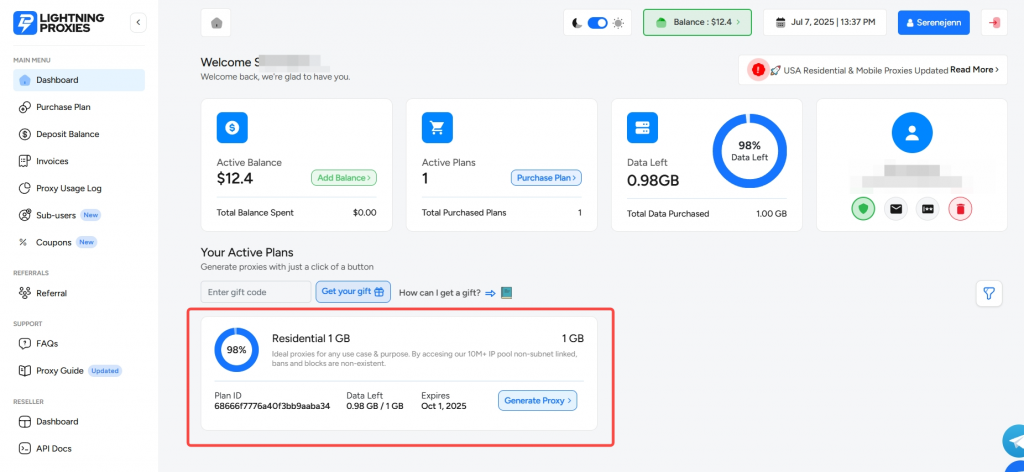
- Select your proxy type and parameters: choose between residential, datacenter, ISP, IPv6, or mobile proxies, then set geo-targeting (country, state, city, ISP), session type (rotating or sticky), and protocol (HTTP/S or SOCKS5)
- You’ll see a Host (IP address or domain), Port, Username, and Password — copy these details.

Configuring LightningProxies Proxy in DICloak Antidetect Browser
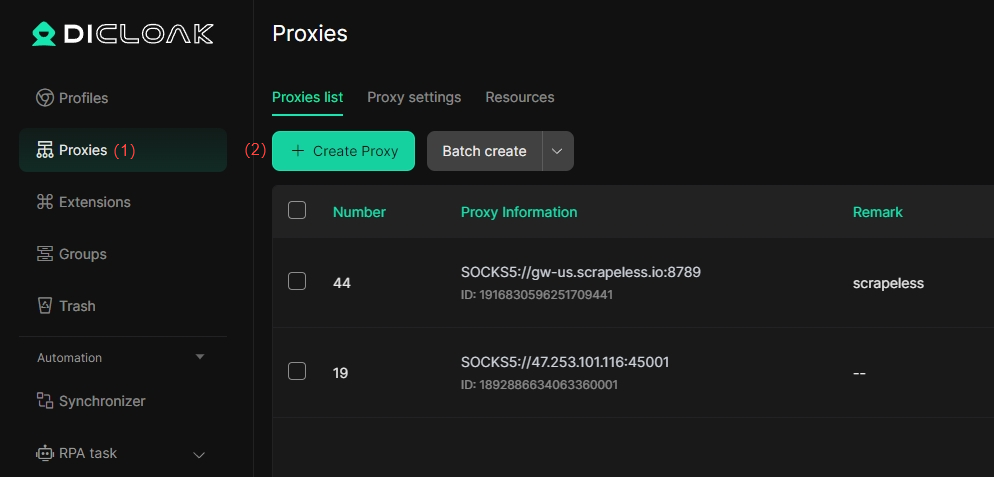
- Launch DICloak Anti-Detect Browser, click on Proxies (1) in the menu on the left. Click the Create Proxy (2) button.
- Select the Proxy type and copy the information from the LightningProxies dashboard (proxy host, proxy port, proxy account, and proxy password) into the appropriate fields.
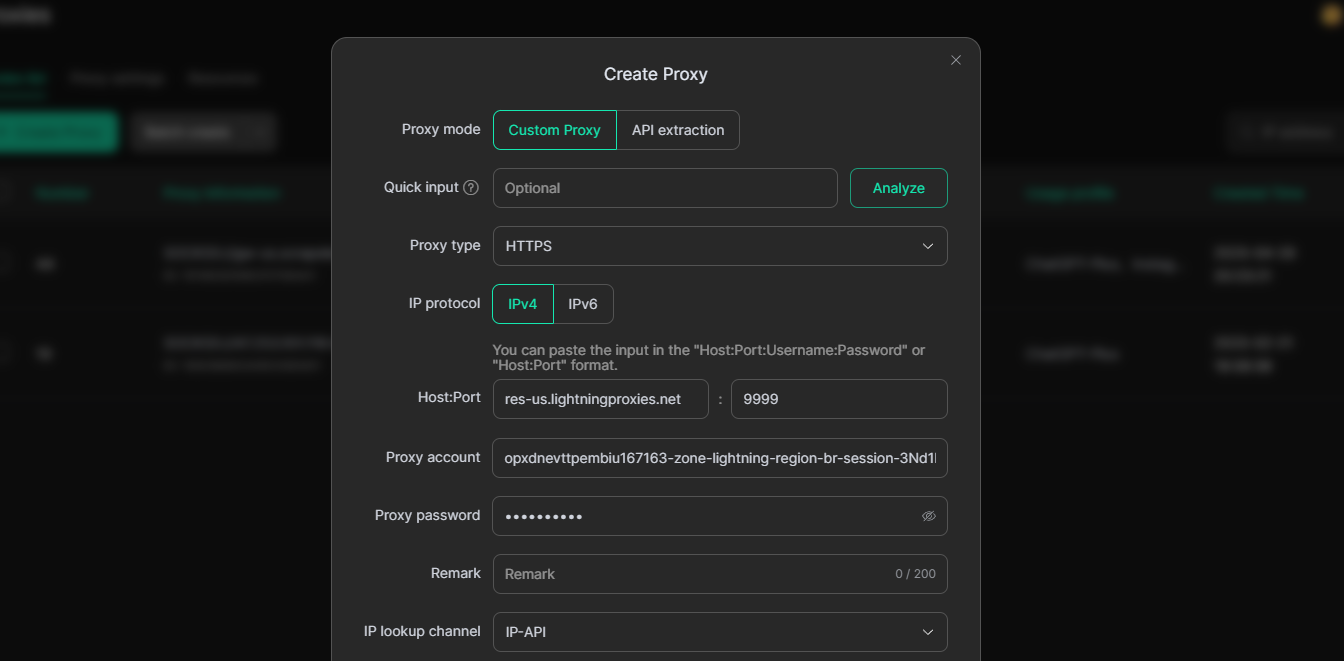
- Click the Checking proxy (3) button. DICloak Anti-Detect Browser will confirm the test was successful and display the proxy’s IP address, location, and time zone. Click Confirm (4) to save your proxy.

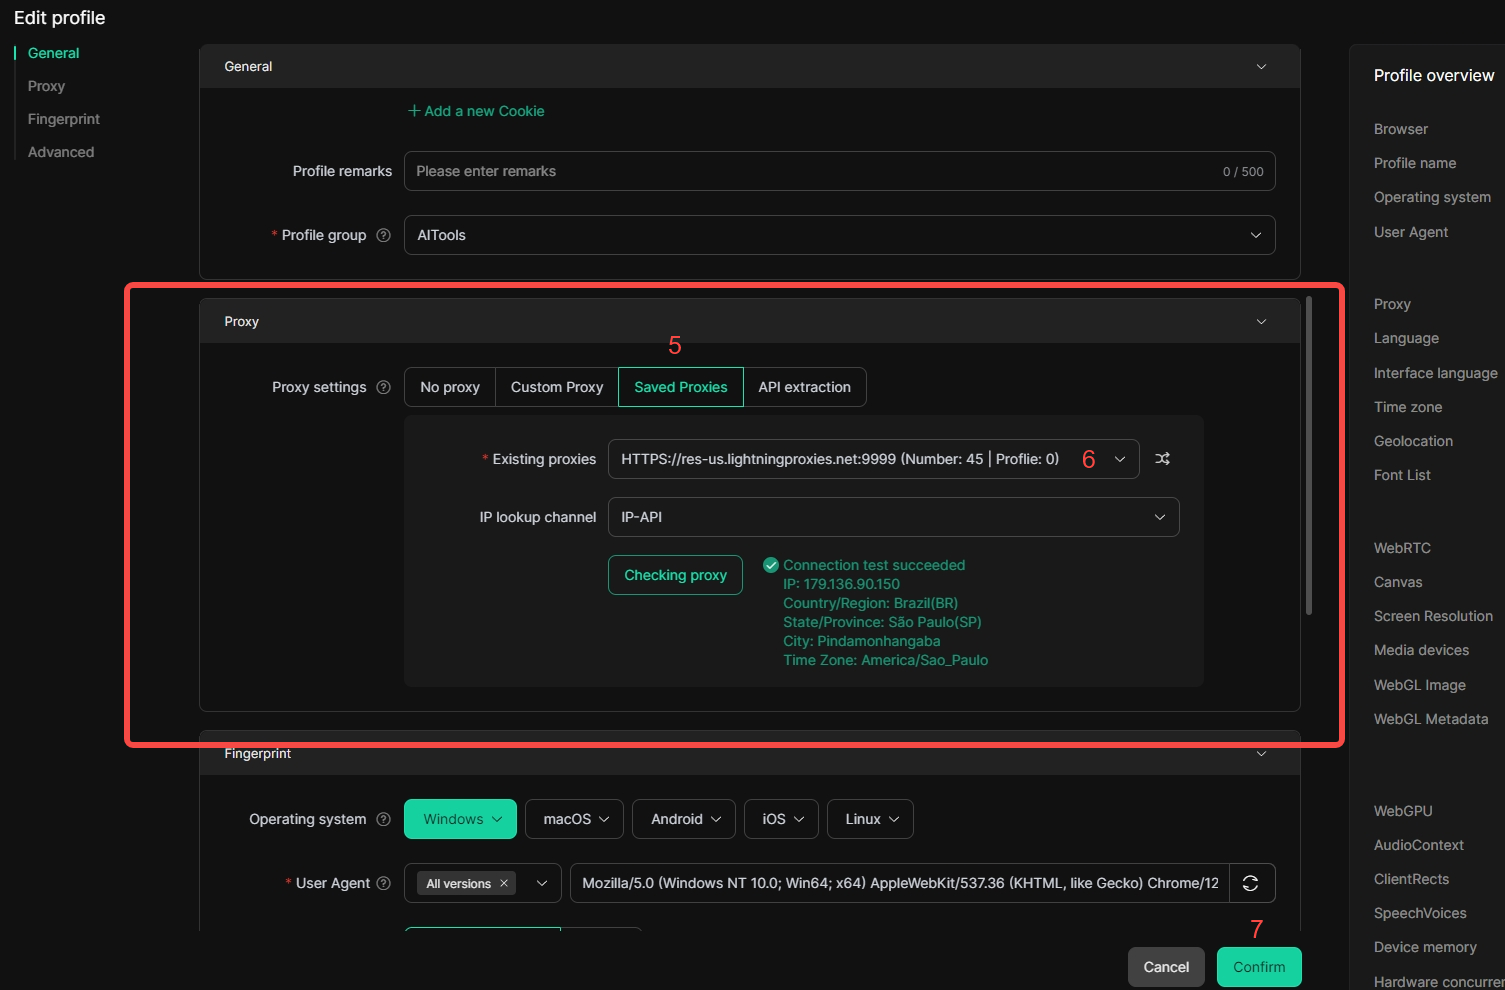
- You can assign your saved proxy to a profile by editing the profile settings. In the Proxy section, click on Saved Proxies (5), select your proxy from the list(6), and click Confirm (7).