If you want to hide your real IP address from websites, then you need to configure proxies when creating a new browser profile. In this way, you will stay anonymous in online activities.
1.Create Profile
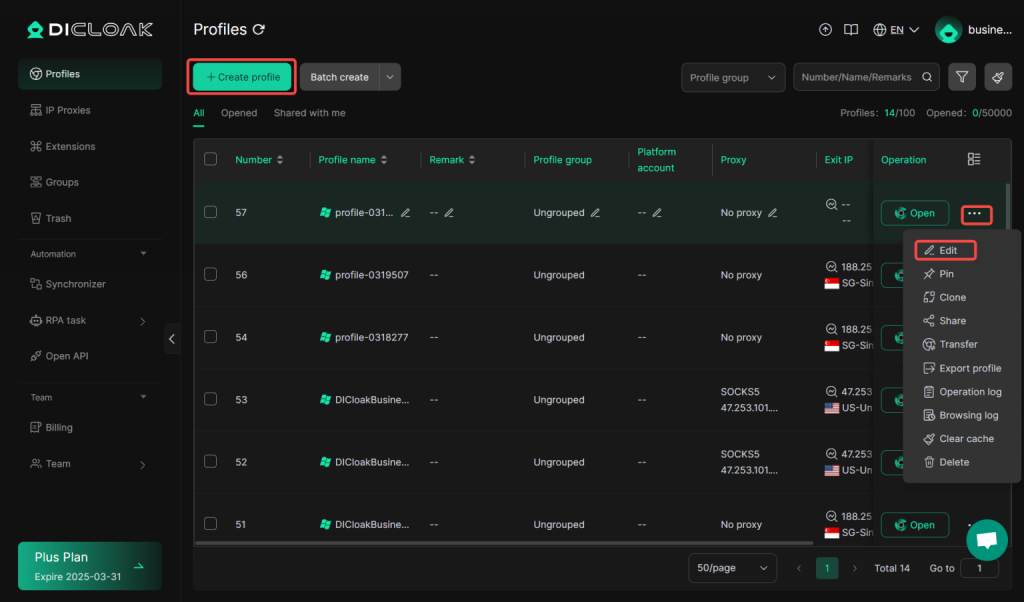
Open and log in to the DICloak software, enter the [Profile Management] interface, then click [Create Profile] to enter the new Profile creation and editing page.
2.Proxy Settings
[Proxy Settings]: Provides four proxy modes: “No Proxy”, “Custom Proxy”, “Saved Proxies”, and “API extraction”.
2.1 No proxy:
means directly using the local network connection without going through any proxy server. This method is the fastest, but it cannot hide the user’s real IP address and geographical location.

2.2 Custom Proxy:
By customizing proxy parameters, you can personalize the construction of the proxy. The specific proxy parameters are as follows:
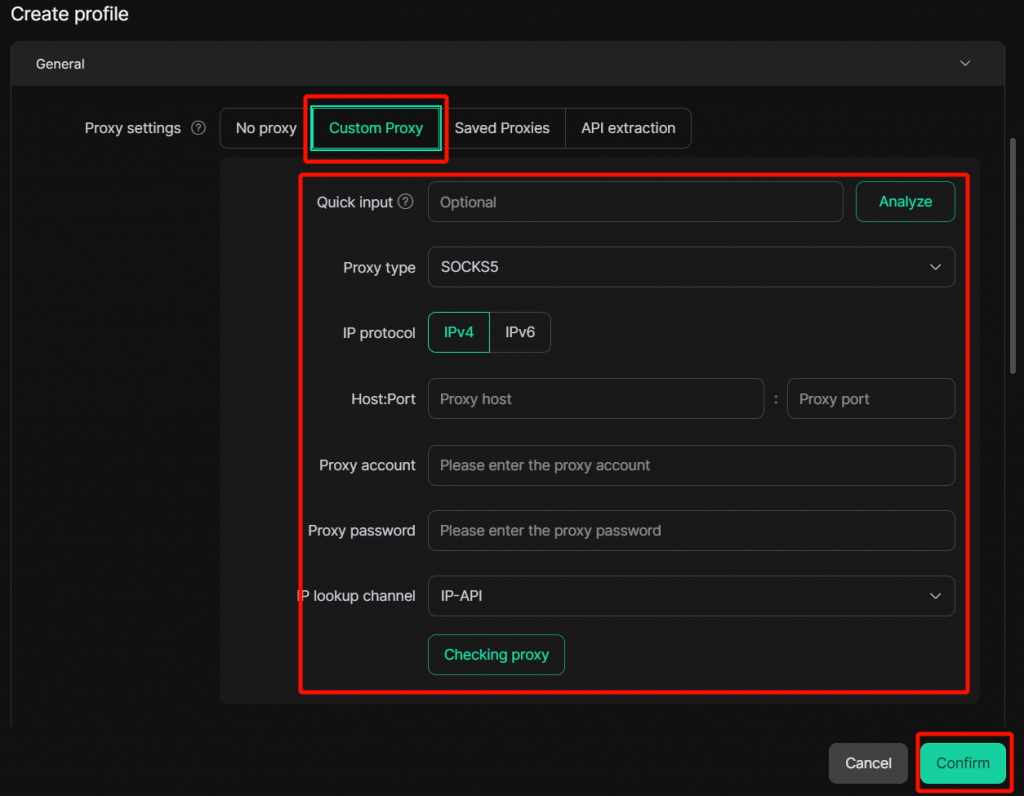
- Quick Input: Enter data in proxy format, click [Parse], and the data will be parsed and filled into the corresponding parameter boxes.
- Proxy Type:
- HTTP: Proxy connection via the HTTP protocol, suitable for ordinary web browsing. It can hide the user’s real IP address but does not provide encryption during data transmission.
- HTTPS: Proxy connection via the HTTPS protocol, suitable for secure total page browse. It not only hides the user’s real IP address but also ensures information security through encrypted data transmission.
- Socks5: SOCKS proxy supports proxy forwarding for both TCP and UDP protocols, offering high flexibility and suitability for various network application scenarios, including online gaming, P2P file sharing, etc. Users can hide their real IP addresses and bypass firewalls and geographical restrictions.
- IPFLY (Dynamic Proxy): A dynamic proxy service that provides a series of constantly changing IP addresses. Each time a user connects, they will obtain a different IP address, thereby greatly enhancing privacy protection and making it difficult to be tracked and detected.
- 922S5 (Dynamic Proxy): A dynamic proxy service that provides a vast amount of short-term rotating IP resources. Each request is assigned a different egress IP, effectively circumventing blocking and anti-crawling mechanisms, and ensuring high anonymity and high availability for large-scale Data Acquisition.
- IP Protocol:
- IPv4: The fourth version of the core Internet protocol, providing approximately 4.3 billion independent addresses, using dotted-decimal notation, widely compatible with Saved network devices and applications, and serving as the primary foundation for current network connectivity and service deployment.
- IPv6: The sixth version of the core Internet protocol, using a 128-bit address length, with nearly infinite address resources, supporting more efficient routing and secure communication, and is the key technological foundation for the development of the next-generation Internet.
- Host Port: Enter the IP address of the proxy host and the proxy port.
- Proxy Account:Account provided by the proxy.
- Proxy Password: Password provided by the proxy.
- IPQuery Channels:Currently supports the detection paths of IP2Location and IP-API, both of which are well-known IP geolocation database and service providers, offering multiple ways to query the geolocation and other relevant information of IP Addresses.
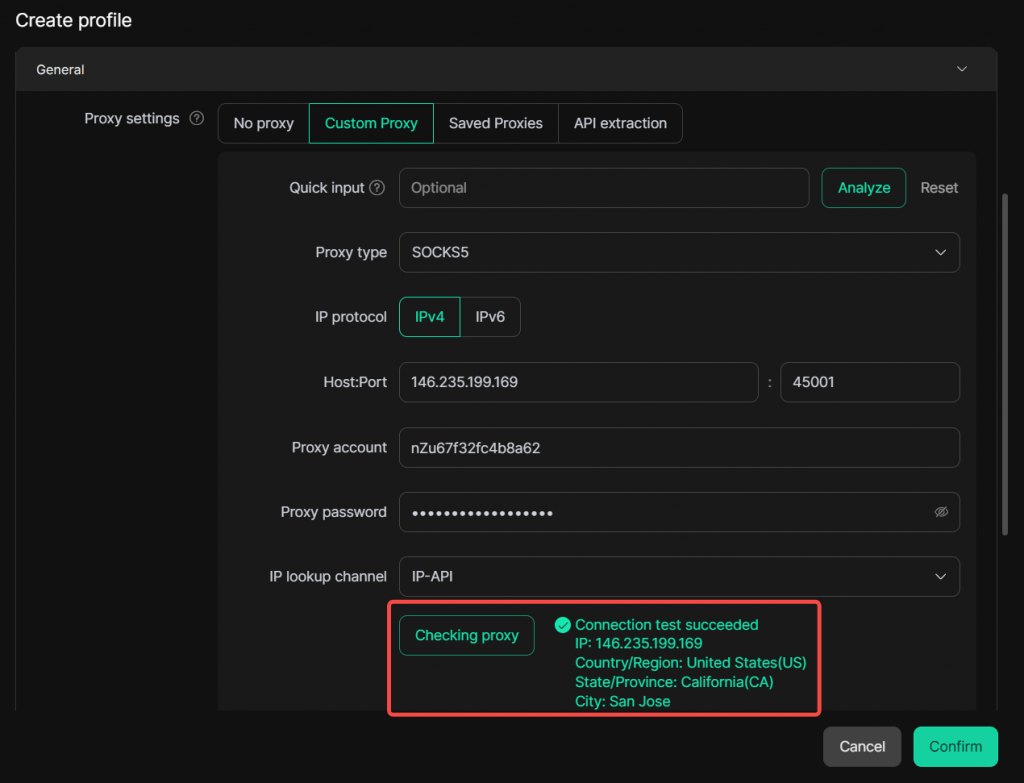
- [Checking proxy]: Clicking the [Checking proxy] button allows you to query the proxy connection status and displays information such as your current IP Address, country/region, and time zone.
- You can also enter https://proxys.io/zh/proxy-checker to perform proxy self-testing.
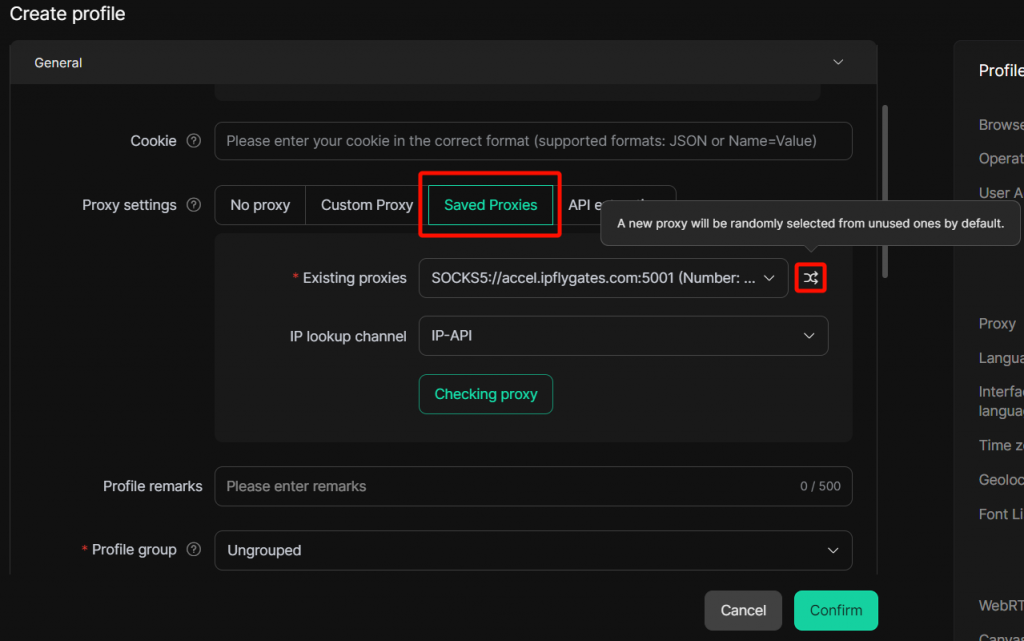
2.3 Saved Proxy:
You can automatically or randomly select a required proxy from the already created proxies. The specific parameters and functions are as follows:
- Saved Proxies: Displays all created proxies and provides the [Randomly Select Proxy] function.
- [Randomly Select Proxy]: In the “Proxy Settings” section, select [Saved Proxy], then click [Random Button]. The system will first randomly select one from the unused proxies, eliminating the need for you to search one by one and ensuring that the proxies are not reused for use .
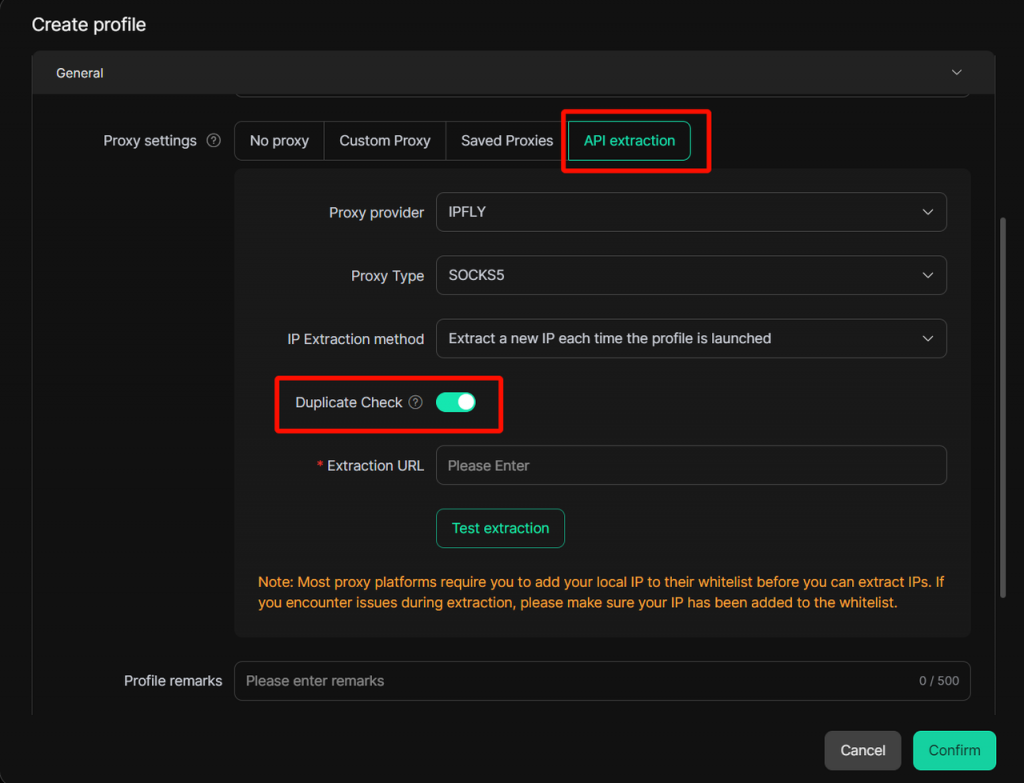
2.4 API Extraction:
[API extraction] Proxy Mode: Provides API extraction functionality. You can extract new IP when opening the Profile or wait until the IPs expire before extraction according to your own needs, eliminating the need for cumbersome manual operations. Additionally, you can enable the [Duplicate Verification] feature, which helps you automatically skip IPs already used by the current team when extracting proxies, thereby avoiding the repeated use of the same IP across multiple Profiles.
Operating Steps:
- Enter the [Create Profile] interface, select [API Extraction] in the “Proxy Settings” module, and enter the proxy parameter settings interface.
- Adjust proxy parameters: “Proxy”, “Proxy Type”, “Extraction method”, “Extraction Link”.
- If necessary to avoid using duplicate proxy, click the [Start] button of “Duplicate Check”.
- After completing the parameter input, you can click [Test Extraction] to verify whether the extraction was successful.
- After confirming that the information filled in is correct, click [Confirm]. After the Profile is successfully created, return to the “Profile List”.
