Operation Guide
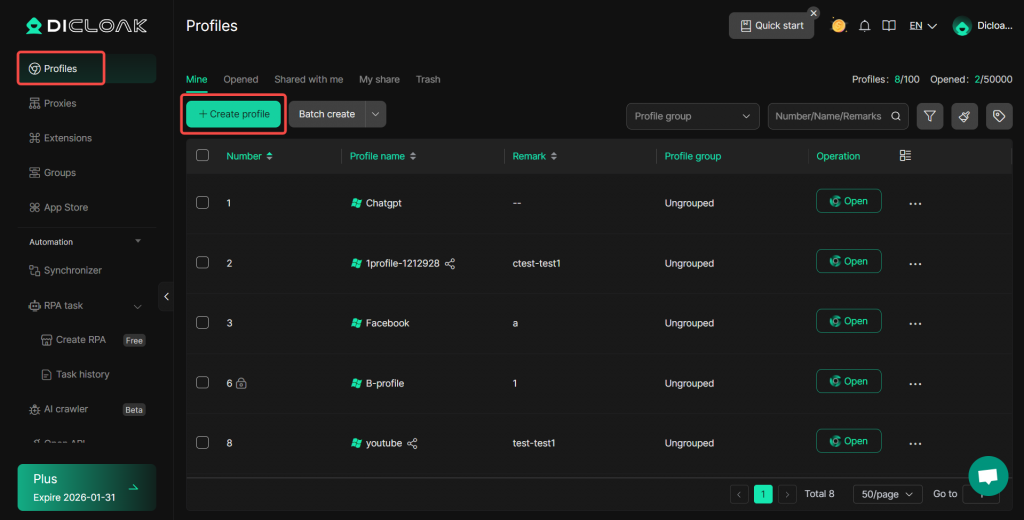
1. Click “Create profile” Button
- Open and log in to the DICloak software first, then click “Profiles” and “Create Profile” to create a new browser profile for you.
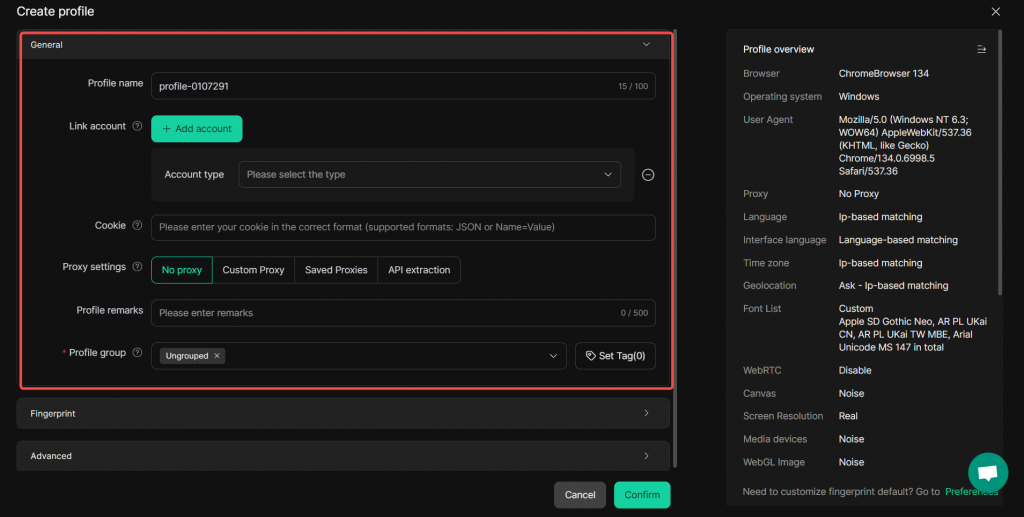
2.General Settings
- Profile name: Enter the name of the browser profile. The name must be unique and cannot match any existing profile names.
- Link account: Link your account and password for the corresponding platform to the profile. The platform’s login credentials will be automatically saved to browser’s password manager.
- Cookie:Enter cookies in JSON format here. Useful for maintaining sessions or storing preferences.
- Proxy settings: “No proxy“: No proxy usage; “Custom Proxy“: Enter detailed proxy info if chosen; “Saved Proxies“: Select from pre-saved proxy setups; “API extraction“: Extracting proxy IP via API url.
- Profile remarks: Add notes up to 200 characters for better profile management.
- Profile group: A dropdown set to “Ungrouped”. Use it to assign the profile to a group for organization.
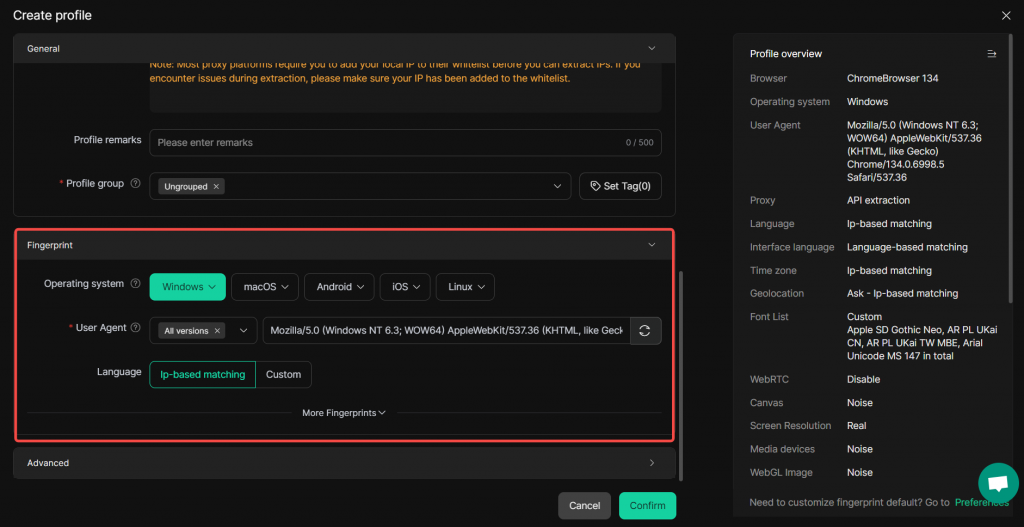
3.Fingerprint Settings
- Operating System: Select the operating system(s) that you want to simulate. DICloak supports different versions of Windows, macOS, Android, iOS, and Linux. You can choose one system or multiple systems. If multiple systems are selected, one of them will be randomly chosen for simulation.
- User Agent: Choose the UA version based on your needs. Selecting “All Versions” will randomly assign a UA from the available options under the chosen operating system.
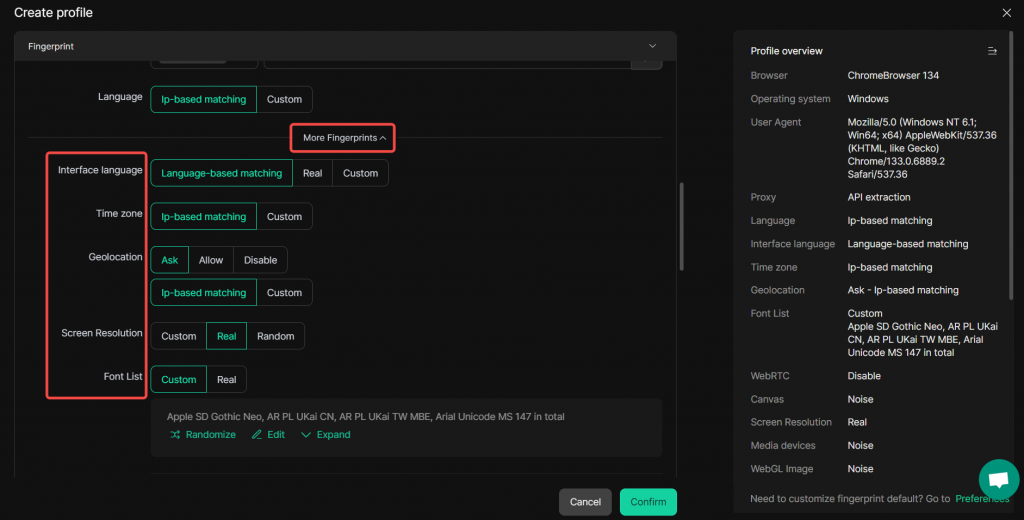
- Language: The default language for the tab, can be set based on IP matching or customized.
- Interface language: Browser interface language.
- Time zone: Can be set to match IP-based location or customized manually to avoid detection issues.
- Geolocation: You can control access permissions (Ask, Allow, Disable) and set the location either by IP-based matching or custom input.
- Screen Resolution: Options include custom-setting a value, using the real device resolution, or a random one.
- Font List: Choose between custom fonts or the real-world default to evade device identification via font fingerprints.
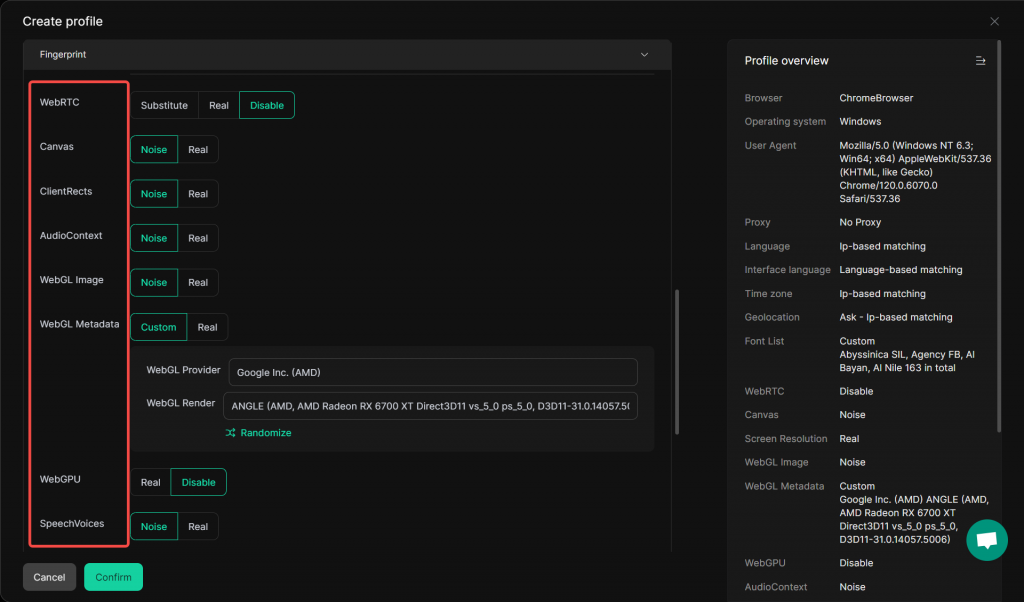
- WebRTC: Options like “Substitute”, “Real”, and “Disable” let you control how Web Real-Time Communication functions. If using a proxy, you can substitute it with the proxy IP address.
- Canvas, ClientRects, AudioContext, WebGL Image: Each has “Noise” and “Real” settings. “Noise” likely adds variability to avoid consistent fingerprinting, while “Real” uses the actual device-related values.
- WebGL Metadata: Can be set to “Custom” or “Real”. “Custom” allows manual configuration of details about the WebGL graphics processing, and “Real” uses default, device-specific data.
- WebGPU: Has “Real” and “Disable” options to either use the actual Web Graphics Processing Unit capabilities or turn them off.
- SpeechVoices: With “Noise” and “Real” choices, it controls how speech-related features are presented to websites, helping to obfuscate or present real device information.
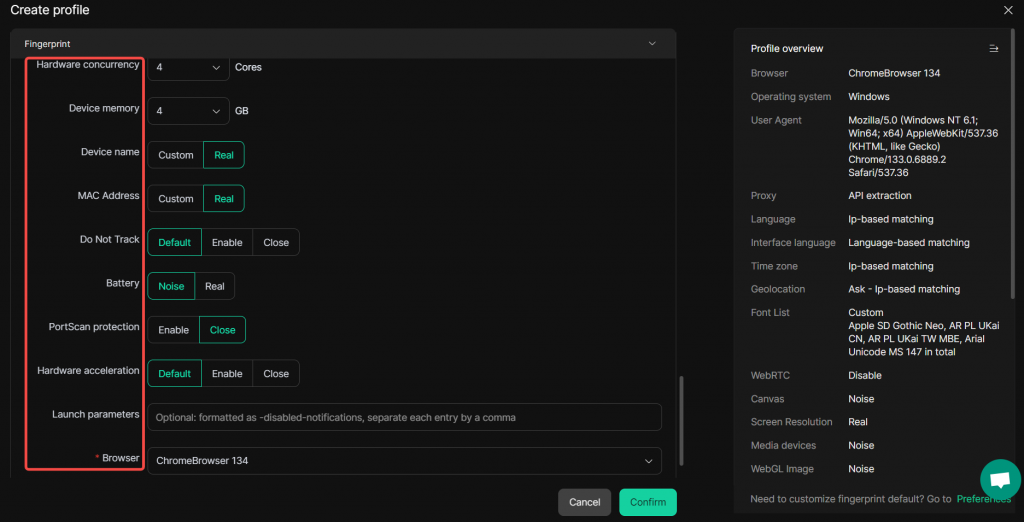
- Hardware concurrency: Sets the number of CPU cores the browser reports.
- Device memory: Specifies the amount of memory the device has.
- Do Not Track: Options like “Default”, “Enable”, and “Close” let you control whether the browser sends a “Do Not Track” signal to websites, affecting online tracking.
- Battery: “Noise” and “Real” settings manage how battery-related information is presented, with “Noise” adding variability.
- PortScan protection: “Enable” (selected) or “Close” controls port-scanning protection. When enabled, you can list allowed scan ports.
- Hardware acceleration: Can be set to “Default”, “Enable”, or “Close”, influencing how the browser uses hardware resources for better performance.
- Browser: Browser versions 120, 134, 142, and 143 are currently supported. We recommend you choose a newer version, as it has better compatibility with websites.
4.Advances Settings
- Default Startup Pages: You can enter a URL so the profile opens a specific site by default.
- Restore last session: You can choose whether to restore the last webpage you visited.
- Data sync: Sync selected data to the cloud when closing the profile, enabling cross-device collaboration.
- Clear local cache: You can set whether to clear local data before opening and the frequency of clearing.
- Browser Settings: Options include “Global settings” and “Custom” to apply general or specific browser-related configurations.
- Multi-open mode: “Global settings” (selected), “Allow”, and “Disable” let you control whether multiple instances of the profile can be opened simultaneously.
- Bookmark settings: Upload bookmark files to current profile with append or overwrite options.
- Website access restriction: Enable to set restrictions on whether team members can access specific websites.
- Extension settings: “Enable” and “Close” control the activation of extensions. You can also select an “Extension group” to add relevant extensions to the profile.
- Video stream spoofing: Once enabled, you can upload video files in the browser webpage to bypass KYC on certain platforms.

These settings give you fine-grained control over the profile’s behavior and functionality.
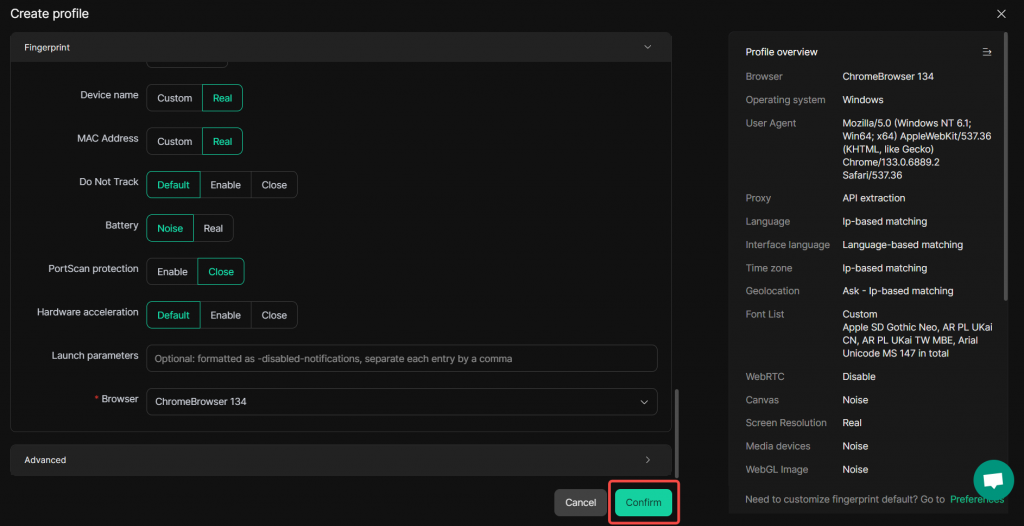
5.Confirm to Create the Browser Profile
- Click the “Confirm” button to complete the creation of the browser profile.
6.Open the Browser Profile
- Return to the Profiles list and click the “Open” button to get the browser working.
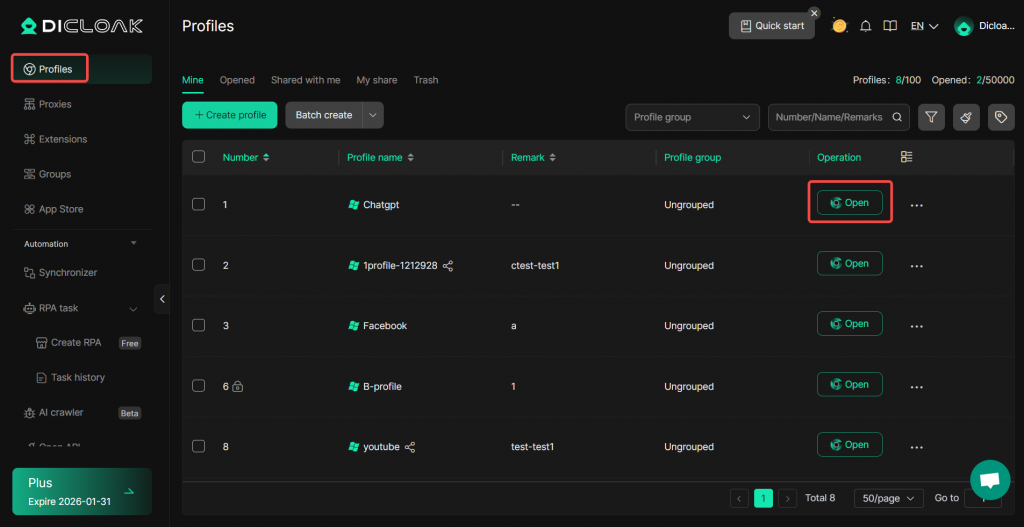
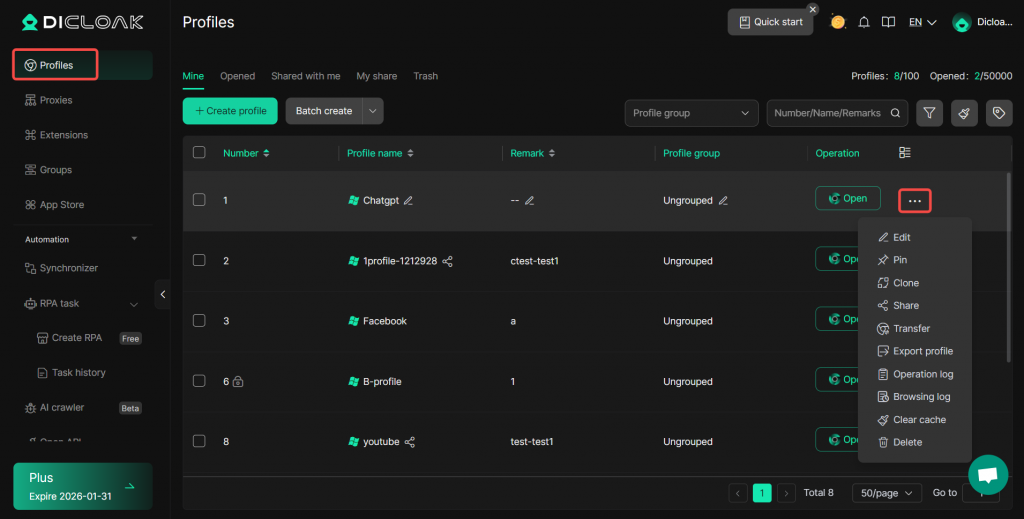
7.Edit the Browser Profile
- Click the “…” button to show more. You can edit or delete the browser profile here.