DICloak allows you to add new members to your team, assign them a team role, and configure their profile group permissions. Member types are divided into Internal Members and External Members. Internal members cannot create or join other teams, making account management easier. External members can create or join other teams, facilitating collaboration. If you want to add a new team member, follow the steps below.
1. Open the Member List
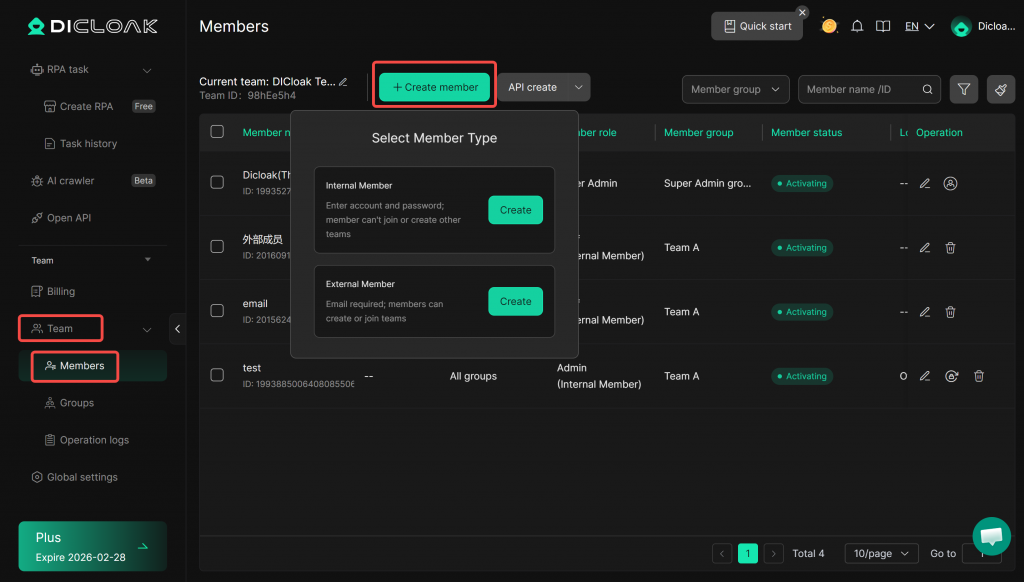
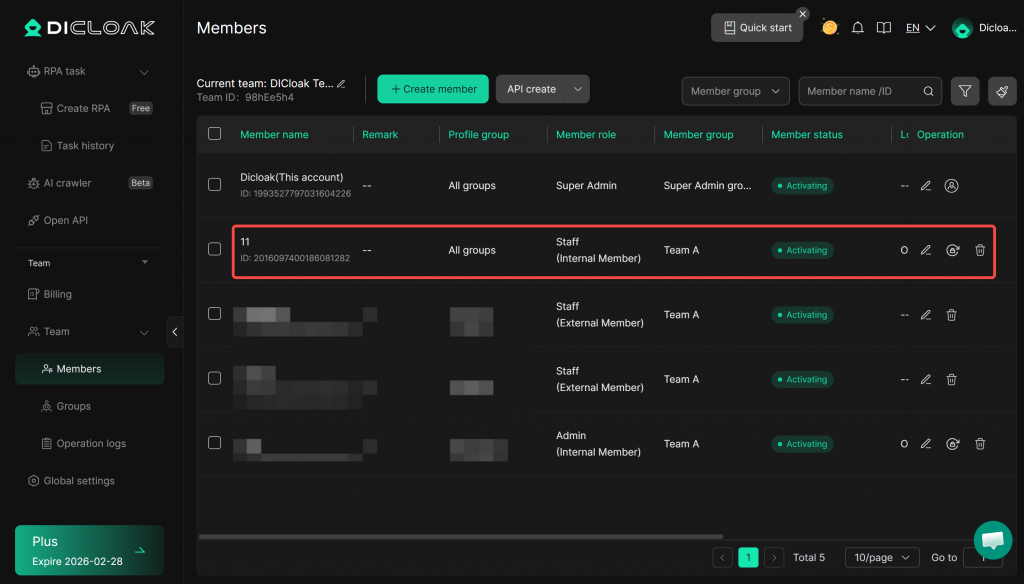
Open and log in to the DICloak software. In the left navigation bar, go to [Team] > [Members], and then click [Create Member] to start adding a new team member.
2. Create an Internal Member
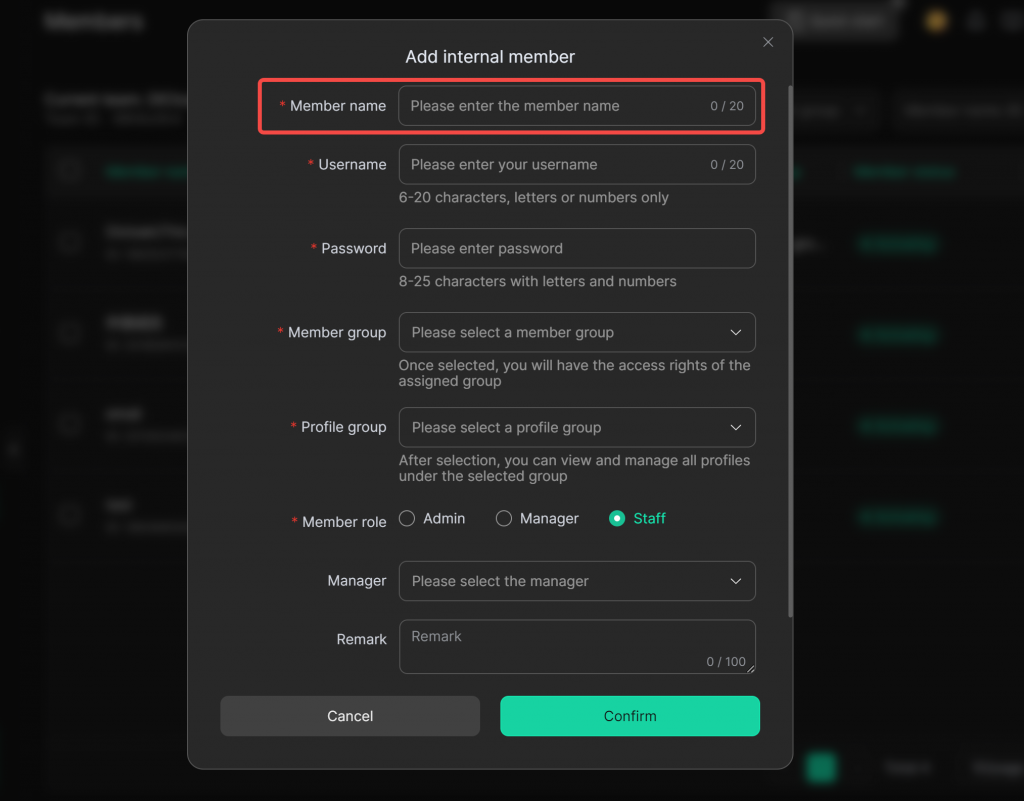
Enter a Member Name to identify the team member. The name cannot be the same as that of any existing member.
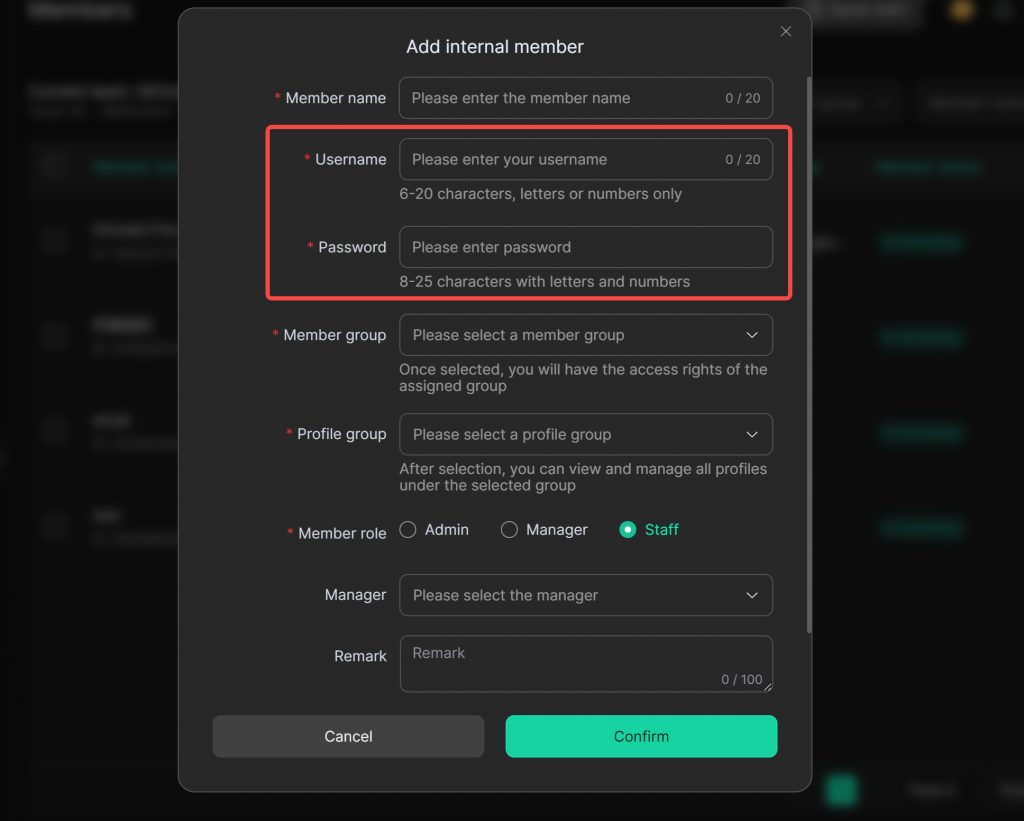
Set up Username and Password for the member. Members will use this information to log in.
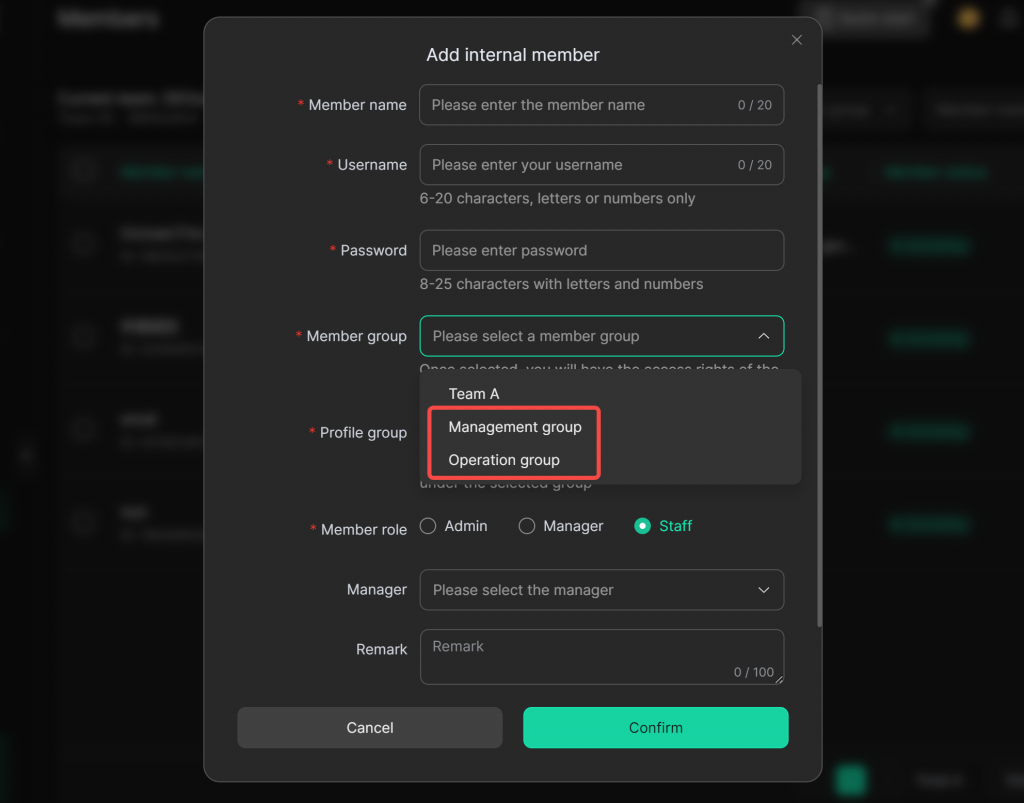
Select the relevant Member Group for the member. You can choose the default groups [Management Group] or [Operation Group], or create a new member group in [Team] > [Groups] and then select it.
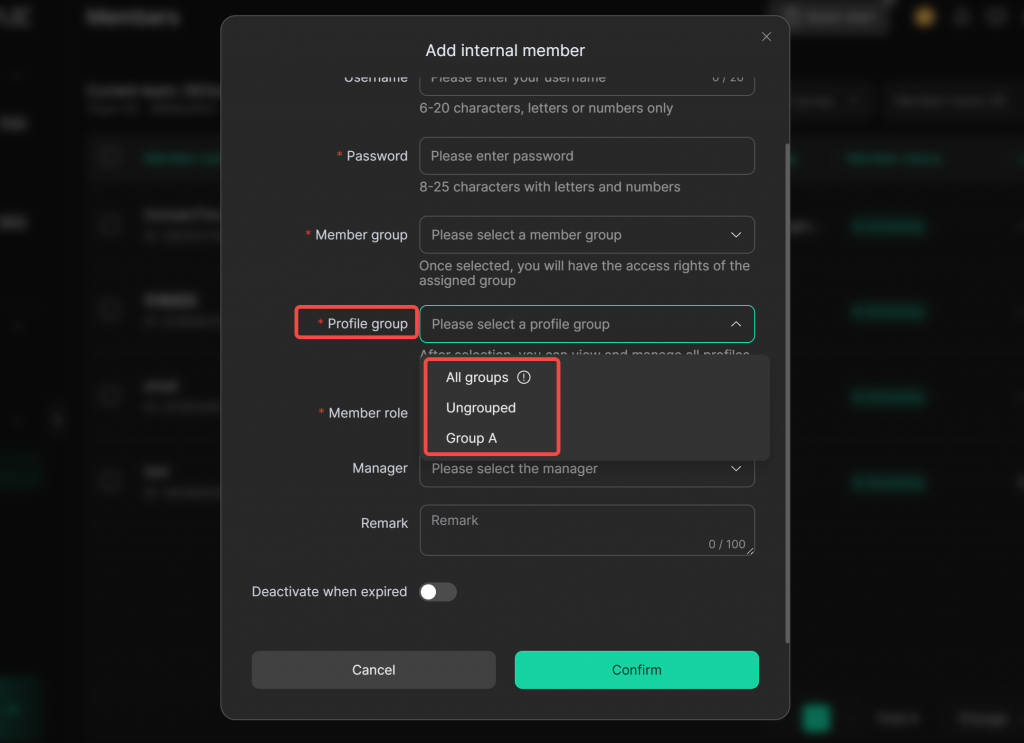
Select the Profile Groups that the new member can access:
- Choose [All Groups] to grant the member access to all profiles in the team.
- Choose [Ungrouped] to grant the member access only to profiles that are not assigned to any group.
- Choose [Existing Single Group] to grant the member access only to profiles within that specific profile group.
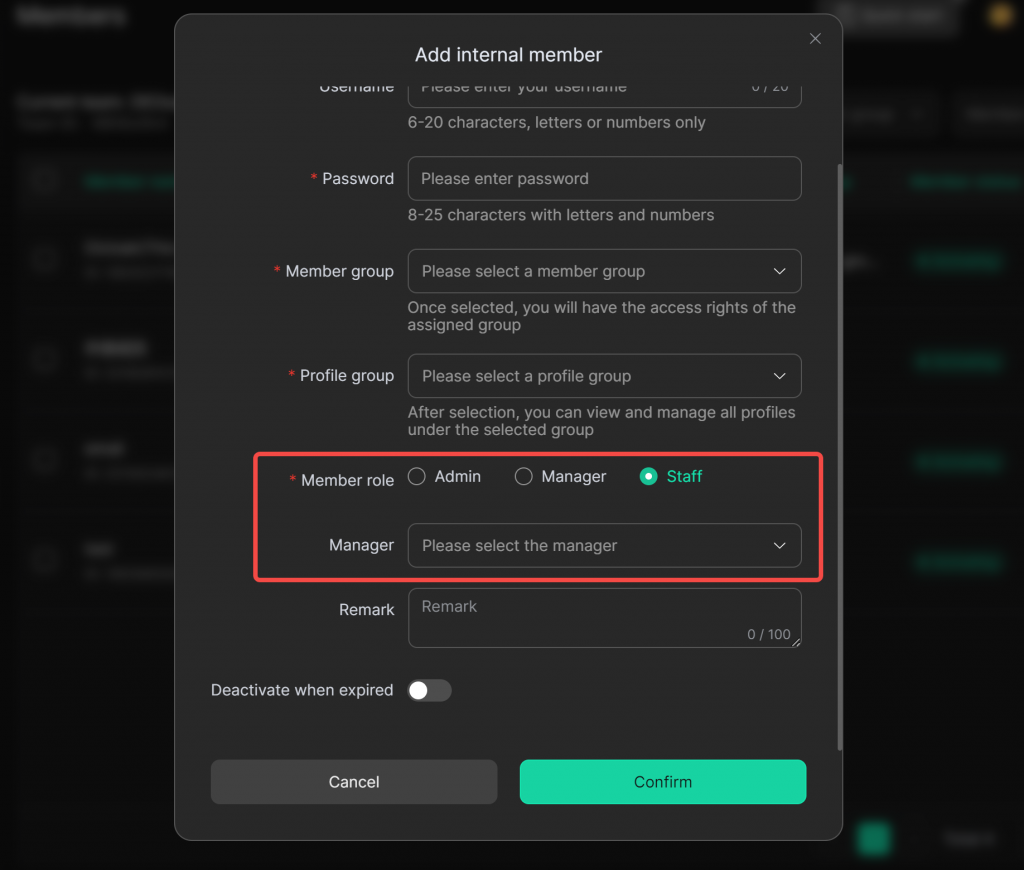
Select the Member Role. Different roles have different operation and management permissions:
- Super Administrator: Has the highest level of permissions, can view all member information, and can set and manage permissions for Administrators, Managers, and Employees. Only the account that created the team has super admin privileges.
- Admin: Has permissions second only to the Super Administrator, can view all member information, and is granted specific operation permissions by the Super Administrator.
- Manager: Can only view information related to their own account and the members under their supervision. Their operation permissions are determined by the permission set of their member group.
- Staff: Can only view authorized information related to themselves. Their operation permissions are determined by the permission set of their member group.
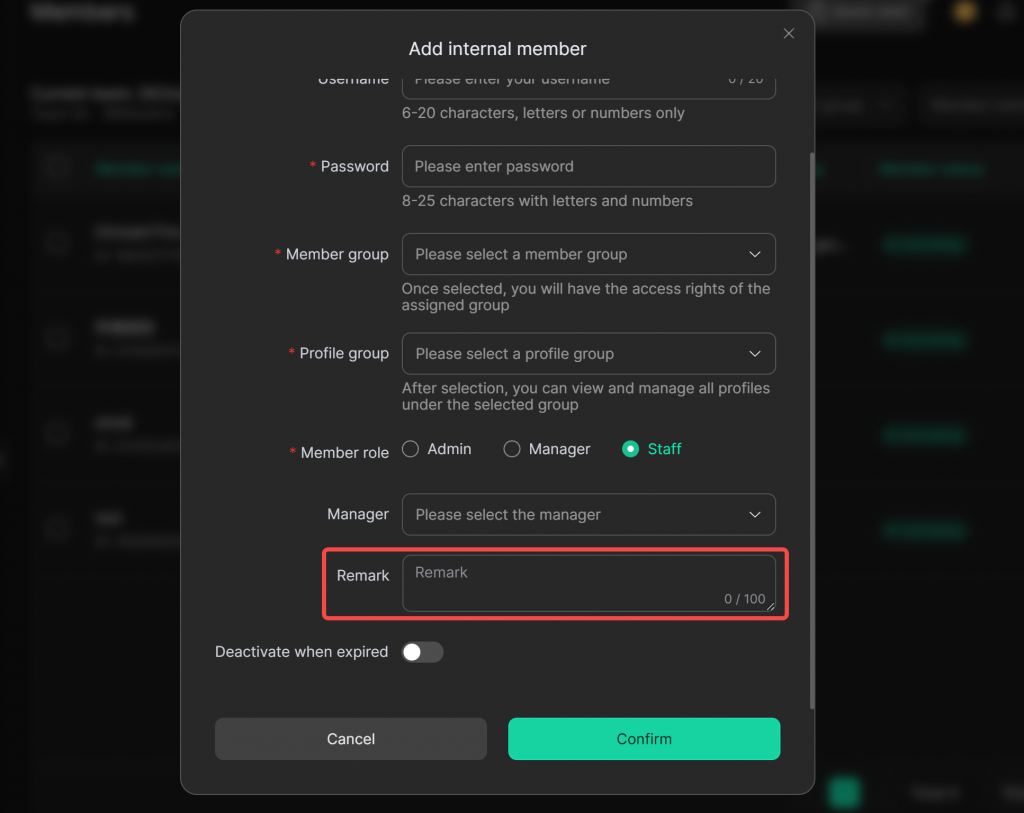
Remark (optional): Add more detailed information about the member for easier management.
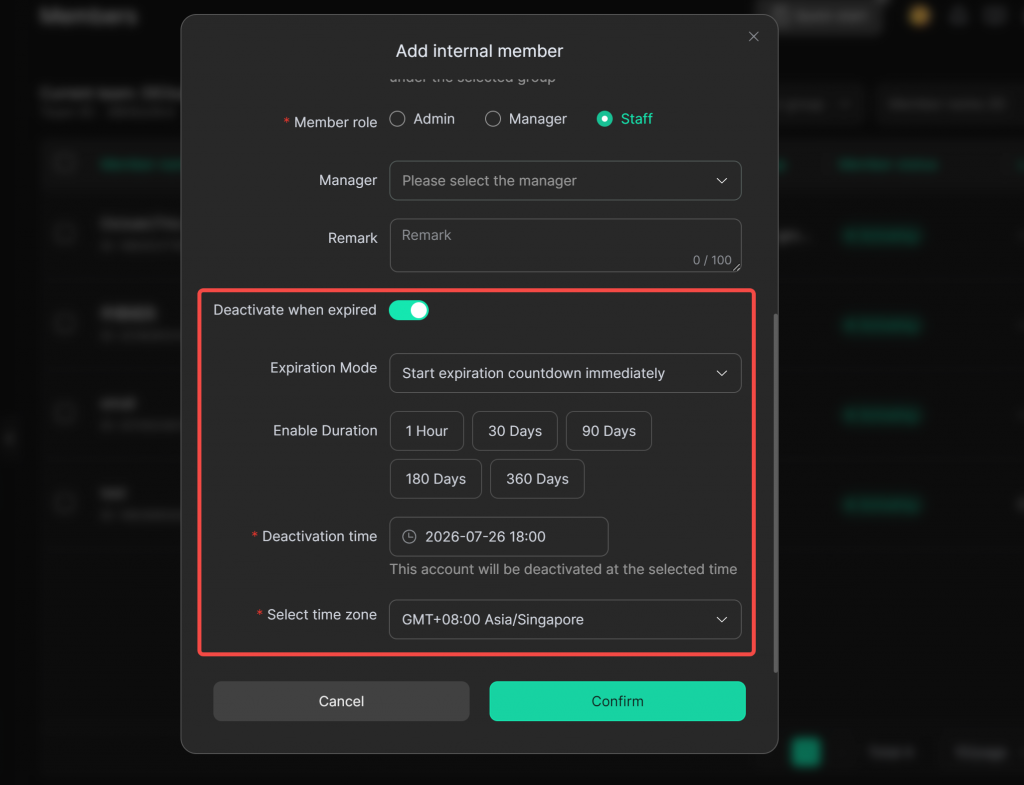
You may choose to enable the expiration deactivation feature, set the deactivation time and time zone. Upon reaching the deactivation time, the member account will be automatically disabled and unable to log in.
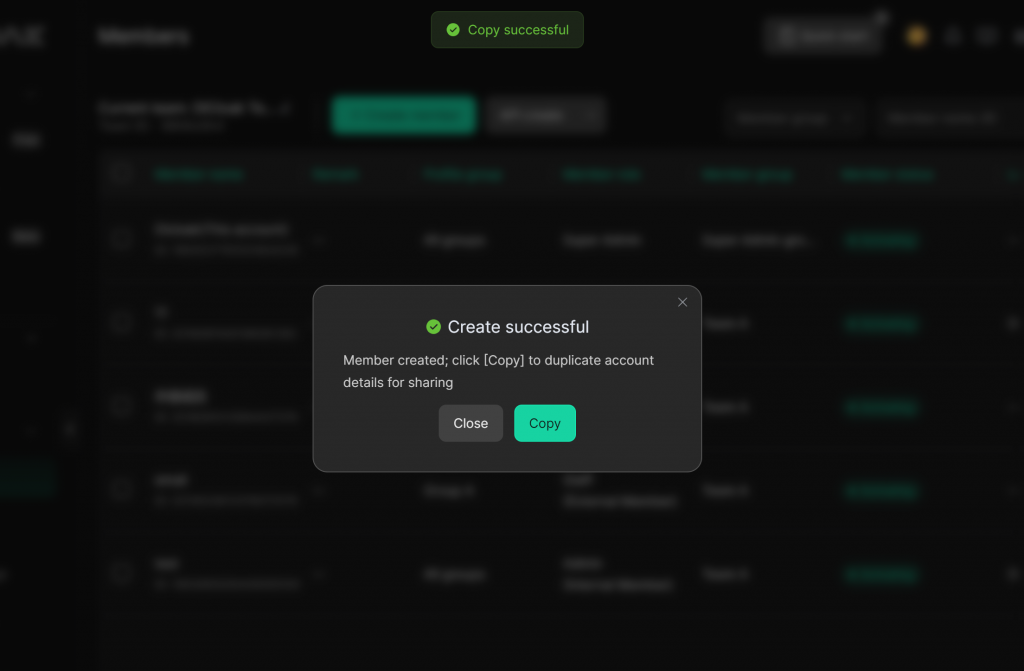
Finally, click the [Confirm] button to create the member. After successful creation, you can directly copy the account and password and share them with the corresponding member. A “Copy Successful” message will appear above.
Once created, the member’s information will appear in the list, where you can view details or make edits.
3. Create an External Member
If you choose to create an External Member, you do not need to enter an account or password—only the member’s Email is required.
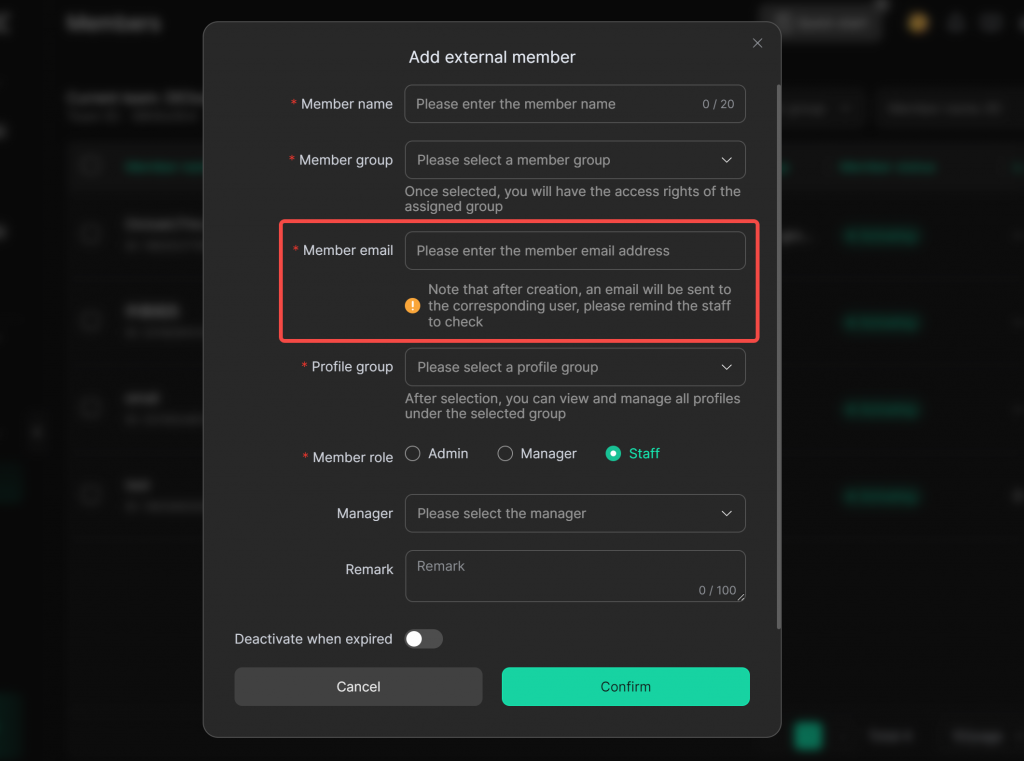
After filling in the other details, click [Confirm] to create the external member.
- If the email (e.g., Email A) is already registered with a DICloak account, the team member will be created directly, and Email A will receive an invitation email to join the team. The external member can then click their avatar in the top-right corner of the DICloak software and switch teams to enter yours.
- If the email (e.g., Email B) is not registered with a DICloak account, a DICloak account will be created automatically, and Email B will receive a team invitation email containing the DICloak login account and initial password. The new user can log in to DICloak directly using the account and initial password provided in the email.