DICloak supports team management and collaboration. In the “Members” section, you can view member group information under your team, create new member groups, and edit the permissions for member groups.
Overview of Groups Page
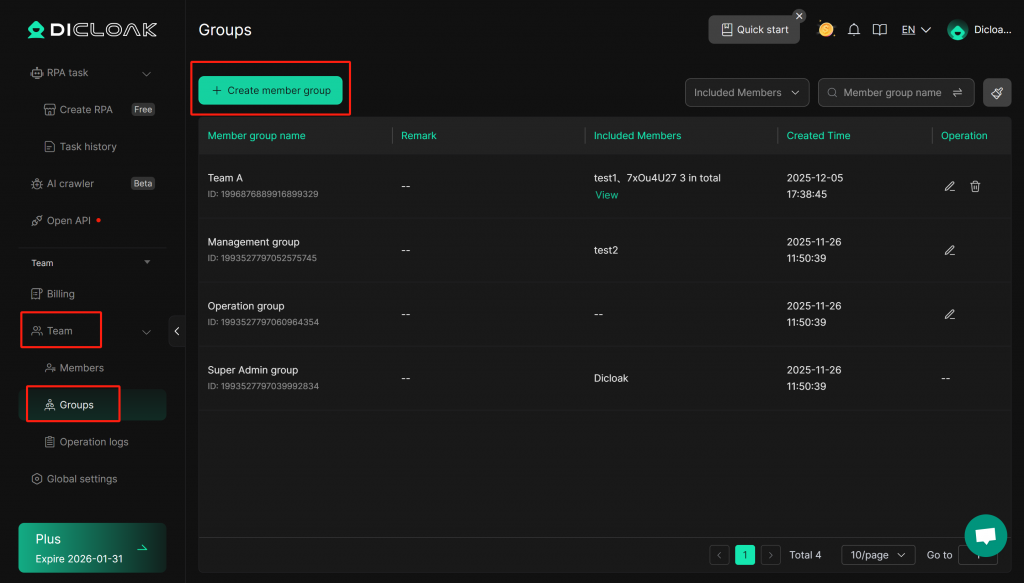
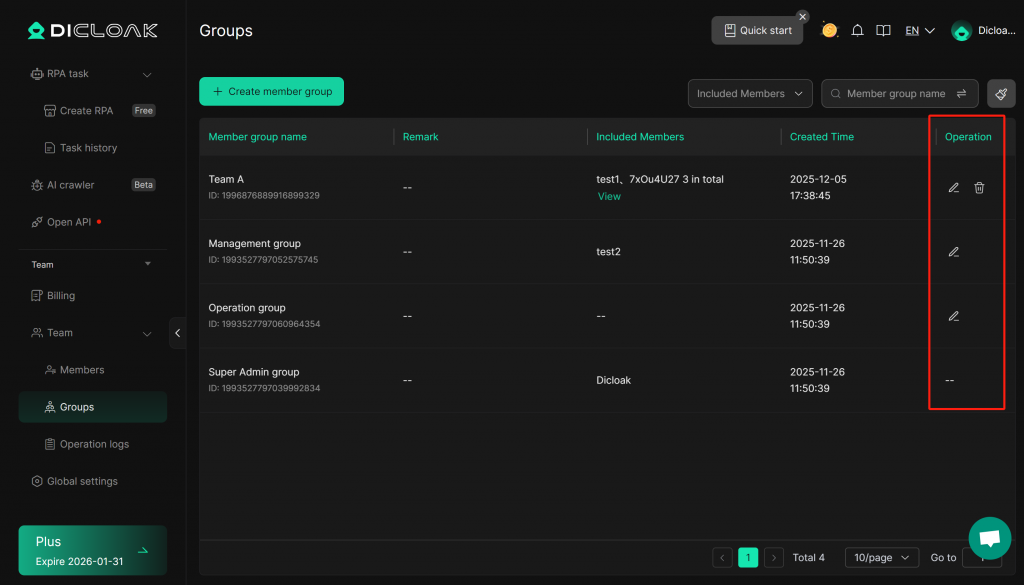
Open and log into the DICloak software. Find “Team” on the left navigation bar, then enter the “Groups” page.
- Create Member Group: Click “Create member group” button to set up a new member group.
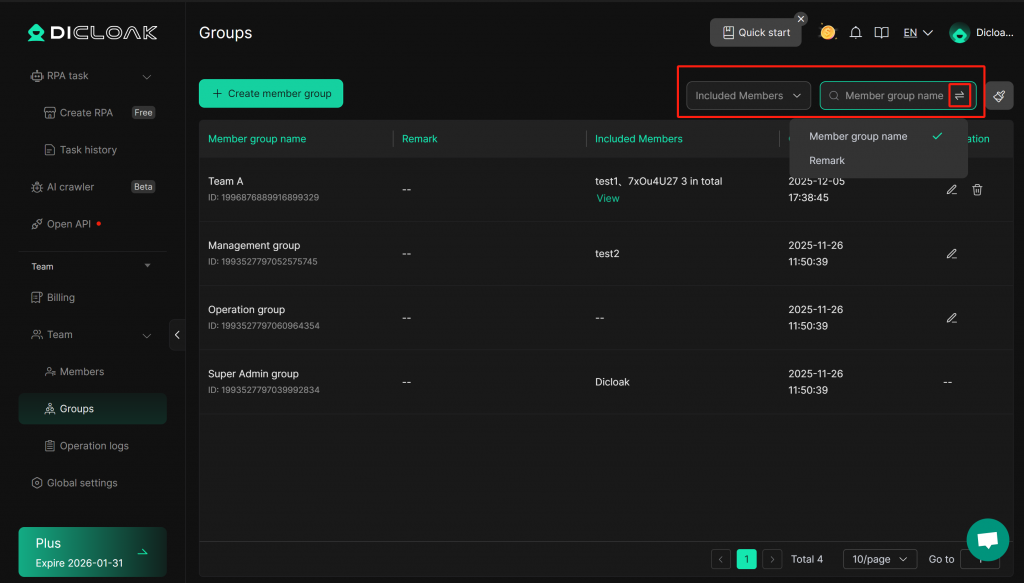
- Group Filter: Filter groups by Included Members, Member group name or Remark. You can click the “Reset” button to clear the filter.
- Group List: View or edit information about groups. Each team automatically generates three initial groups: 1) Super Admin group, 2) Management Group, and 3) Operation Group. The super admin account is defaulted to the Super Admin group and cannot be edited.
- Member group name: The name of the group.
- Remark: Add detailed notes about the member groups for better management.
- Included members: The team members included in this group.
- Created Time: The time when the group was initially set up.
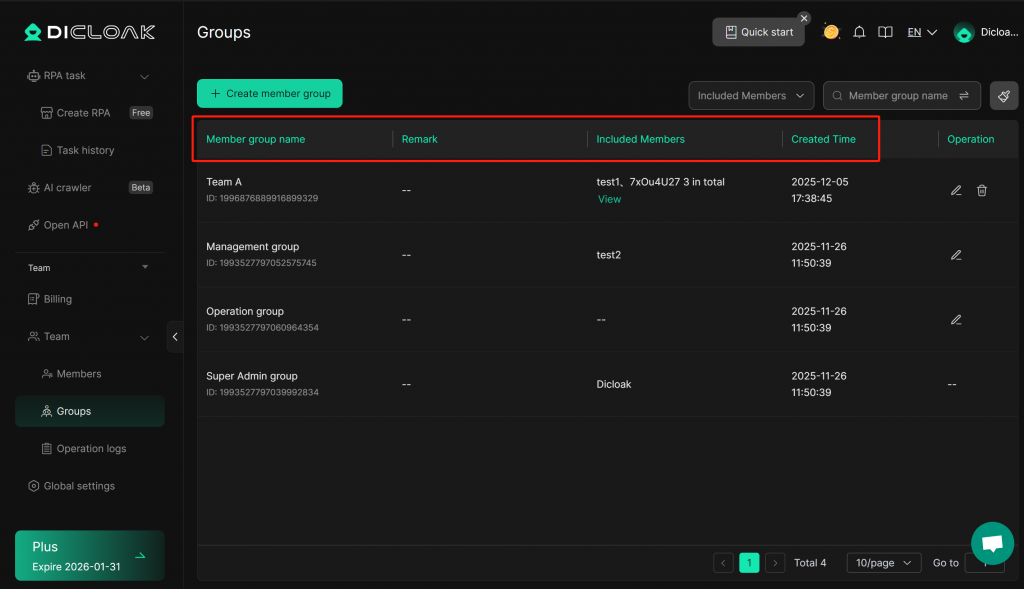
- Operation: Click the buttons to edit or delete group (Only newly created groups can be deleted).
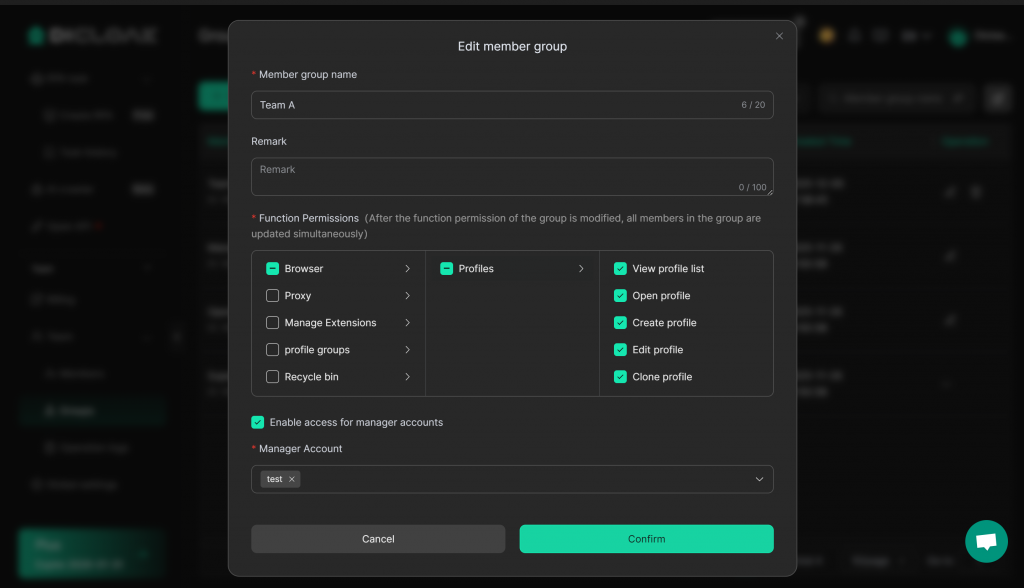
- [Edit]: Here you can edit the Member group name, Remark, functional permissions, and assign manager account.
- Function Permissions: Members within this group can only view the functional modules that have been selected.
- Enable access for manager accounts: If selected, corresponding manager accounts can view and manage this member group. If not selected, only super admins and admins can view and manage this group.