In this guide, we’ll walk you through the steps to configure Proxywing proxies within the DICloak browser. Follow the instructions below to ensure a smooth and secure integration.
Introduction of ProxyWing Proxy
ProxyWing is a provider of premium IPv4 proxies of three types (residential, datacenter and isp). For ProxyWing, the main priorities are the security of your data, stable operation, and the availability of any regions.
Advantages of ProxyWing
- Global access: IPs from 190+ countries, including major markets (US/EU).
- Flexibility for use cases: ISP (static proxies from real providers), Residential (rotation/sticky sessions, traffic does not expire, pay-per-traffic from $2.5 per GB), Datacenter (High stability and low price for static proxies from $0.87/IP).
- Simple integration: you can integrate the proxies in a few minutes by following this guide.
- Protocols and stability: HTTP/SOCKS5, speeds up to 1 Gb/s+ and a 99% uptime guarantee.
- Free tools that make work easier (IP Checker, Proxy Tester, Proxy Formatter).
ProxyWing is great for web scraping, SEO promotion, traffic arbitration, and multi-account management, ensuring the efficiency and security of online tasks.
ProxyWing Proxy Configuration
- Register/log in to your ProxyWing account.
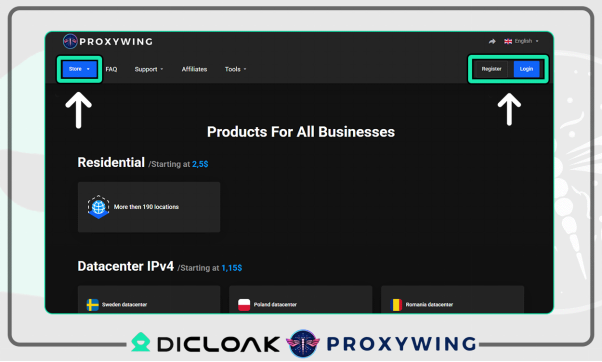
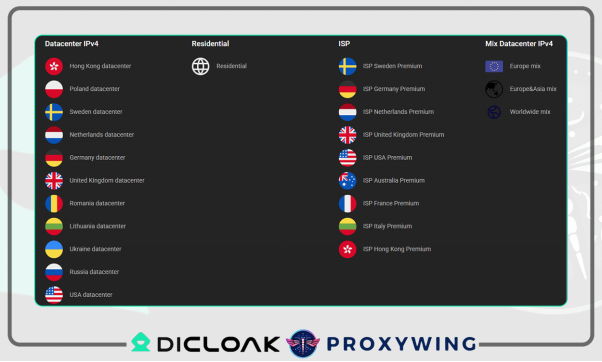
- Click on «Store», select the required proxy type (residential, datacenter, or ISP) and add it to the shopping cart. After payment, the necessary proxies will immediately appear in your dashboard.
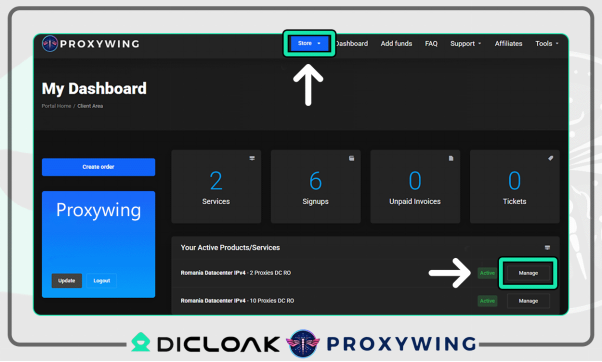
- Open your dashboard, select a product, and click «Manage»
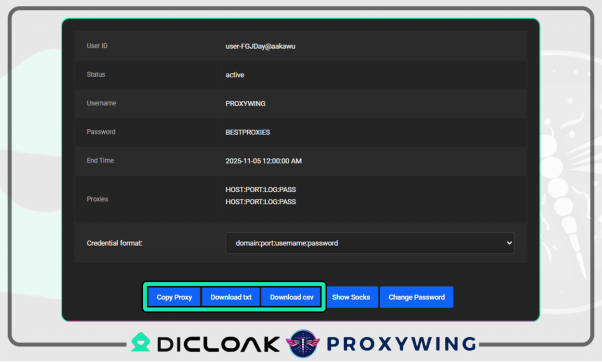
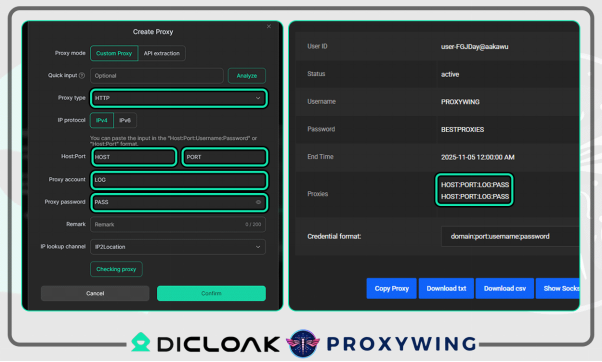
- Copy or download the proxy using the buttons at the bottom. HOST:PORT:LOG:PASS — this is the proxy format used on the ProxyWing website.
Configuring ProxyWing Proxy in DICloak
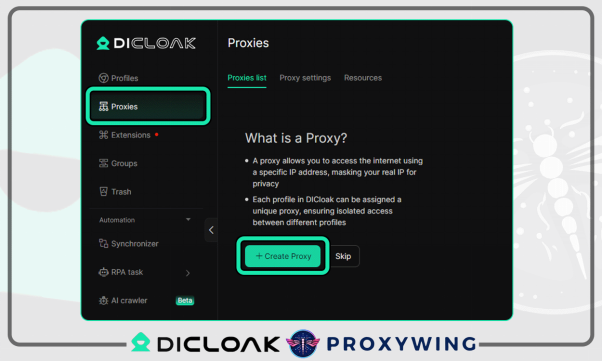
- Launch DICloak, click on «Proxies» in the menu on the left. Click the «Create Proxy» button.
- Select the Proxy type and copy the information from the ProxyWingdashboard (proxy host, proxy port, proxy account, and proxy password) into the appropriate fields.
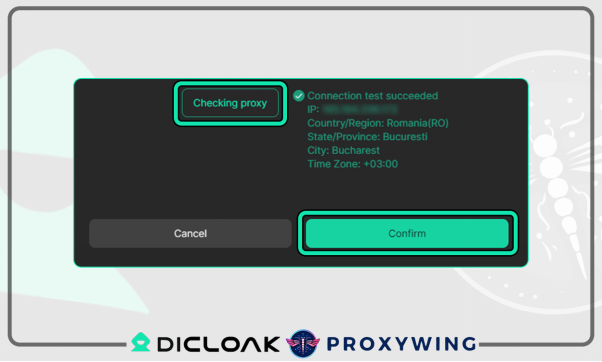
- Click the «Checking proxy» button. DICloak will confirm the test was successful and display the proxy’s IP address, location, and time zone. Click «Confirm» to save your proxy.
- You can assign your saved proxy to a profile by editing the profile settings. In the Proxy section, click on «Saved Proxies», select your proxy from the list, and click «Confirm».