DICloak antidetect browser allows you to create a unique browser fingerprint and IP address for each e-commerce account. This way, you can efficiently manage multiple accounts on platforms like TikTok shop, eBay, Shopify, Amazon, and more. Additionally, DICloak’s browser profile isolation feature helps minimize the risk of your accounts being banned.
1 Preparation Before Managing Multiple e-commerce accounts
1.1 Download and Register DICloak Browser
- Visit the official DICloak antidetect browser website to download the software. Currently, DICloak only supports Windows, MacOS and Linux devices.
- Register and log in to your DICloak account.
1.2 Subscribe to the Appropriate DICloak Paid Plan
Before using DICloak to manage your e-commerce accounts, choose a paid plan that fits your team size and the number of e-commerce accounts you need to manage.
1.2.1 Confirm Your Team’s Details:
- How many members do you have? ——-Purchase the number of member accounts based on your team size.
- How many e-commerce accounts do you need to manage? ——-Purchase the number of browser profiles according to the number of accounts.
1.2.2 Choose a Paid Plan:
We recommend subscribing to the Plus plan to manage e-commerce accounts, as it offers enhanced automation features and supports internal members logging in from multiple devices at the same time. For more details on paid plans, please visit the DICloak pricing page.
1.3 Recommended Purchase of Static Residential Proxies
To ensure the stability and security of your e-commerce accounts and achieve IP isolation for each account, we recommend configuring static residential proxies for your browser profiles. Important Note: This is a recommendation, and you should decide based on your specific situation whether to purchase proxies.
1.3.1 Why Do You Need Static Residential Proxies?
Using data center IPs or low-quality, cheap proxy IPs to manage your e-commerce accounts, or frequently changing the login IP address, or accessing multiple accounts via the same IP address, increases the risk of your accounts being banned. Important Note: It’s advised to choose a static residential proxy from the region where your e-commerce account is based. For example, if your account is for a U.S.-based e-commerce platform, you should configure a U.S. residential proxy IP (ensure that your device’s local network is capable of connecting to overseas networks for overseas proxy IPs). Please note, if you don’t configure proxies, the profile will use your local device network, and IP isolation will not be achieved.
1.3.2 Where Can You Buy Static Residential Proxies?
DICloak does not provide proxy IP services, so we recommend:
- Searching for proxy service providers online to purchase proxy IPs.
- Checking the [Proxies] > [Resources] page in the DICloak antidetect browser software for proxy providers that DICloak partners with. Important Note: The [Resources] page displays third-party proxy resources, and you should assess the quality of the IPs (IP quality impacts browsing experience, so it’s suggested to perform tests). If there are issues, please contact the respective proxy provider’s customer service.
1.3.3 How Many Static Residential Proxies Do You Need to Purchase?
Typically, one e-commerce account requires one static proxy. For example, if you have 99 e-commerce accounts, you should purchase 99 static residential proxy IPs.
2 Necessary Configuration Steps for Managing Multiple e-commerce accounts in DICloak
2.1 Pre-Configuration Settings
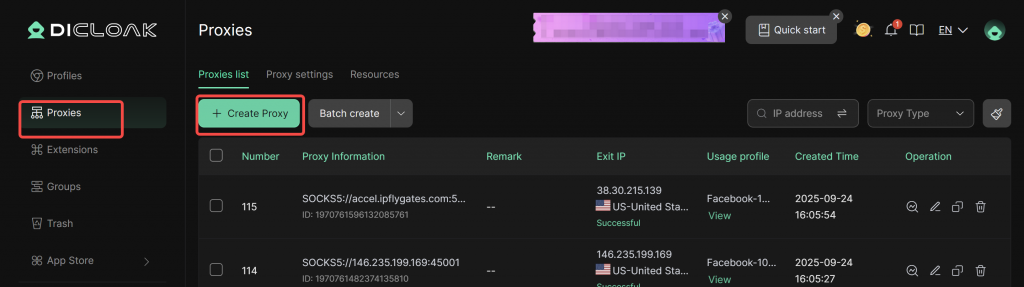
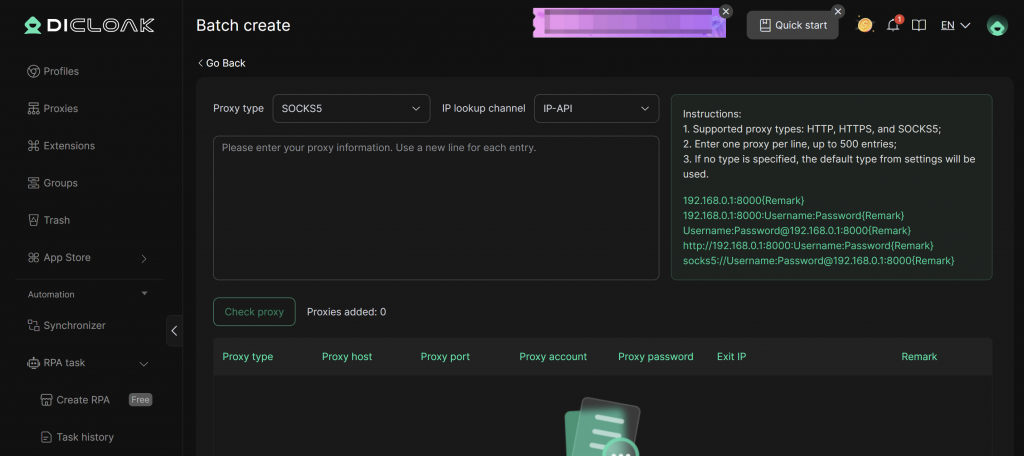
- Create Proxy: Go to [Proxies] to create proxies.
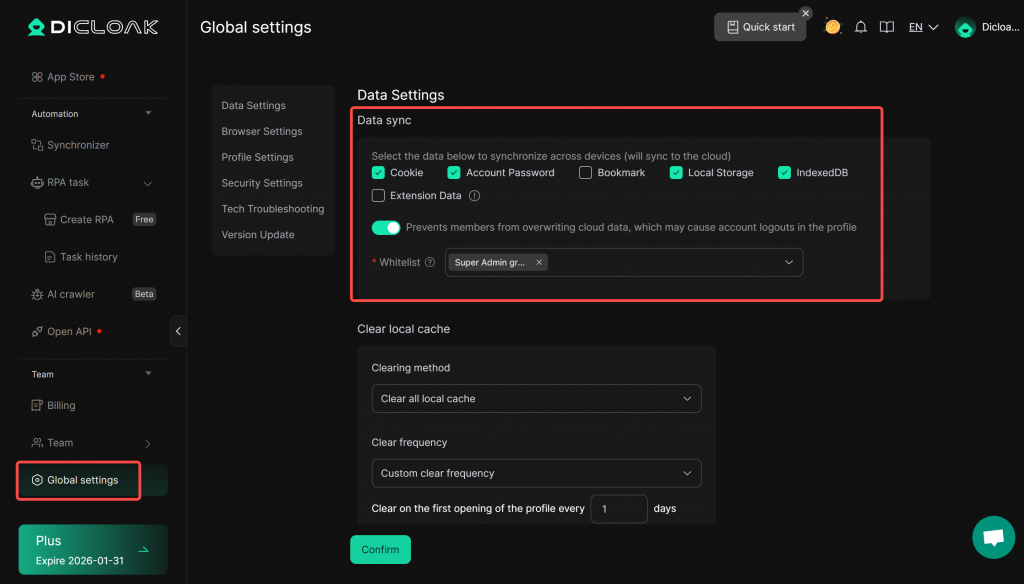
- Enable Data Sync Feature: Go to [Global Settings] and enable the data sync feature.
2.2 Configuring Browser Profiles for e-commerce accounts
DICloak currently supports both individual creation and bulk import of browser profiles for e-commerce accounts. Choose the method that suits your situation.
2.2.1 Creating a Single e-commerce account Browser Profile
Important Note: The following operations should be performed with an super admin account (check the member list for admin accounts).

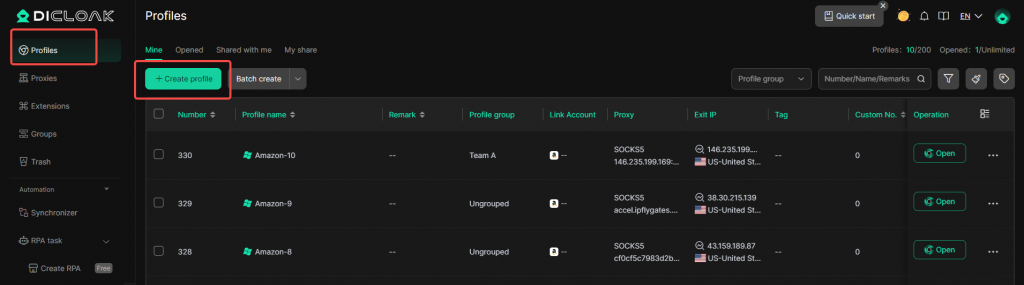
- Create Profile: In the main interface, find and click [Profiles], then click the [Create Profile] button. The system will pop up a configuration page for creating a profile.
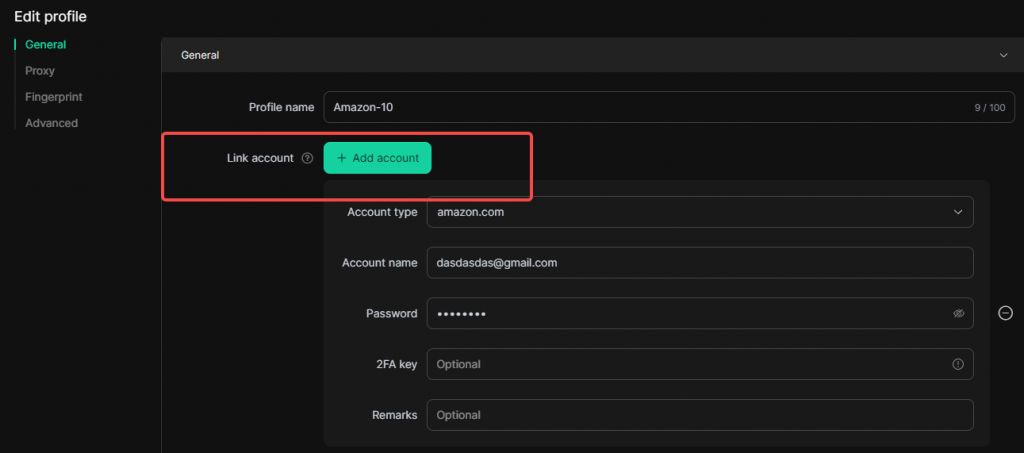
- Add Account: Click [Add Account], select the e-commerce platform you want to manage, enter the platform account and password to bind the account.
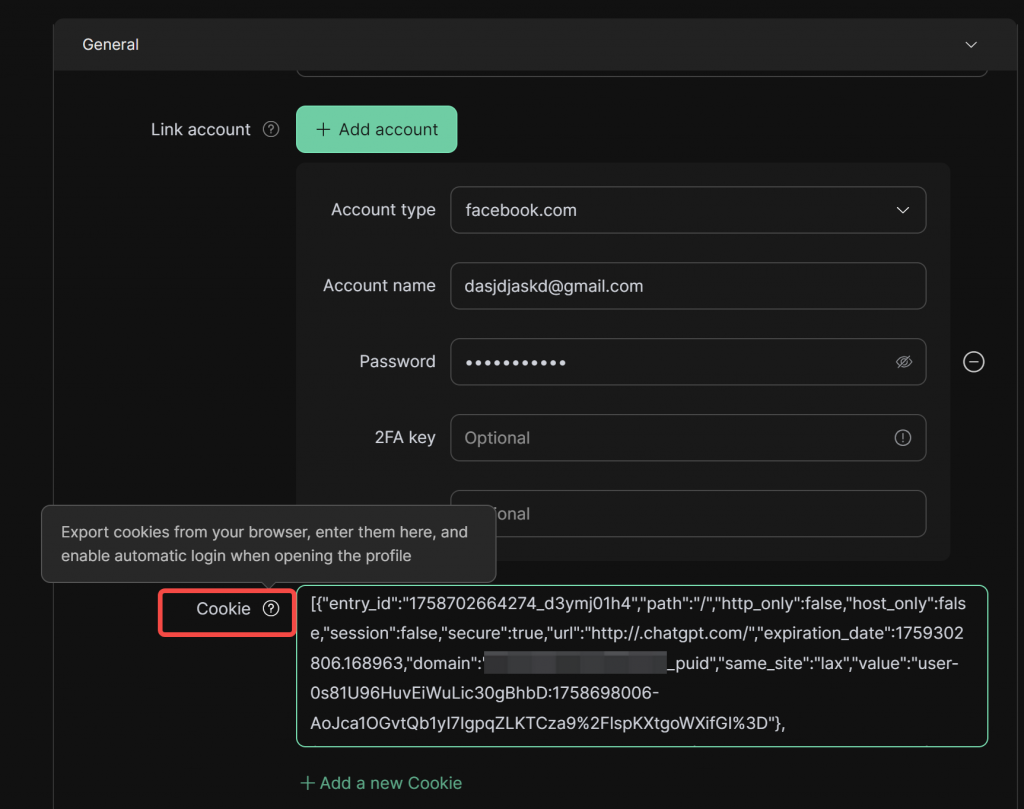
- Import Cookie Data: If you do not bind an account and password, you can also import the cookie data of an already logged-in e-commerce platform account to make the e-commerce website in your browser appear logged in.
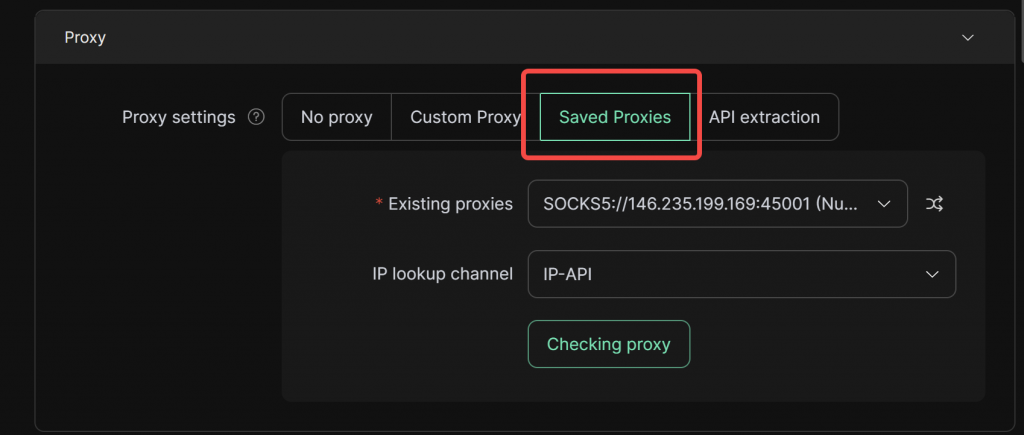
- Configure Proxy: Select [Saved Proxies].
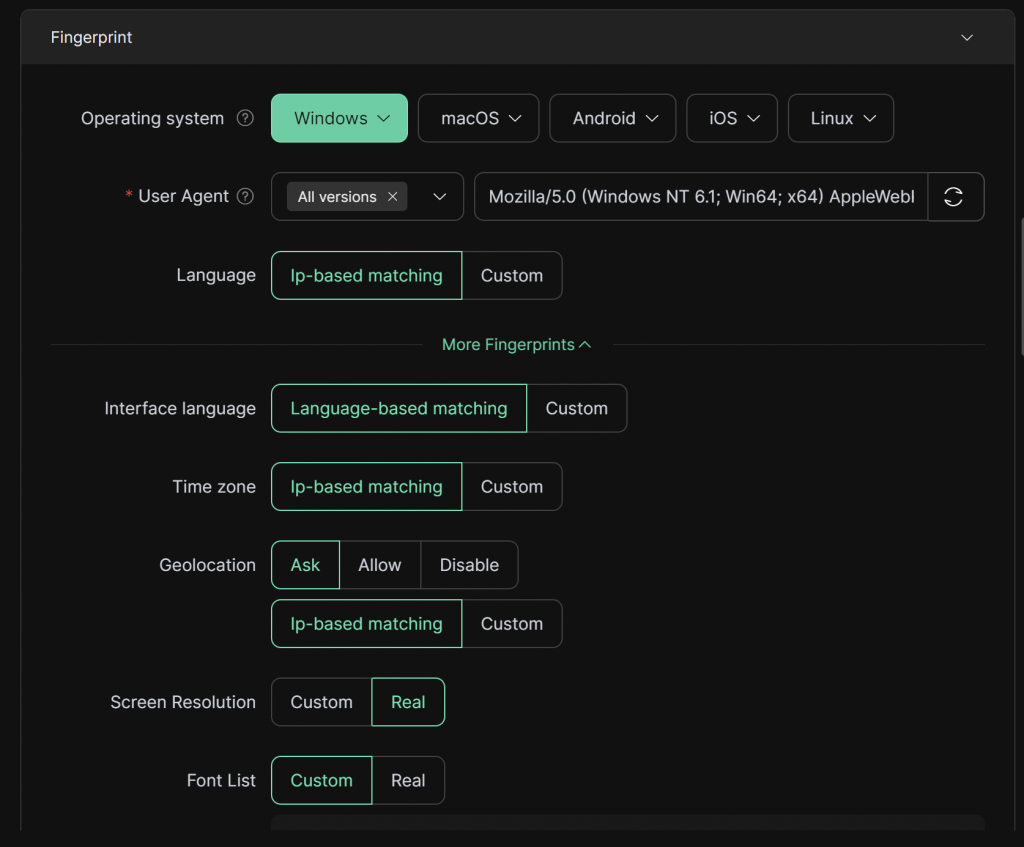
- Configure Fingerprint: Adjust the fingerprint settings according to your needs, such as OS/UA, etc. (The default fingerprint usually suffices).
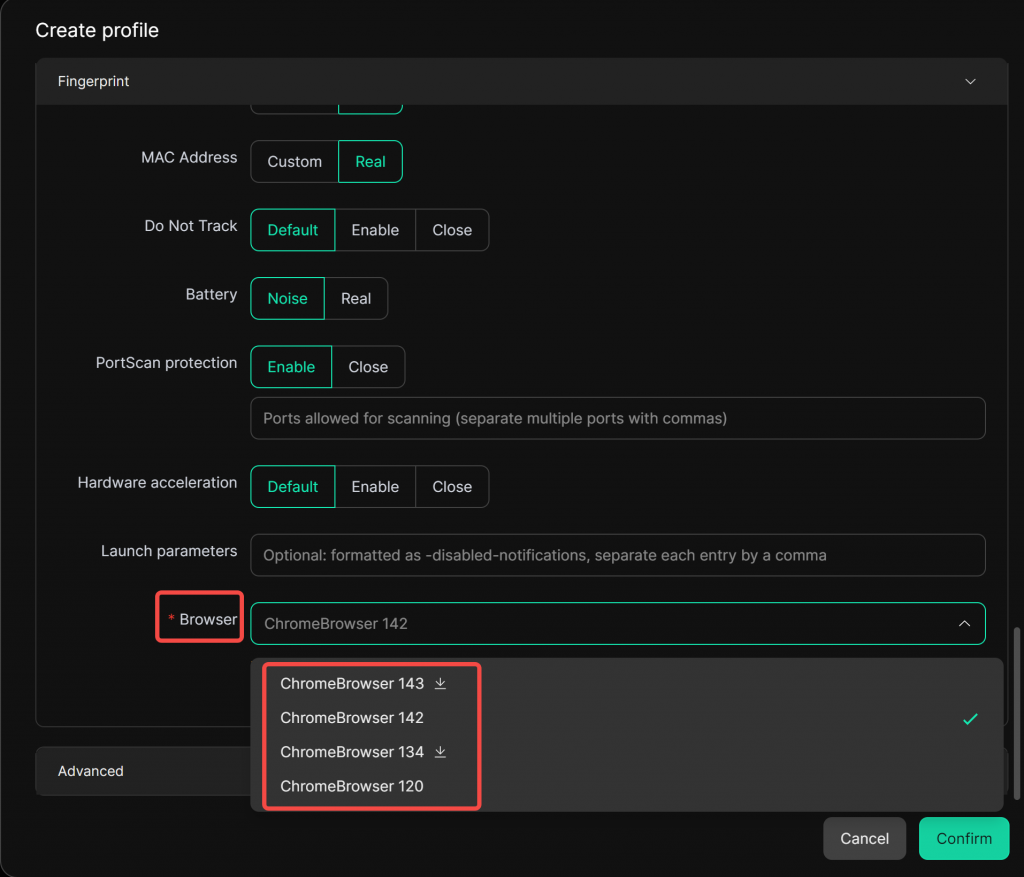
- Choose Browser Kernel Version: The default choice is kernel 142. If you prefer a newer version, select kernel 143.
- Set Default Website: Enter the e-commerce account URL in [Default Startup Pages], so that every time you open the profile, it will automatically load the platform page. Then save the settings.

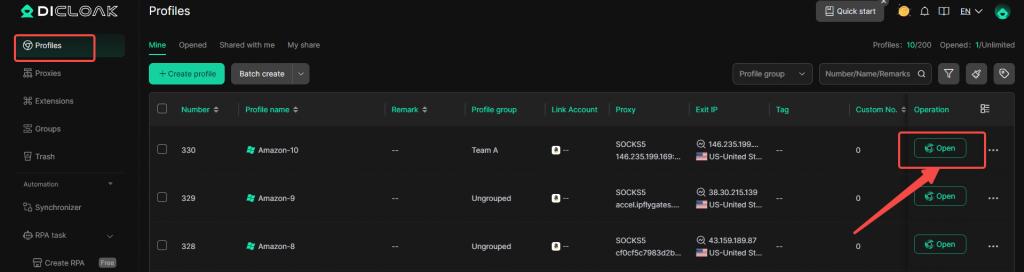
- Access the Profile: Go to the [Profiles] list and click [Open] to access the e-commerce platform.

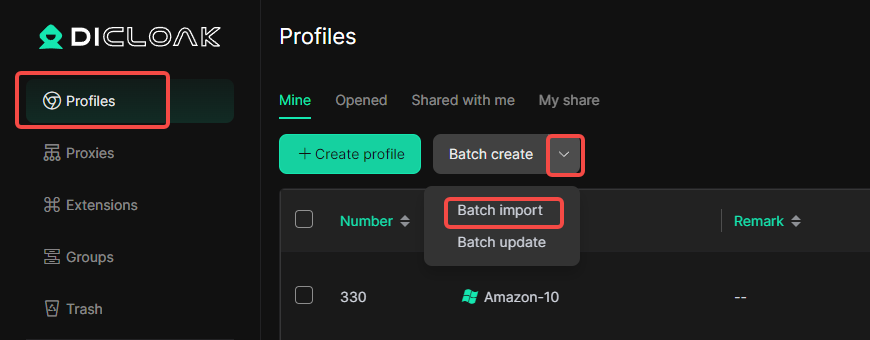
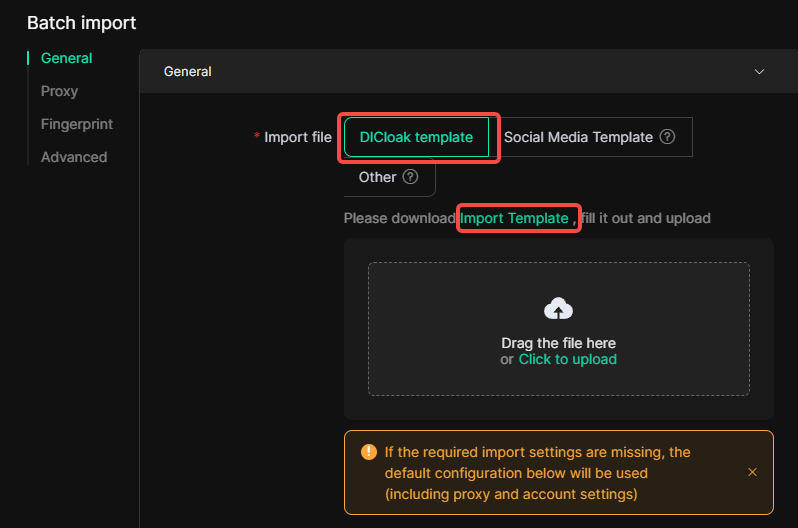
2.2.2 Bulk Import e-commerce accounts If you have multiple accounts to import, follow these steps:
- Bulk Import Accounts: In the main interface, find and click [Profiles], then click the [Bulk Import] button. The system will pop up a bulk import profile configuration page.
- Import DICloak Template: Select [DICloak Template], fill in the account details, and upload the document.
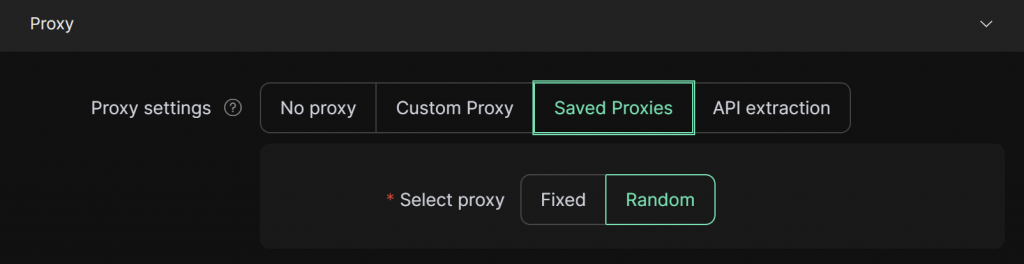
- Configure Proxy: Select [Random] to configure proxies.
Important Note: If you select [Random] to configure proxies, the system will prioritize matching unused proxies to the Facebook profiles. If your number of proxies is insufficient to match each Facebook profile, some profiles may be matched with the same proxy. Therefore, it is recommended to save the settings and confirm that each profile has a unique proxy to avoid multiple Facebook profiles using the same proxy.
- Configure Fingerprint: Set the fingerprint as needed, and we recommend [Random] selection for UA.

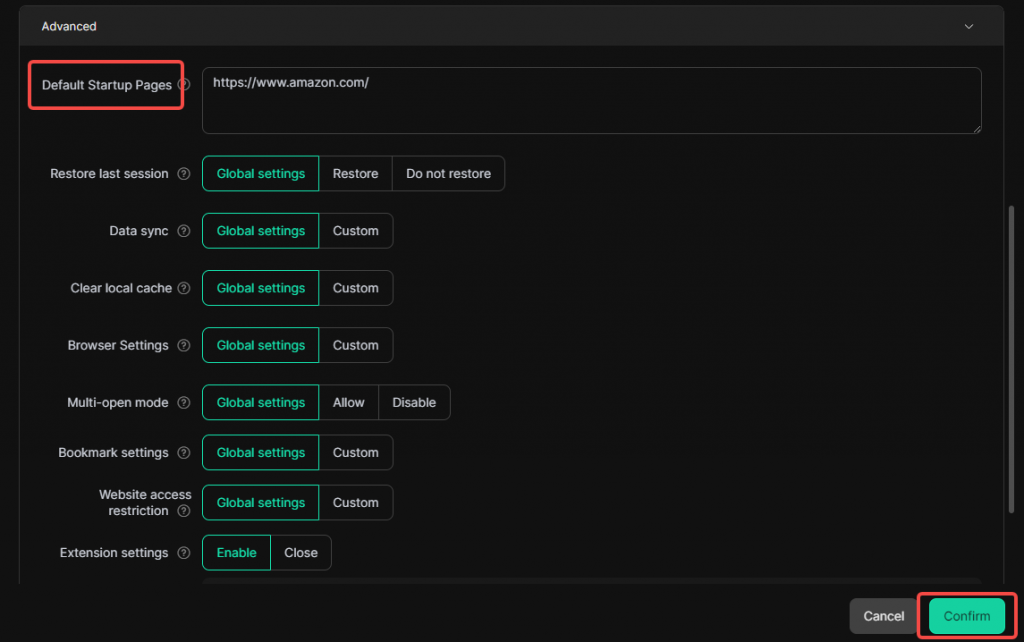
- Set Default Startup Page: Enter the e-commerce platform URL in [Default Startup Pages], so each time the profile opens, it will automatically load the platform. After saving, the accounts will be imported.
- Access the Profile: Go to the [Profiles] list and click [Open] to access the e-commerce platform.


3 Advanced Configuration for Managing Multiple e-commerce accounts
3.1 Window Synchronization
You can use the window synchronization feature to manage multiple e-commerce accounts in parallel, reducing repetitive tasks.

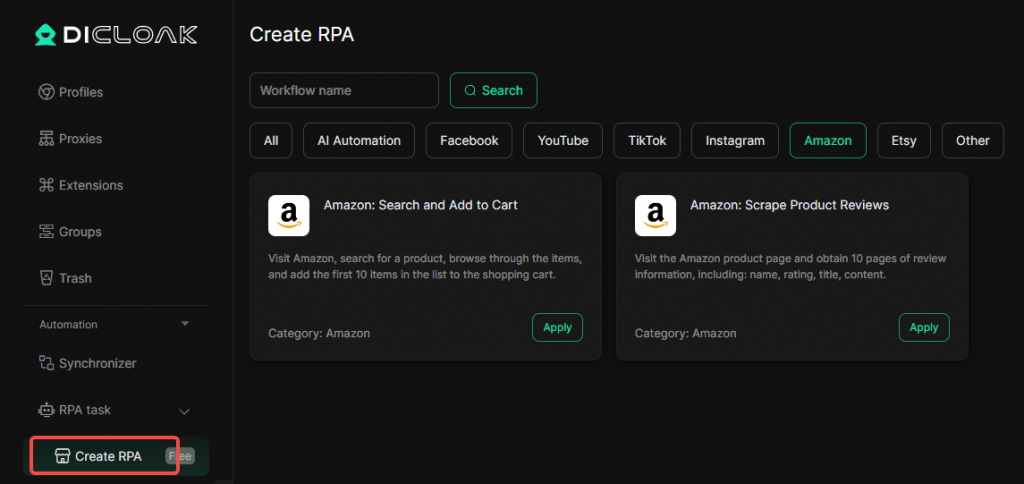
3.2 RPA Function
The RPA feature helps automate account nurturing, saving time and labor, and improving account management efficiency. (You can contact DICloak support for customized RPA processes.)
4 Team Member Management and Access Control
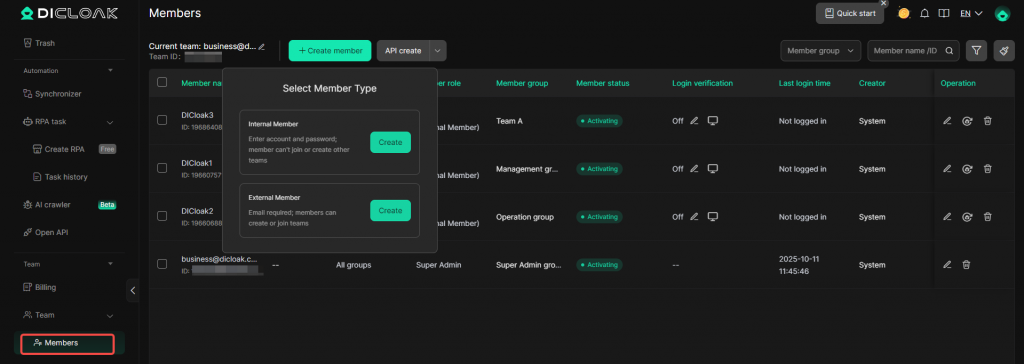
4.1 Create Members
Go to the member list to create members. You can choose to create internal or external members based on your management needs.
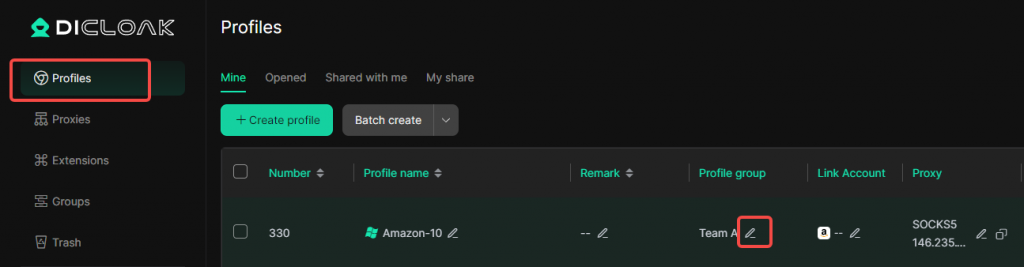
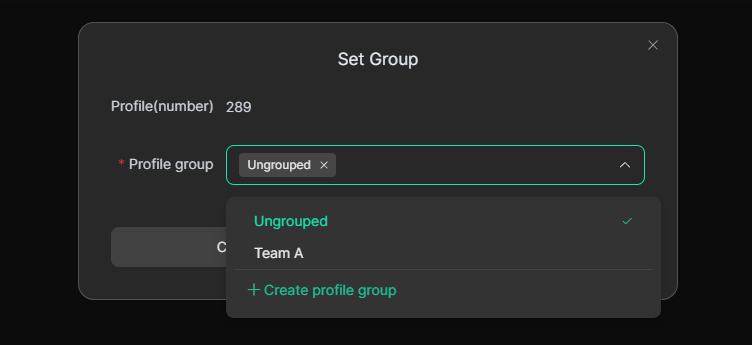
4.2 Assign Members to Specific Profiles
- Go to [Profiles] and create/select the profile group, then save the settings.
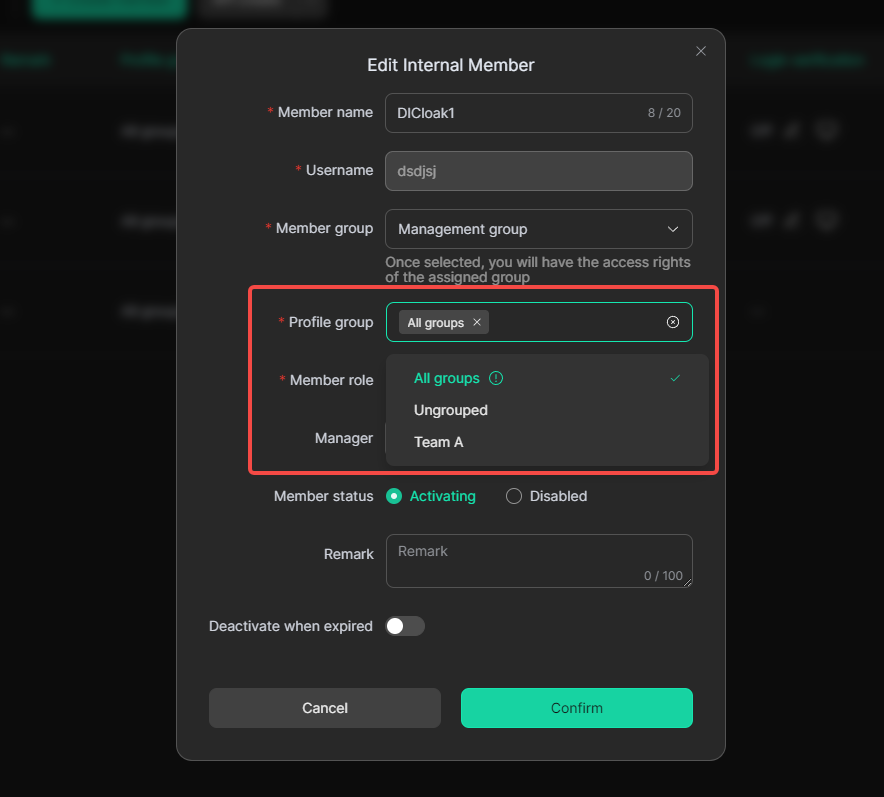
- Go to the member list to assign the corresponding profile group to the members and save the settings.

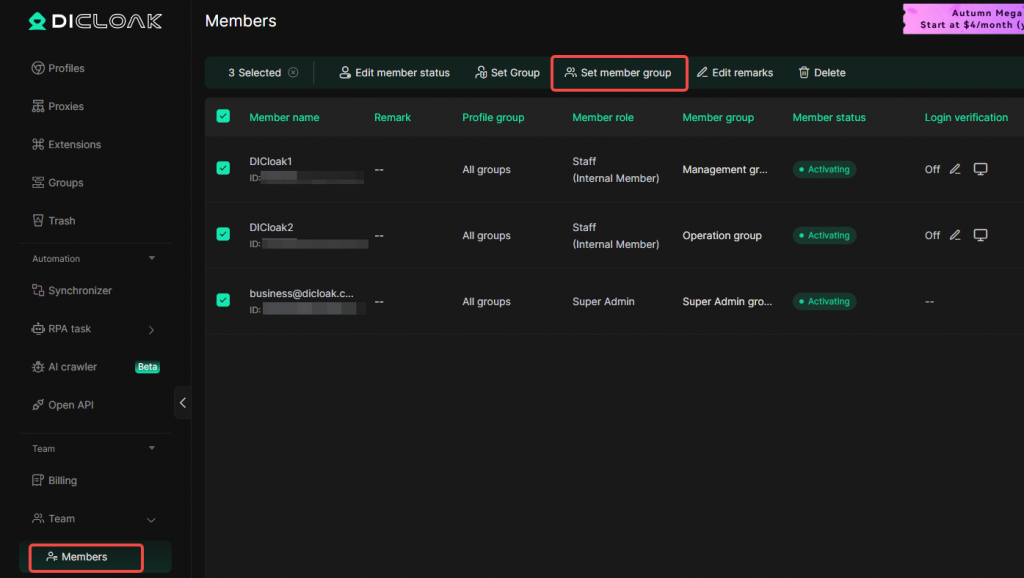
- Assign accessible profile groups to members in bulk.
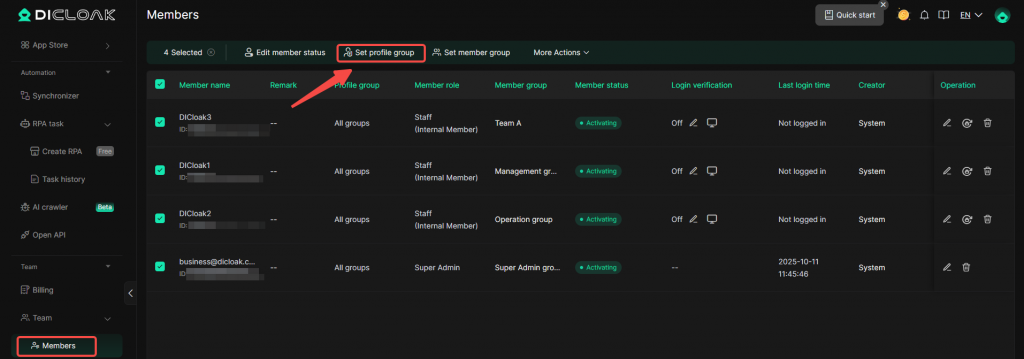
4.3 Assign Browser Features to Members
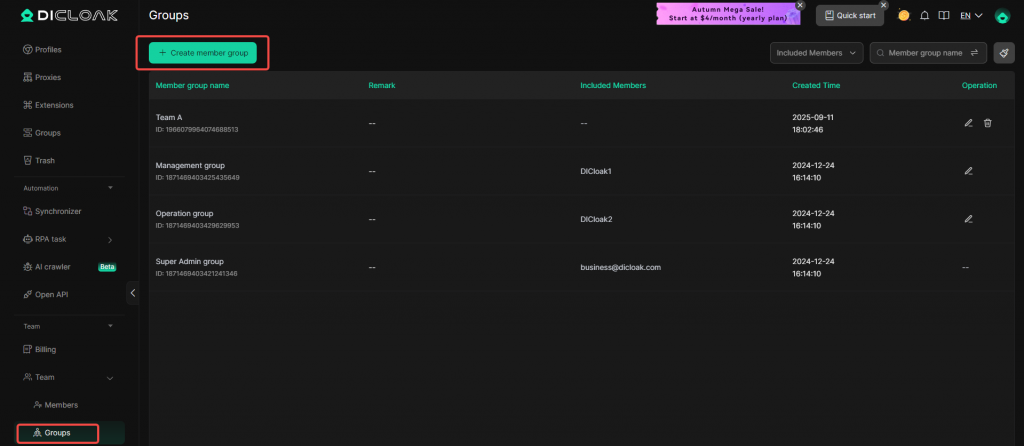
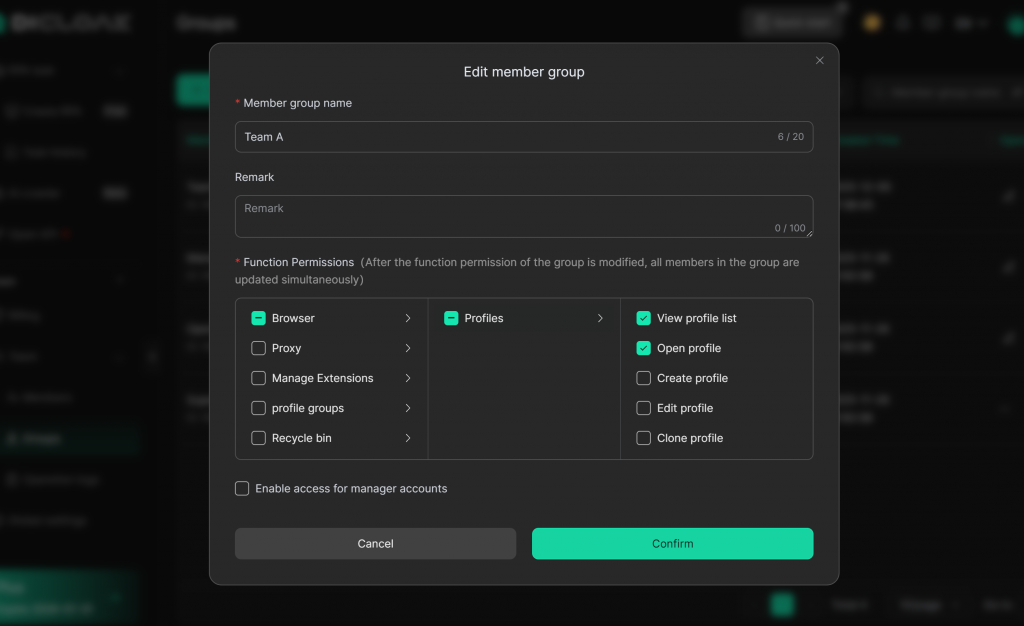
- Go to the [groups] list to create the corresponding member group and set the permissions.
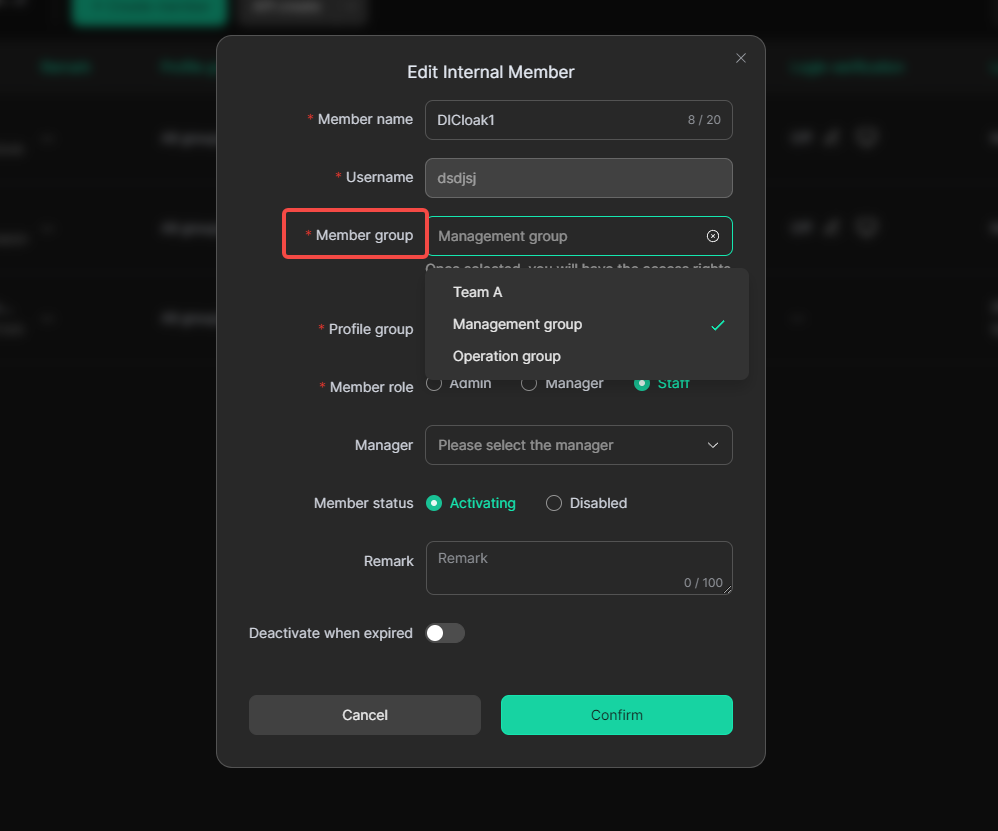
- Go to the member list to assign the corresponding member group to the members and save the settings.

- Bulk assigns accessible member groups to members.
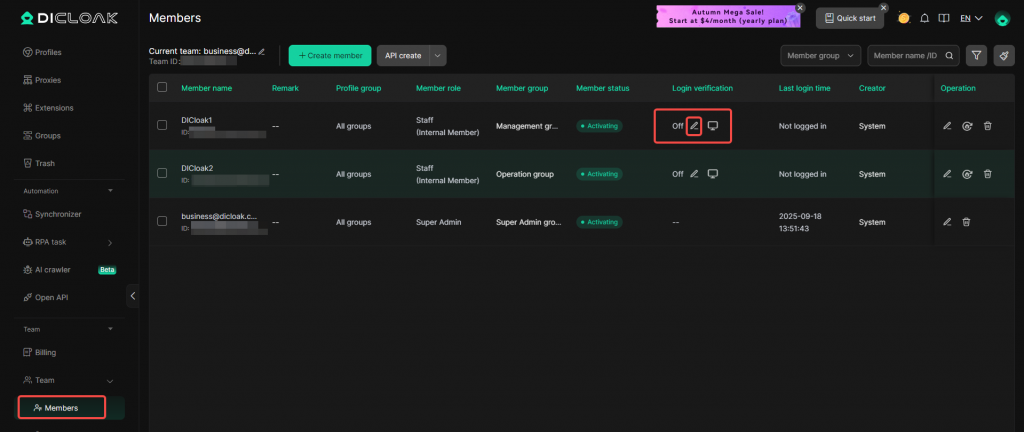
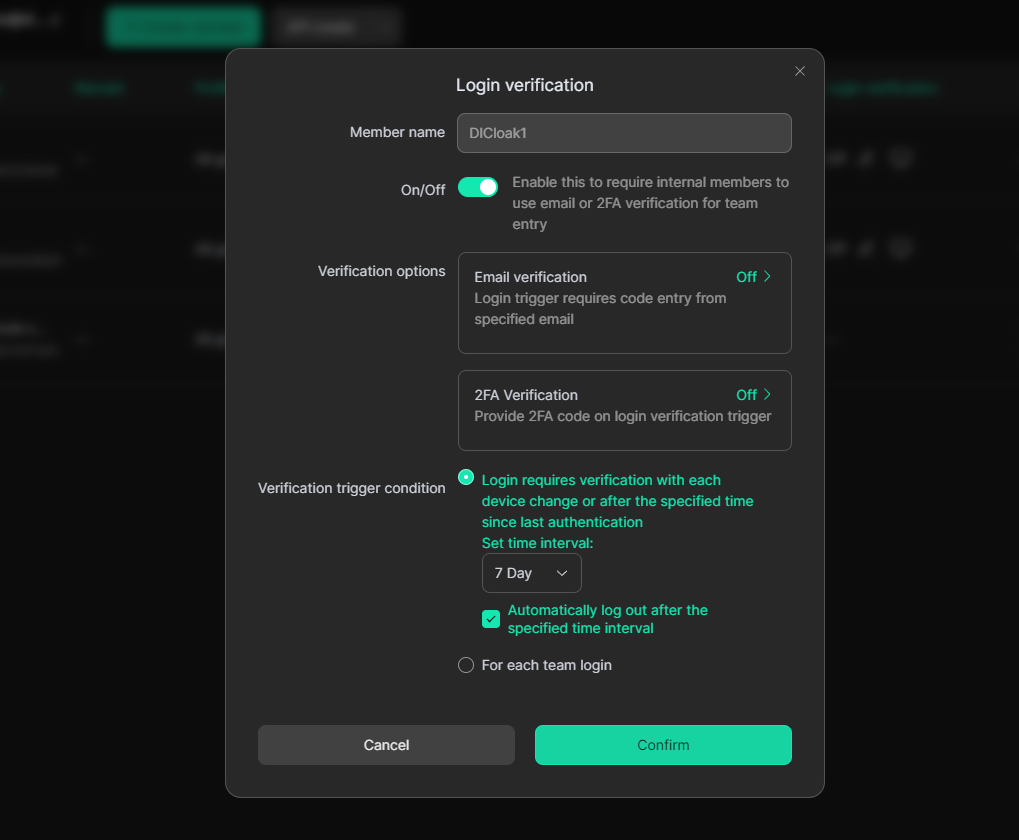
4.4 2FA Verification Setup
Important Note: Currently, 2FA verification is only supported by internal members. If you enable 2FA, your members will need to contact the team admin for the verification code when logging in from a new device. This feature prevents members from casually sharing login details.
- Go to the member list, find the internal member, click on login verification, and enable 2FA.
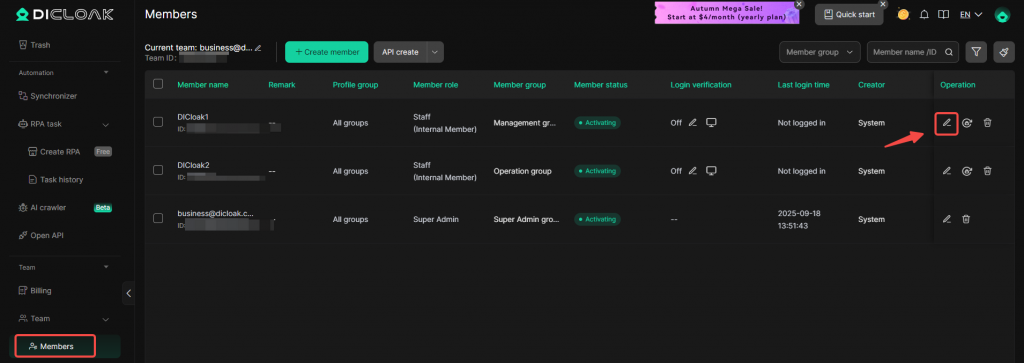
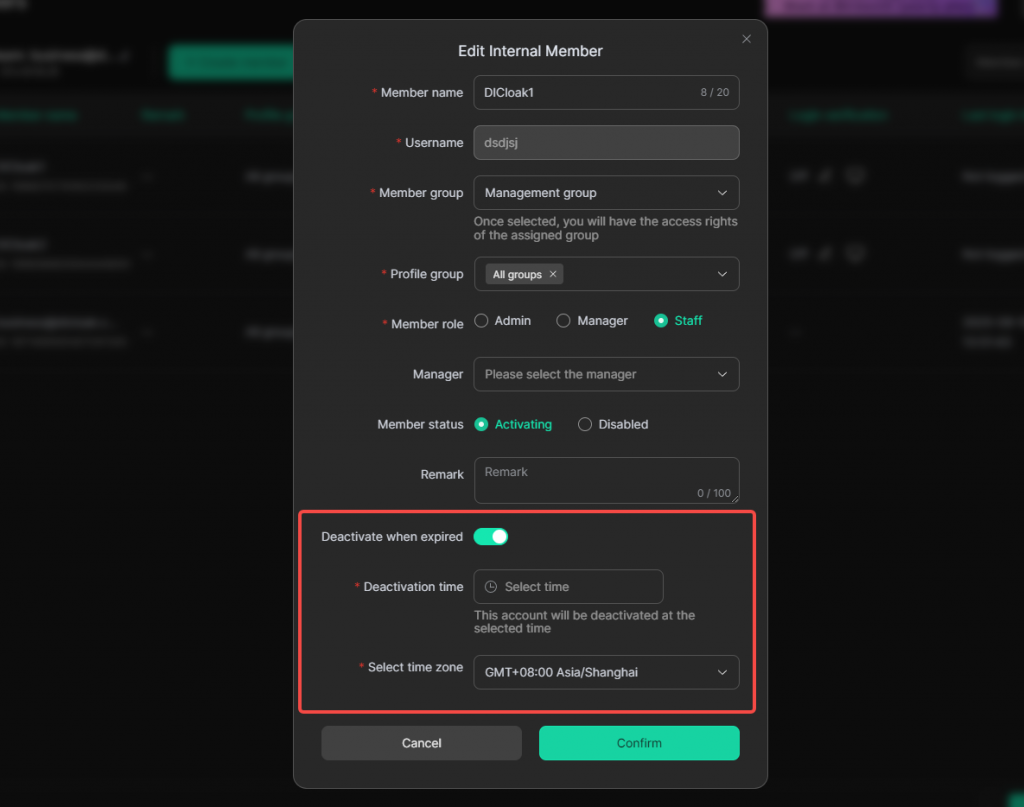
4.5 Set Member Account Deactivation Time
- Go to the member list, find the member to be deactivated, and click the edit button to set the account expiration time.
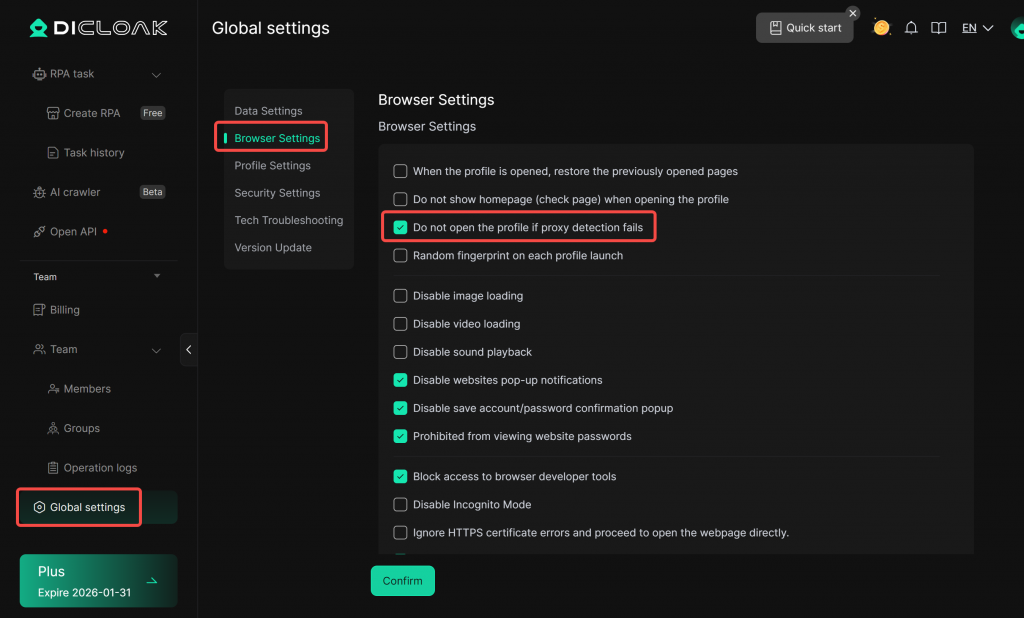
5 Other Common Settings
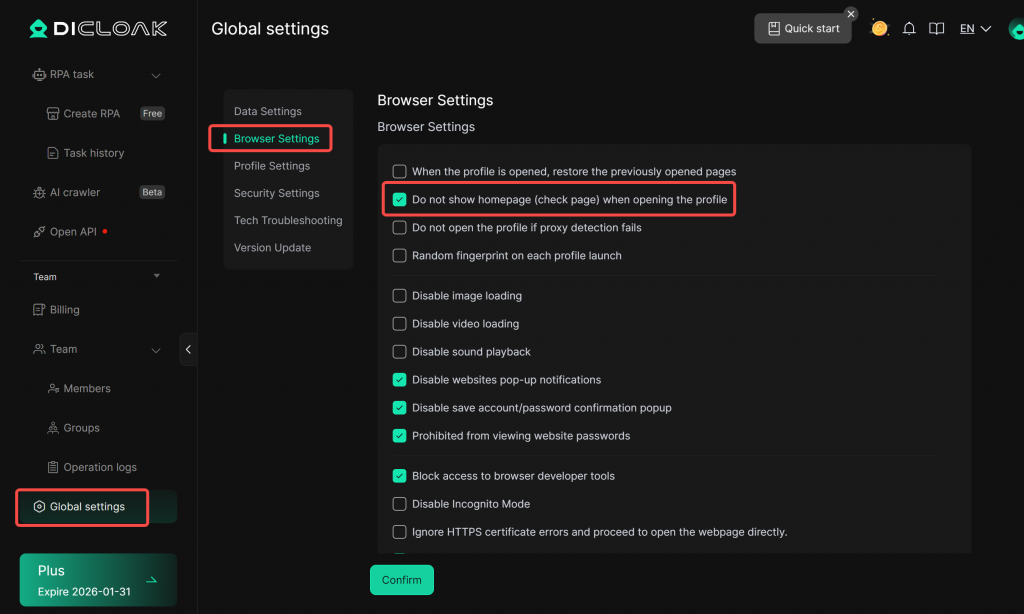
5.1 Remove Kernel Page
If you want to remove the following page, go to [Global Settings] and check [Do not show homepage (check page) when opening the profile].
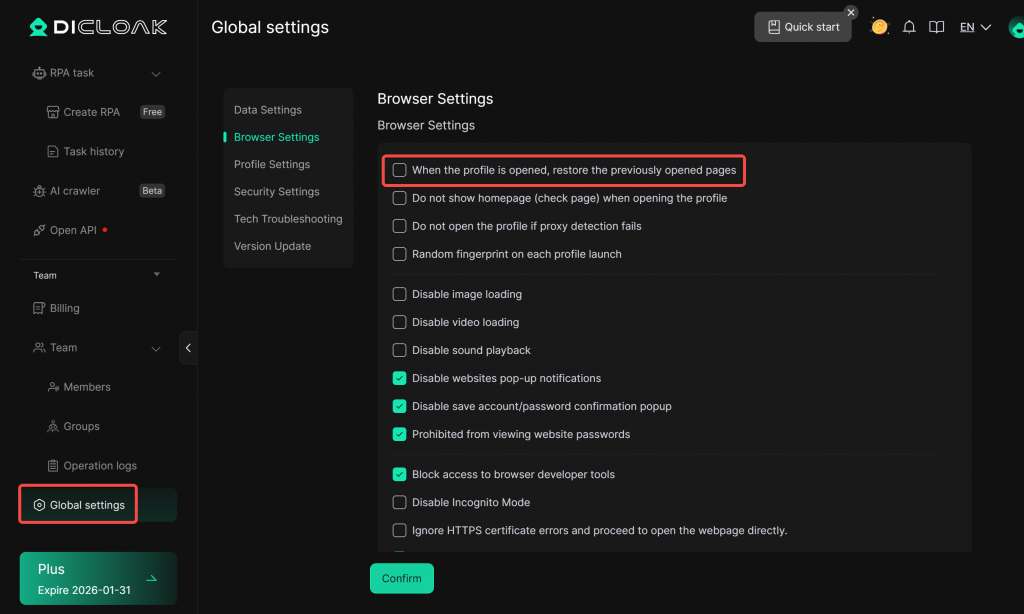
5.2 Disable Restore Page
If you do not want the previously visited pages in the profile to appear each time you open a profile, go to [Global Settings] and uncheck [When the profile is opened, restore the previously opened page].
5.3 Prevent Browser Profile Opening When Proxy Detection Failure
To maintain account stability, go to [Global Settings] and uncheck [Do not open profile when proxy detection fails].
6 Contact Customer Support
If you encounter any issues during setup, feel free to contact DICloak’s customer support for assistance.