Introduction of IPFoxy
IPFoxy provides a wide range of proxy services, including static data center IPv4/IPv6 proxies, dedicated residential ISP proxies, and rotating residential proxies. Known for their extensive IP pool and robust performance, IPFoxy ensures high-speed, reliable connections suitable for web scraping, market research, social media management, and more.
IPFoxy supports HTTP, HTTPS, and SOCKS5 protocols, offering flexible pricing plans and seamless integration with various tools. Their dedicated customer support and ethical sourcing practices make them a top choice for businesses and individuals.
IPFoxy Proxy Configuration
1.Log in to IPFoxy and Copy Proxy Information
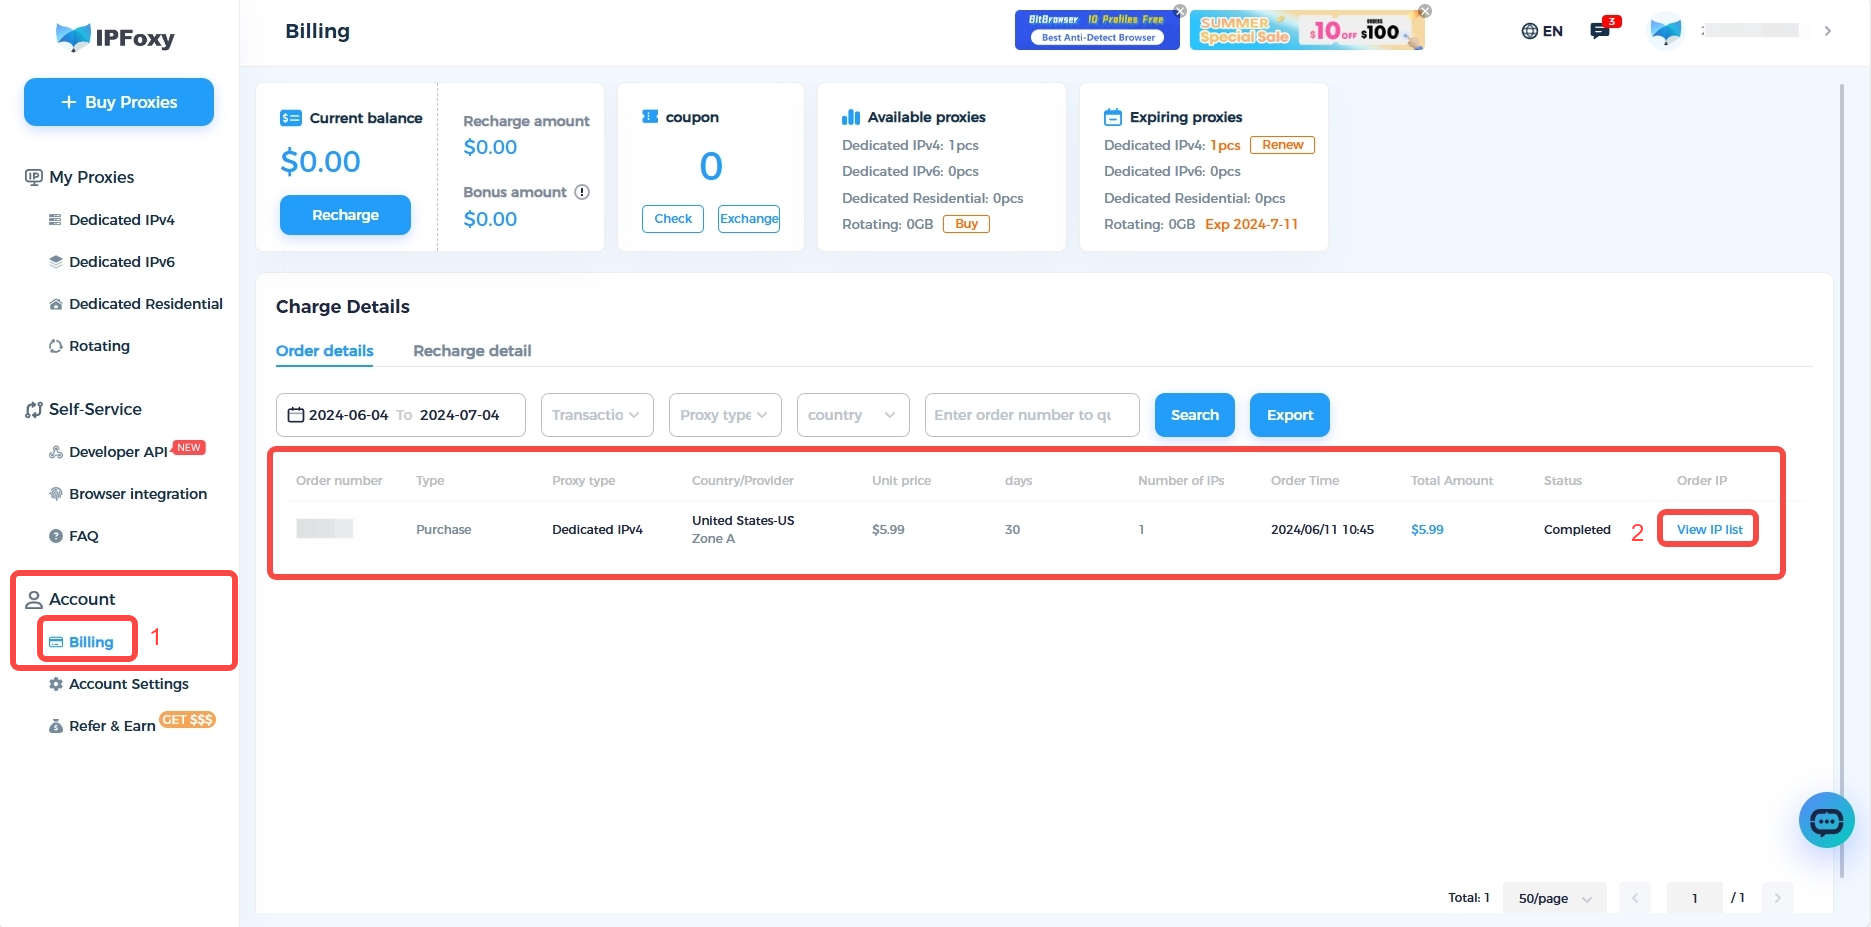
- Log in to IPFoxy, and find “Billing” on the left navigation bar to view your purchased proxy orders. (Tips: if you haven’t made a purchase yet, you need to buy a proxy first before proceeding to the next step).
- In the “Charge Details” section, find the proxy that you want to configure and click “View IP List“.
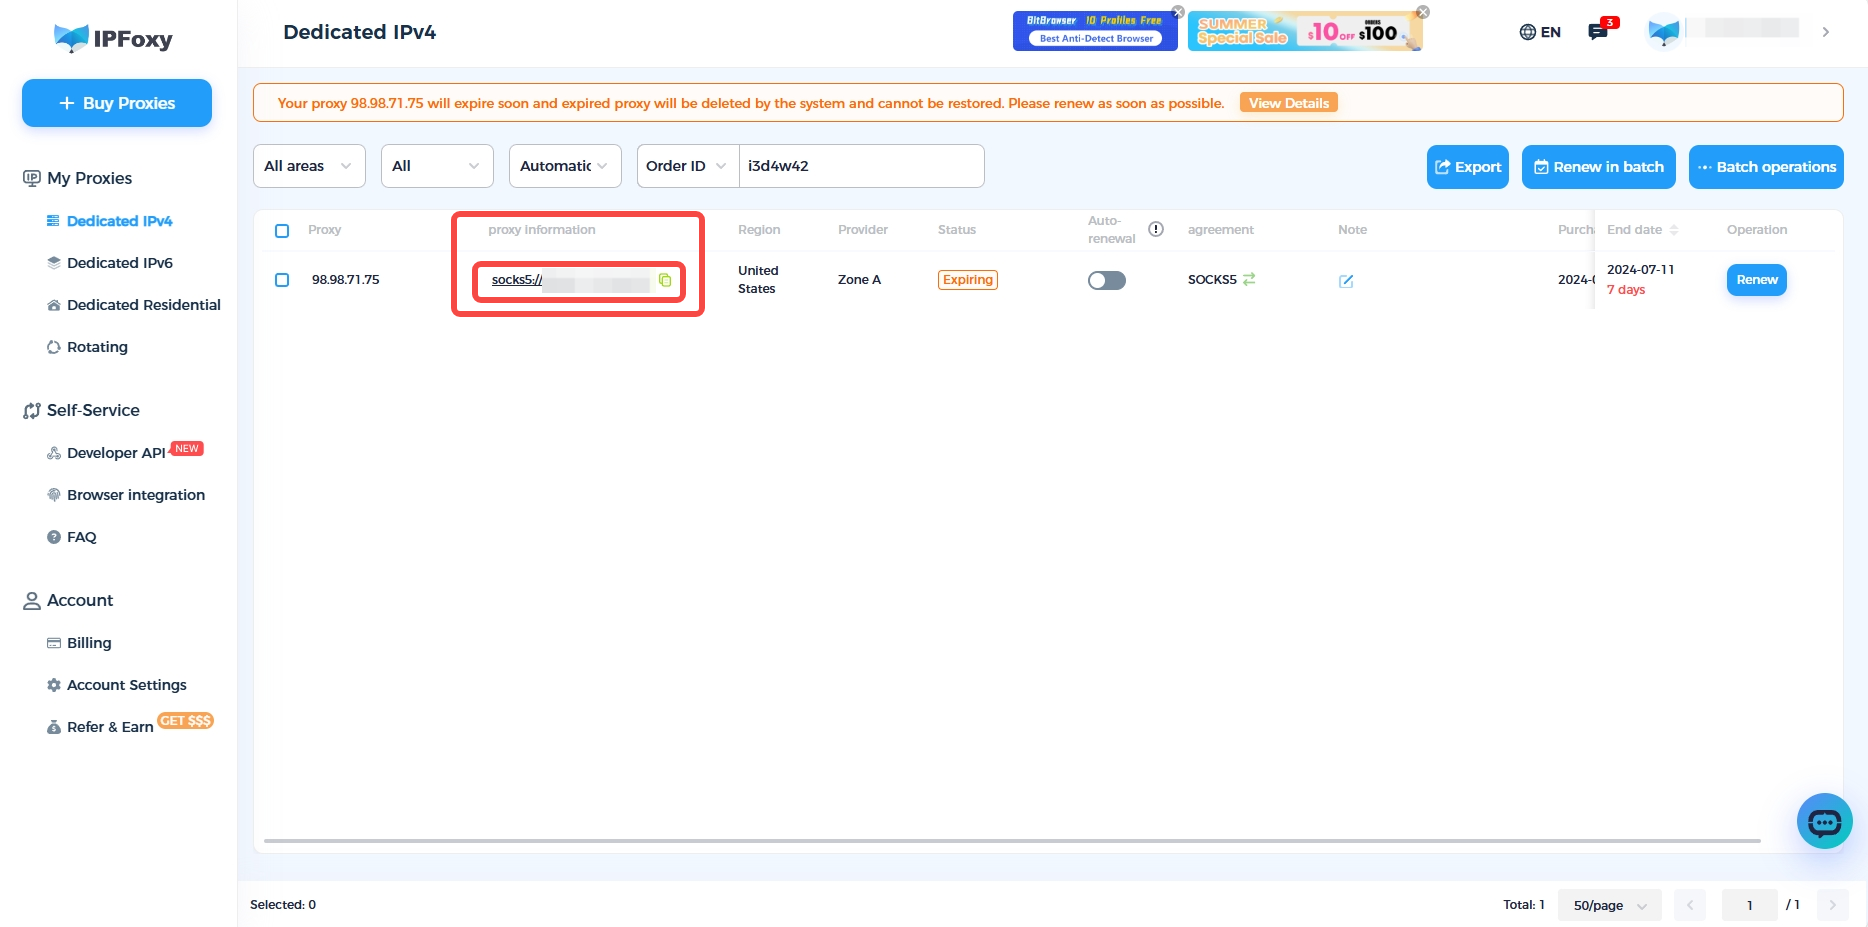
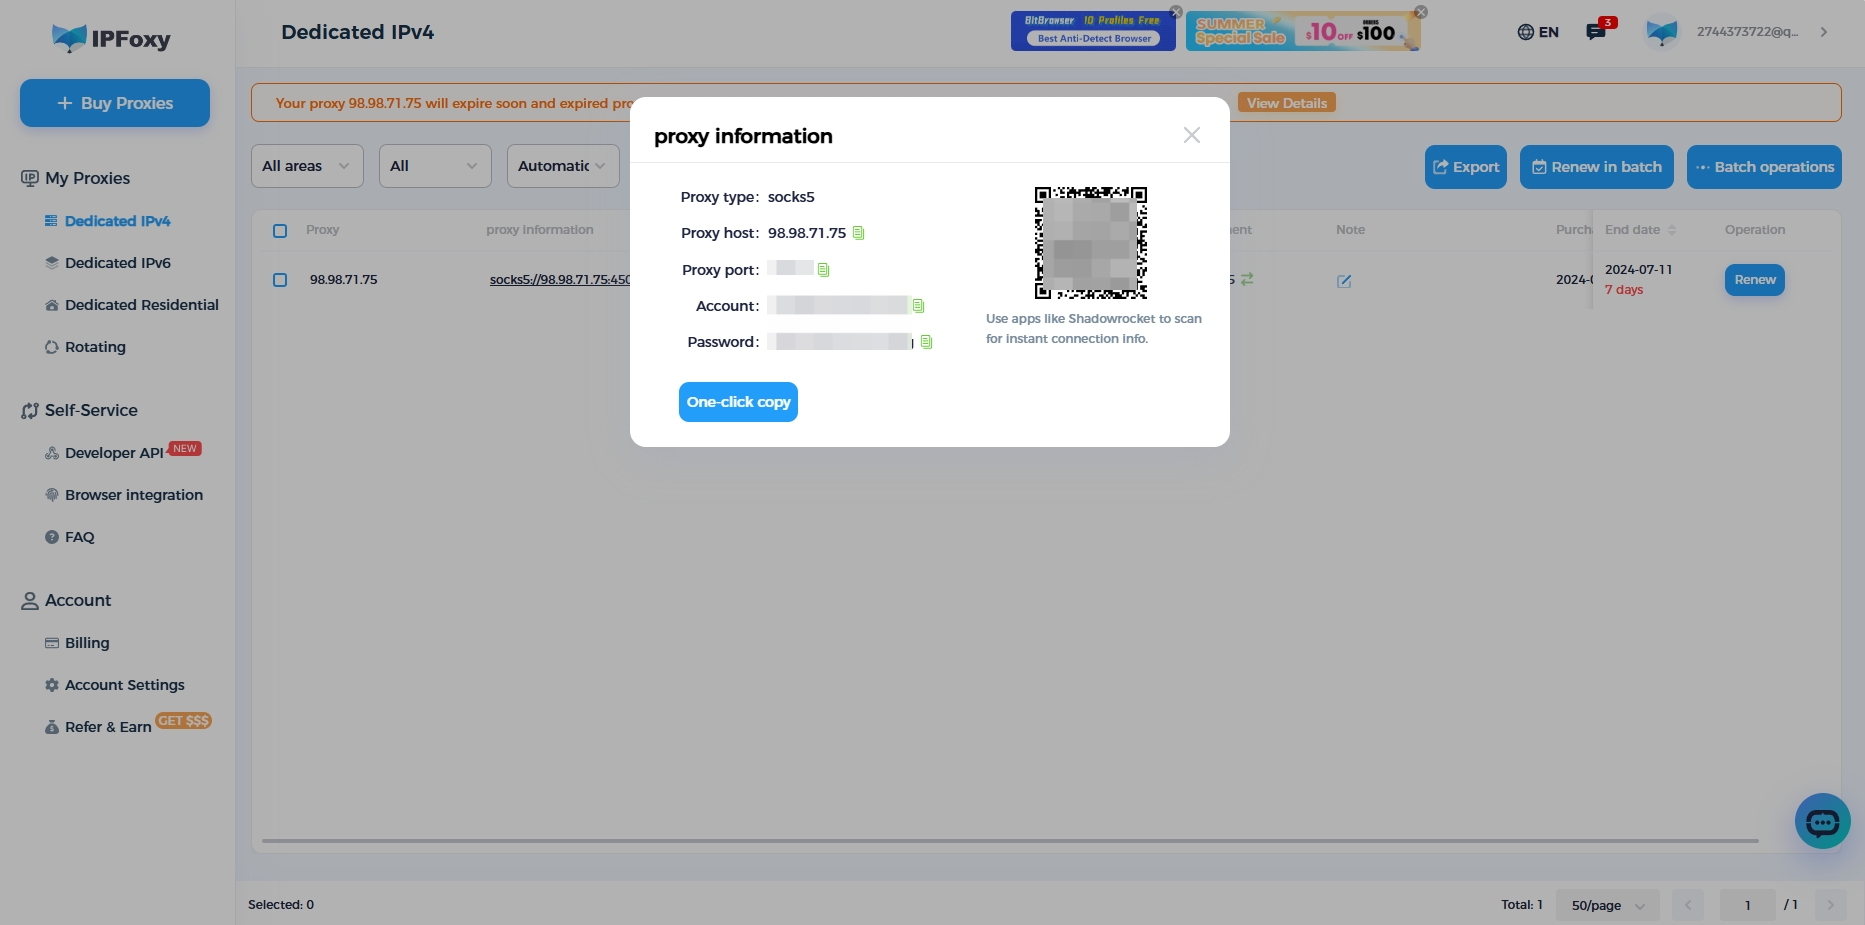
- Click “Proxy Information” to view and copy the proxy’s port, host, account, and password information.
2.Configure IPFoxy Proxy in DICloak
Note: Internet connections within mainland China (excluding Hong Kong, Macau and Taiwan) generally cannot directly access foreign IPs. Therefore, if you are trying to configure an overseas IP proxy in DICloak within mainland China (excluding Hong Kong, Macau and Taiwan), you need to set up an overseas network through a VPS, a dedicated international line, or a VPN service first. Then you will be able to connect and access the overseas IP in DICloak properly.
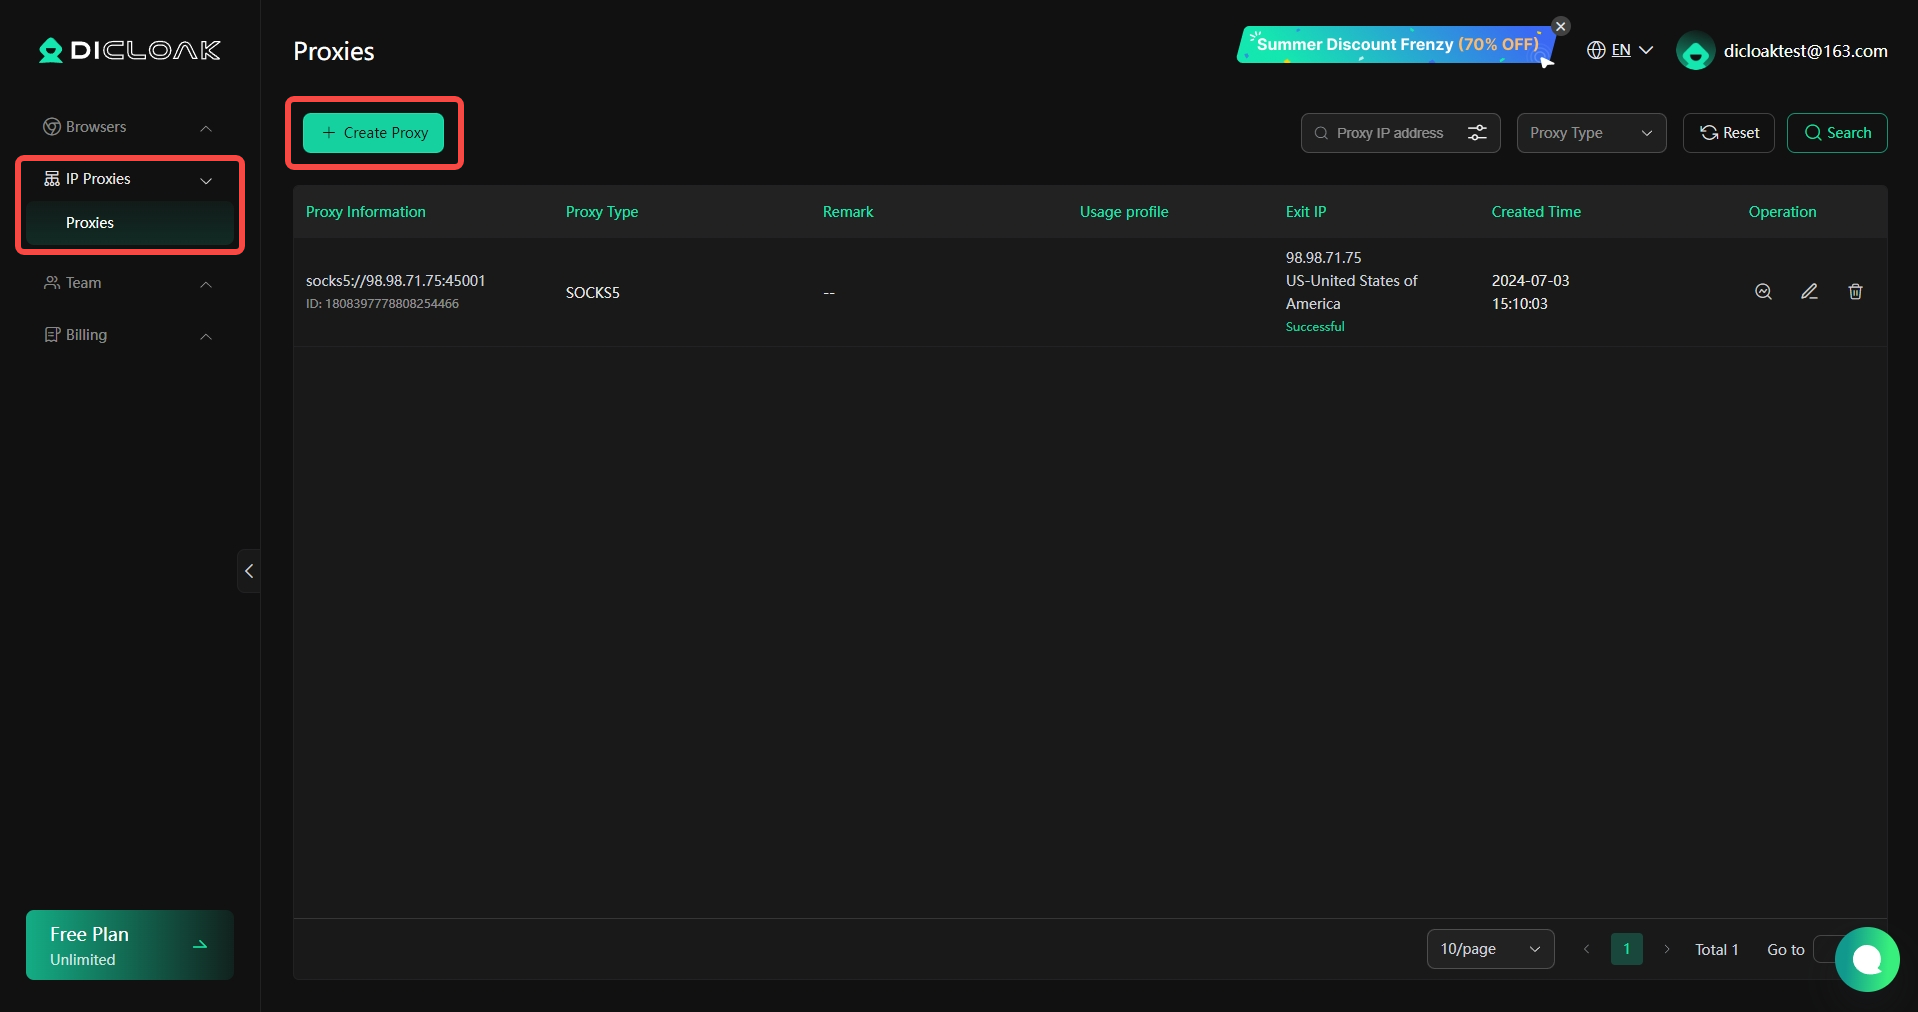
- Log in to DICloak, find the “Proxies” on the left navigation bar, and click “Create Proxy“.
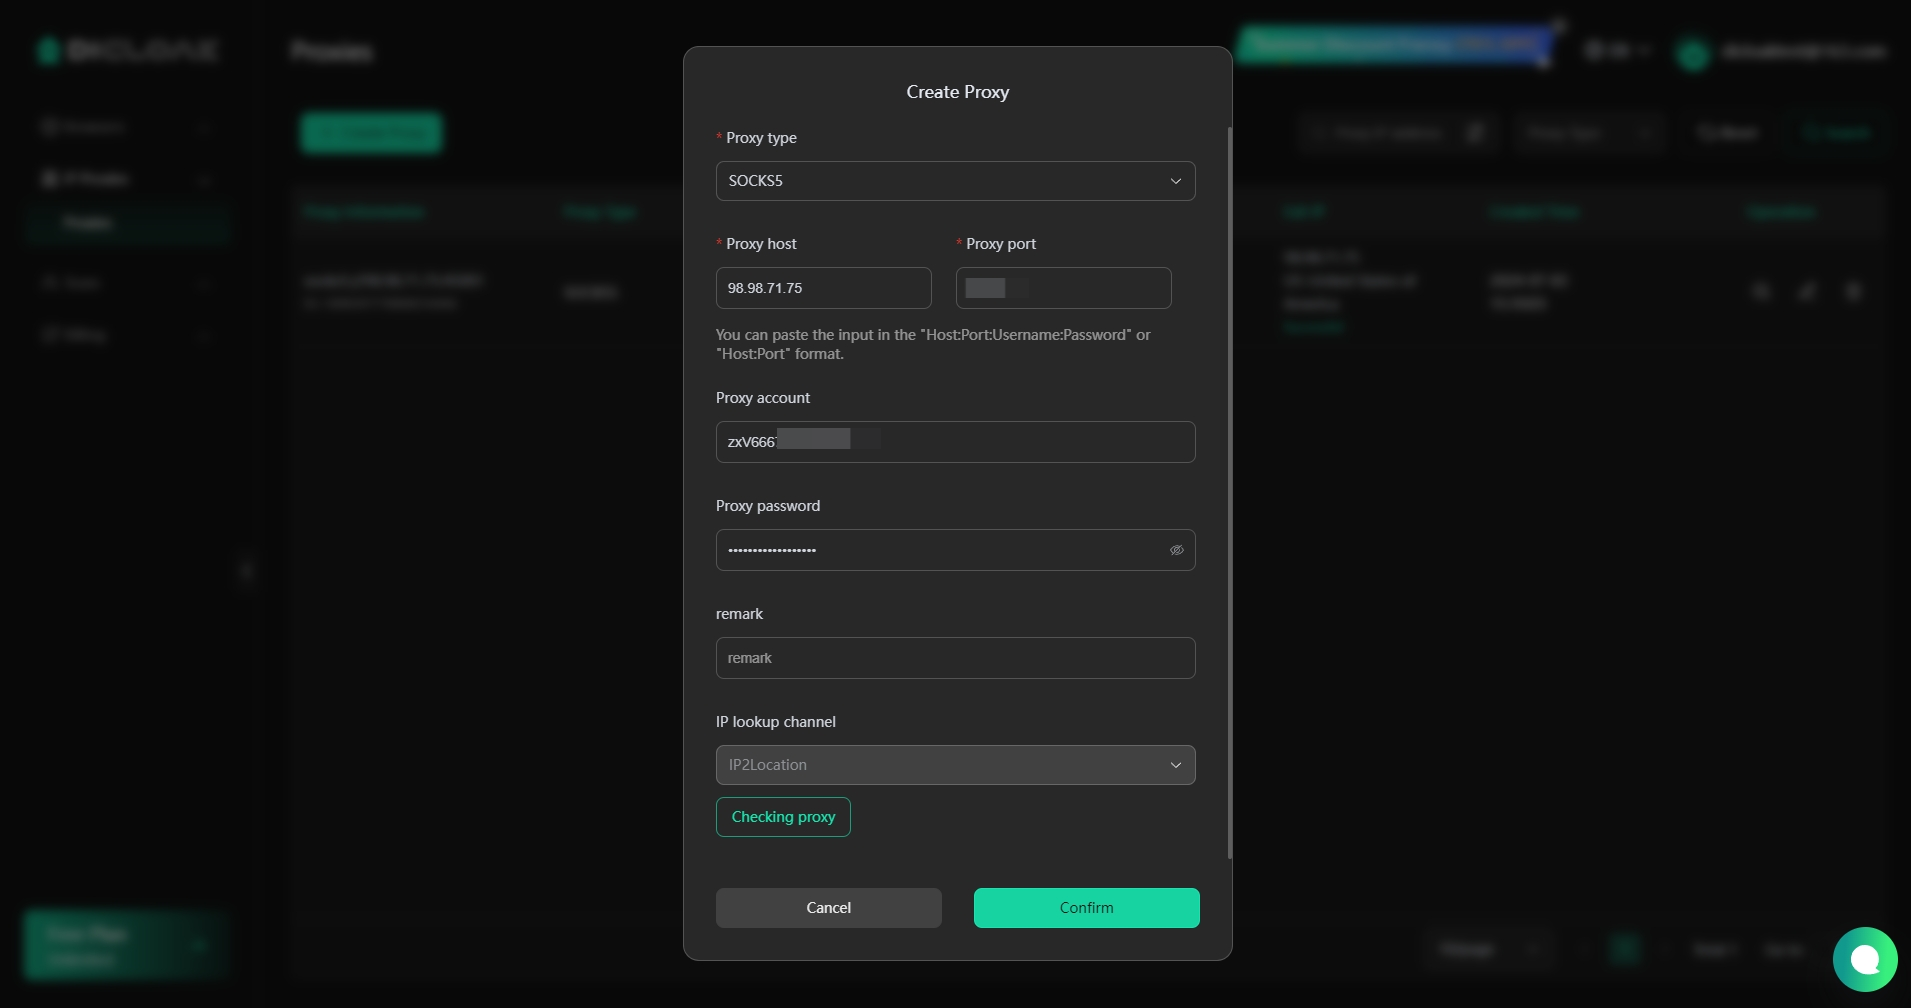
- Based on your proxy information purchased on IPFoxy, you need to select the “Proxy Type” and copy the “Proxy Host“, “Proxy Port“, “Proxy Account“, and “Proxy Password” from the IPFoxy website, then paste them into DICloak.
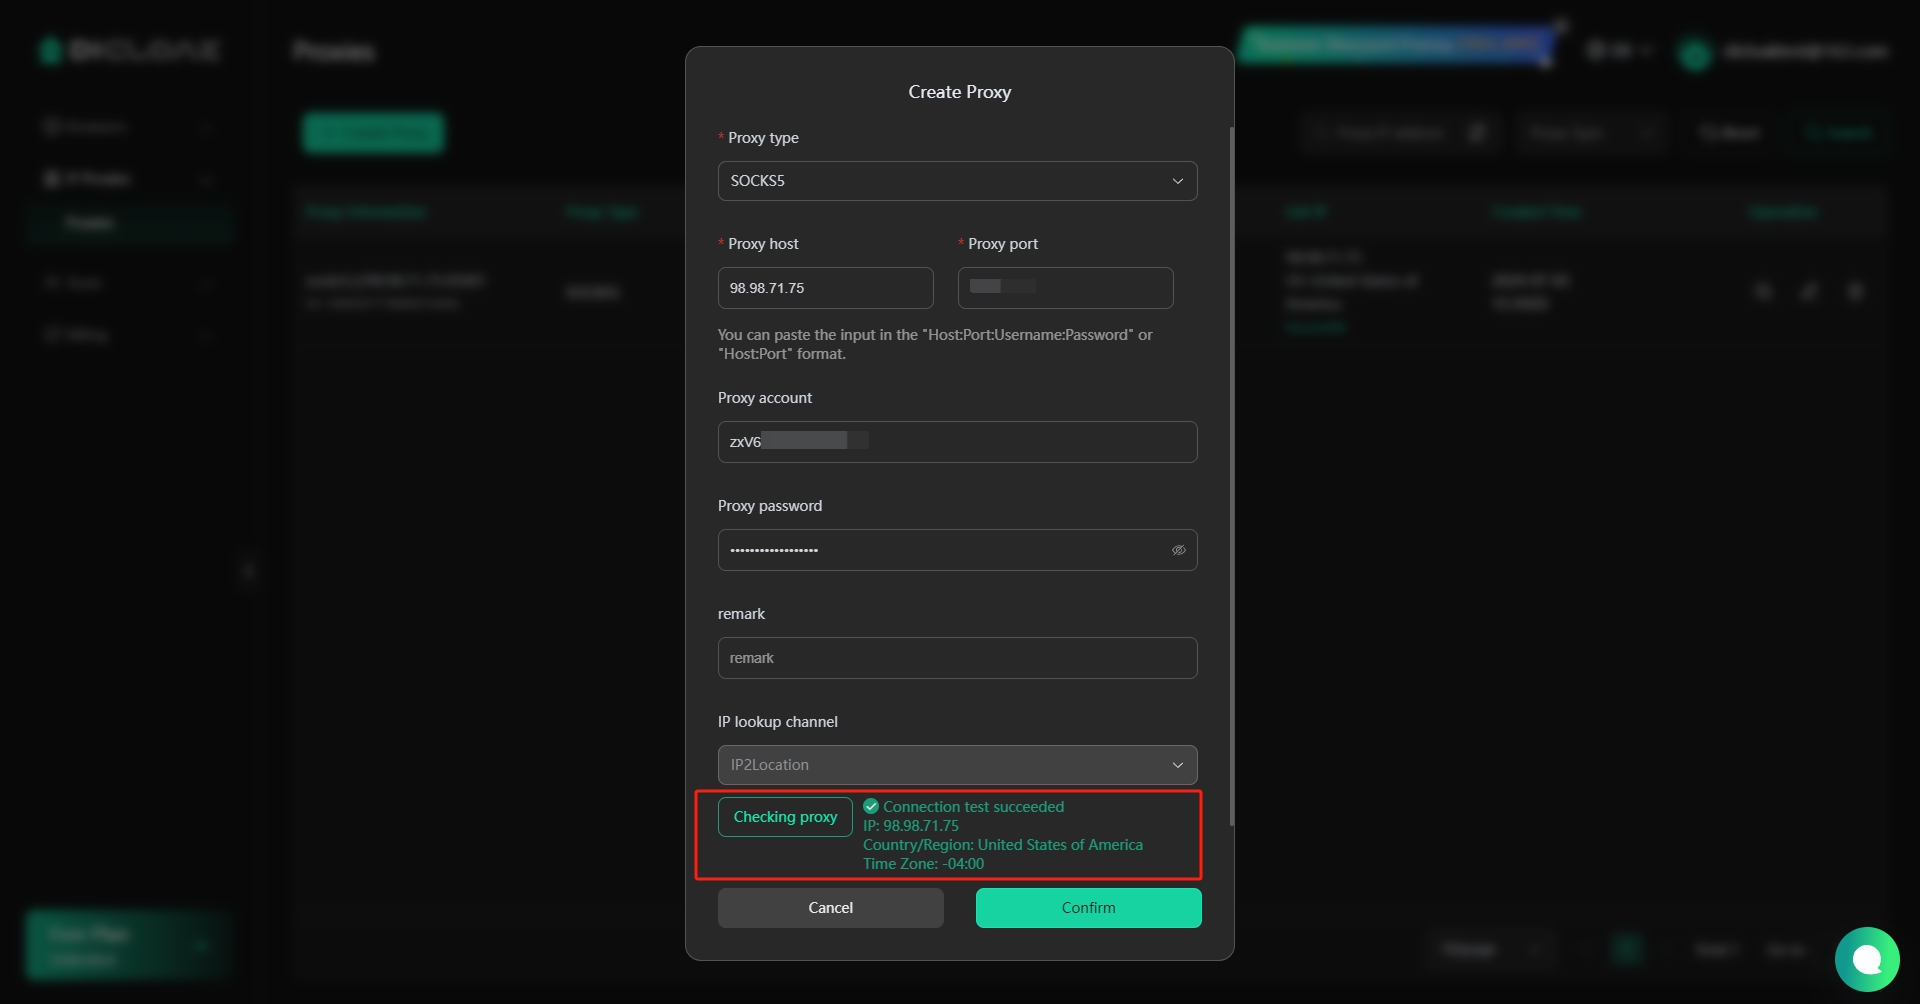
- Click “Checking Proxy” to verify if the proxy is successfully connected. If the connection is successful, click the “Confirm” button to complete the proxy setup.
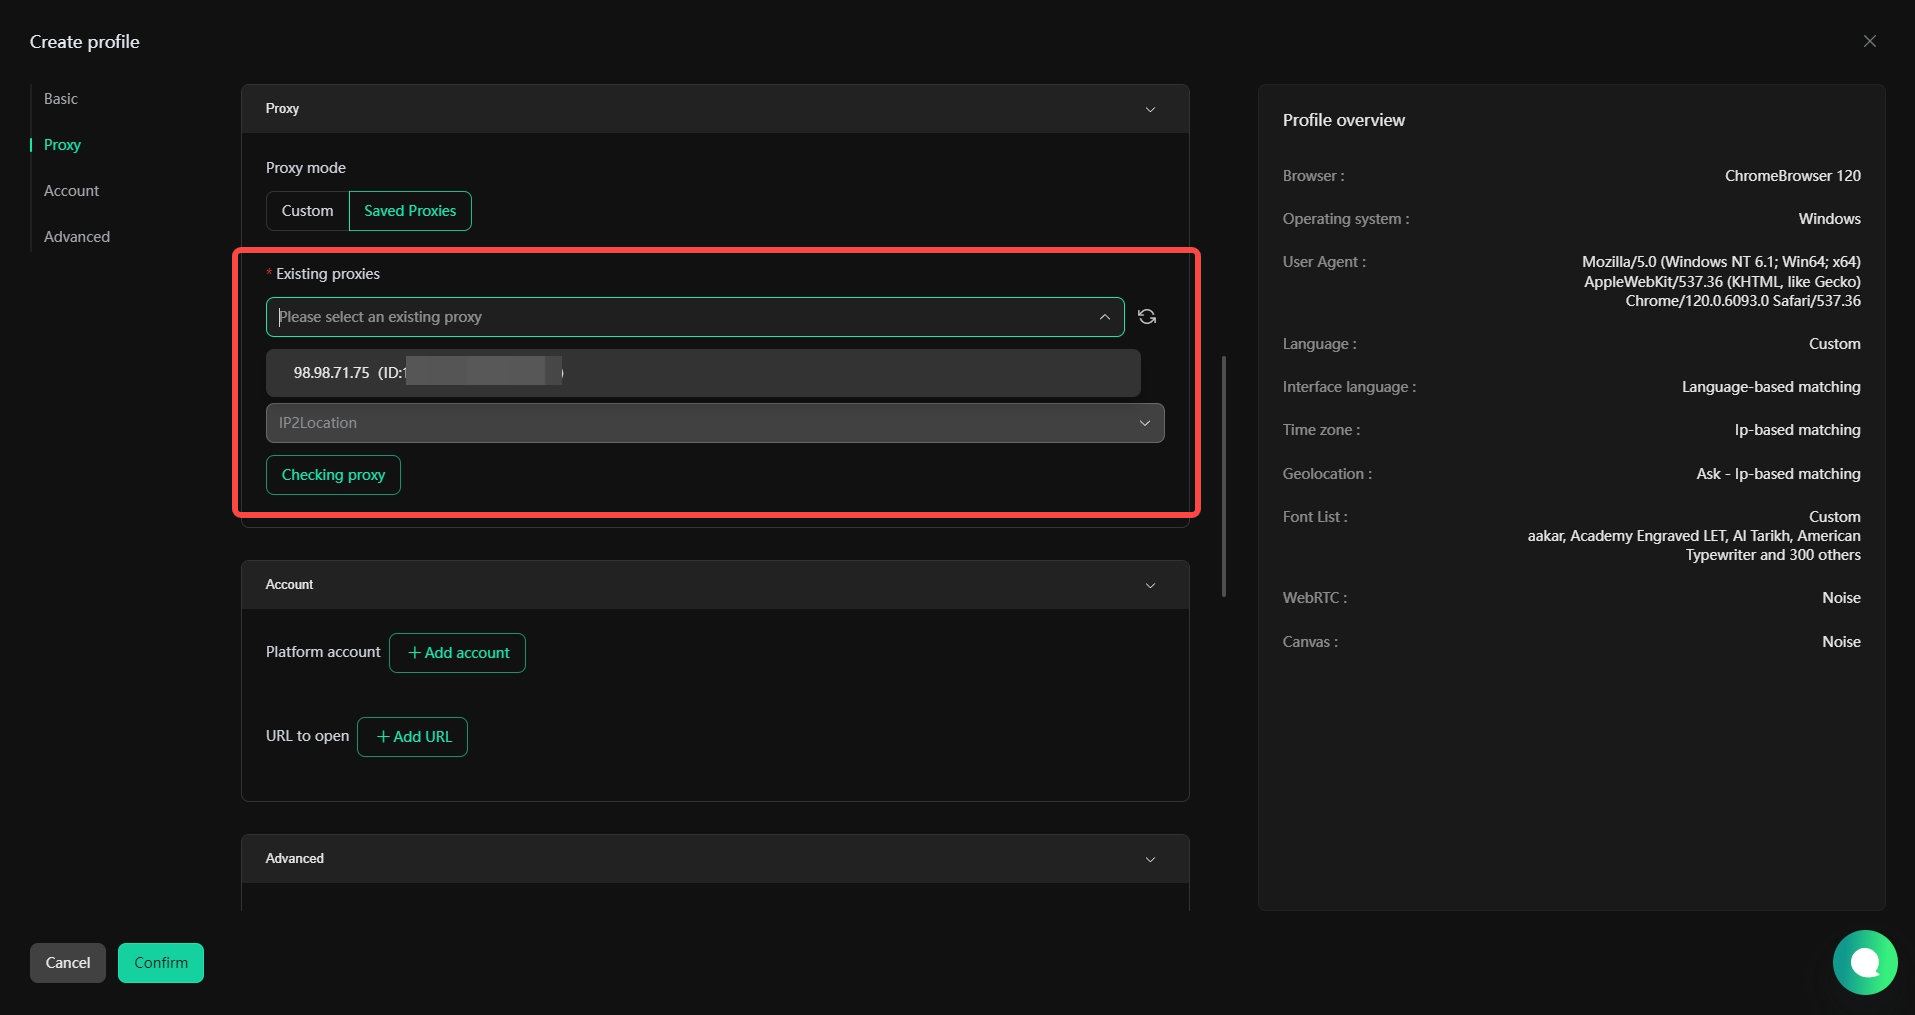
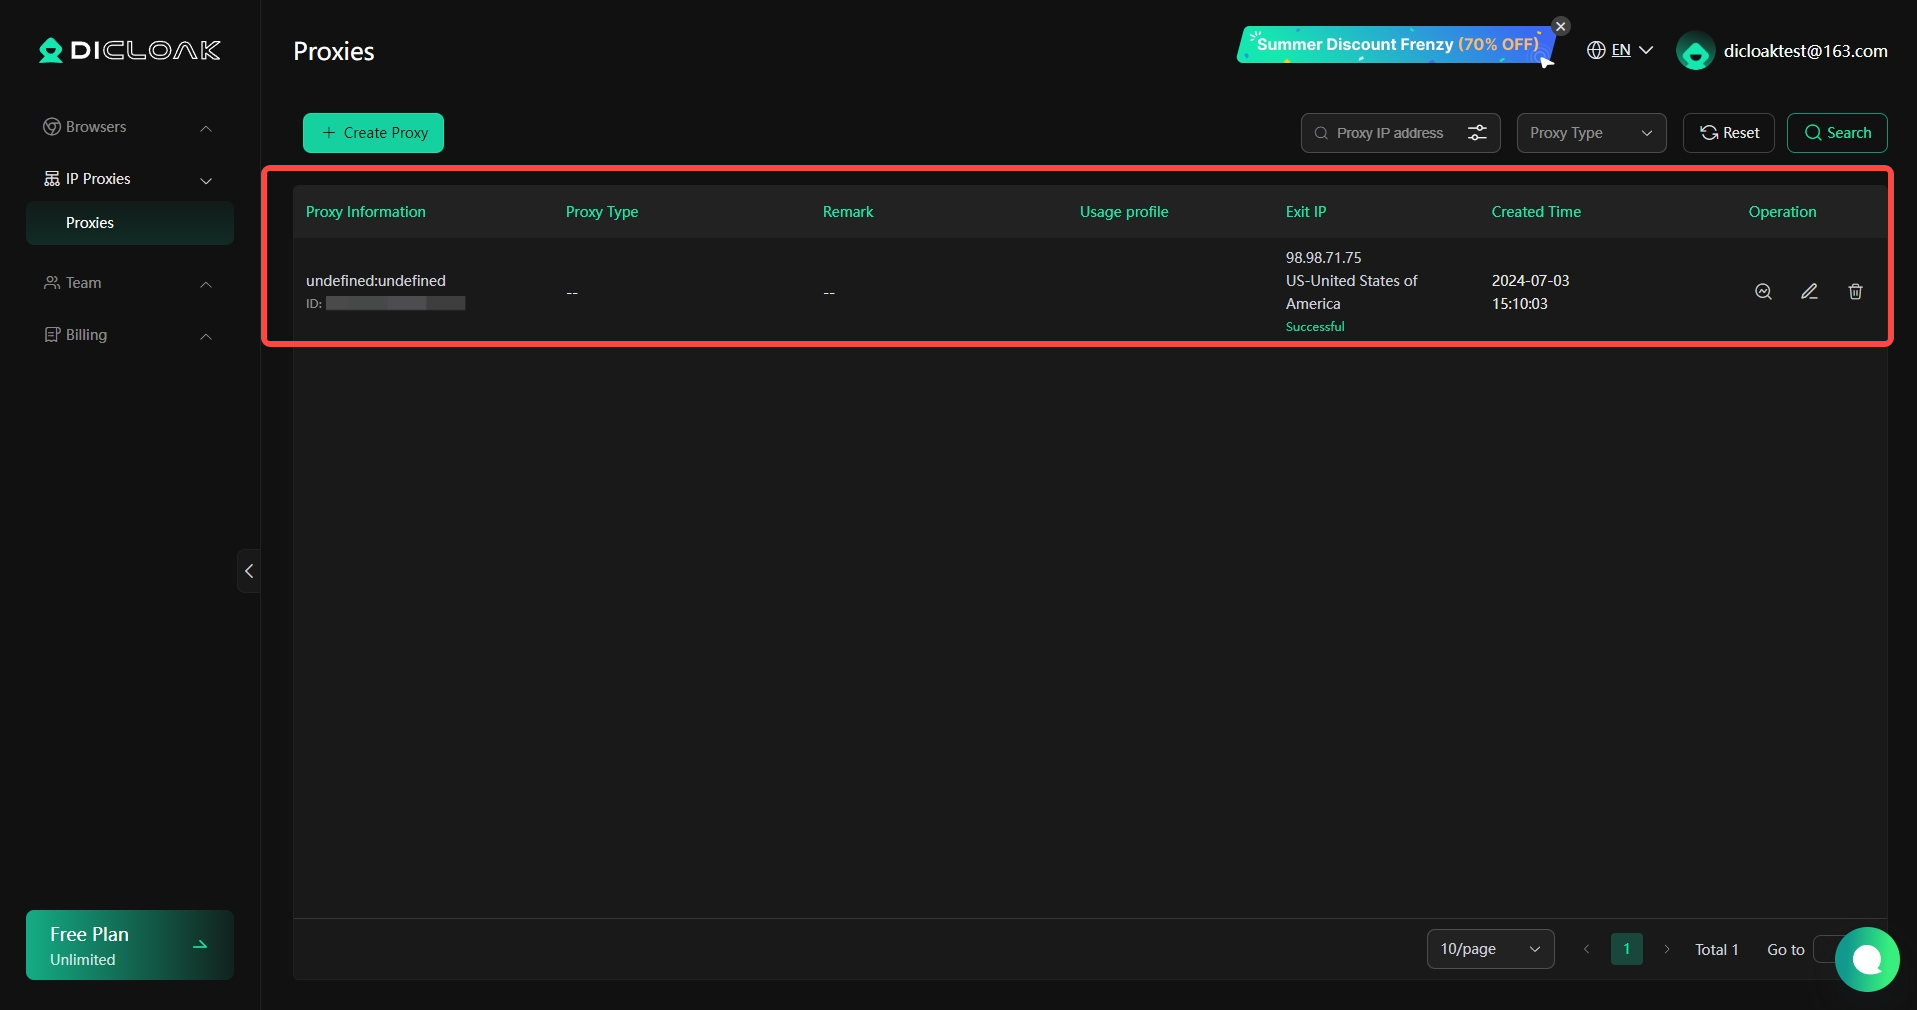
- Once the proxy is set up, you can use it when creating browser profiles by selecting “Saved Proxies” and choosing the proxy you have configured.