IPRoyal Introduction
IPRoyal offers a full range of proxy services, including residential, datacenter, ISP, and mobile proxies. Residential proxies are its most popular product, with an extensive pool of over 32 million genuine IPs in 195 countries, HTTP/S and SOCKS5 support, non-expiring traffic, and discounts of up to 75% for bulk orders.
Whether you need proxies for web scraping, social media management, brand protection, or any other purpose, IPRoyal offers secure and scalable products tailored to your needs. With 24/7 support, ethical sourcing, and competitive pricing, IPRoyal is a trusted partner for businesses and individuals worldwide.
IPRoyal Proxy Configuration
Create an Account and Make a Purchase
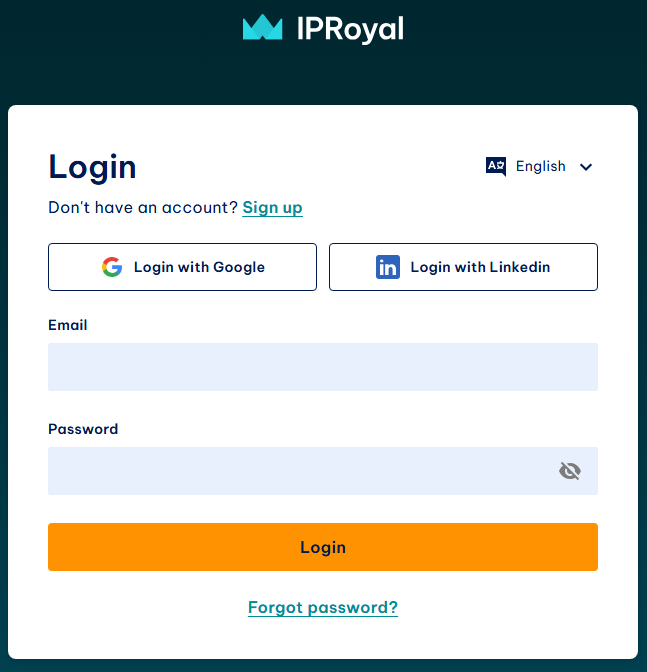
- Log in to IPRoyal.
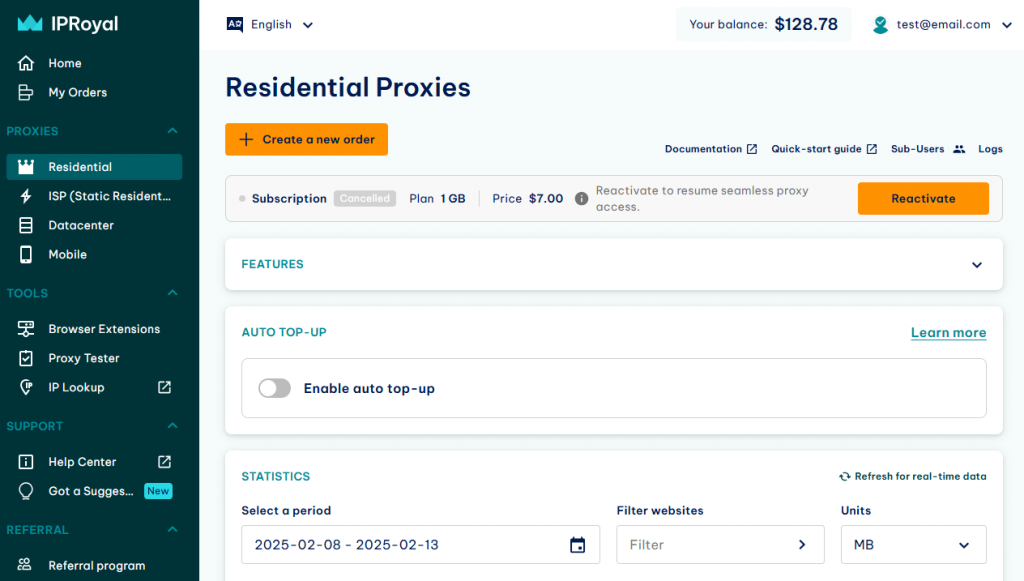
- Choose Residential (1) from the quick menu and click the Create a new order (2) button.
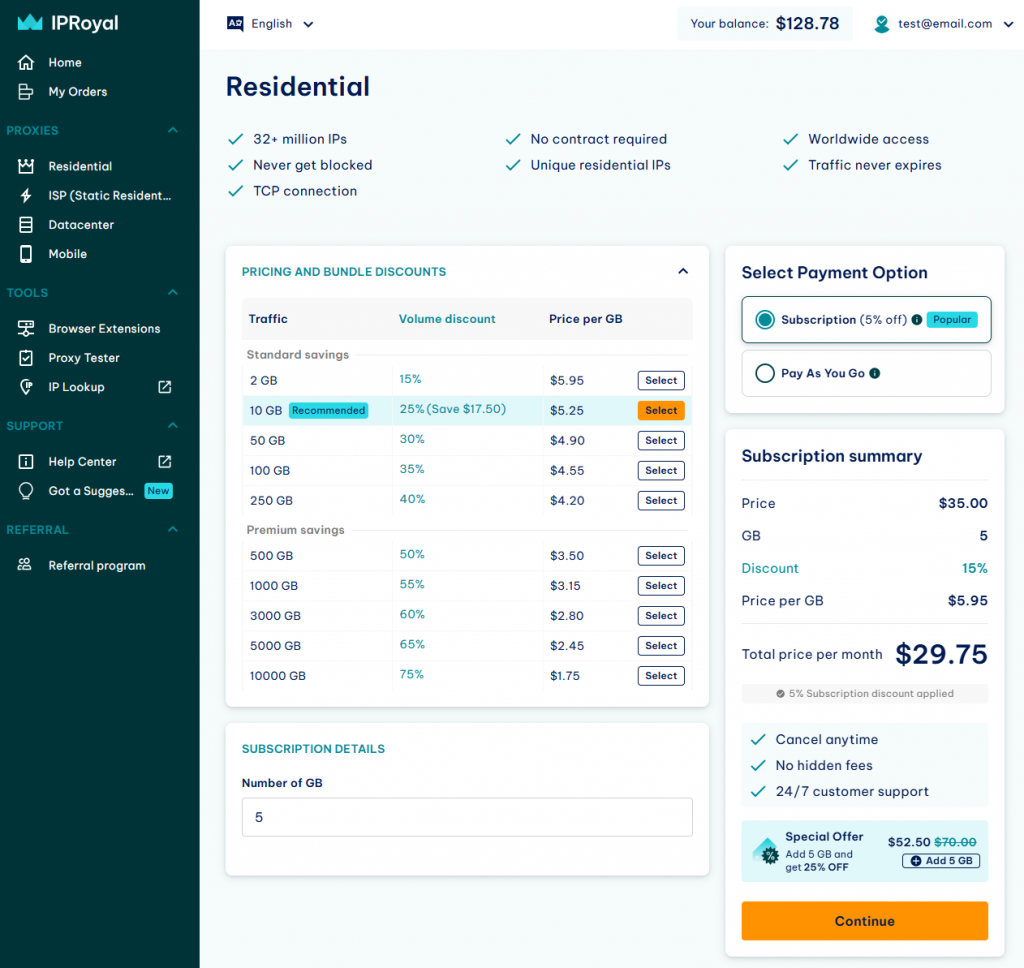
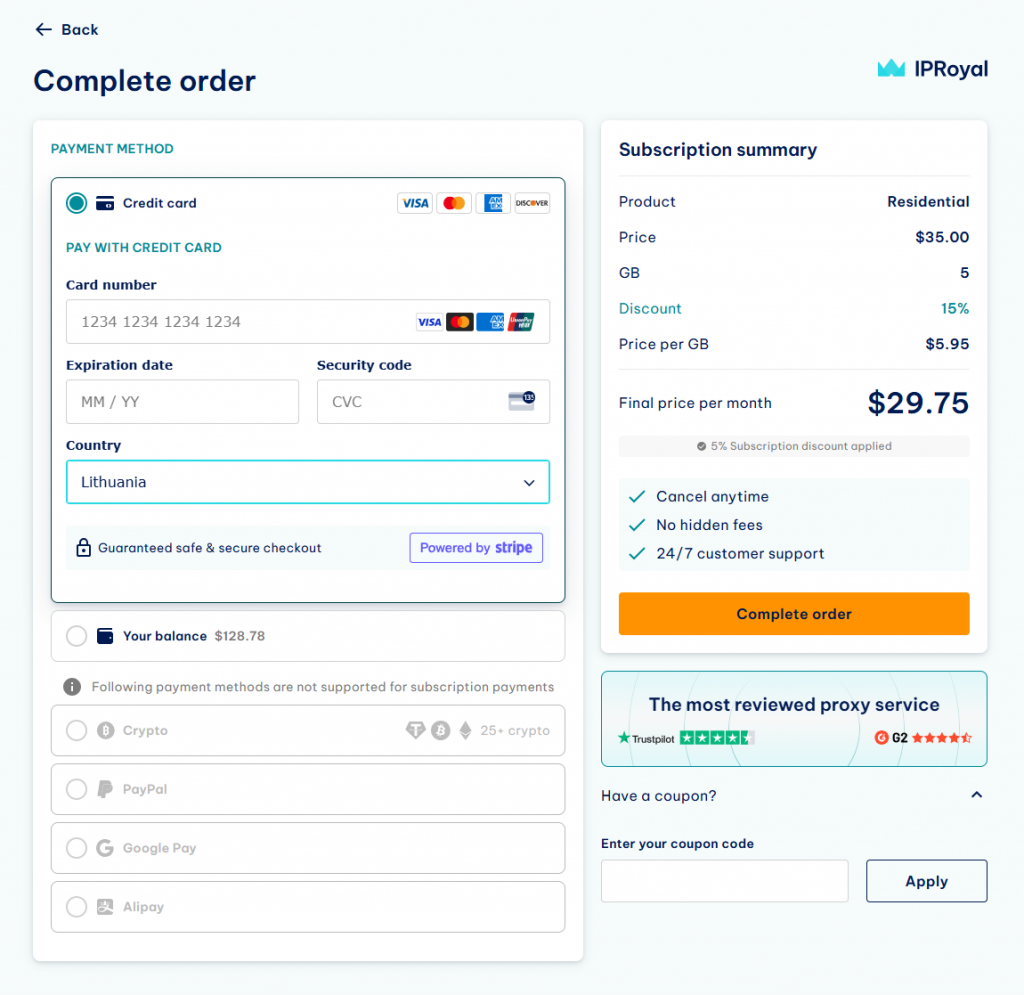
- Choose the Payment Option (3) and enter the amount of traffic (4) you want to purchase (in GB). Click the Continue (5) button. All discounts you’re entitled to will apply automatically.
- Select the payment method (6). If you have a coupon code, click the Have a coupon (7) button. Paste your code in the designated field (8) and click the Apply (9) button. Once you’re done, click the Complete order (10) button.
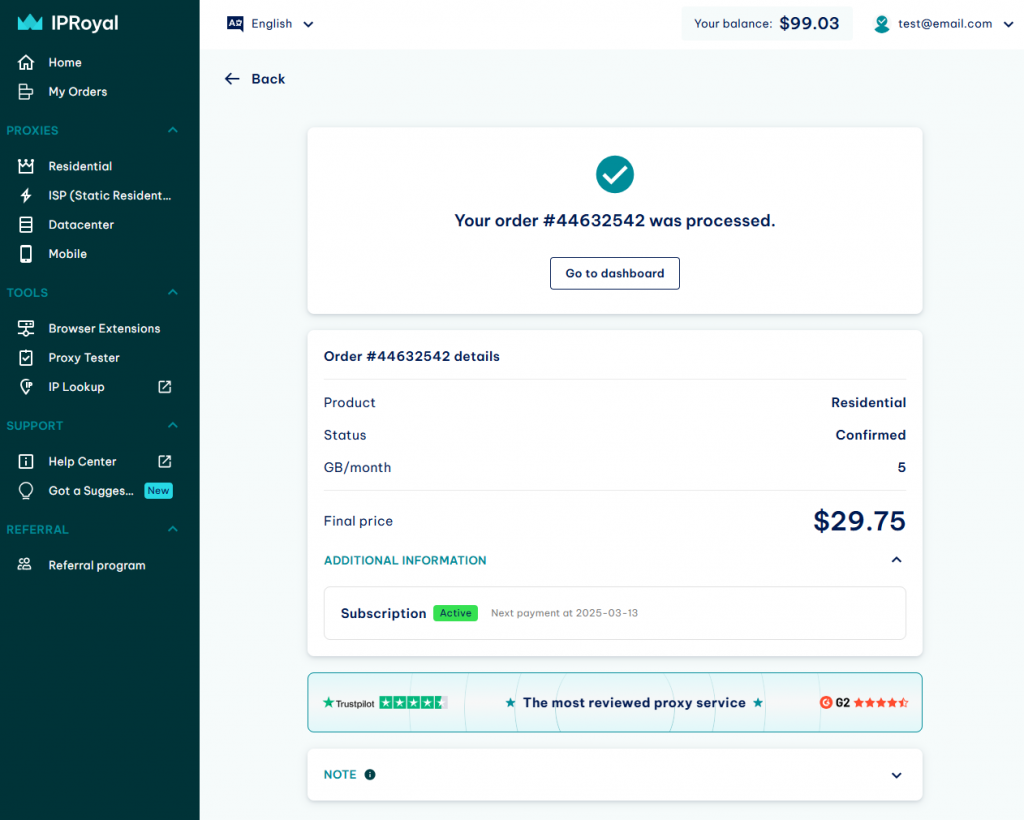
- You will get an order confirmation. Your residential proxies are ready to use.
Configuring Your Proxies
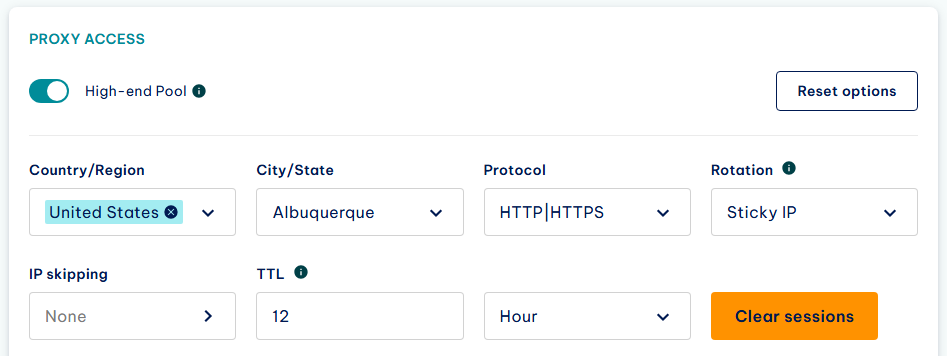
- Visit the residential proxies dashboard to configure your proxies. You can use the high-end pool (1) and configure country (2), city or state (3), protocol (4), rotation type (5), IP skipping (6), and session duration (7) (in seconds, hours, or days) if you’re using sticky sessions.
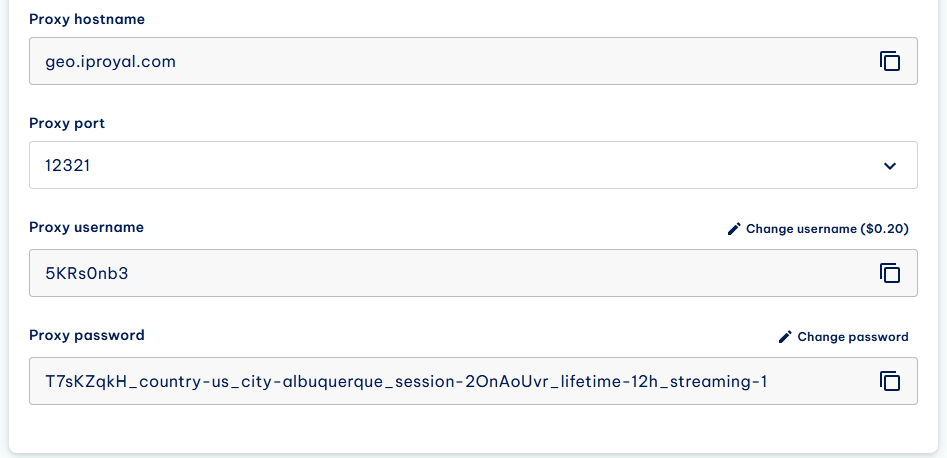
- Your proxy credentials will update automatically and you can copy them to DICloak.
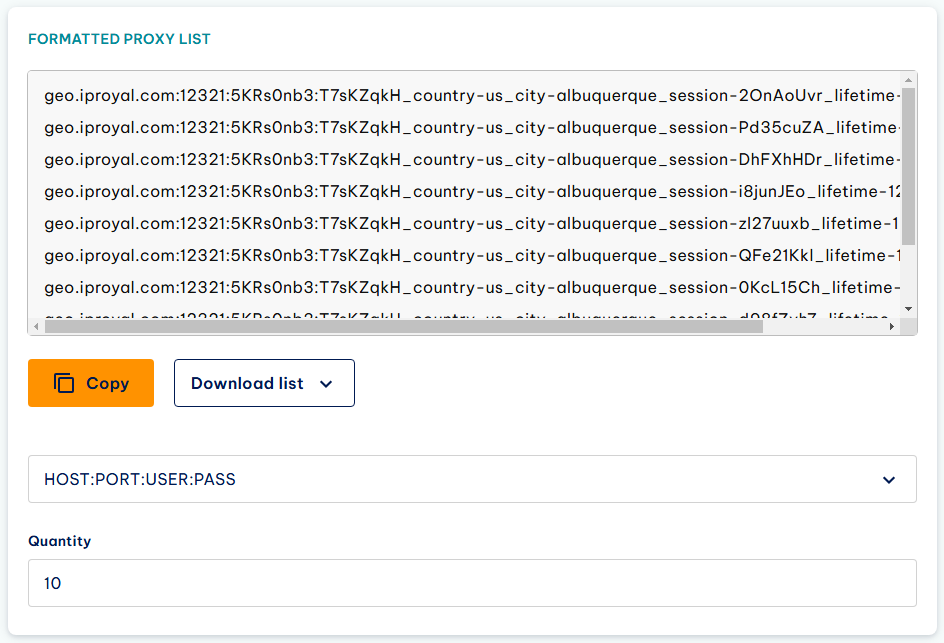
- If you want to add multiple proxies at once, scroll down to the Formatted proxy list and enter the number of sessions you need in the Quantity (8) field. Each line is a unique set of proxy credentials.
Configuring IPRoyal Proxy in DICloak
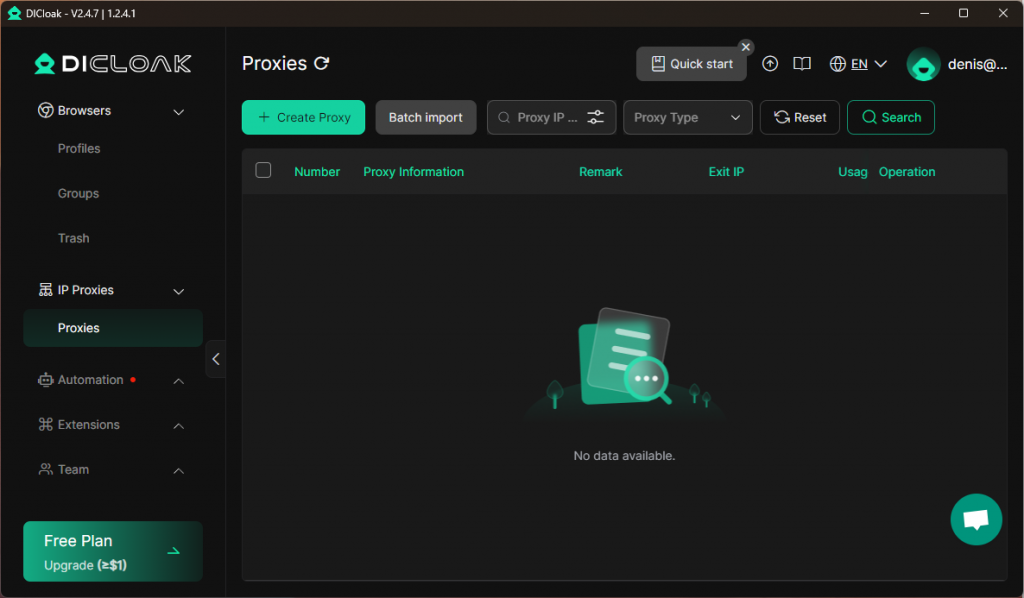
- Launch DICloak, click on IP Proxies (1) and then Proxies (2) in the menu on the left.

- Click the Create Proxy (3) button.
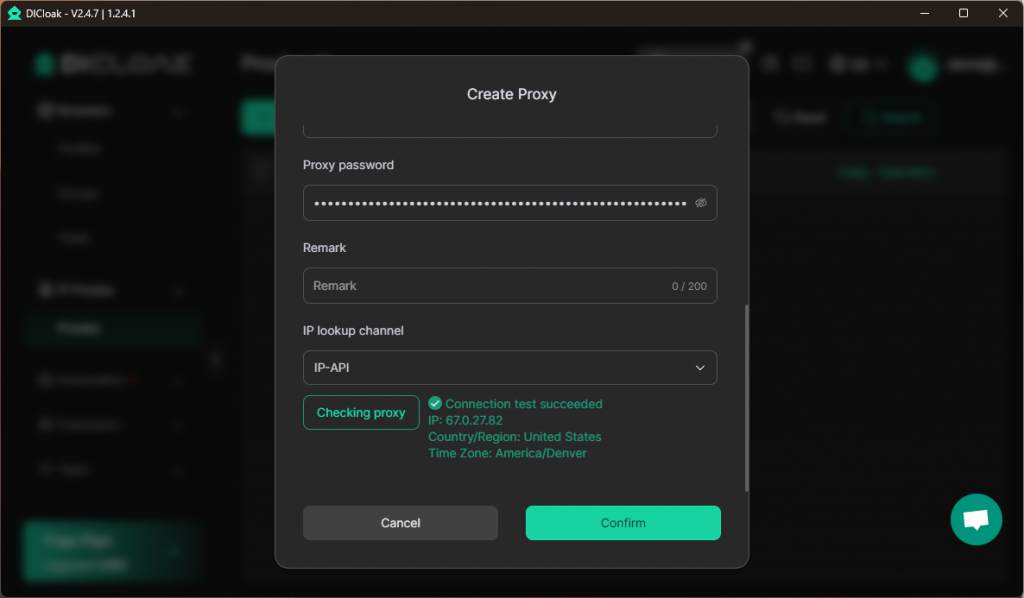
- Select the Proxy type (4) and copy the information from the IPRoyal dashboard (proxy host, proxy port, proxy account, and proxy password) into the appropriate fields (5).

- Scroll down and click the Checking proxy (6) button. DICloak will confirm the test was successful and display the proxy’s IP address, location, and time zone. Click Confirm (7) to save your proxy.
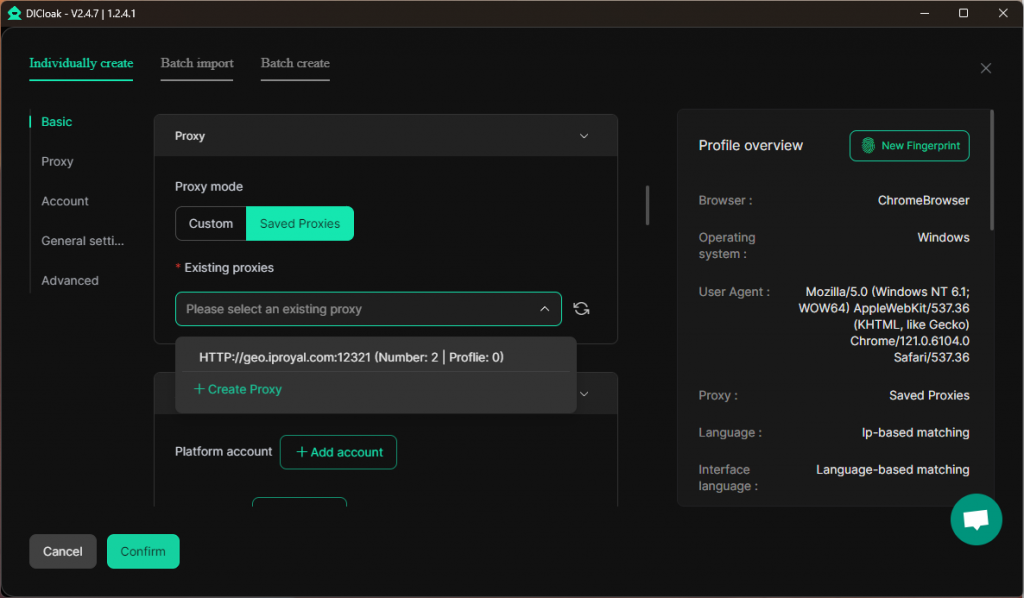
- You can assign your saved proxy to a profile by editing the profile settings. In the Proxy section, click on Saved Proxies (8), select your proxy from the list (9), and click Confirm (10).