MarsProxies is a premium proxy provider with a lineup of services tailored to various needs. These include residential, datacenter, ISP, sneaker, and mobile proxies.
Their most popular service, residential proxies, is a great option for DICloak due to gits reat features, pricing, and support. MarsProxies offers over 1 million real residential IPs in 190+ countries, with country and city-level targeting, HTTP(S) + SOCKS5 support, and customizable sessions.
Pricing starts at just $4.99/GB, but you can get discounts of up to 30% on bulk orders since the traffic never expires.
MarsProxies Residential Proxies Configuration
- Log into MarsProxies and select Residential (1) on the left. Purchase your traffic here and click on the Dashboard tab (2).

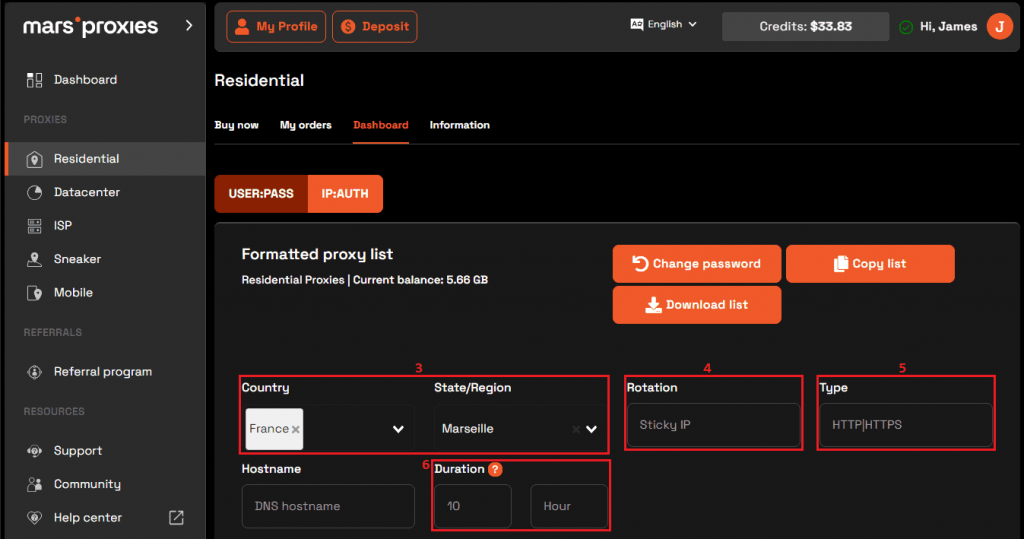
2. Configure your proxies. Choose the country (3), state/region/city (4), rotation (5), type (6), and session duration (7).
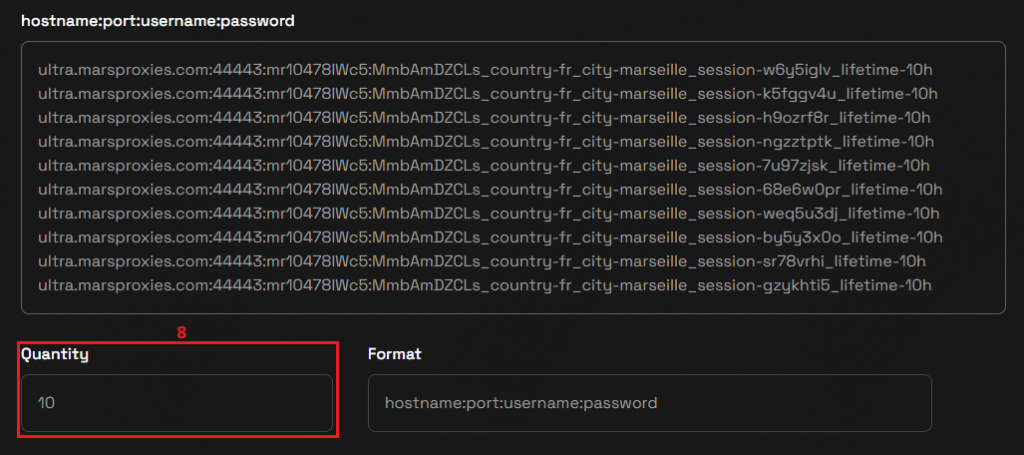
3. Scroll down to the hostname:port:username:password field. Each row here is a unique set of credentials. Enter the number of sessions you want to add to DICloak in the Quantity (8) field.
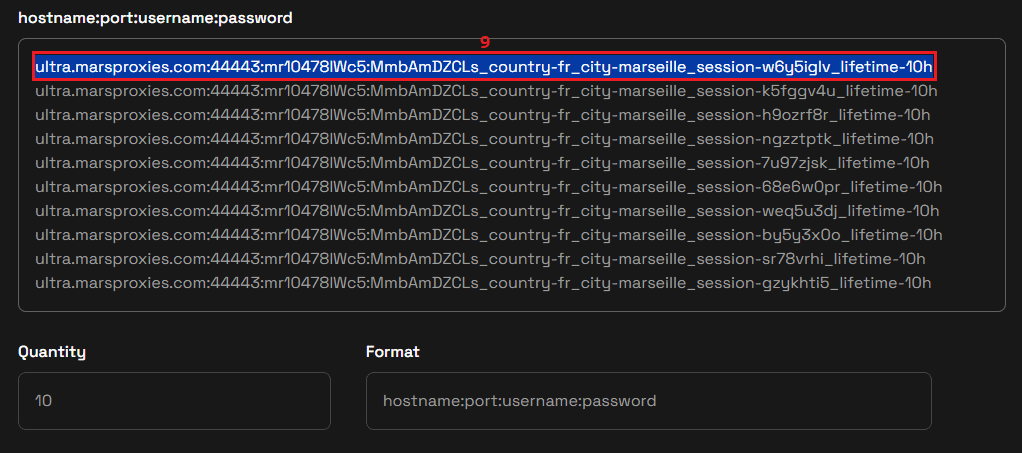
4. Select one set of credentials (9) and copy it to the clipboard.
Configure MarsProxies Proxy in DICloak
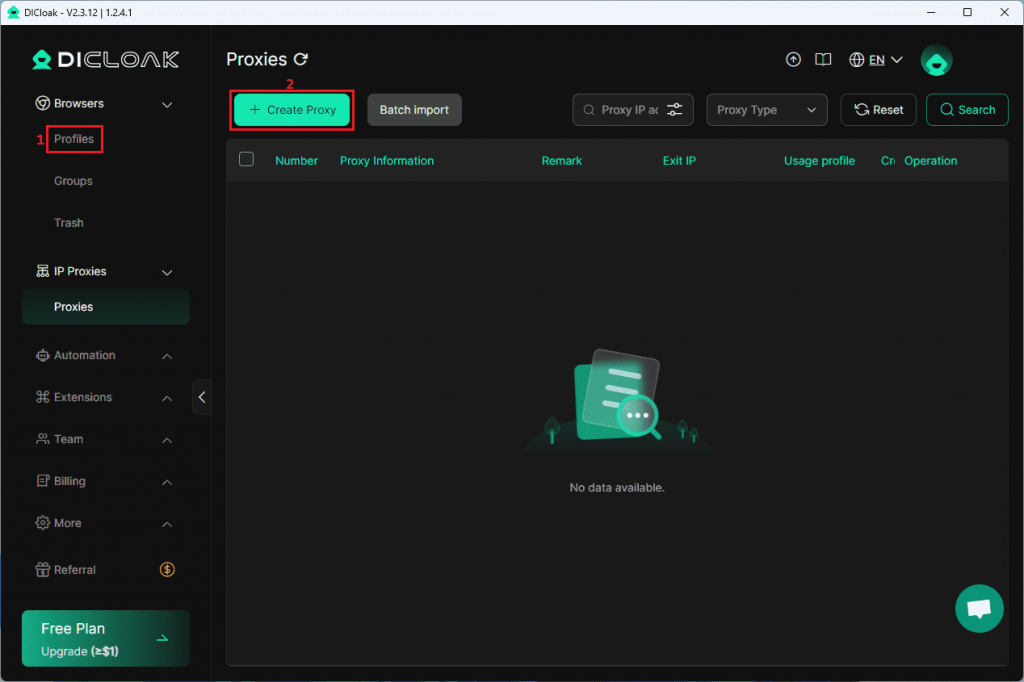
- Launch DICloak and select Proxies (1) on the left. Click the Create Proxy (2) button.
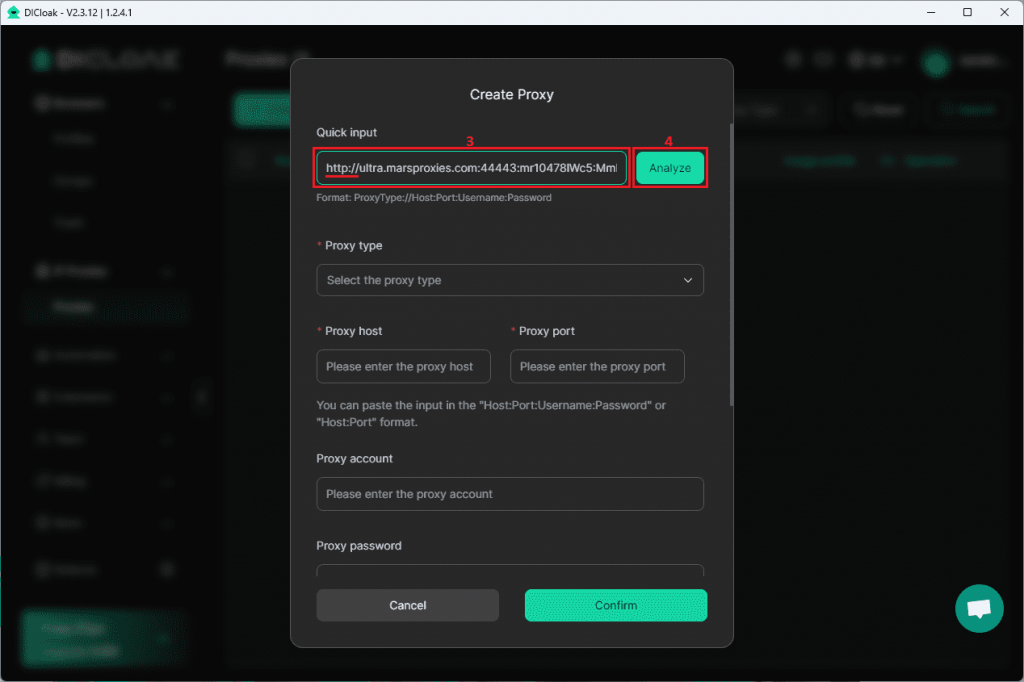
2. Add the proxy type (“http://” in this case) and paste your proxy credentials in the Quick input field (3). Click the Analyze button (4).
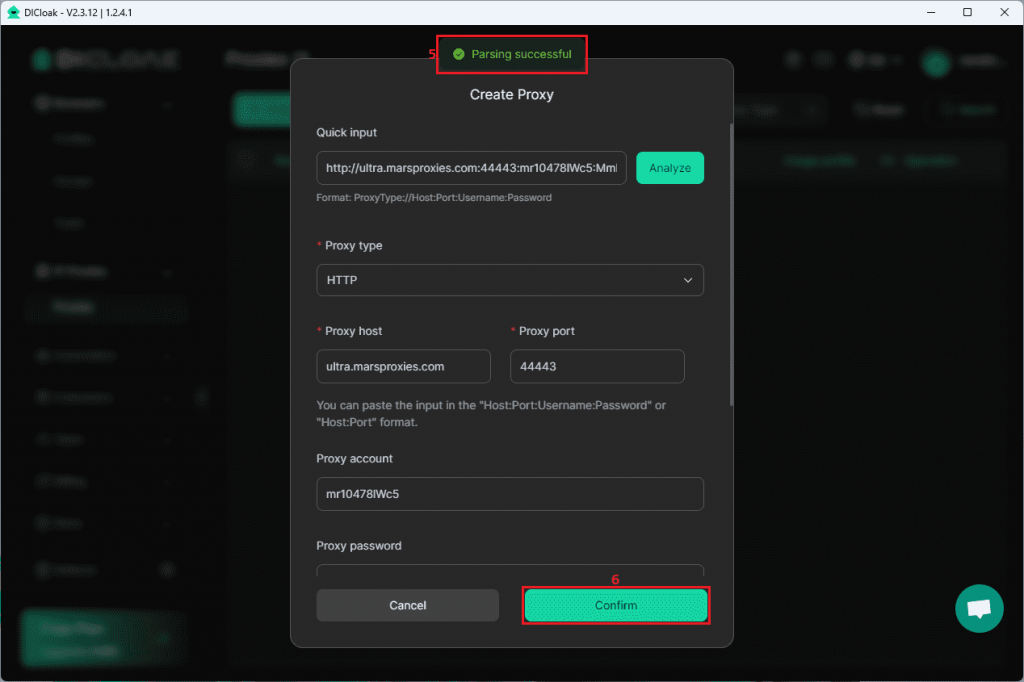
3. DICloak will use your credentials to fill in the necessary fields and inform you that the proxy parsing was successful (5). Click the Confirm button (6) to save your proxy.
4. You will see your proxy (7) in the list, along with its IP and location.
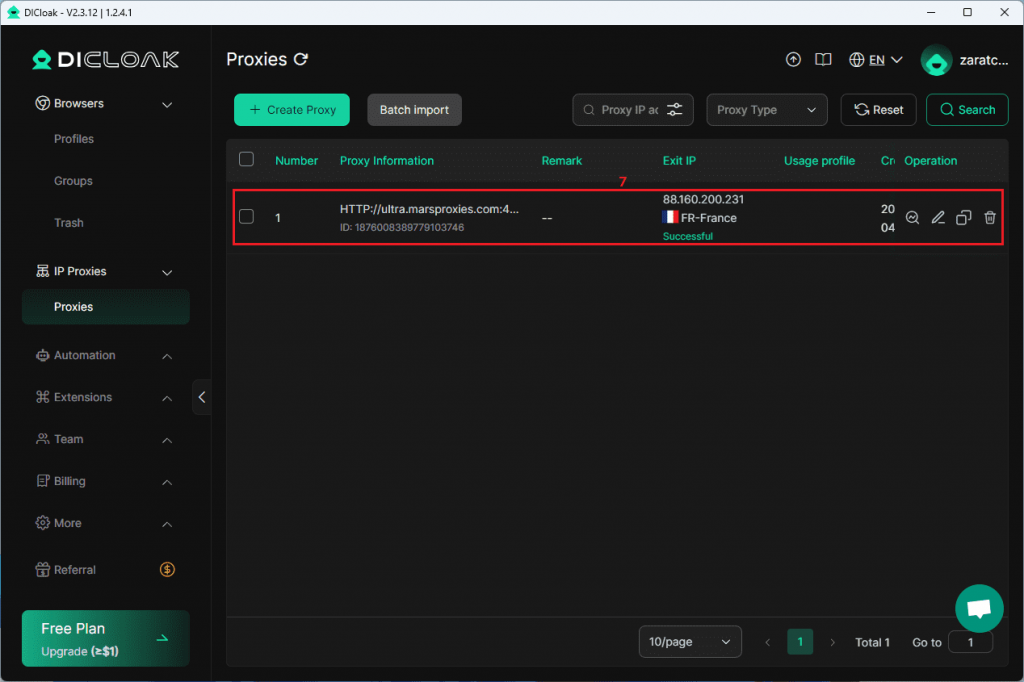
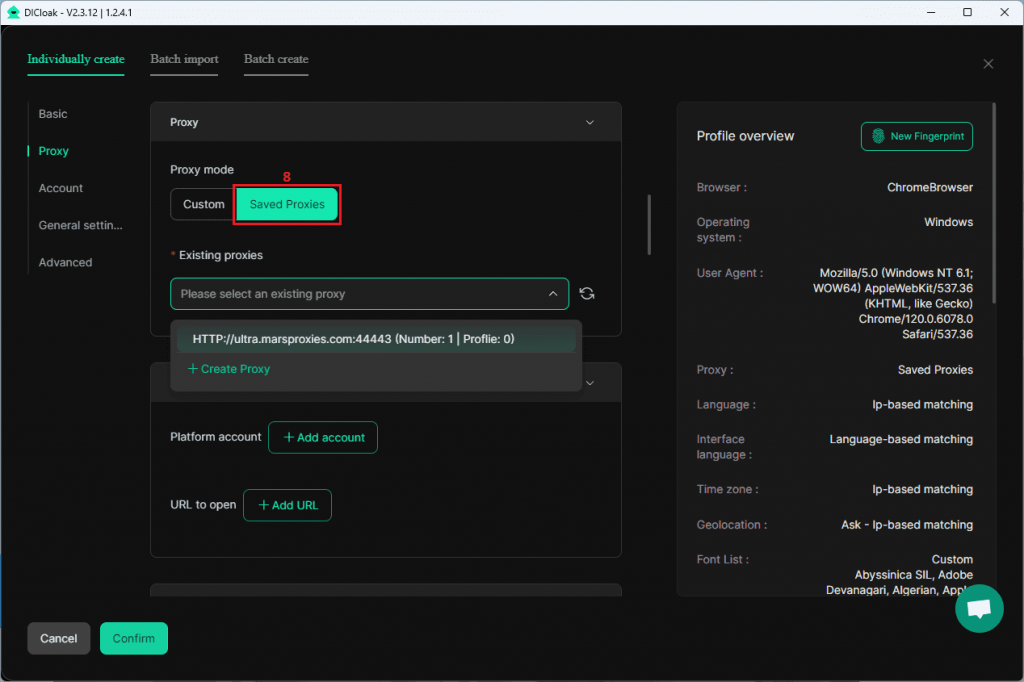
5. You can now use this proxy for your browser profiles by clicking on Saved Proxies (8) in profile creation/customization.