In this guide, we’ll walk you through the steps to configure Nsocks proxies within the DICloak Antidetect Browser. Follow the instructions below to ensure a smooth and secure integration.
Introduction of Nsocks Proxy?
Nsocks is a leading proxy provider offering high-performance residential, datacenter, and ISP proxy solutions across 195+ countries, with over 80 million residential IPs, ensuring users can easily target the exact location they need.
- Supports SOCKS5 and HTTP(S) protocols
- Country, city, postal code, ISP-level targeting
- 99.9% IP availability, with no charge for inactive IPs
- Unlimited bandwidth and sessions, with 12+ hour uptime on average
- Multiple integration options, including proxy software, user authentication, and API
- Easy integration with fingerprint browsers, emulators, and third-party tools
Quick and simple setup — deploy in seconds
Nsocks Proxy Configuration
Please refer to the tutorial:
- Dynamic Residential Proxy IP Extraction: [Account and Password Extraction and API Extraction Tutorial]
2. Unlimited traffic package extraction IP: [Withdrawal encryption withdrawal tutorial]; [API withdrawal tutorial]
3 . Extracting IP using a static residential proxy: [Account Encryption Extraction Tutorial]
Configuring Nsocks Proxy in DICloak
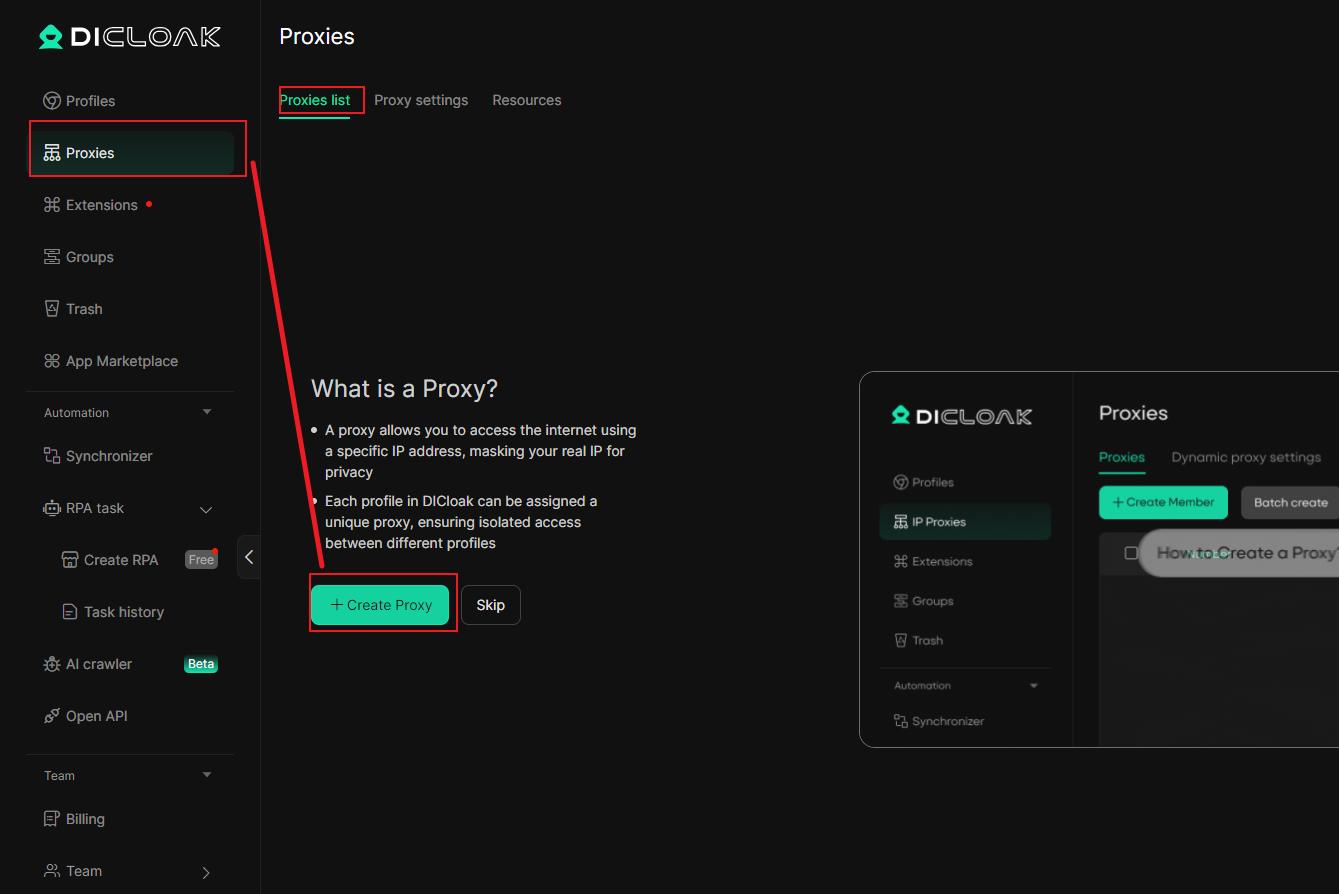
1 . Launch DICloak, click on Proxies (1) in the menu on the left. Click the Create Proxy (2) button.
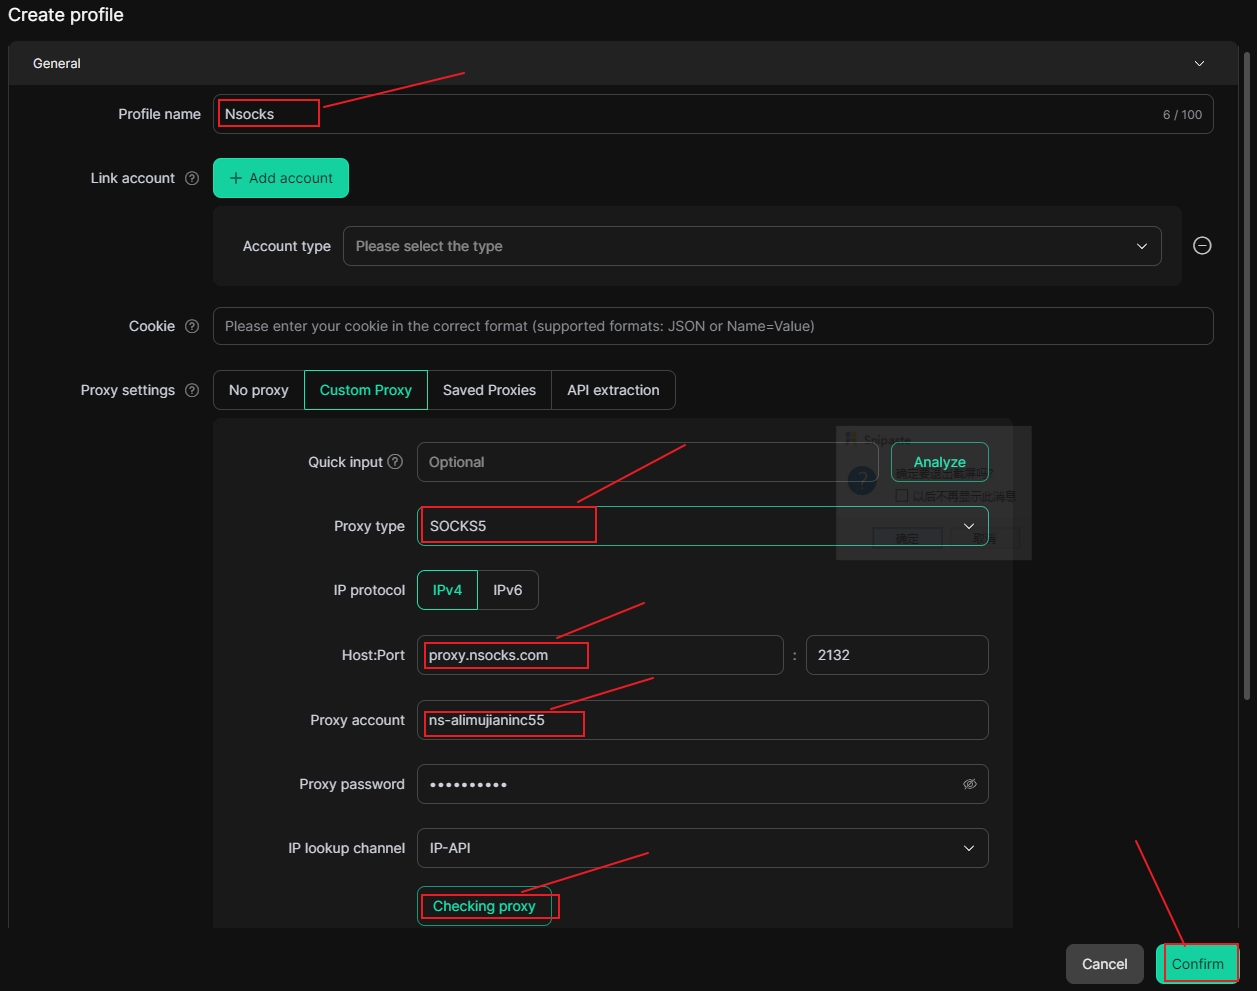
2. Select the Proxy type and copy the information from the Nsocks dashboard (proxy host, proxy port, proxy account, and proxy password) into the appropriate fields.
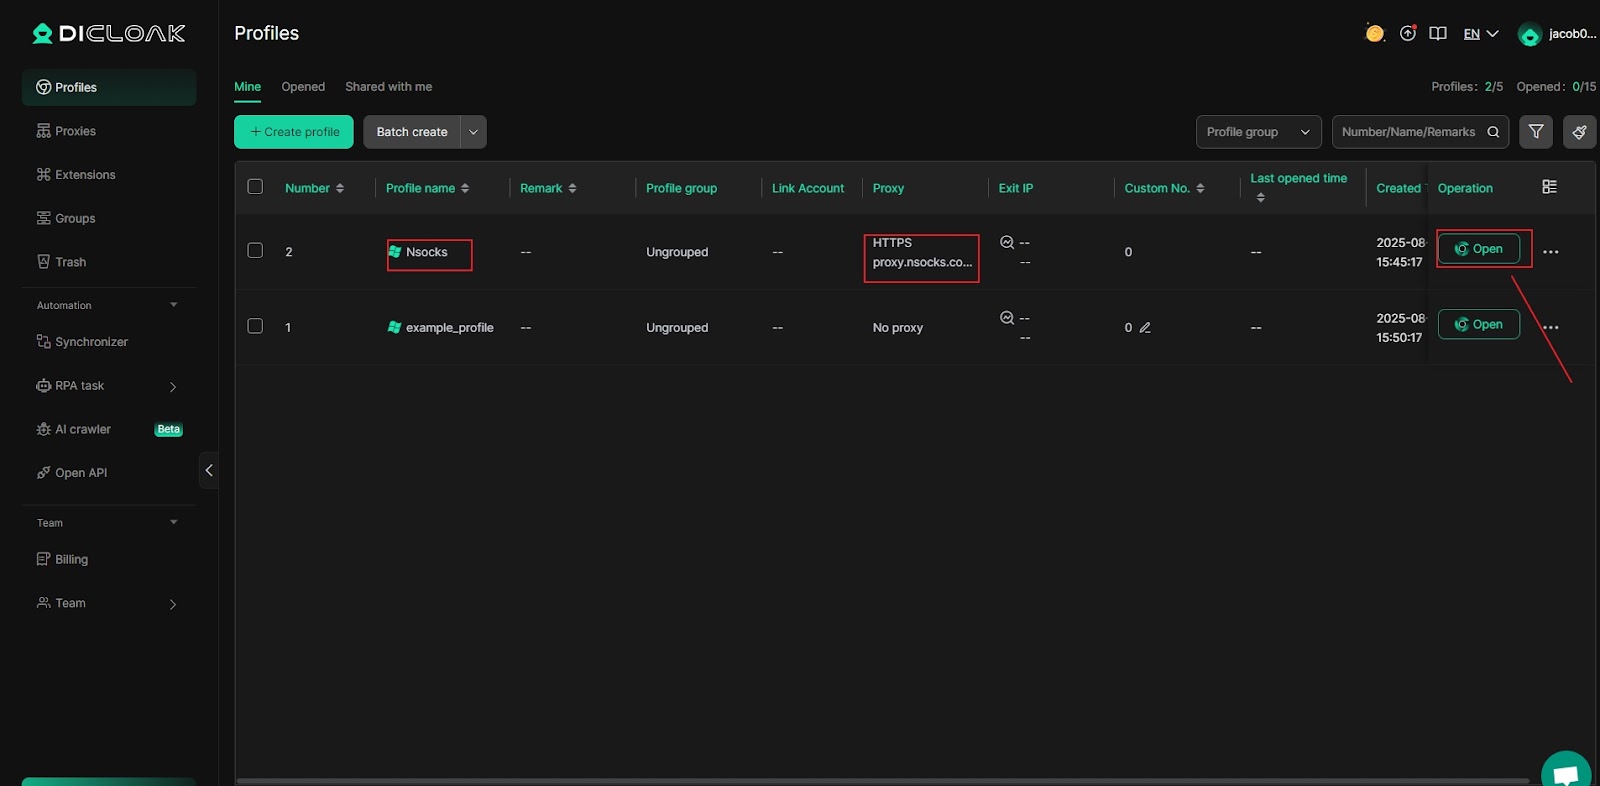
3. Click the “Open” button. If the IP address displayed on the browser page is consistent with the IP address extracted by the Nsocks client, it means that the browser environment has been successfully created. Then you can use it.