Want to shield your data and disguise your online presence from third parties? DICloak is your ideal solution. When combined with Ping Proxies, you’ll not only eliminate your digital footprint but also avoid bans and restrictions. Discover how to effectively pair both tools in our comprehensive guide.
Integrating DICloak with Ping Proxies
Even the most secure browser may not provide complete protection for your data. As technology evolves, hackers continually develop new methods to target vulnerable users. For maximum security, it’s advisable to implement additional measures to safeguard your online presence.
We suggest pairing the cutting-edge DICloak anti-detect browser with our dependable Ping Proxies. Whatever your requirements, Ping Proxies has the right proxy solutions, including static residential ISP, rotating residential, and datacenter. In this article, we’ll provide a guide for integrating a Ping Proxies’ proxy with DICloak.
What is DICloak?
DICloak is an essential anti-detect browser offering numerous benefits. Users can conceal their IP addresses and circumvent geographic limitations. Built on Chrome’s foundation, DICloak alters your digital fingerprints to ensure anonymity.
Beyond its capabilities, this browser features an intuitive interface across both its website and applications. While DICloak functions effectively on its own, integrating it with Ping Proxies’ rotating residential service creates an even more stable connection.
How to Link DICloak With Ping Proxies
There are two stages to linking DICloak with Ping Proxies, with each of them having several steps to follow. In this section, we’ll provide, in detail, how to go about it.
Stage One
This stage shows a step-by-step guide on how to download and install the DICloak software on your PC. Here is what to do:
Step 1: Sign Up for an Account With DICloak

Head to the official DICloak website (https://dicloak.com) and click on the “Sign In” button. This opens a new page with the “Sign Up” button. After clicking it, the platform will require the user to provide an email and password.
There is also the option to use a Google account to create an account with DICloak . Then, before ticking the box, make sure to read the terms and conditions.
Step 2: Download the DICloak Software on Your PC
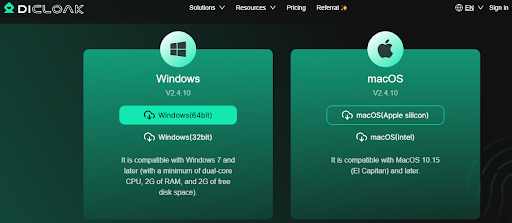
Go back to the DICloak homepage and click on the green “Download” button. On the next page, select the right software for the PC (either Windows or macOS). Wait for the download process to complete, then install the software.
Stage Two
For the other part of this process, we’ll provide a guide to get the proxy from Ping Proxies and link it with the DICloak browser. Follow the instructions below.
Step 1: Register or Login to Ping Proxies
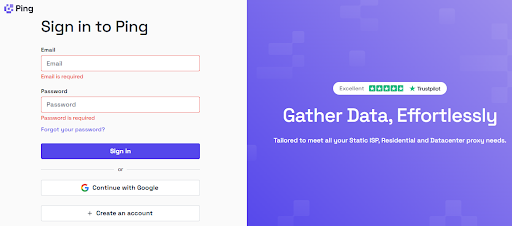
Load up the Ping Proxies platform and register or log into your account. To sign up, the platform requires an email, full name, and password.
Step 2: Head to Residential Proxy Generator
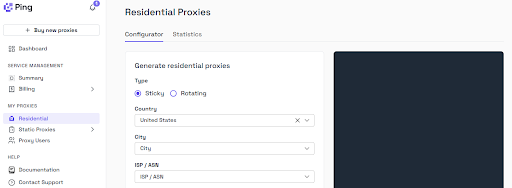
After logging in, the dashboard page will be shown on the screen with a side menu bar. Click on the “Residential” button under the “My Proxies” section. If you don’t have residential proxies, you can purchase them here [https://pingproxies.com/proxy-service/residential-proxies].
Step 3: Generate Proxies

Select the preferred country and the city, and enter the number of proxies. Next, click the “Generate” button, then the platform will list them in the dark section. Each proxy will have a username, port, address, and password.
For example:
Address/Host Name: residential.pingproxies.com
Port: 1087
Username/Account: dWDCX0kjHTEB2A0_c_IE_s_VSCOAYLIGV
Password: Js6fgFJ1DQ
Step 4: Add and Set Them Up in the DICloak Browser
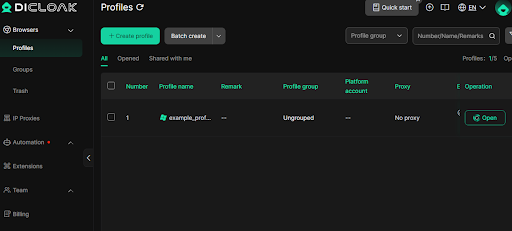
After copying the proxy from Ping Proxies, go to the DICloak browser and log into your account. Next, click on the green “Create profile” button.
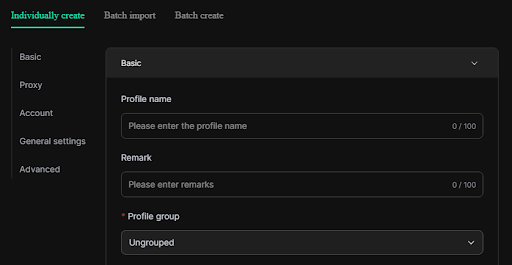
This takes you to a new page to set up the proxy. However, the first thing to do is to enter the preferred profile name.
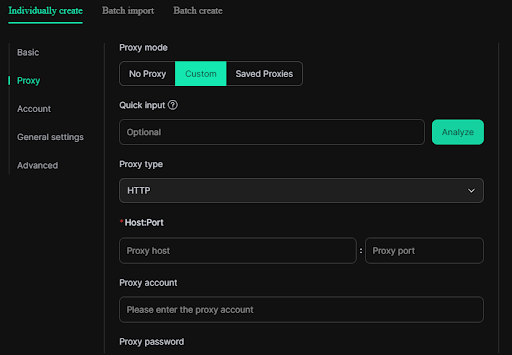
Then, click on the “Proxy” option on the side menu. This moves the page to the proxy section, where the next thing to do is select the custom button and change the proxy type to “HTTPS”. Enter the proxy information from Ping Proxies in their right boxes.
Step 5: Test Them
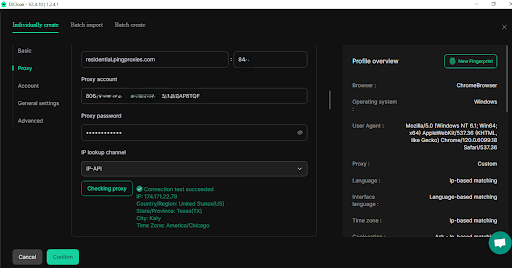
After entering the proxy details, click on the “Checking proxy” button to verify if the connection was successful. It will also show the information of the proxy as seen in the image above. Click on the confirm button to complete the profile and proxy setup.
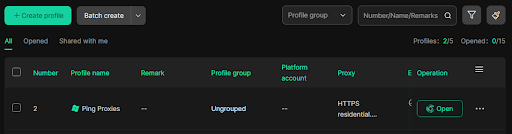
To start browsing with the proxy, click on the “Open” button. This opens up a browser window with the confirmed proxy details. Just open a new tab and start browsing with better online protection.