Proxy302 is the most flexible global premium proxy, offering pay-as-you-go options, a comprehensive range of proxy types, and a clear, efficient dashboard as its key features.
Proxy302 supports HTTP and SOCKS5 protocols, offering over 65 million IPs with flexible pay-as-you-go pricing. It provides a range of proxy options, including rotating and static residential proxies, as well as datacenter proxies. Users benefit from a clear and efficient dashboard, a free Google Chrome extension, and exceptional 24/7 customer support.
New users can enjoy a $1 free trial with a referral code to test all proxy types. Proxy302 is ideal for social media marketing, cross-border e-commerce, advertising verification, brand protection, tourism intelligence, market research, website testing, SEO monitoring, and more.
Proxy302 Residential Proxies Configuration
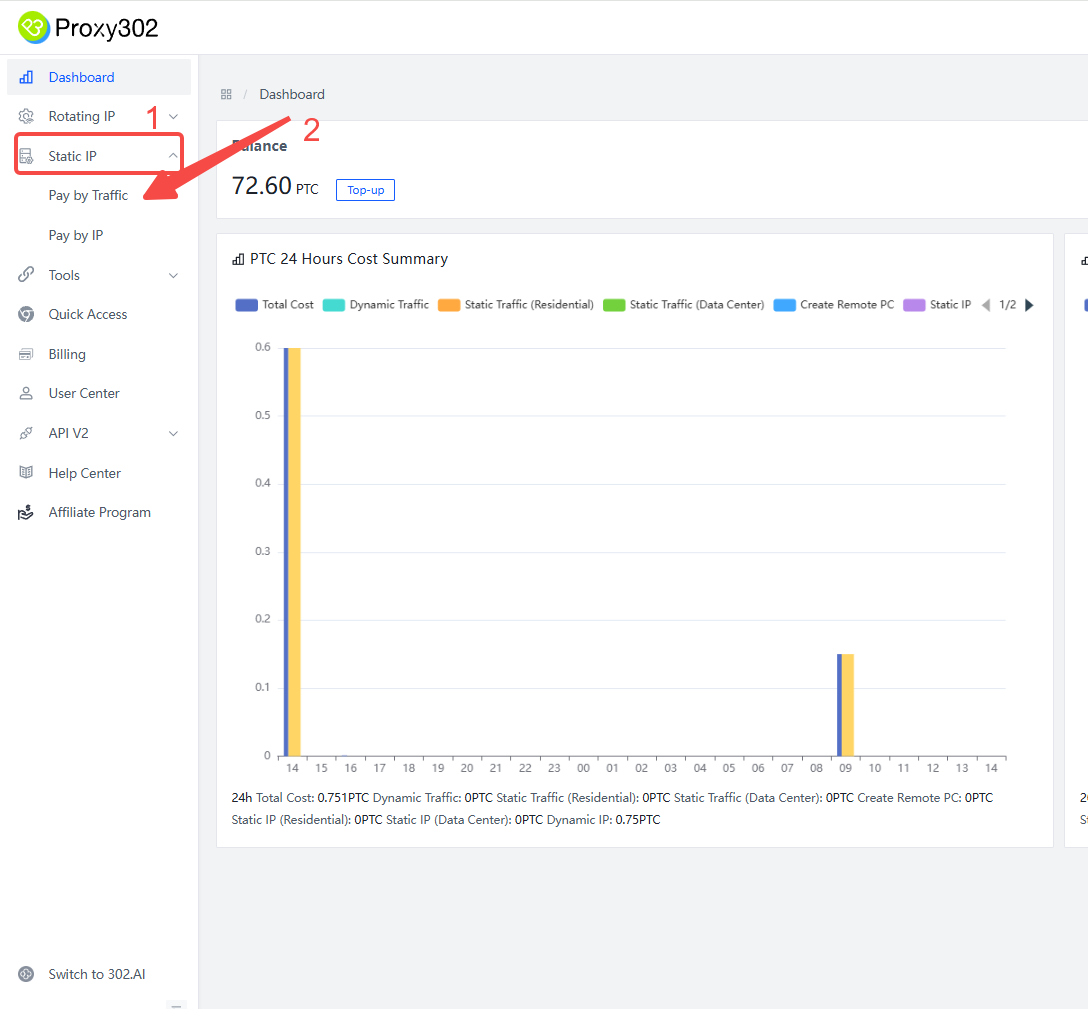
- Log in to Proxy302 and select Static IP (1), and Pay by Traffic (2).
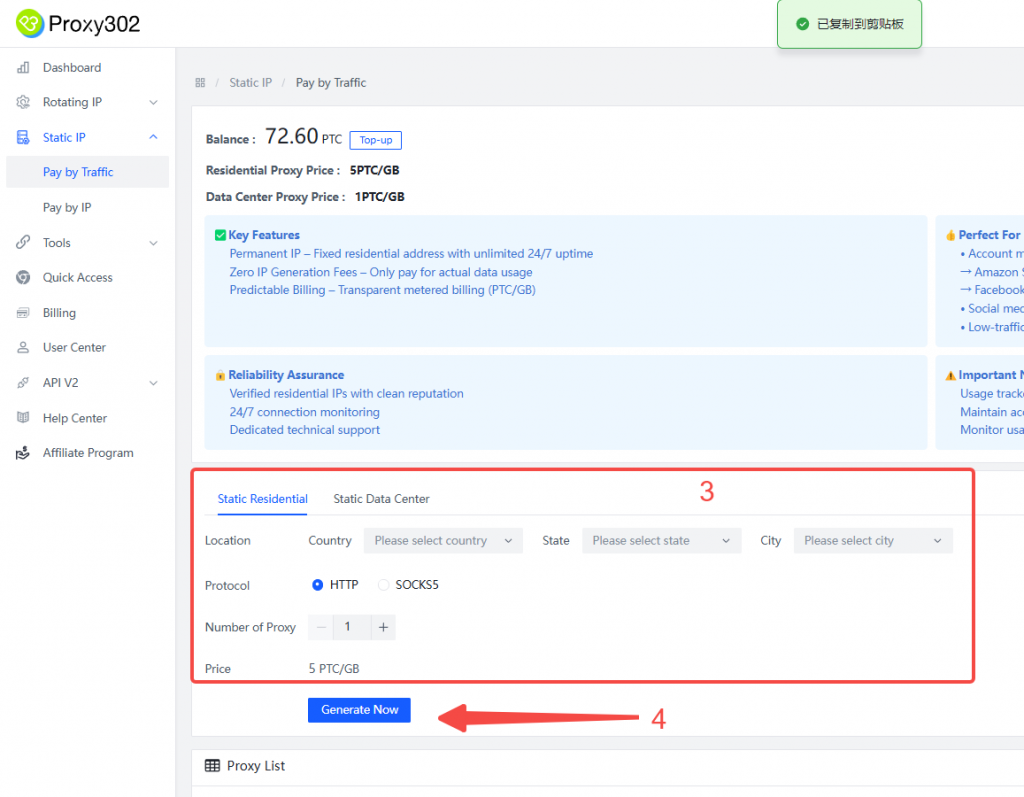
- Example as [Static IP-Pay by Traffic]
- Configure your proxies. Choose the Location, Protocol, and Number of proxy(3). Then click Generate Now(4).
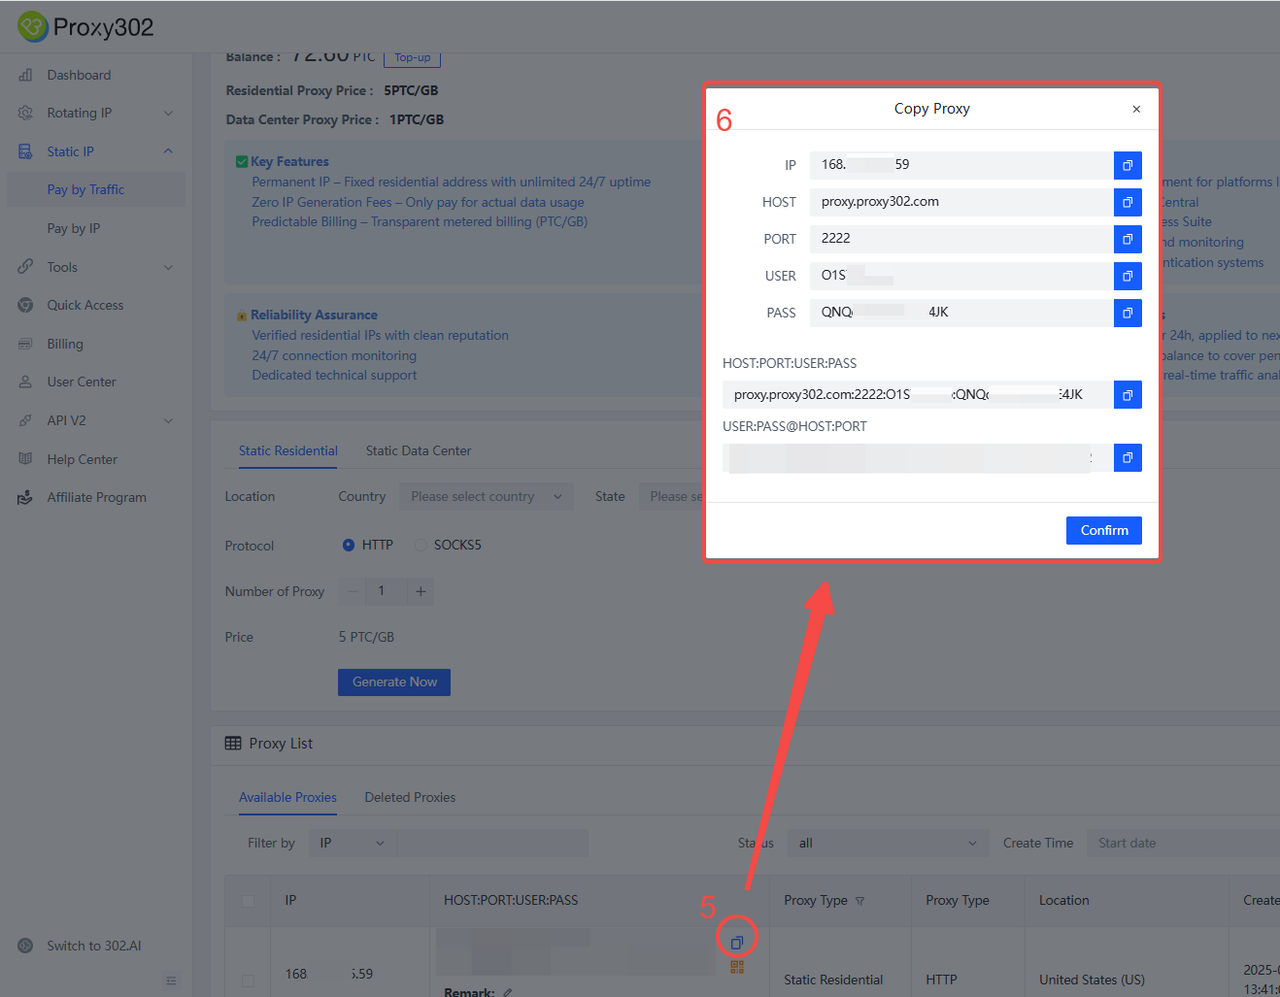
3. Copy Proxy302 proxy information [HOST: PORT: USER: PASS]
Configure Proxy302 Proxy in DICloak
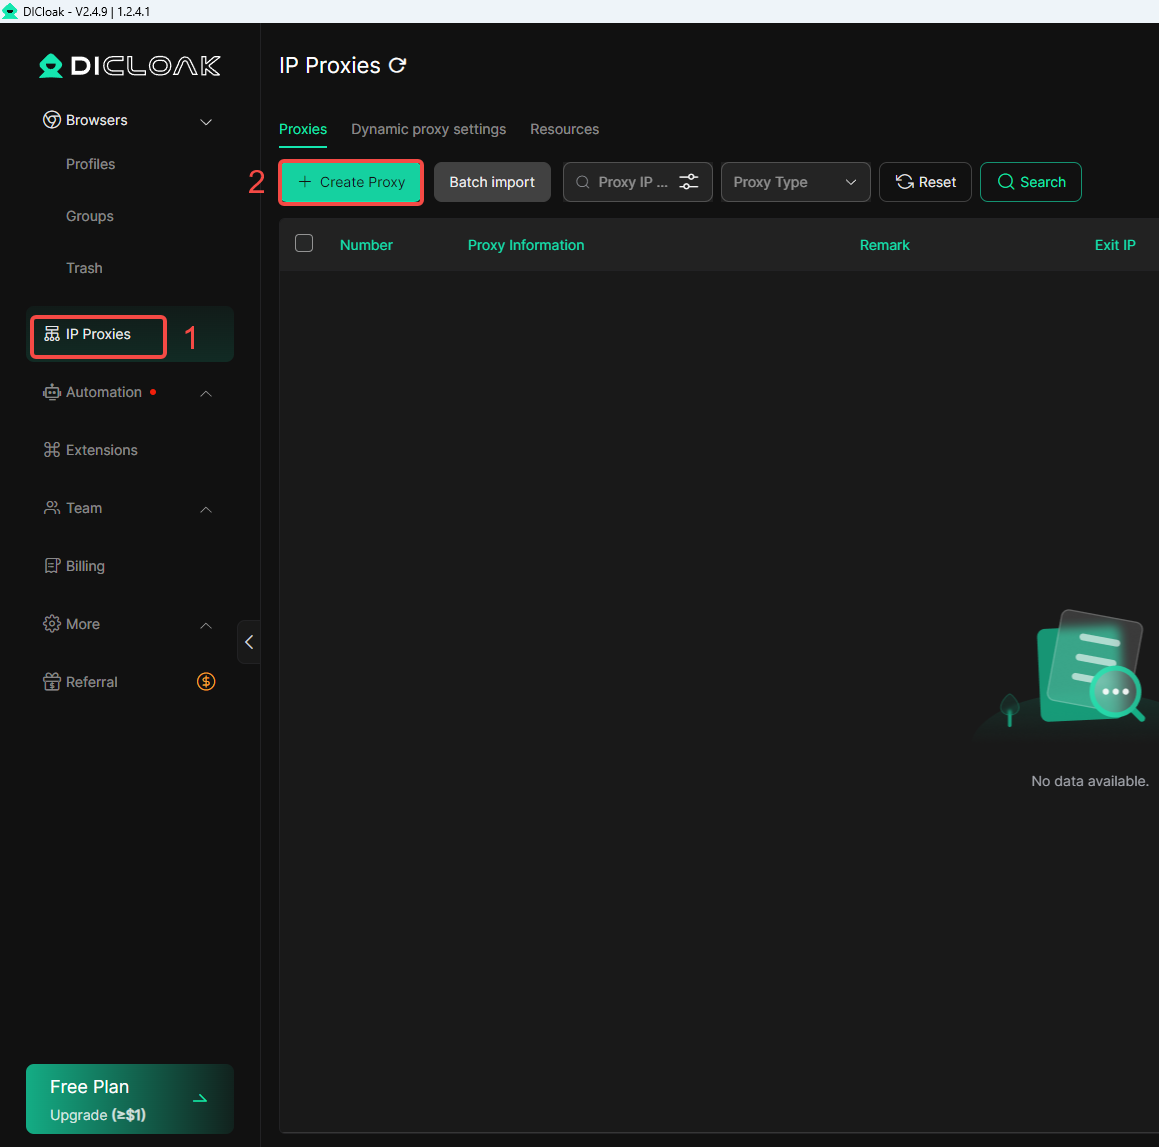
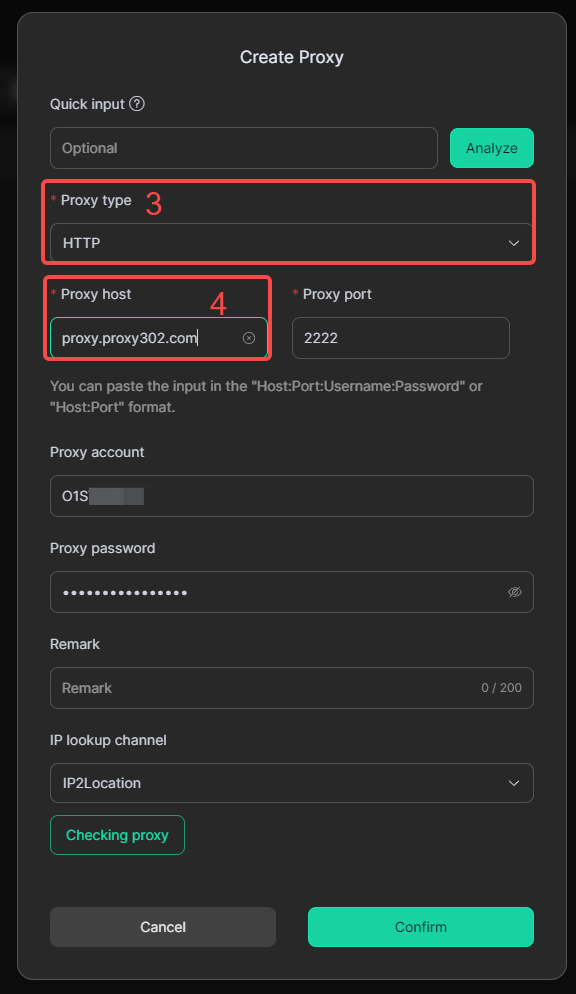
- Log in to DICloak and find IP Proxies (1) on the left navigation bar. Then Click Create Proxy (2).
- Select the Proxy type (HTTP or socks5), then click Proxy host (3) and paste Proxy302 proxy info [HSOT: PORT: USER: PASS], proxy port, account, and password will be automatically filled in.
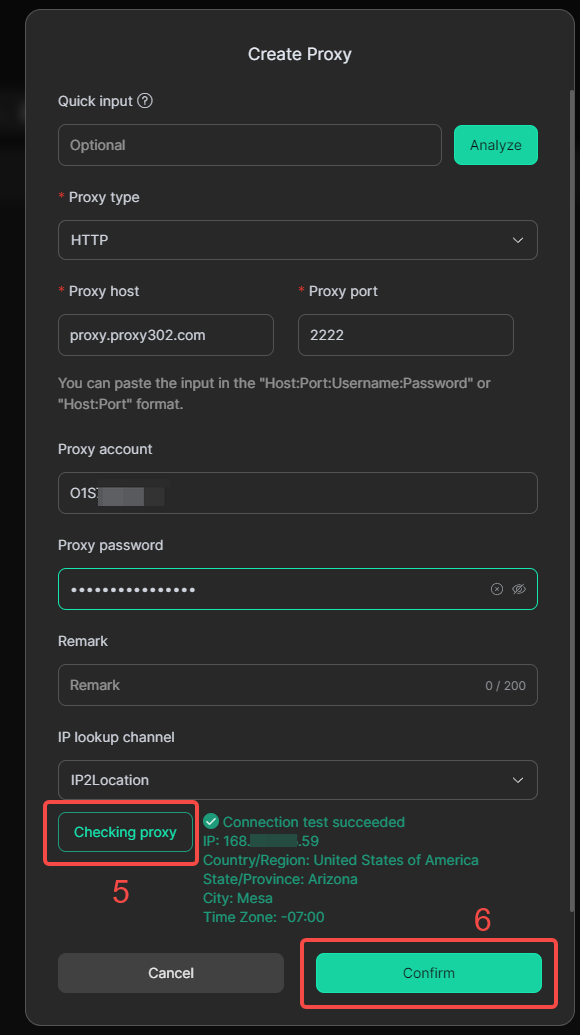
- Click “Checking Proxy” to verify if the proxy is successfully connected. If the connection is successful, click the “Confirm” button to complete the proxy setup.
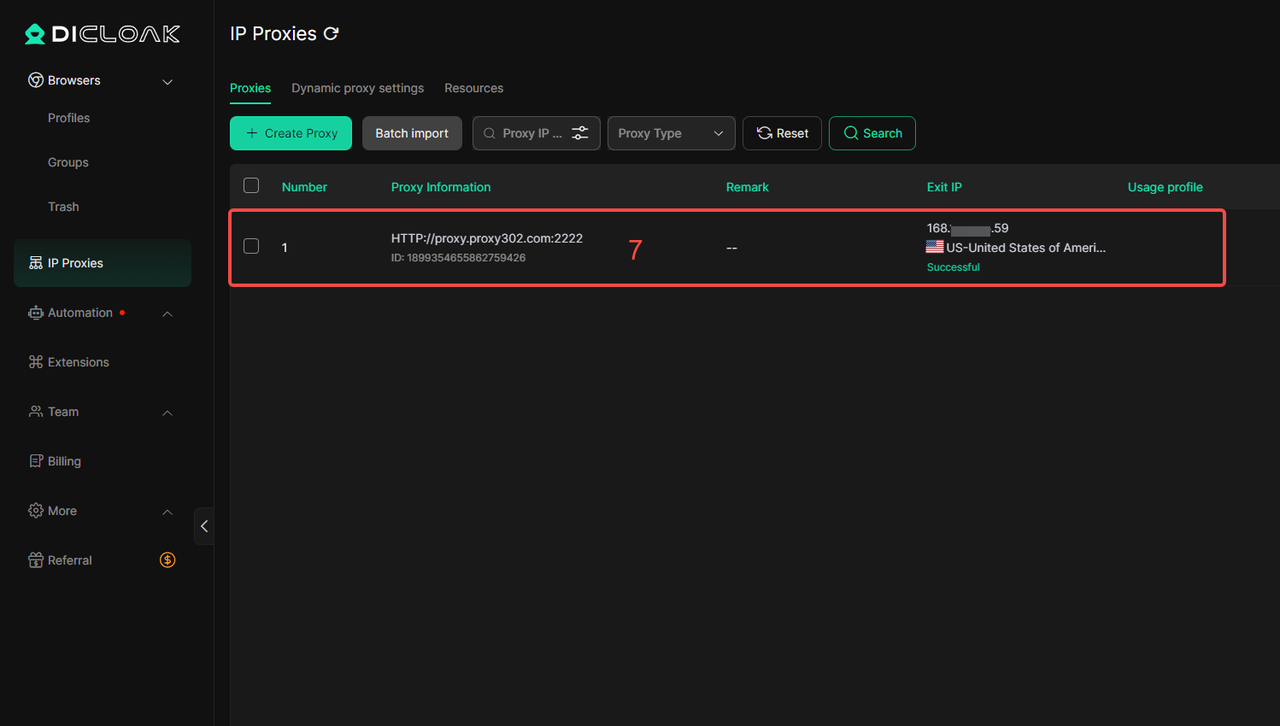
- You will see proxy infomation(7) in the list, along with its IP and location.
Once the proxy is set up, you can use it when creating browser profiles by selecting “Saved Proxies” and choosing the proxy you have set up.
