Introduction of RapidProxy
RapidProxy delivers premium residential and ISP proxies designed for efficient, large-scale data extraction. With a pool of over 70 million clean IPs across 220+ regions, it helps users easily overcome geo-restrictions, CAPTCHA challenges, and IP bans. Ideal for web scraping, SEO monitoring, social media management, and e-commerce intelligence.
What sets RapidProxy apart is its user-friendly, flexible access model. Enjoy free testing before purchase, with no expiration on traffic packages. HTTP(S) and SOCKS5 protocols are fully supported, offering 99.9% uptime and unlimited concurrent sessions—ensuring fast, reliable, and secure connectivity for every use case.
Configure RapidProxy Proxy in DICloak
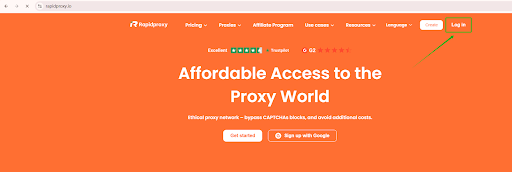
Step 1: Log in to the RapidProxy website
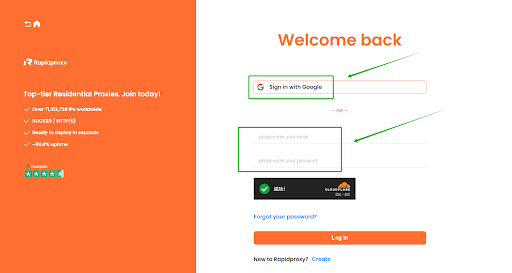
Go to the website and click 【Log in】. Rapidproxy offers Free test and Traffic that never expires. There are two login methods:
- Sign in with Google
- Log in with email and password

Step 2: Go to the dashboard
After logging in, go to the RapidProxy dashboard and click: 【Get Proxy】 → 【Sub-account list】 → 【+Add】
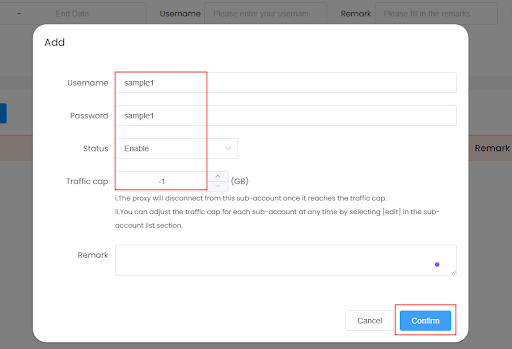
Step 3: Enter sub-account information
In the pop-up window, fill in the following:
- username to 12 letters and numbers
- password to 12 letters and numbers
- Set Status to 【Enable】
- Traffic cap (GB): enter【 -1 】for unlimited traffic
Then click 【Confirm】 to save the sub-account.
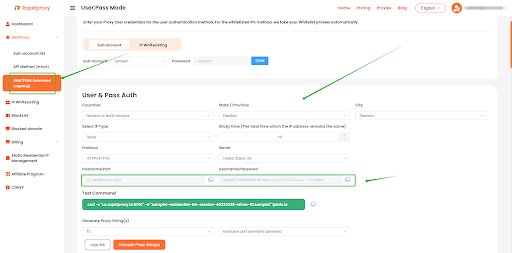
Step 4: Configure proxy parameters
- Go to the【User:Pass (Advanced targeting)】 page.
- Configure proxy parameters as needed, including specifying country/region, rotation interval, proxy protocol, etc.
- Copy the proxy information generated by Rapidproxy and import it into your proxy software for use.
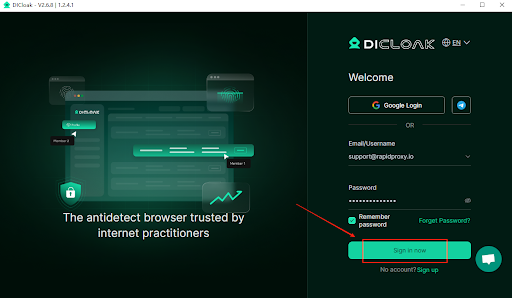
Step 5: Download and Install DICloak
Open the DlCloak browser and click【Sign in now】 to access your account.
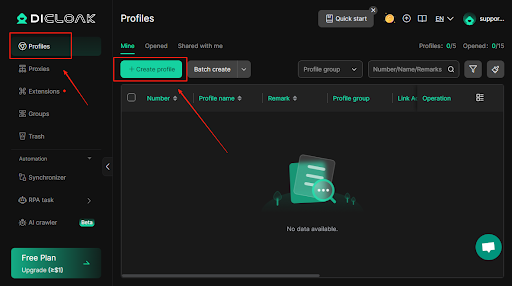
Step 6: Create a New Proxy Profile
Go to【Profiles】 and click【Create Profile】to begin creating a new configuration.
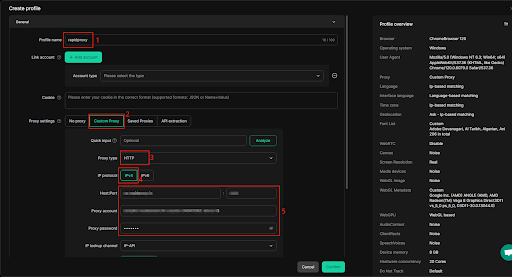
Step 7: Configure Proxy Settings
- Enter a name for your profile, such as “rapidproxy”.
- In the Proxy Settings section, locate the 【Custom Proxy】 field.
- Set Proxy Type to【HTTP】.
- Choose【IPv4】for IP Protocol.
- Paste the proxy information provided by RapidProxy, including:IP Address:Port:Username:Password
Note: This example uses HTTP, but RapidProxy supports HTTP(S)/SOCKS5 protocols.
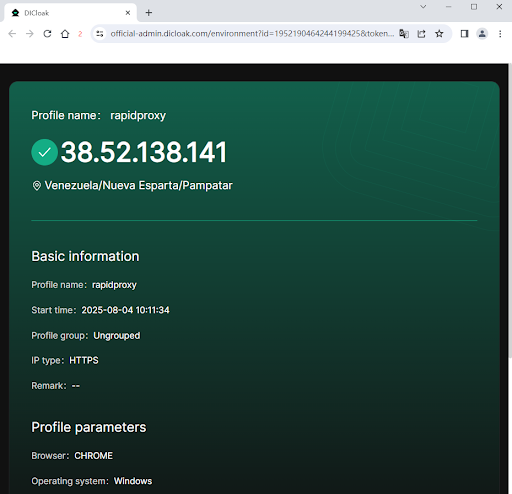
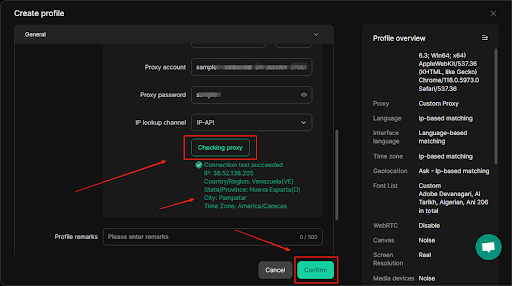
Step 8: Test the Proxy Connection
After entering the settings, click 【Checking Proxy】to verify the connection. If successful, you’ll see the proxy details displayed. Click【Confirm】to save your configuration.
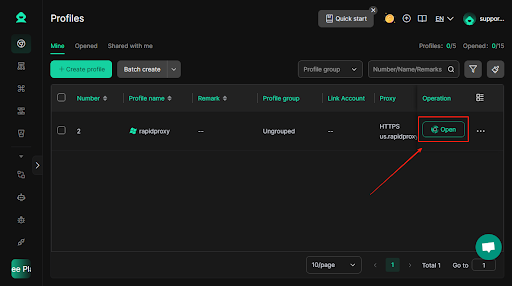
Step 9: Start Using the Proxy
Click【Open】to launch the configured environment. You’re now ready to browse safely and securely with RapidProxy in DlCloak Browser.