In this guide, we’ll walk you through the steps to configure SX.ORG proxies within the DICloak browser. Follow the instructions below to ensure a smooth and secure integration.
Introduction of SX.ORG Proxy
SX.ORG is a fresh proxy market with 12M+ clean IP addresses of all types with 235 GEOs. Each proxy is measured and has its own highest rating. All types of proxies: Mobile, Residential, Corporate. Users pay only for the traffic they use – pay as you go or buy an unlimited proxy for a fixed price per month.
Support for HTTP and SOCKS5 protocols. Open API for developers. 24/7 customer support in WeChat, Telegram, WhatsApp or in your personal SX.ORG account.
SX.ORG Proxy Configuration
Use promo code DICLOAK25 to receive 3GB of proxy traffic for FREE, valid for 7 days.
- First, log in to your SX.ORG dashboard, select your desired region, and create a new proxy.

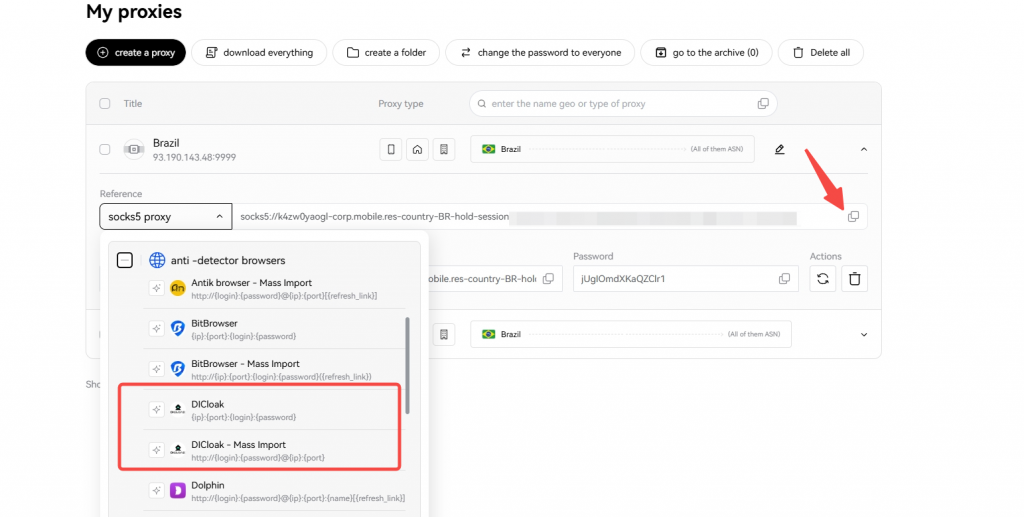
- In the My Proxies section, choose the DICloak template for a quick setup in the DICloak app, then click.
Configuring SX.ORG Proxy in DICloak
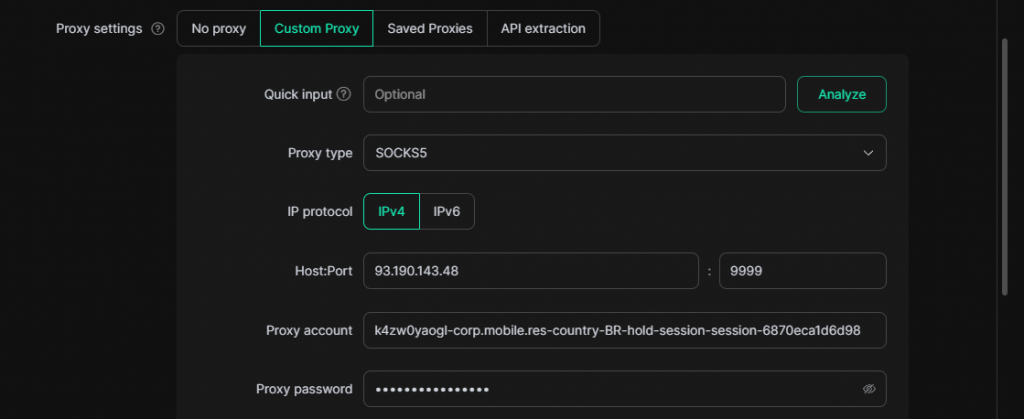
- Next, open your DICloak app and paste the proxy information directly into the appropriate field.
- Click Check Proxy to ensure everything is working.

- Once everything is in place, click Confirm to save your settings.
- Click “Open” to launch your browser with the configured proxy settings.

That’s it! You’ve successfully integrated SX.ORG proxies with DICloak Anti-Detect Browser, and you’re ready to go.