1. Design and export the “Automa” process file
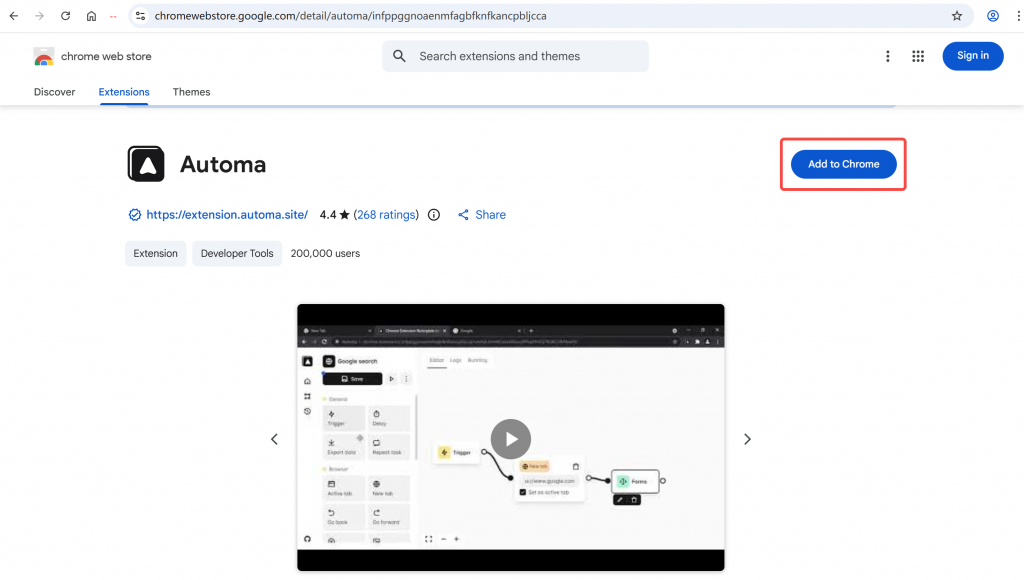
1.1 First install the “Automa” extension
You can install the “Automa” extension in your local browser or DICloak browser.
Installation link for “Automa” extension:https://chromewebstore.google.com/detail/automa/infppggnoaenmfagbfknfkancpbljcca
1.2 Design the Workflow
This section allows you to quickly experience “Automa” by creating your first workflow. In “Automa”, there are two ways to create a workflow:
- Recording your actions on a webpage
- Manually create
Click here to view the official detailed tutorial of “Automa”.
1. Recording operation
Recording is the simplest way to create a workflow in “Automa”. First, click the “Automa” icon in the top right corner to open the “Automa” panel. Then, click the downward arrow icon on the workflow page and select the “Record Workflow” menu.

① Start recording from the initial state in the workflow
When “Automa” starts recording, it will record all your operations, such as creating a new tab, scrolling, clicking, and typing. While recording, you can also select an element to retrieve text or attribute values from it.
To stop recording, open the “Automa” pop-up window and click the ⏹️ button. To learn more about the recording workflow, you can watch the relevant video tutorials.
② Start recording from a specific block in the workflow
If you have created a workflow and wish to start recording from a specific block within the workflow, you can right-click on the output bit of that block and then click the “Record from here” menu.

2. Manually create
Manually create a workflow:
- Open the “Automa” panel.
- Click the “New Workflow” button, and enter the name and description of the workflow.
- Then open the workflow you just created.
Within the editor, you will see a trigger block. This trigger block is where the workflow begins execution, and you can also schedule the time for the workflow to run within this block.
To add a module to the workflow, drag and drop the module from the module list on the left into the canvas. To connect the trigger block to the module you added, connect the output port of the trigger block to the input port of the module.

Save the workflow, and now you can run it by clicking the play icon
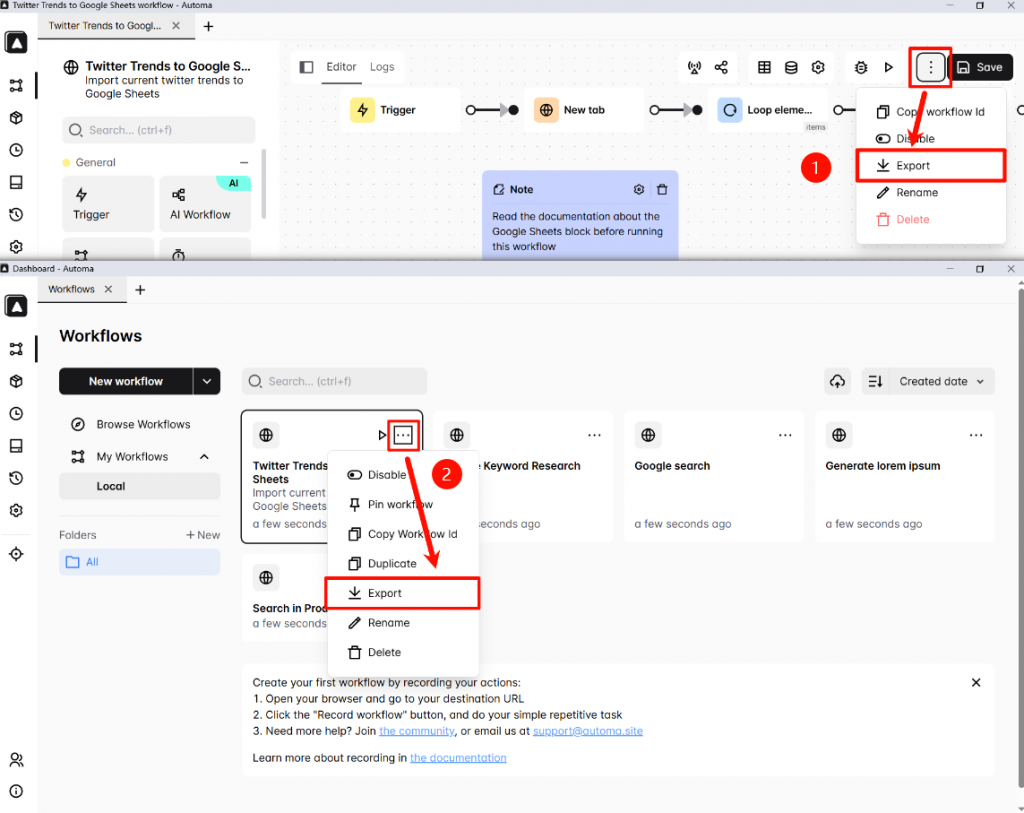
1.3 Export Process File
After completing the design of the workflow and saving it, you can click [Export] to export the workflow file (in JSON format).
2. Import files and run RPA tasks
2.1 Import the “Automa” file
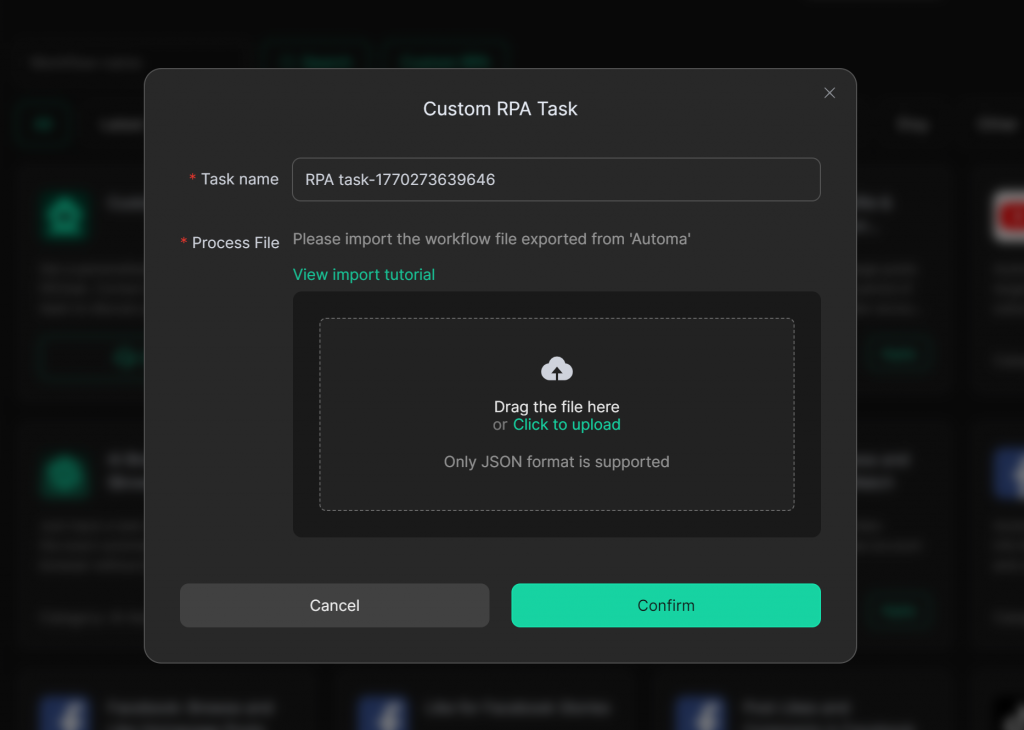
You can enter the [Create RPA] interface, click [Custom RPA], and then you can enter the “Custom RPA Task” creation interface.

On the “Custom RPA” creation interface, you can fill in the task name, import the process file exported from “Automa”, click [Confirm], and enter the “RPA details page”.
2.2 Task settings
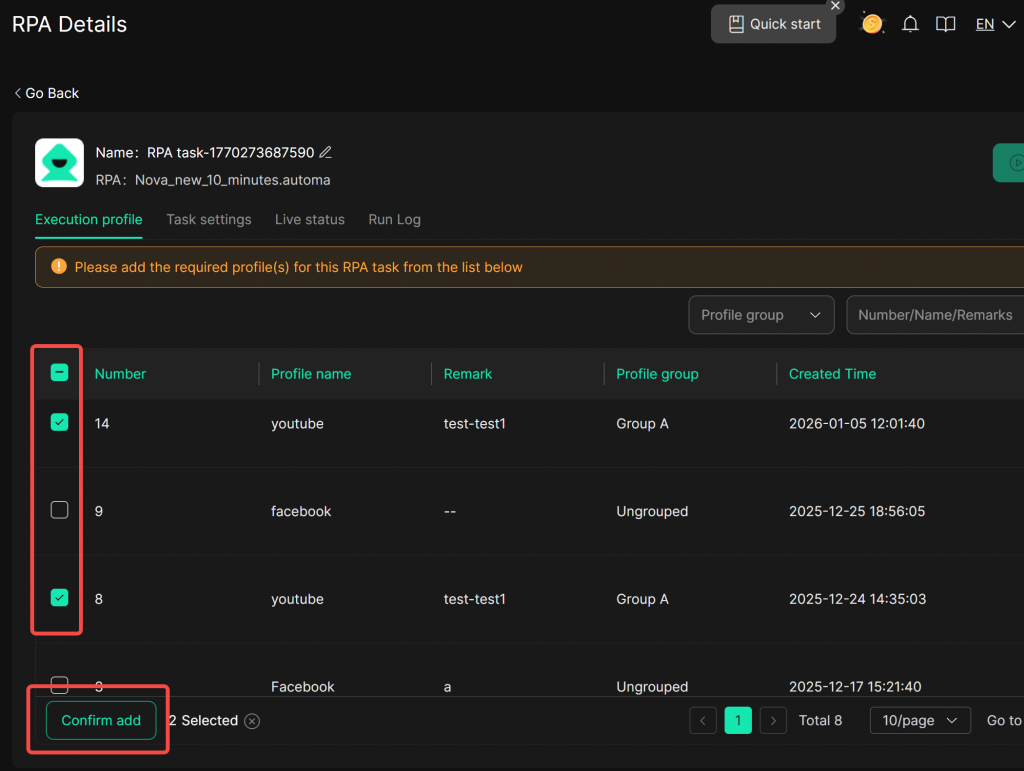
On the “RPA Details”, please first check the runtime profile required for the current RPA task, which can be single or multiple. After the selection is completed, click “Task Settings”.
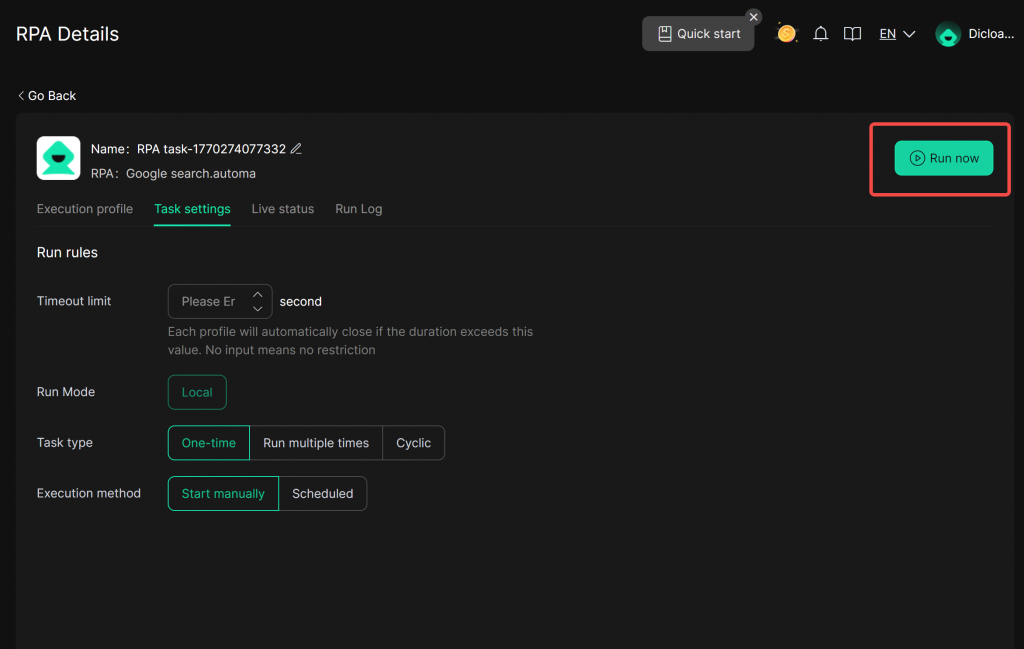
In the “Task Settings” module, you can edit the running rules of the current task. For the tutorial on using specific parameters, you can click to view . After completing the settings, click [Run Now].
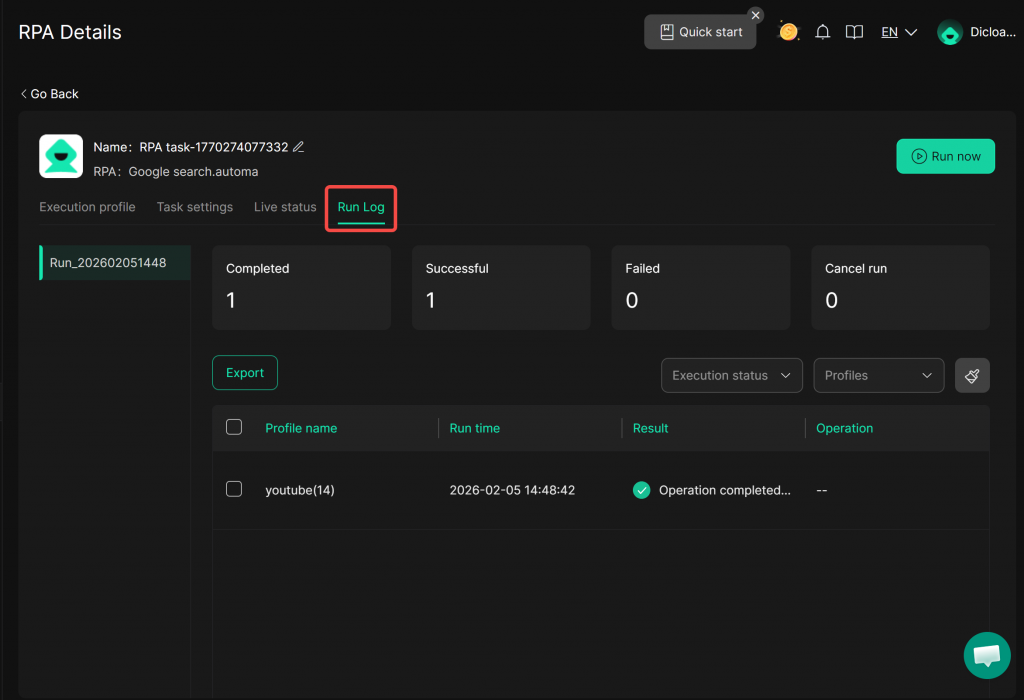
2.3 View the running results
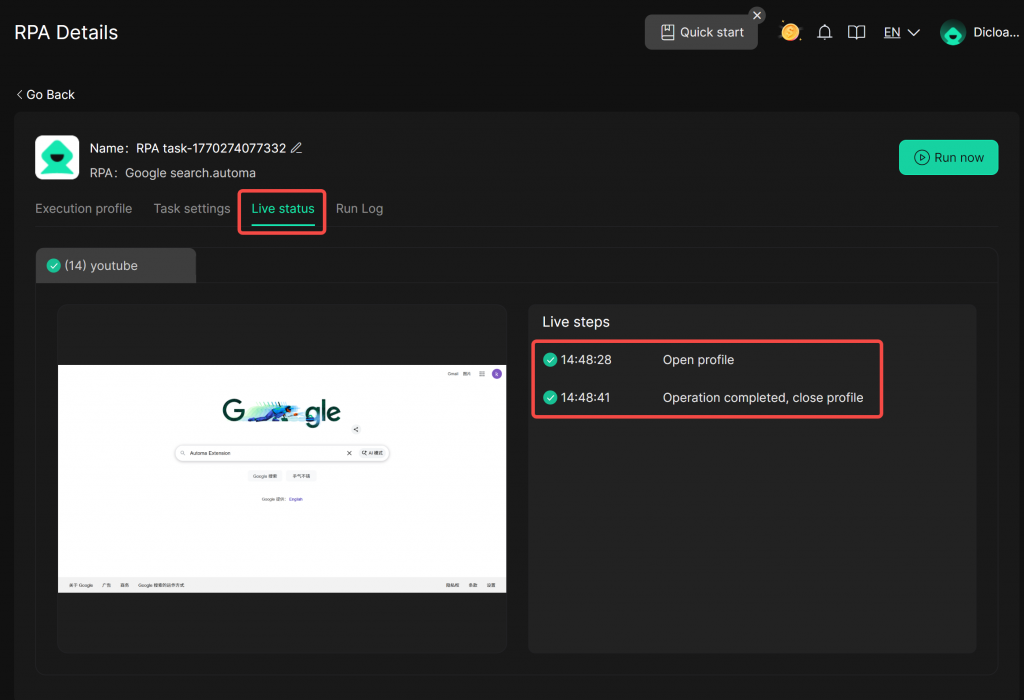
After running, you can enter the “Live status” module to view the task running status.
After the task has completed running, you can click “Run Log” to view the statistical results of the current task’s running status in each profile.
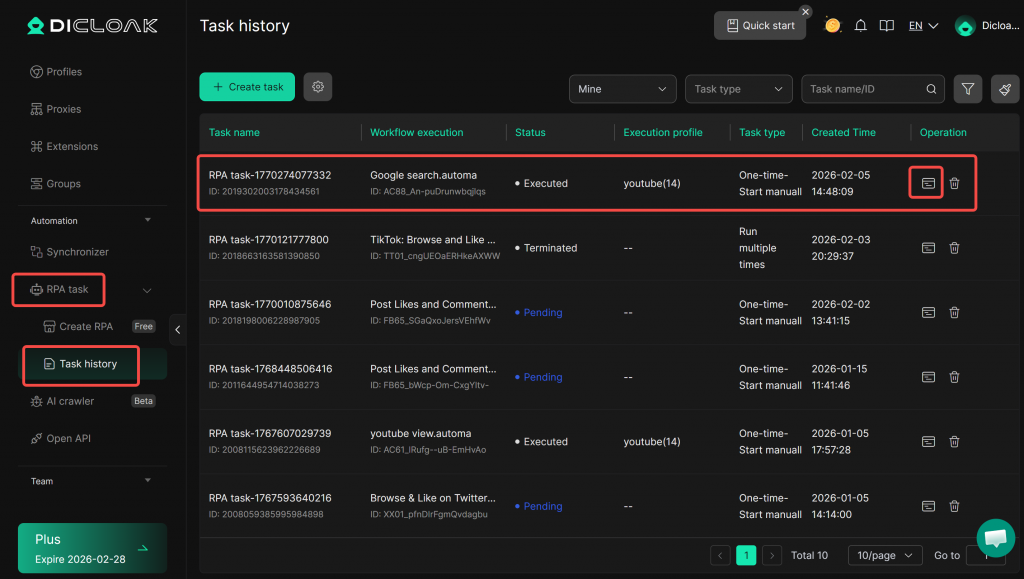
Additionally, you can view customized RPA tasks on the [Task history] interface.