DICloak provides a comprehensive solution for shared account scenarios, allowing multiple members to quickly and securely use the same shared account without triggering the platform’s risk control mechanisms. With DICloak, administrators can quickly configure the browser profiles, input shared account details, invite members to use the shared account, and simultaneously prevent the leakage of account passwords and Cookie data. Below is the detailed operation guide.
1. Quick Start
1.1 Download and Register
- DICloak Download: https://dicloak.com/download. Currently, DICloak supports Windows and MacOS systems.
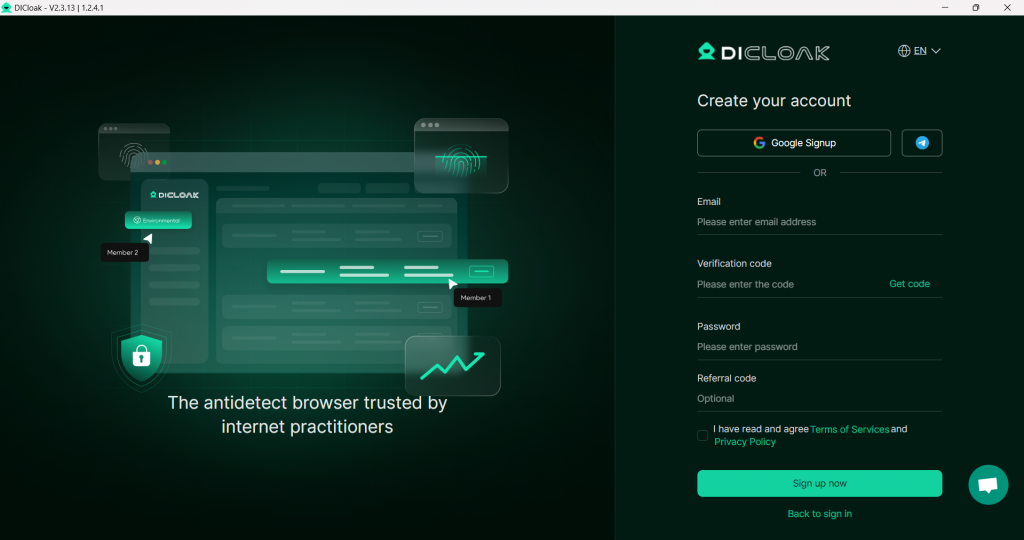
- Launch the software, register for your DICloak account, and start your business of shared accounts by using DICloak.
1.2 Contact Customer Support
- If you have any questions, you can contact customer support for assistance.
2. Browser Profile Management
2.1 Create a Browser Profile
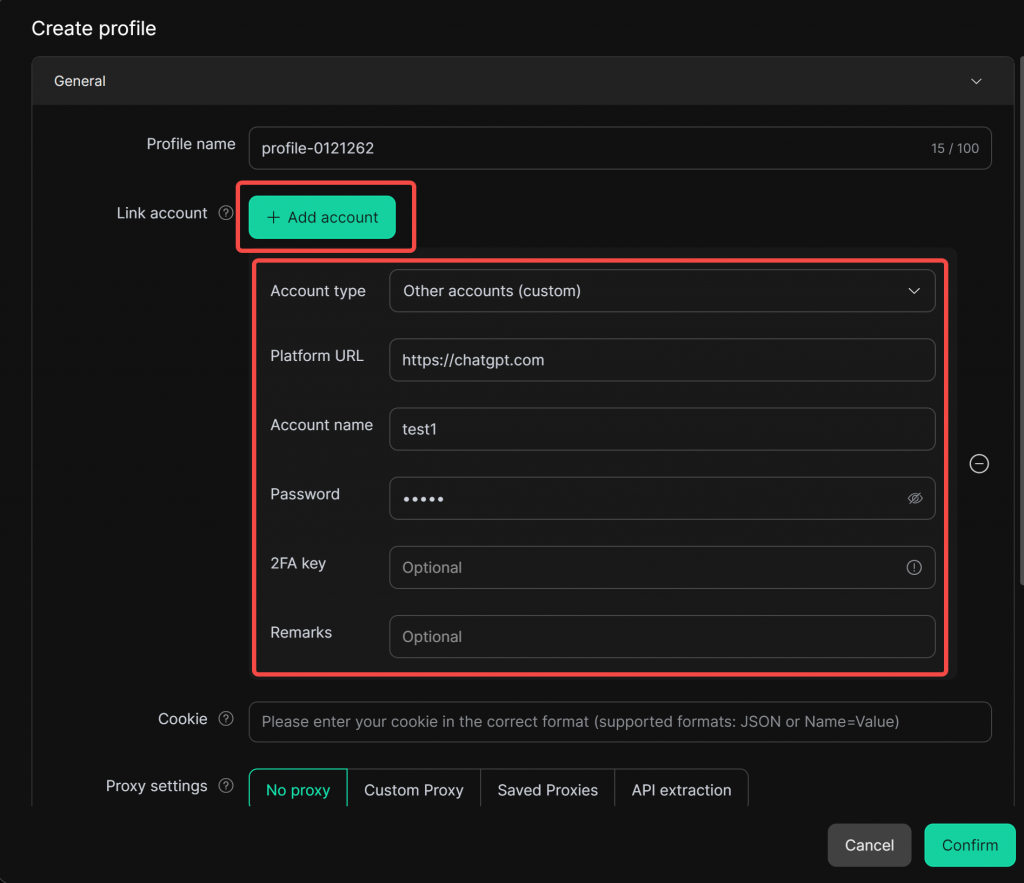
- Find the [Profiles] List, click on Create Profile
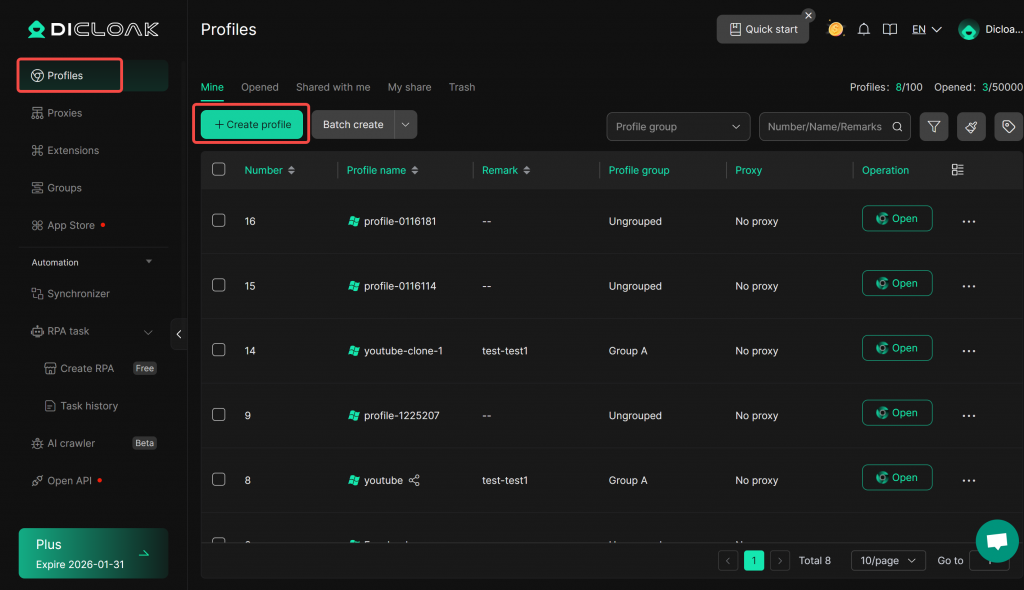
On the profile creating page, you can set the following browser profile information:
- Platform Account: You can enter the shared account credentials (for example, for ChatGPT). Once the profile is opened, it allows quick login without requiring members to input the account details again.
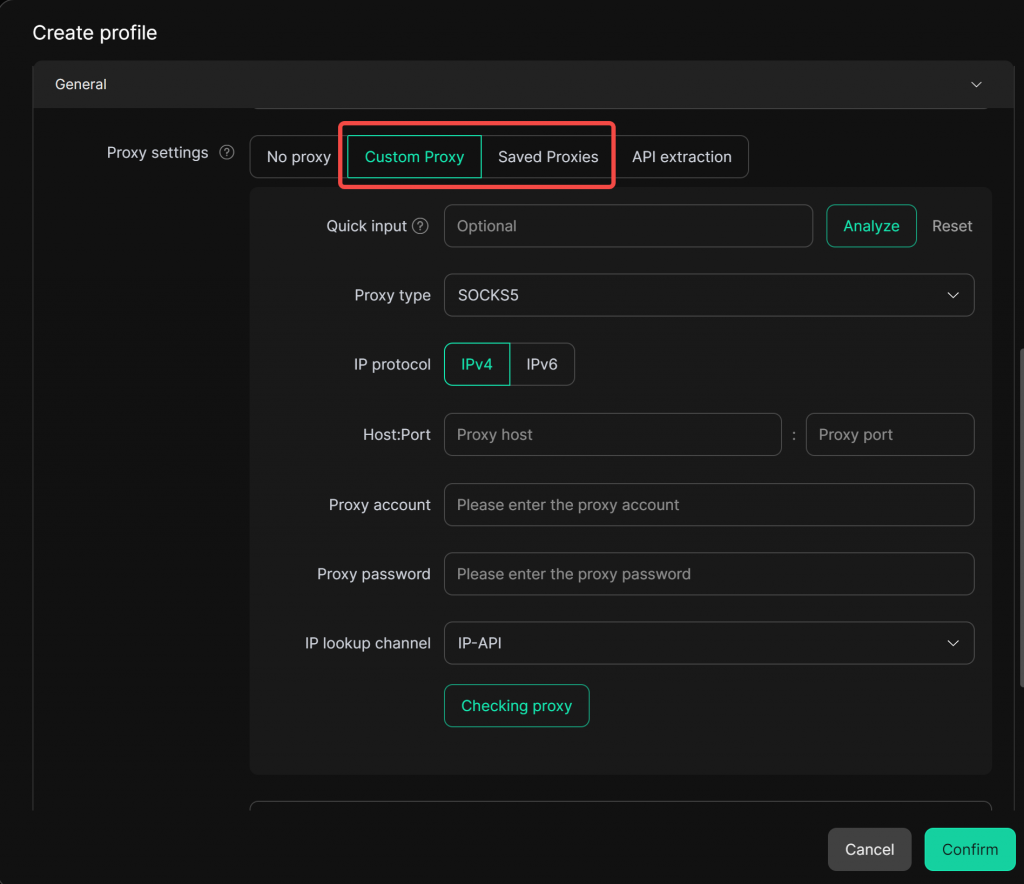
- Proxy Configuration: Since the shared account in the profile will be used by multiple members, it is recommended to configure a static proxy for the profile to ensure a unified external IP address. This can effectively prevent abnormal account usage detection caused by changes in device information and IP address when different members use the same account in different regions or network environments, thereby reducing the risk of account suspension.
- Operating System: If there are no special requirements, the default choice is Windows
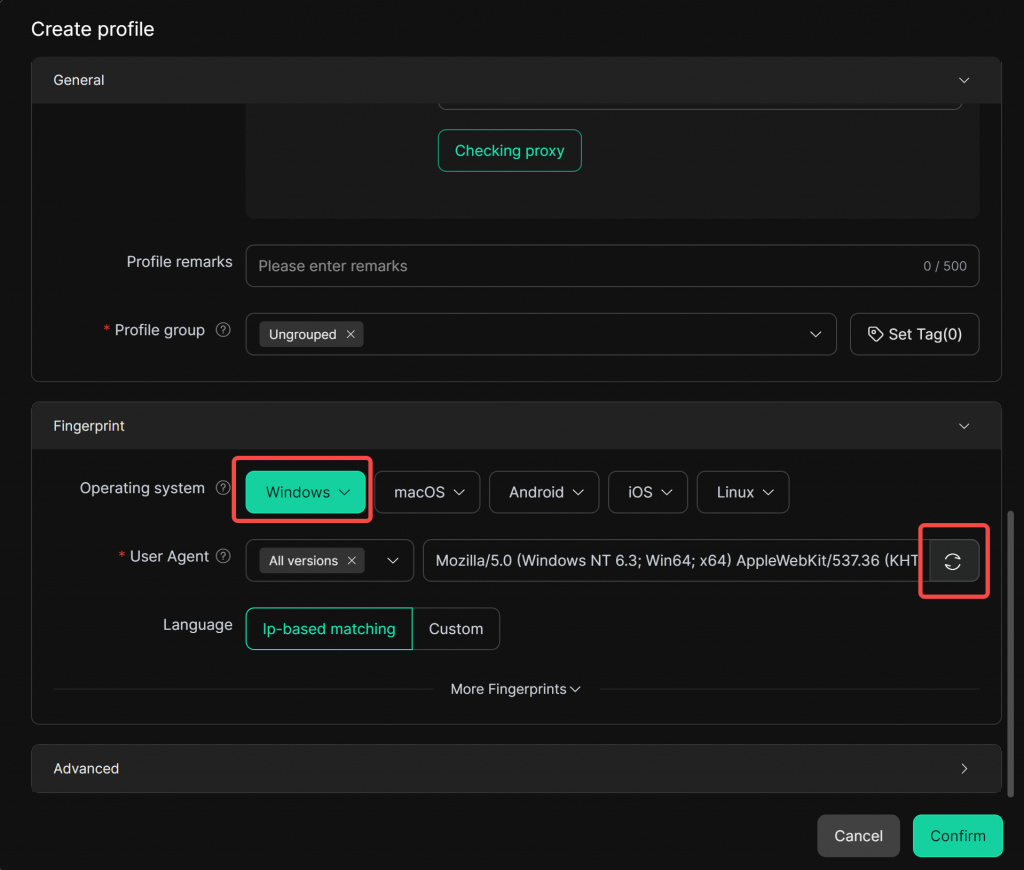
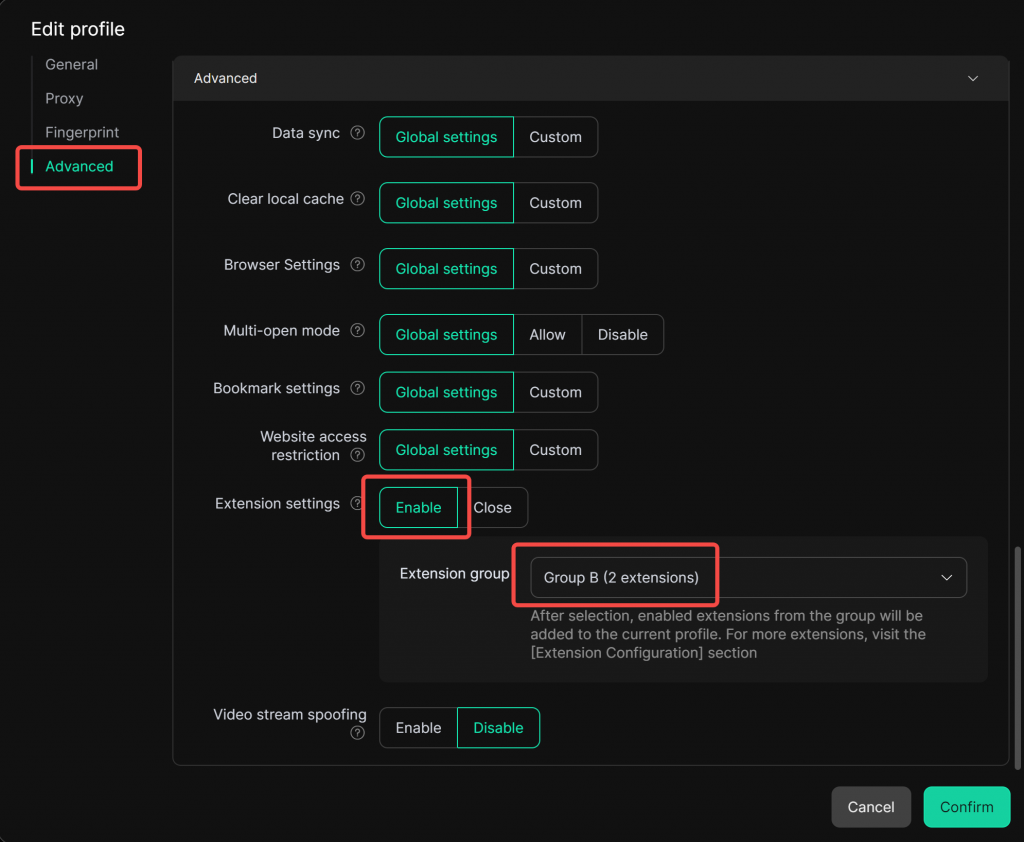
- Data Sync: Enable the Data Sync option to sync the login status of the shared accounts

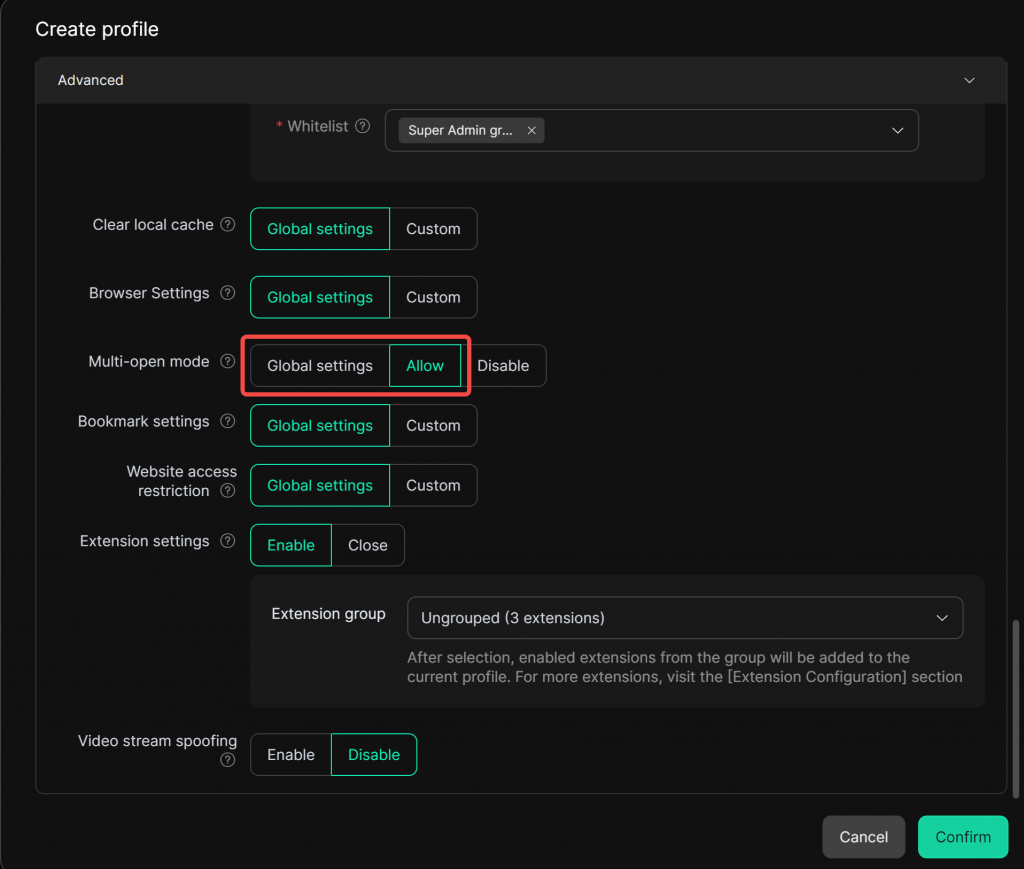
- Multi-open Mode: Select “Allow” to allow the profile to be used by multiple members simultaneously, enabling several people to share the same account in the profile.
- After configuring, click Confirm, and then open the newly created browser profile.
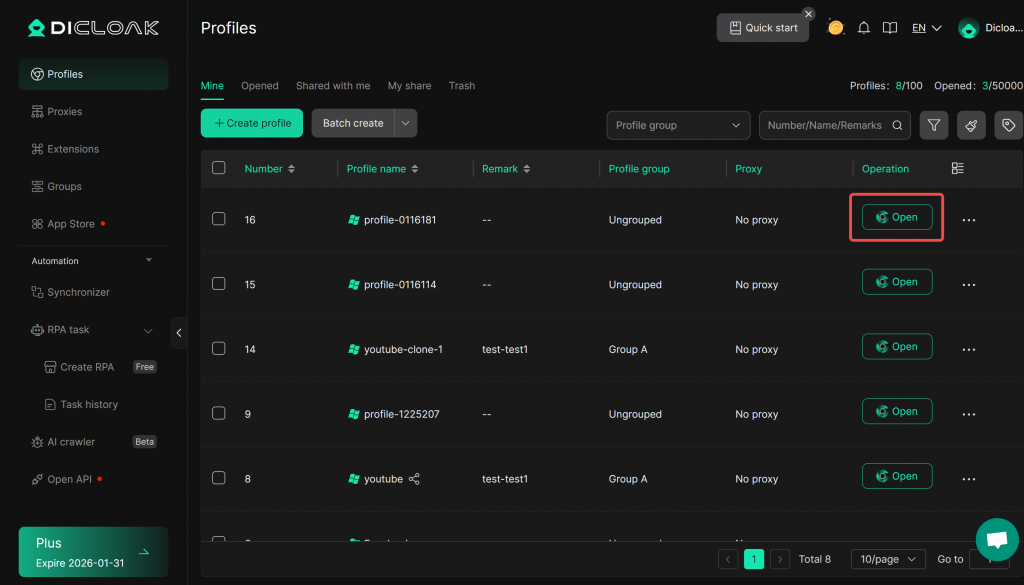
2.2 Log into the Shared Account
- After opening the profile, the home page will display the account details. Click Open to log into the shared account.
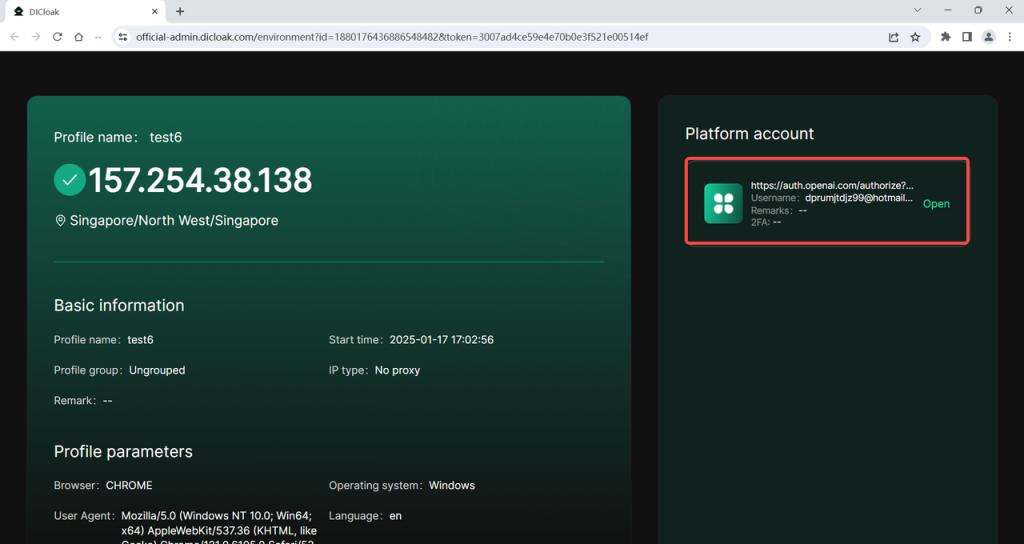
- On the login page of the tool website, members can fill in the username and password bound to your profile with one click.
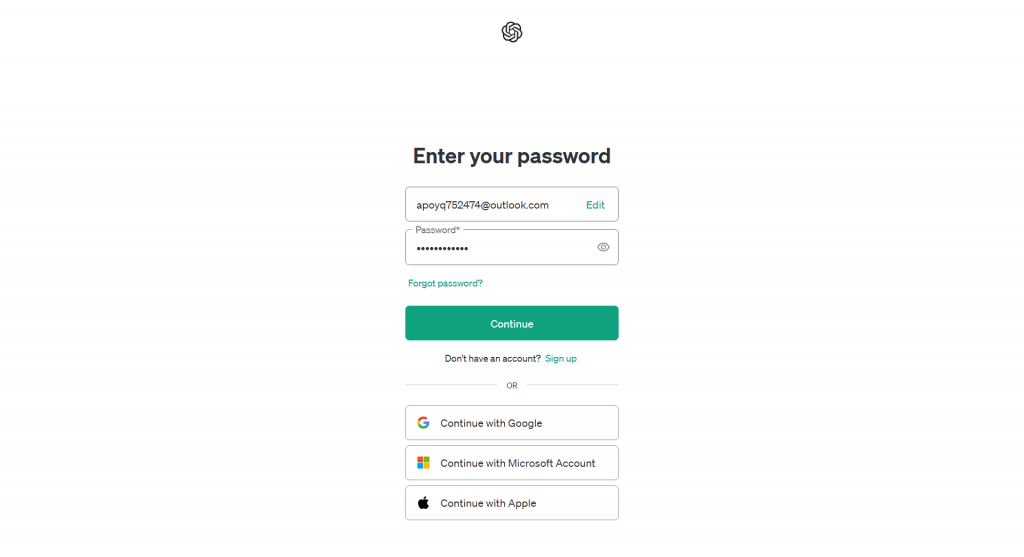
- Once logged in successfully, there will be no need to re-enter the username and password when reopening the profile. The website will automatically log in without a password prompt (the same applies for members opening the profile).
3. Member Management
3.1 Create Member
- Click on [Members] > Create Member, then select to create an internal member.
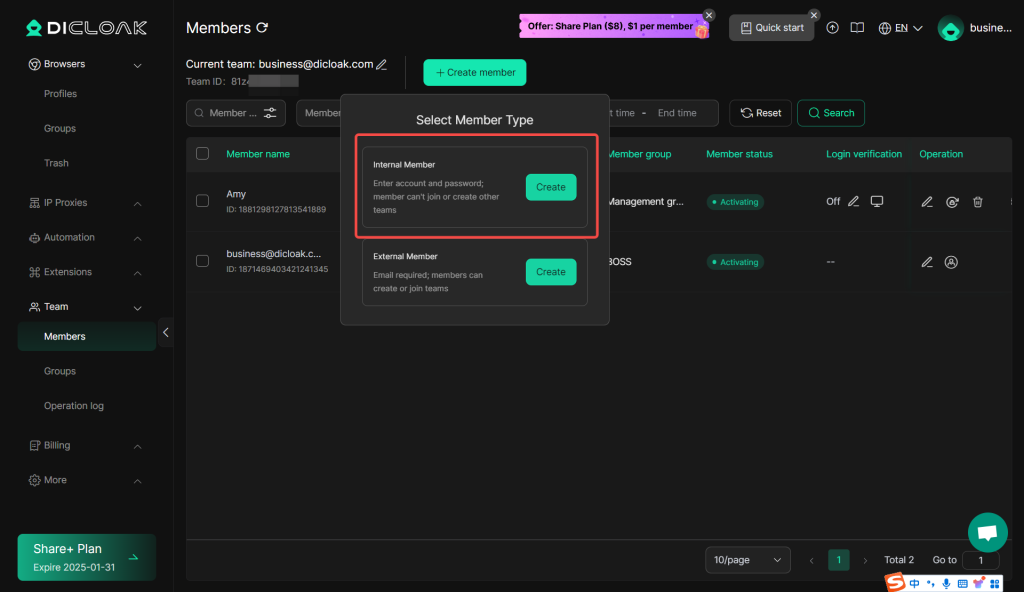
- Enter the member’s account information by providing their DICloak login credentials, and assign them to a member group and browser group.
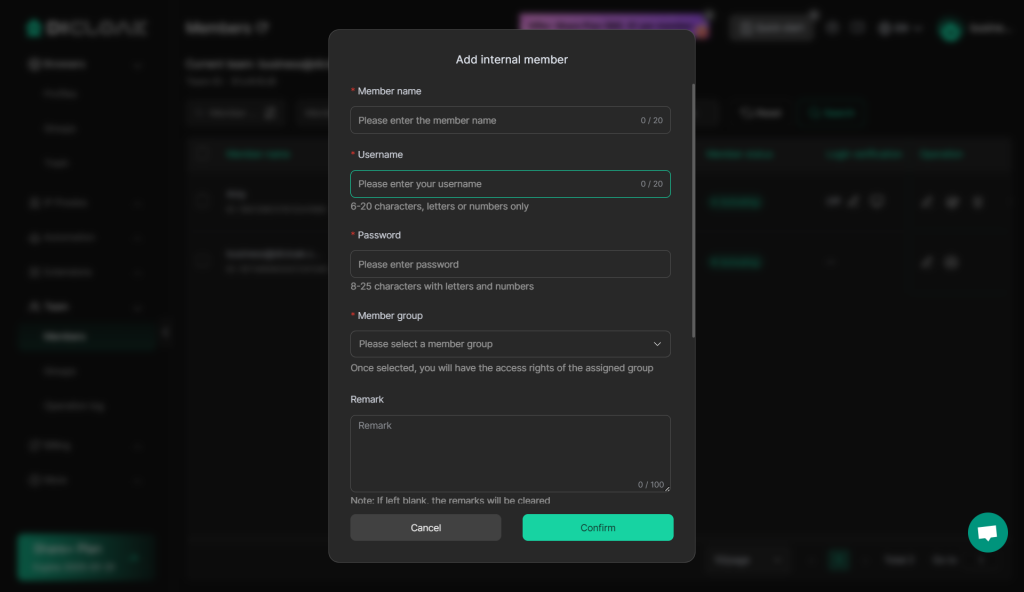
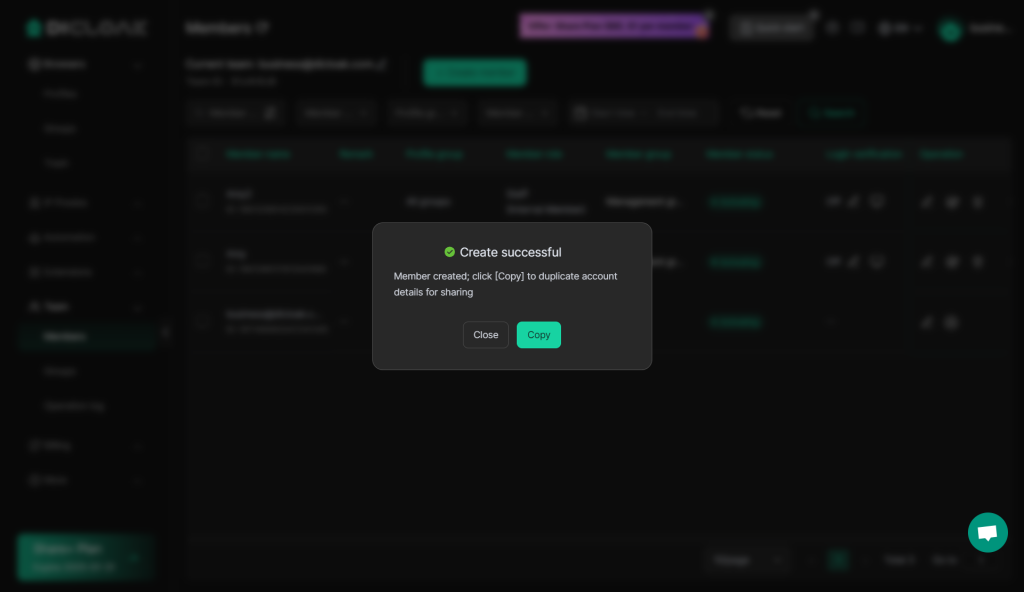
- After creation, copy the DICloak account credentials and share them with your member.
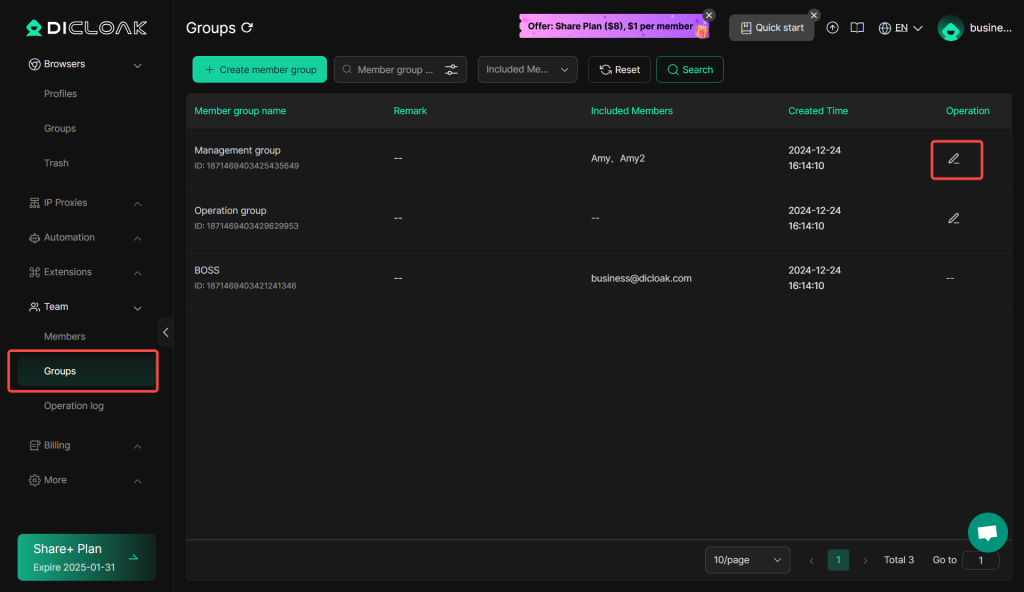
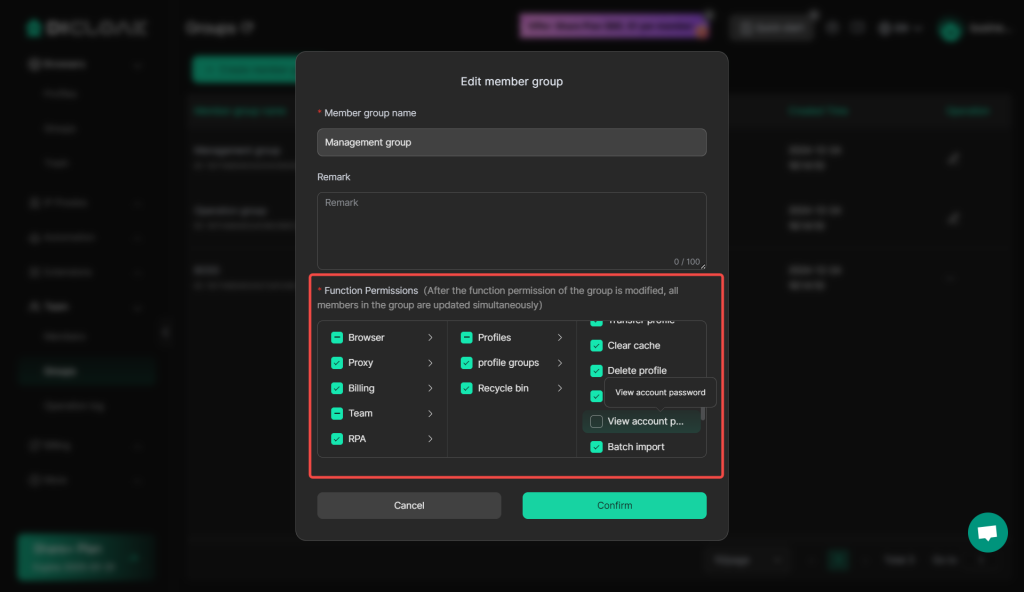
3.2 Edit Member Permissions
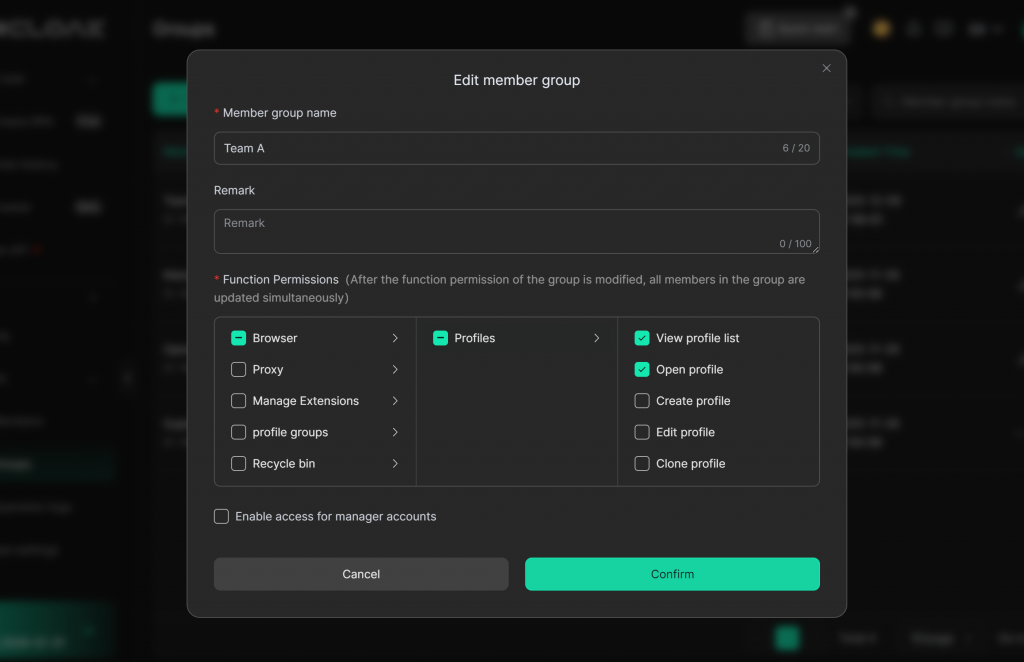
- Click on [Group], select the corresponding group to edit.
- Since members only need to use the browser profile and do not require other permissions, you can choose to only grant access to view profile list and to open profiles, while disabling other permissions. Then Click Confirm to complete the edits.
3.3 Members Access to Shared Account
- After downloading and logging in, the member will see the following interface for their group. When the member opens the profile, they can log in and use the corresponding shared account.

4. Advanced Features
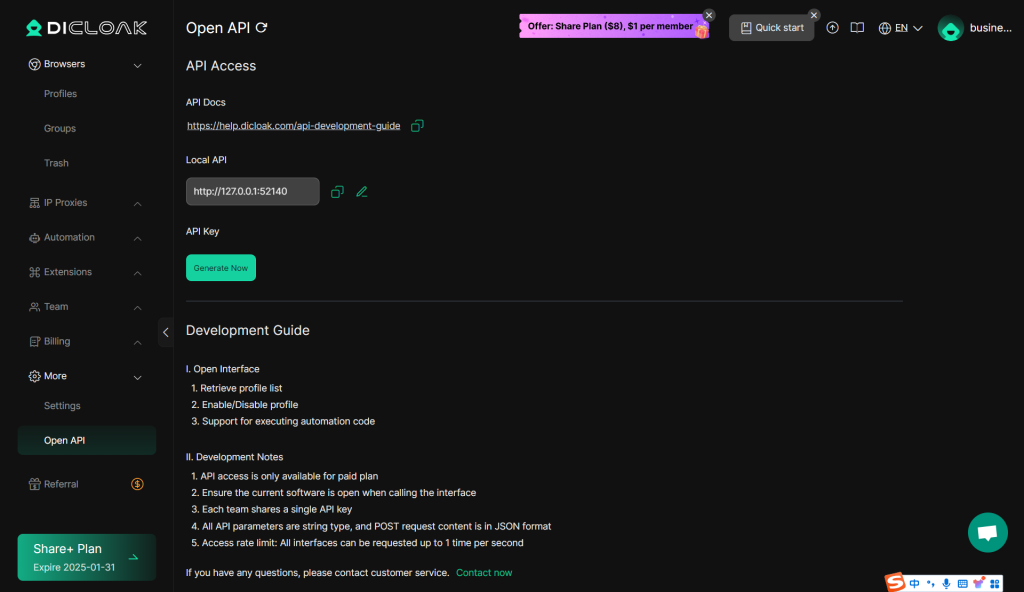
4.1 Open API
- Through API integration, your technical team can achieve system-level integration. You can use the local API to adjust account statuses, assign permissions, and automate workflows. For example, when a customer places an order for a shared account, you can automatically process the order via the local API, create the account and password, set an automatic deactivation date, and send this information to the customer.
- API Development Guide: https://help.dicloak.com/api-development-guide
4.2 Browser Extension
- If you need to add an extension within the browser profile, follow these steps:
- Click on Extensions > Added Extension, then either select a URL from the Chrome Web Store or upload the installation package directly from your local machine. The extension must be enabled to synchronize to the corresponding profile.
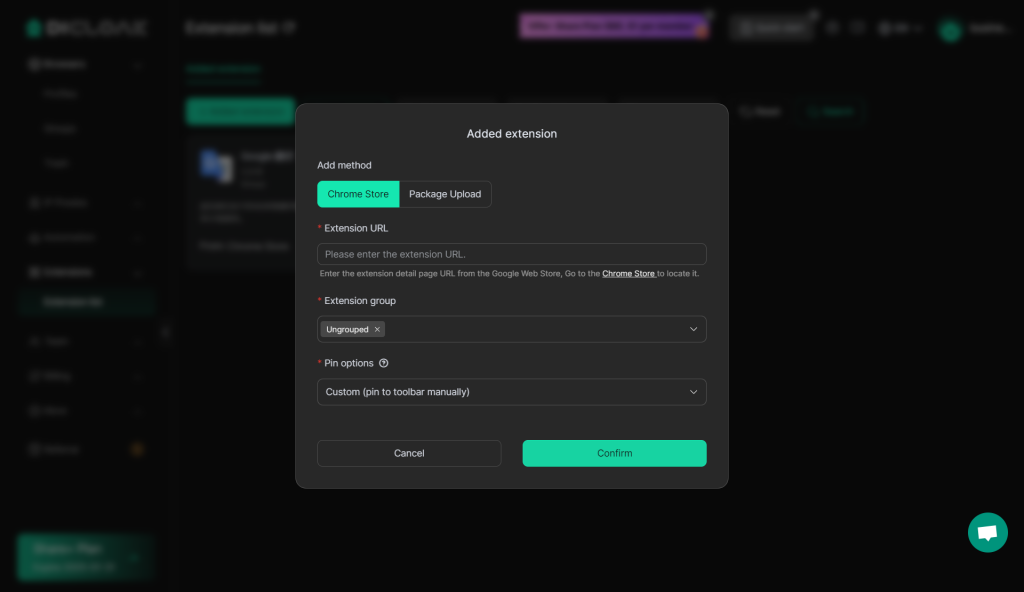
- After adding it, configure the extension group containing this extension in the profile, and the browser profile will automatically install the extension.
5. Frequently Asked Questions (FAQ)
1 How to prevent the password of the shared account in the profile from being exposed?
1.1 Configure Member Permissions and Uncheck “View Password”
- In Team Groups, select the corresponding group and edit permissions. Uncheck “View Password” to prevent users from seeing the password of your account.
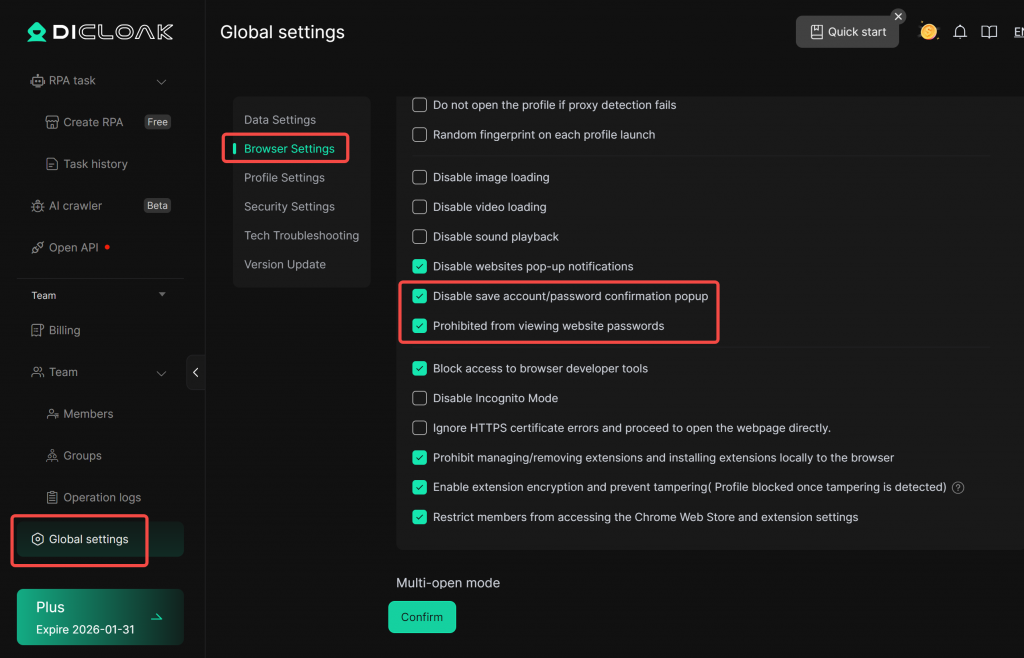
1.2 Prohibit viewing website passwords / Disable save password confirmation popup
- In Global Settings, under the Browser Settings, check “Disable save account/password confirmation popup” and “Prohibited from viewing website passwords”(Available only on the Plus and Share+ plans).
Then After opening the profile:
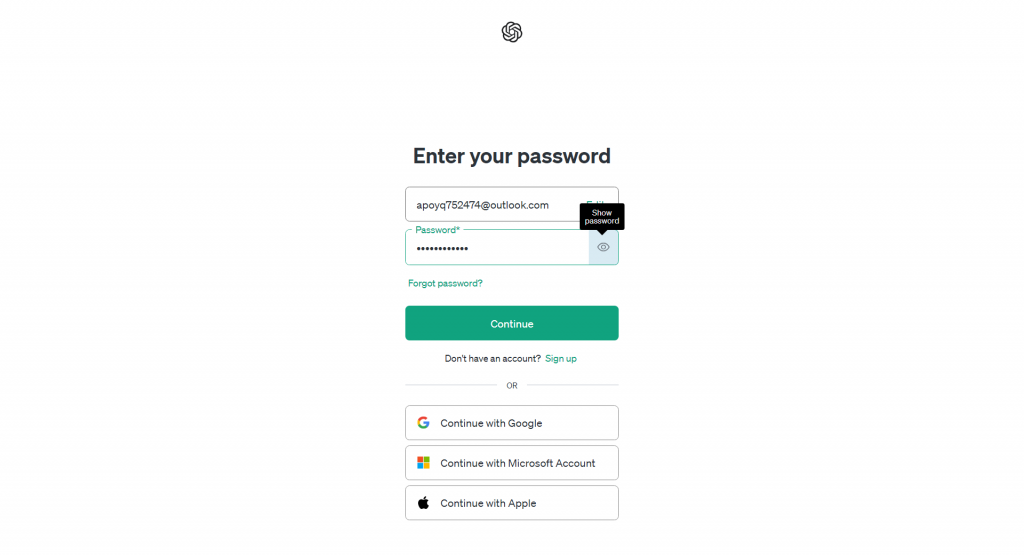
- Users cannot view passwords by clicking the password icon on the website login page.
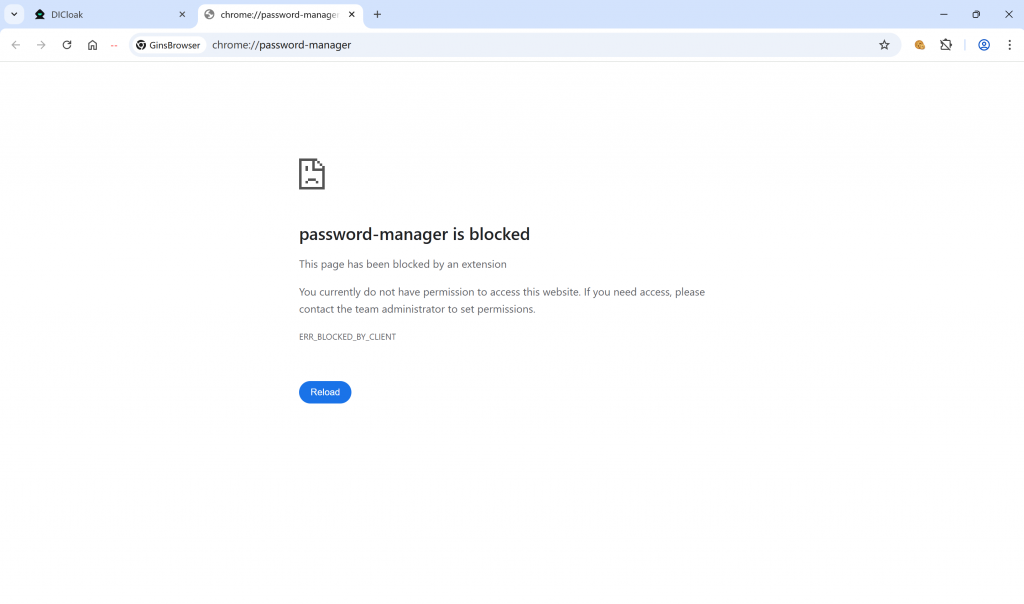
- Unable to access the password manager for the profile.
1.3 Set Website Access Restrictions
- In the Global Settings, after enabling the Website Access Restrictions feature, you can enter URLs related to the platform’s account management to prevent members from accessing and modifying account information.
- Note: Make sure to click Confirm to apply changes after enabling this feature.

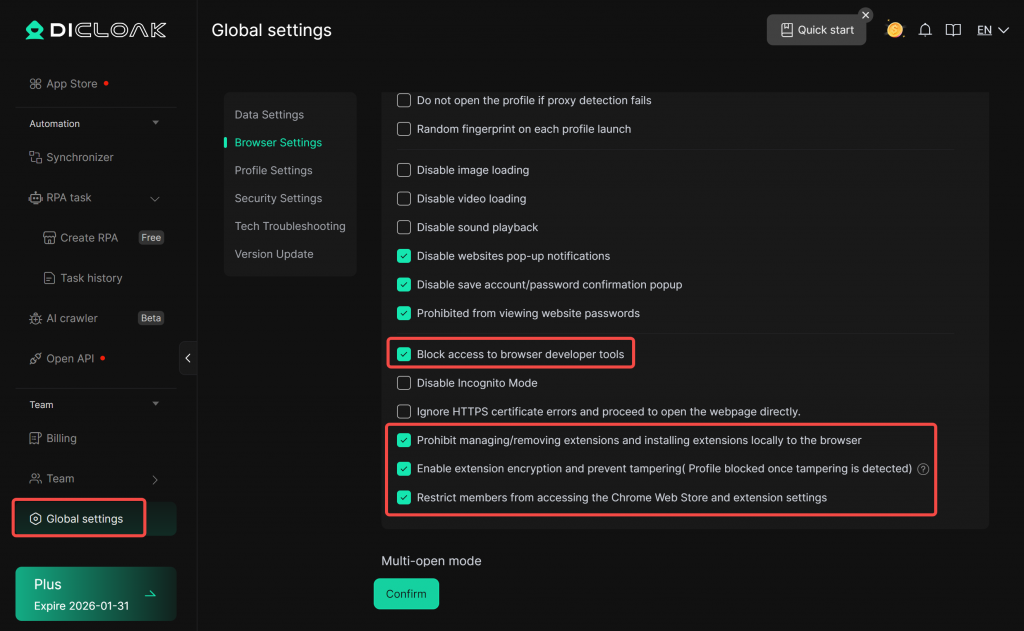
1.4 Enable Extension Security Protection
In the Global Settings, enable the extension-related disabling function in the Browser settings to prevent members from stealing account information through extensions.
2. How to Manage/Monitor Members?
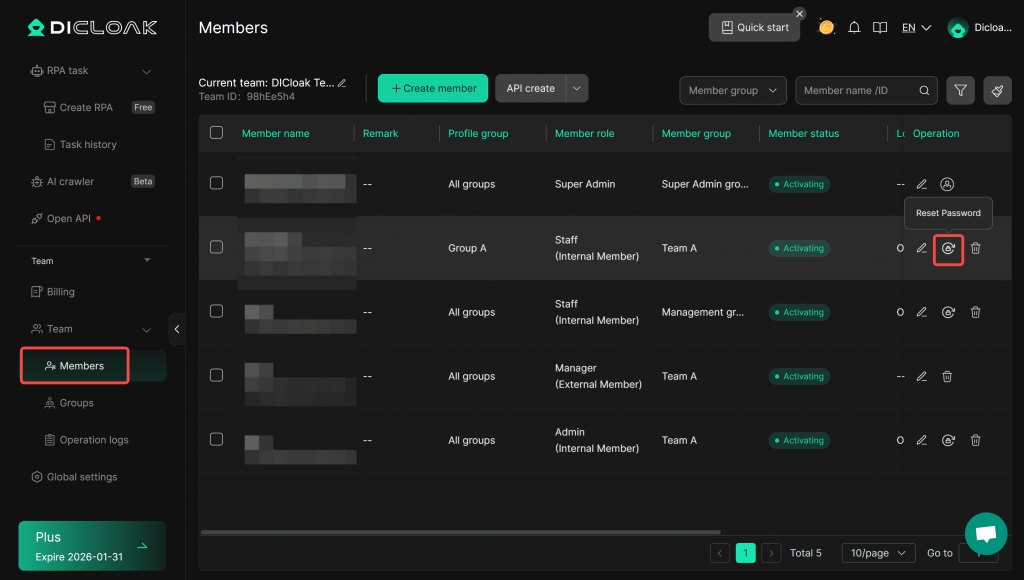
2.1 Deactivate Member Accounts / Reset Passwords
- In Members, when a member’s access expires, you can deactivate their account. If you need to assign that account to another user, simply reset the password.
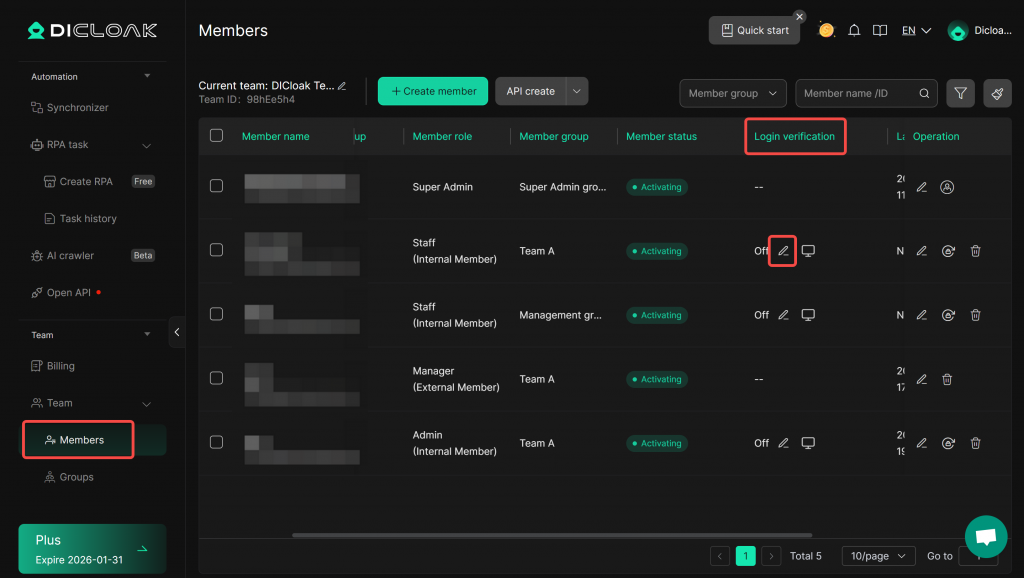
2.2 Enable Login Verification
Within the Members, enable login verification for members. When logging in, members must obtain a one-time verification code from the administrator. This prevents members from sharing their accounts with others.
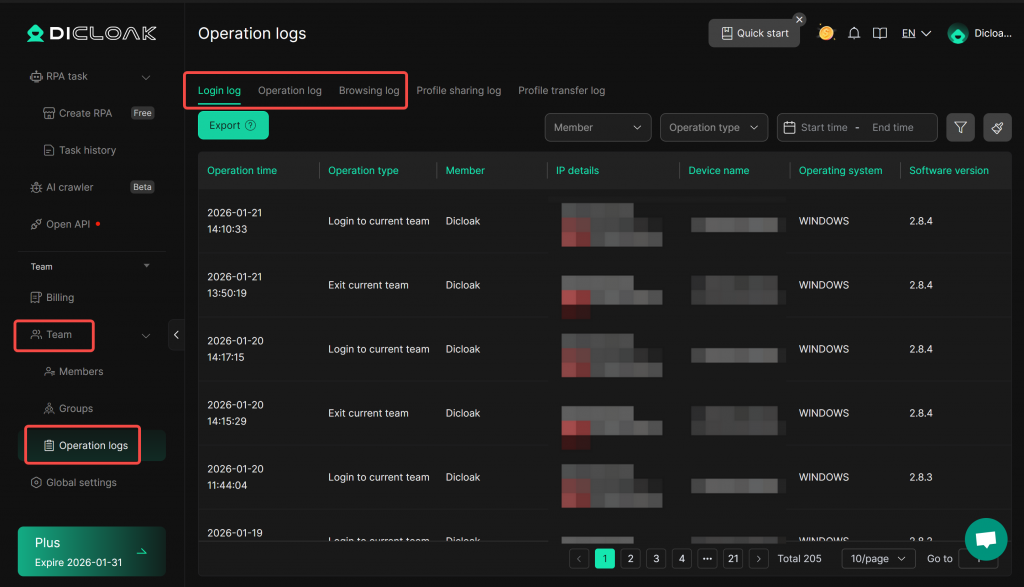
2.3 View Members’ Activity Logs
- In Team > Operation Log, you can monitor member activities in real time by reviewing their login logs, operation logs, and browsering logs. This allows for ongoing supervision of member actions.