You can implement automatic rotation of IP addresses through [Dynamic Proxy], effectively bypassing the website’s anti-crawling mechanism. In large-scale web crawling and data acquisition, dynamic proxy allows each request to use a different egress IP, significantly improving the success rate and stability of acquisition, and avoiding IP bans caused by high-frequency requests.
Usage Steps:
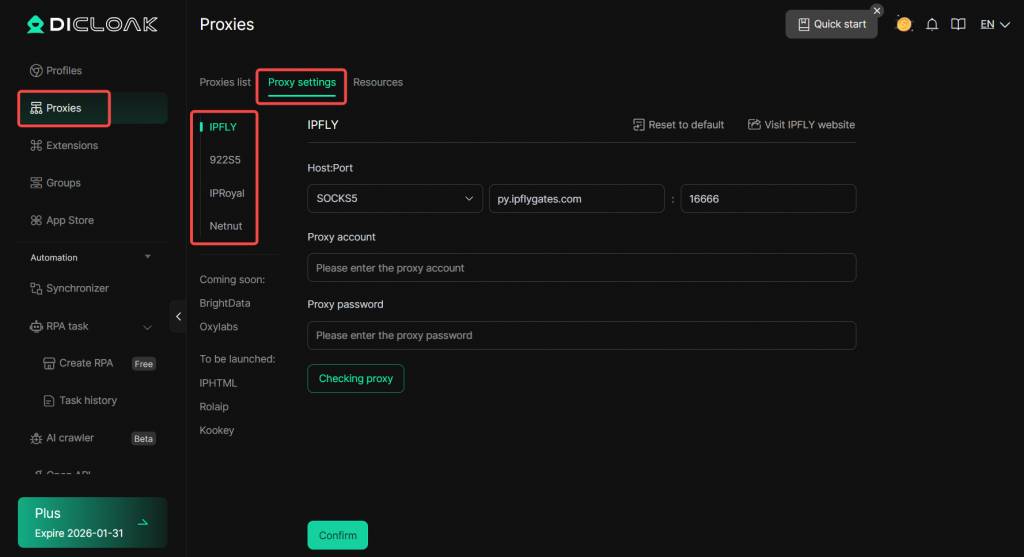
Global Proxy Settings:
- Enter the [Proxies] interface and click [Proxy Settings].
- Choose dynamic proxy service on demand: optional [IPFLY], [922S5], [IPRoyal] and [Netnut].
- Fill in the specific parameters: “Host:Port”, “Proxy account”, and “Proxy password”. After inputting, you can click “Checking proxy” to test the account.
- After filling in the information and confirming it is correct, click “Confirm” to save the proxy settings. This proxy setting, as a global setting, can be selected in any Profile.
Select global proxy/ filter countries and regions in the profiles:
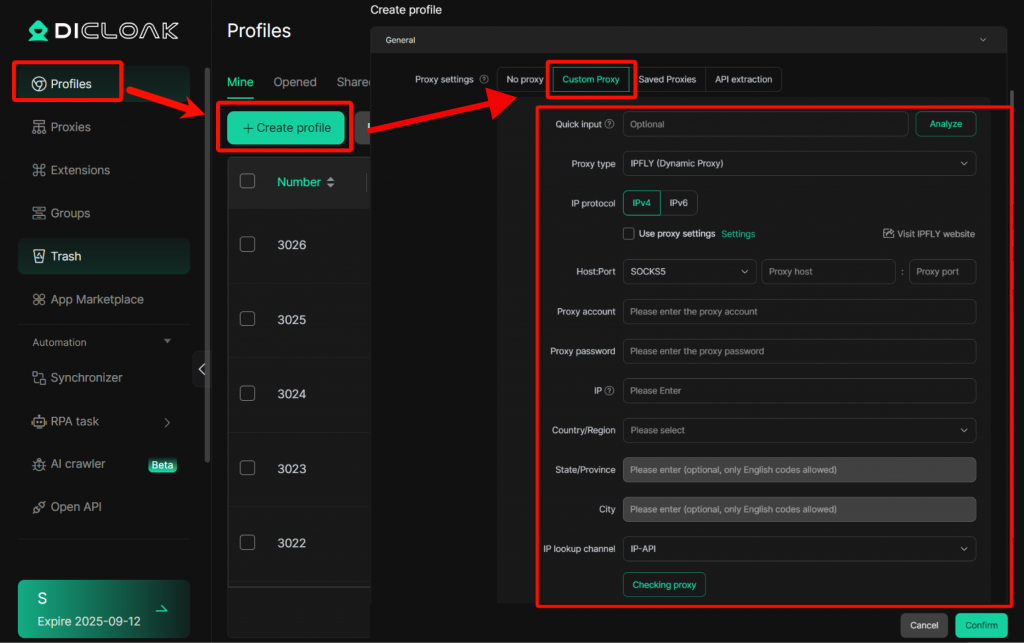
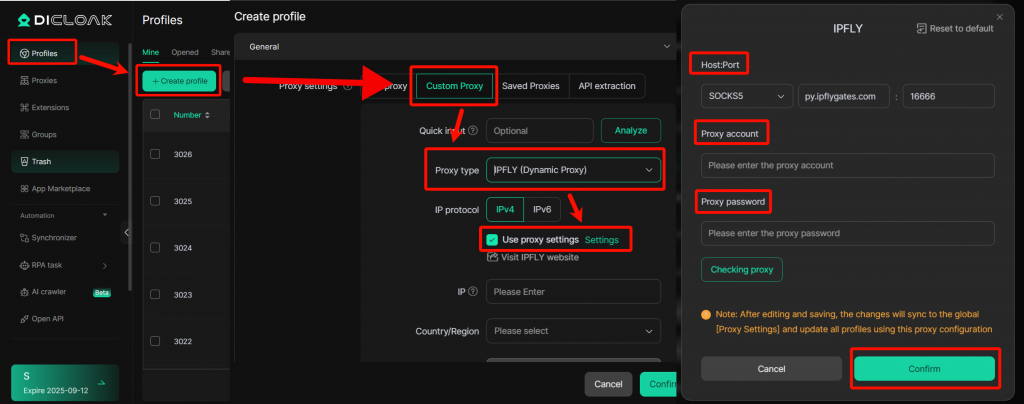
- Enter the [Profiles] interface, click [Create Profile], and enter the Profile editing interface.
- In the [Proxy Settings] module, click [Custom Proxy], and select Dynamic Proxy in the [Proxy type].
- Check “Use proxy settings” to use the proxy configured above. If you need to modify it, click [Settings] to configure the specific proxy parameters. If not checked, you can set a separate proxy account for each Profile.
- If you need to limit the IP range generated by dynamic proxy, you can input parameters through the following three methods:
- Method 1: Parse IP
- IP: Automatically resolve the “Country/Region”, “State/Province”, and “City” where the IP is located based on the IP you provide.
- Method 2: Parse Country/Region name
- Country/Region: Select the country of the export IP through the dropdown box.
- State/Province, City: After selecting a country, simply enter the corresponding English code for the state/province and city.
- Method 3: Parse proxy account
- Proxy Account: The account provided by the proxy.
- Proxy Password: The password provided by the proxy.
- After confirming that the proxy information is correct, click the “Confirm” button to complete the settings. You can also click [Checking Proxy] to test the proxy and then click “Confirm” to complete the operation.