Configuring proxies in an antidetect browser helps hide the user’s real IP address, using exit IPs from other regions to bypass platform detection and ensure account stability. In the Profile List, you can assign unused proxies randomly to multiple profiles with one click, or assign specific proxies.
1. Create Proxy
1.1 Create a Proxy Individually
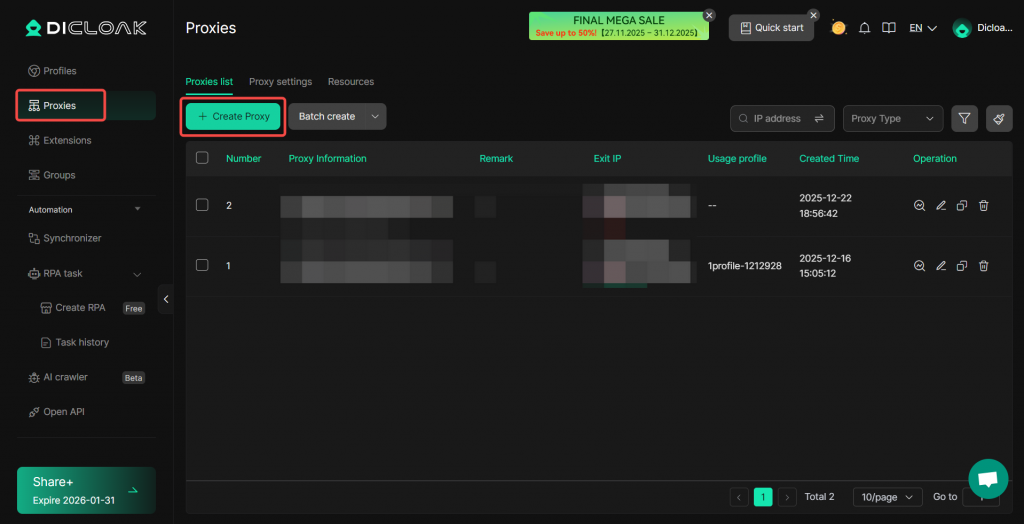
Go to Proxies> Create Proxy.
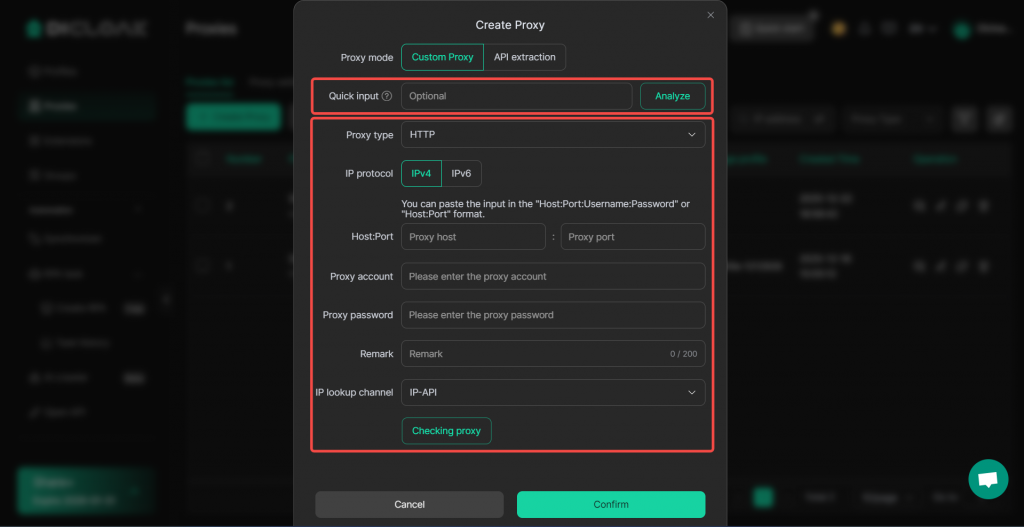
Fill in the proxy information obtained from your proxy service provider. Quick input is supported. After filling, click “Checking proxy” to check if the connection is successful.
PS: DICloak does not provide proxy services. You can visit our proxy partner resource page to test proxy quality yourself.
1.2 Create Proxies in Batches
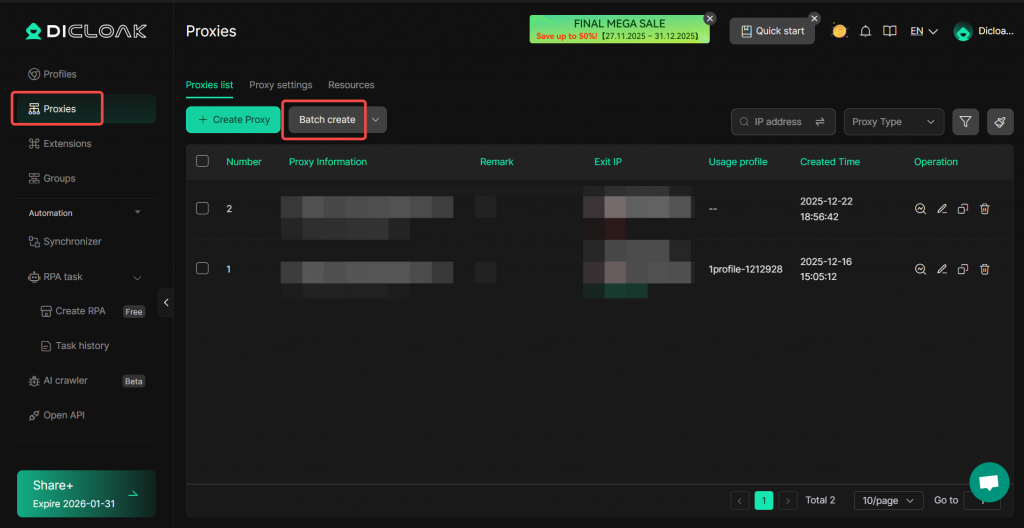
You can also go to Proxies > Batch Create Proxies.
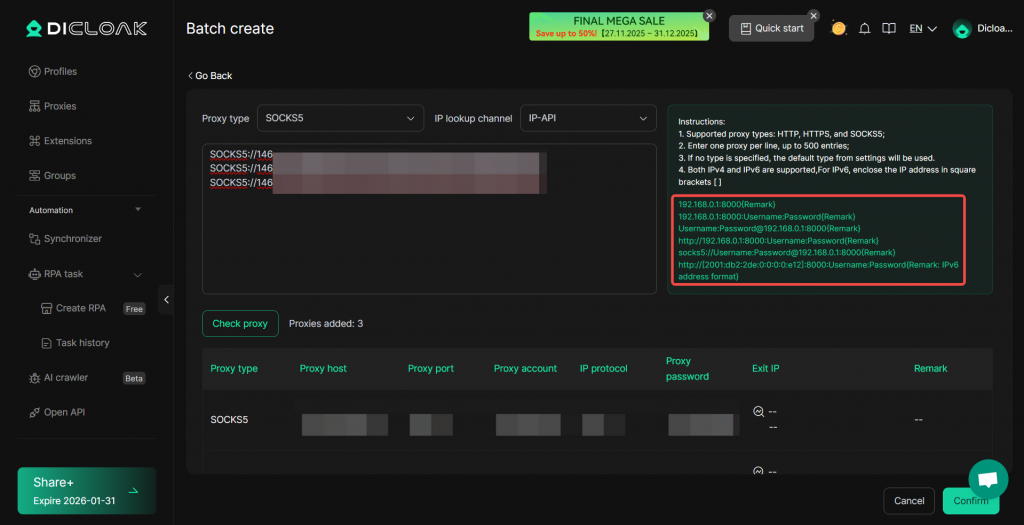
Enter proxy information in batches according to the format, with one proxy per line. After filling, click “Check proxy” to check connectivity. If there are no issues, click “Confirm” in the bottom right corner to complete the creation.
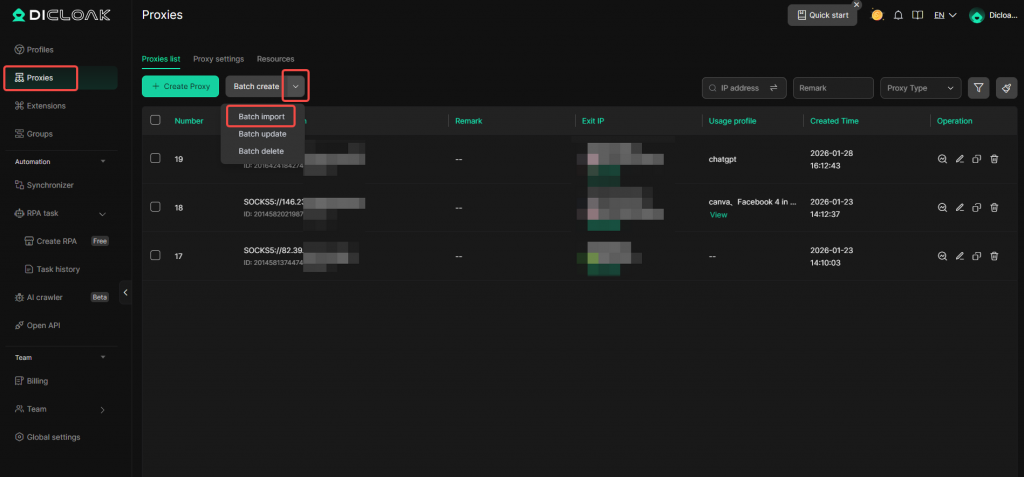
1.3 Batch Import Proxies
In Proxies, select Batch Import.
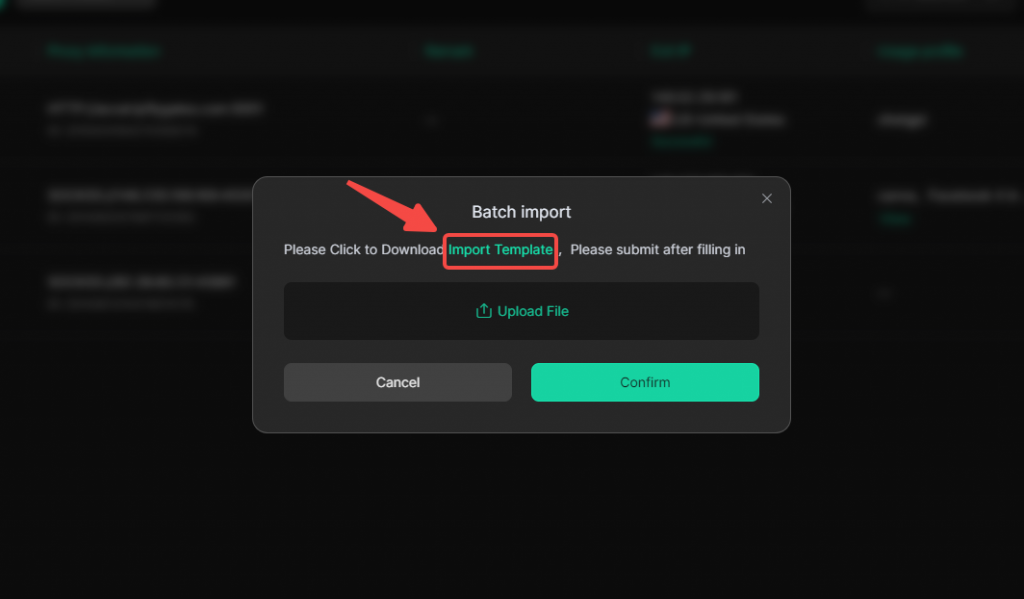
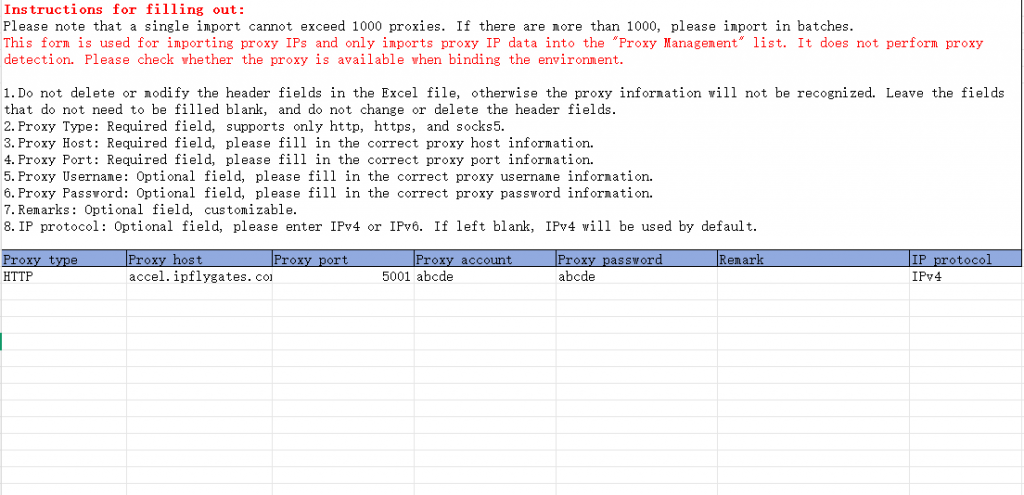
Download the “Import Template” and fill in the proxy information within the template. Please note: Do not alter the original content or formatting of the table. After completion, upload the file to DICloak and click Confirm.
2. Batch Assign Proxies in the Profile List
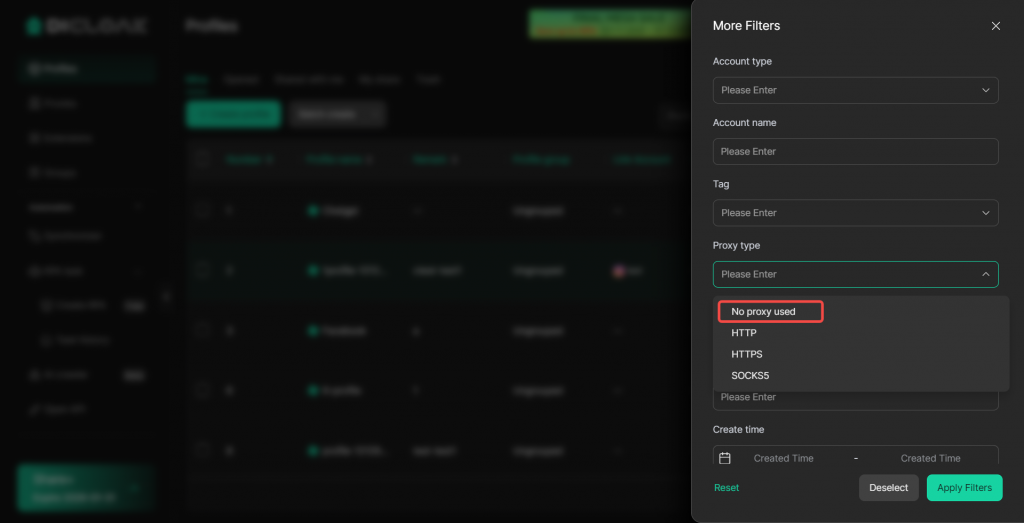
Go to Profiles. You can filter profiles that have no proxy configured.

Or directly select the profiles you wish to configure, click More Actions > Edit Profile > Edit Proxy.

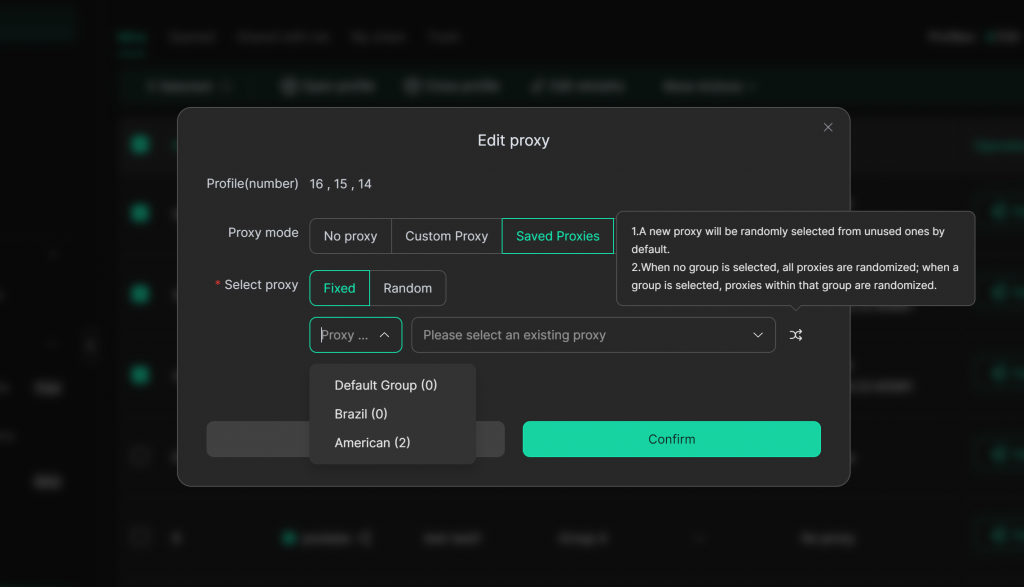
2.1 Batch Assign the Same Proxy
- Proxy mode: Saved Proxies
- Select proxy: Fixed
The “Fixed” method assigns the same proxy to the operating profiles. You may select a proxy group, click the button to prioritize randomly selecting an unused proxy, or manually choose a specific proxy to configure.
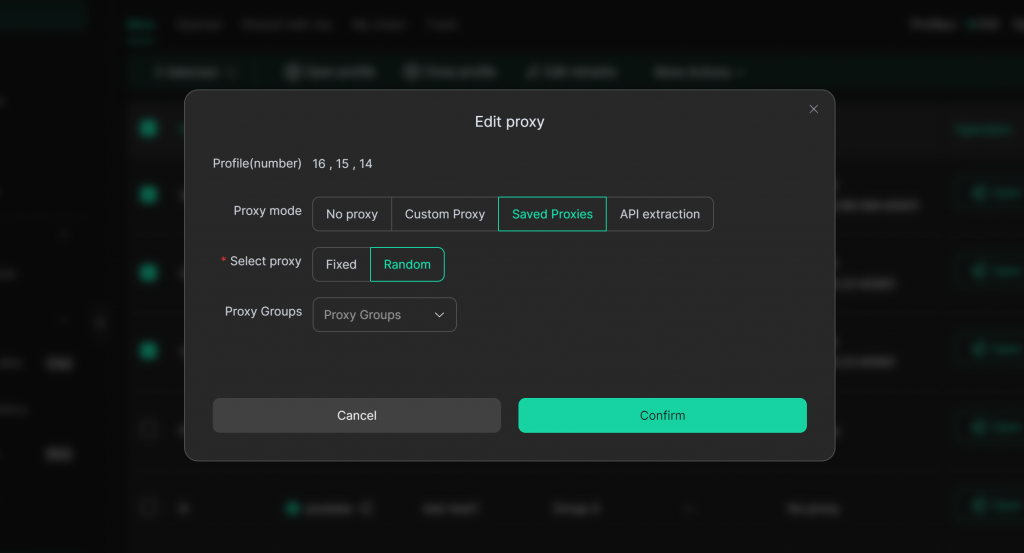
2.2 Randomly Assign Unused Proxies
- Proxy Method: Saved Proxies
- Select proxy: Random
The “Random” method will assign different proxies to each profile (provided the number of proxies exceeds the number of operational profiles).
It will prioritize randomly assigning unused proxies to selected profiles. If all proxies are already in use, it will randomly assign proxies that have been used before.
If a proxy group is selected, it will randomly choose from the proxies within that group. If no proxy group is selected, it will randomly choose from all proxies.
For any further questions, please contact DICloak Customer Service for further assistance.