In general, configuring proxies in an antidetect browser is done to conceal users’ actual IP addresses, to circumvent geographical restrictions for online activities, or to avoid detection on linked accounts.
It’s important to note that some countries cannot directly access overseas IP addresses. Therefore, if you configure an overseas IP proxy on DICloak, you need to set up international network access first by using methods like VPS/international dedicated lines/VPN to connect and access overseas IPs on DICloak.
DICloak supports configuring various mainstream proxy types, enabling you to switch IPs in real-time. An easy setup guide is provided below:
Operation Guide
1. Create Proxy
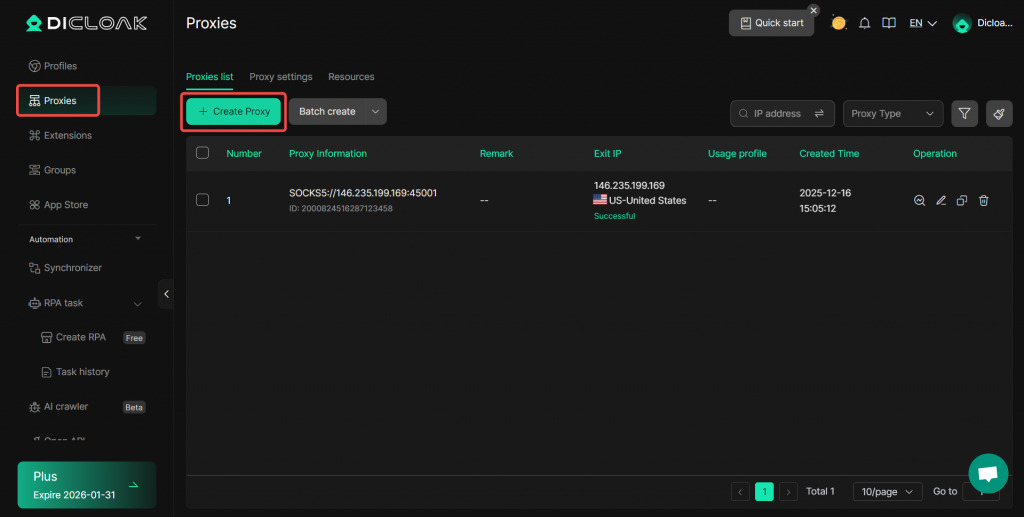
- Open and log in to DICloak software. Enter “Proxies” on the left navigation bar. Click the “Create Proxy” button.
2.Fill in Proxy Information
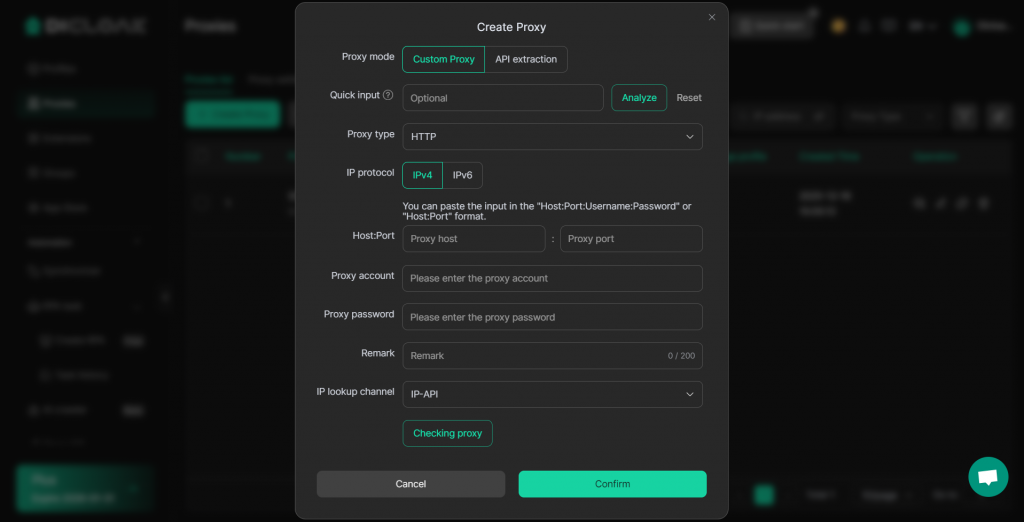
Supports creating proxies via two methods: “Custom Proxy” and “API Extraction”:
- Custom Proxy: Select the proxy type based on your purchased proxy information and input the relevant details. Supports quick input according to a specified format.
- Proxy Type: DICloak supports HTTP, HTTPS, SOCKS5, IPFLY (Dynamic proxy), 922S5(Dynamic proxy)、IPRoyal(Dynamic proxy) and Netnut(Dynamic proxy).
- Proxy Host: Enter purchased proxy host information (the proxy server acts as an intermediary device or software in the network, facilitating user-to-internet communication).
- Proxy Port: Enter purchased proxy port information (the port number used for communication on the proxy server).
- Proxy Account: Enter purchased proxy account information.
- Proxy Password: Enter purchased proxy password information.
- Remarks: Provide additional information to manage the proxy efficiently.
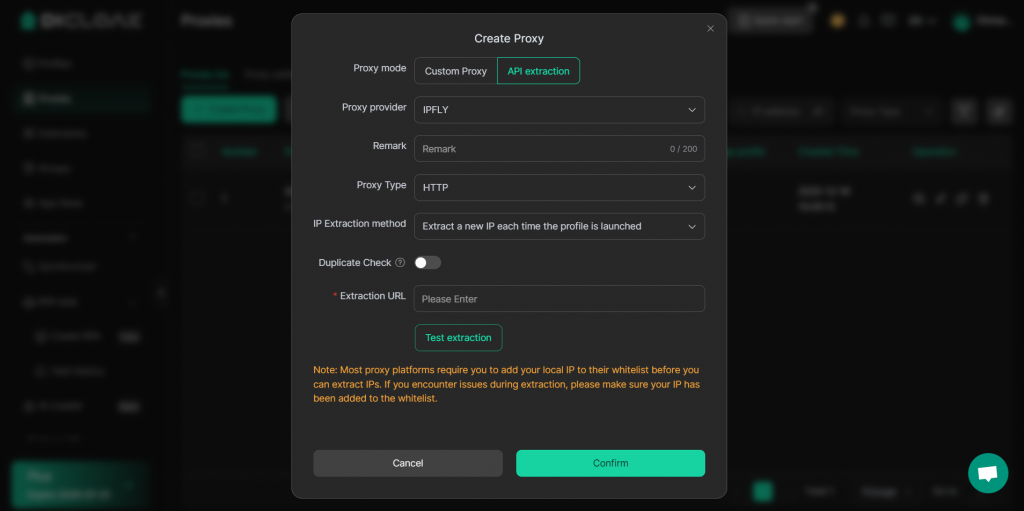
- API extraction: Extract proxy IPs using the extraction URL obtained from the proxy service provider.
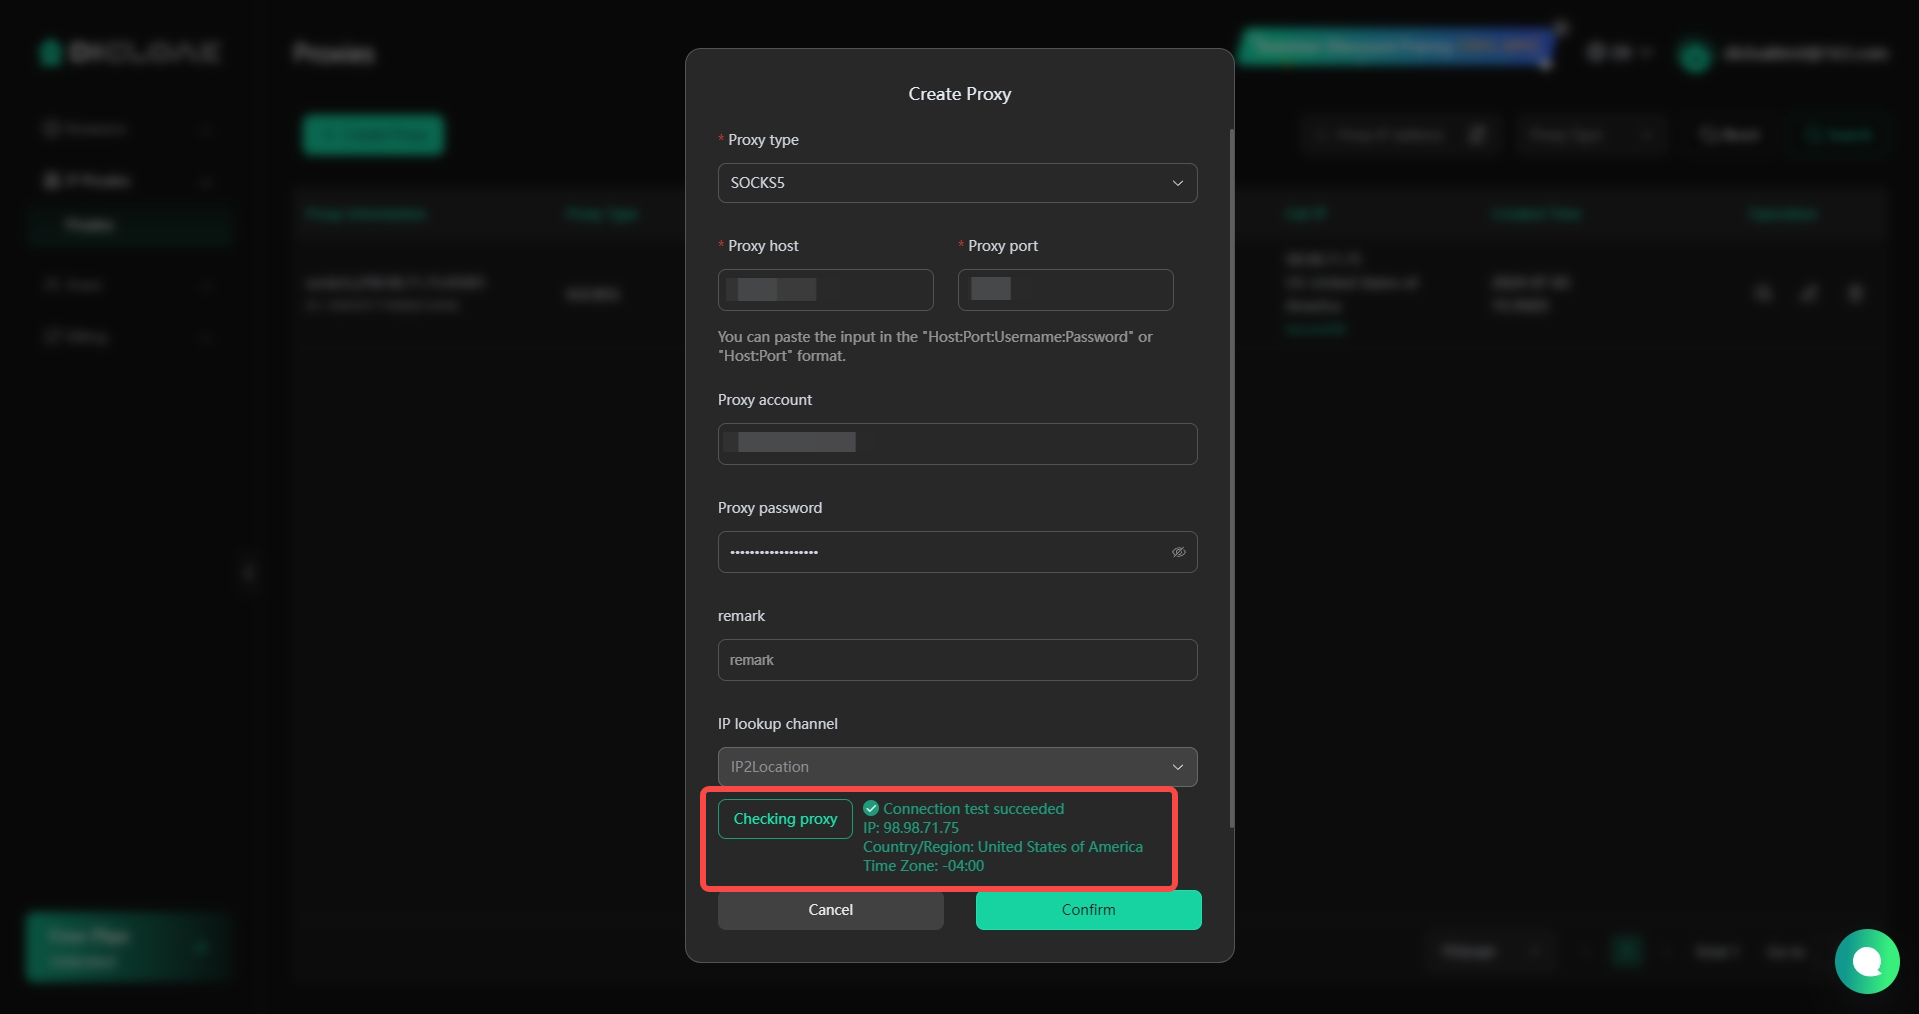
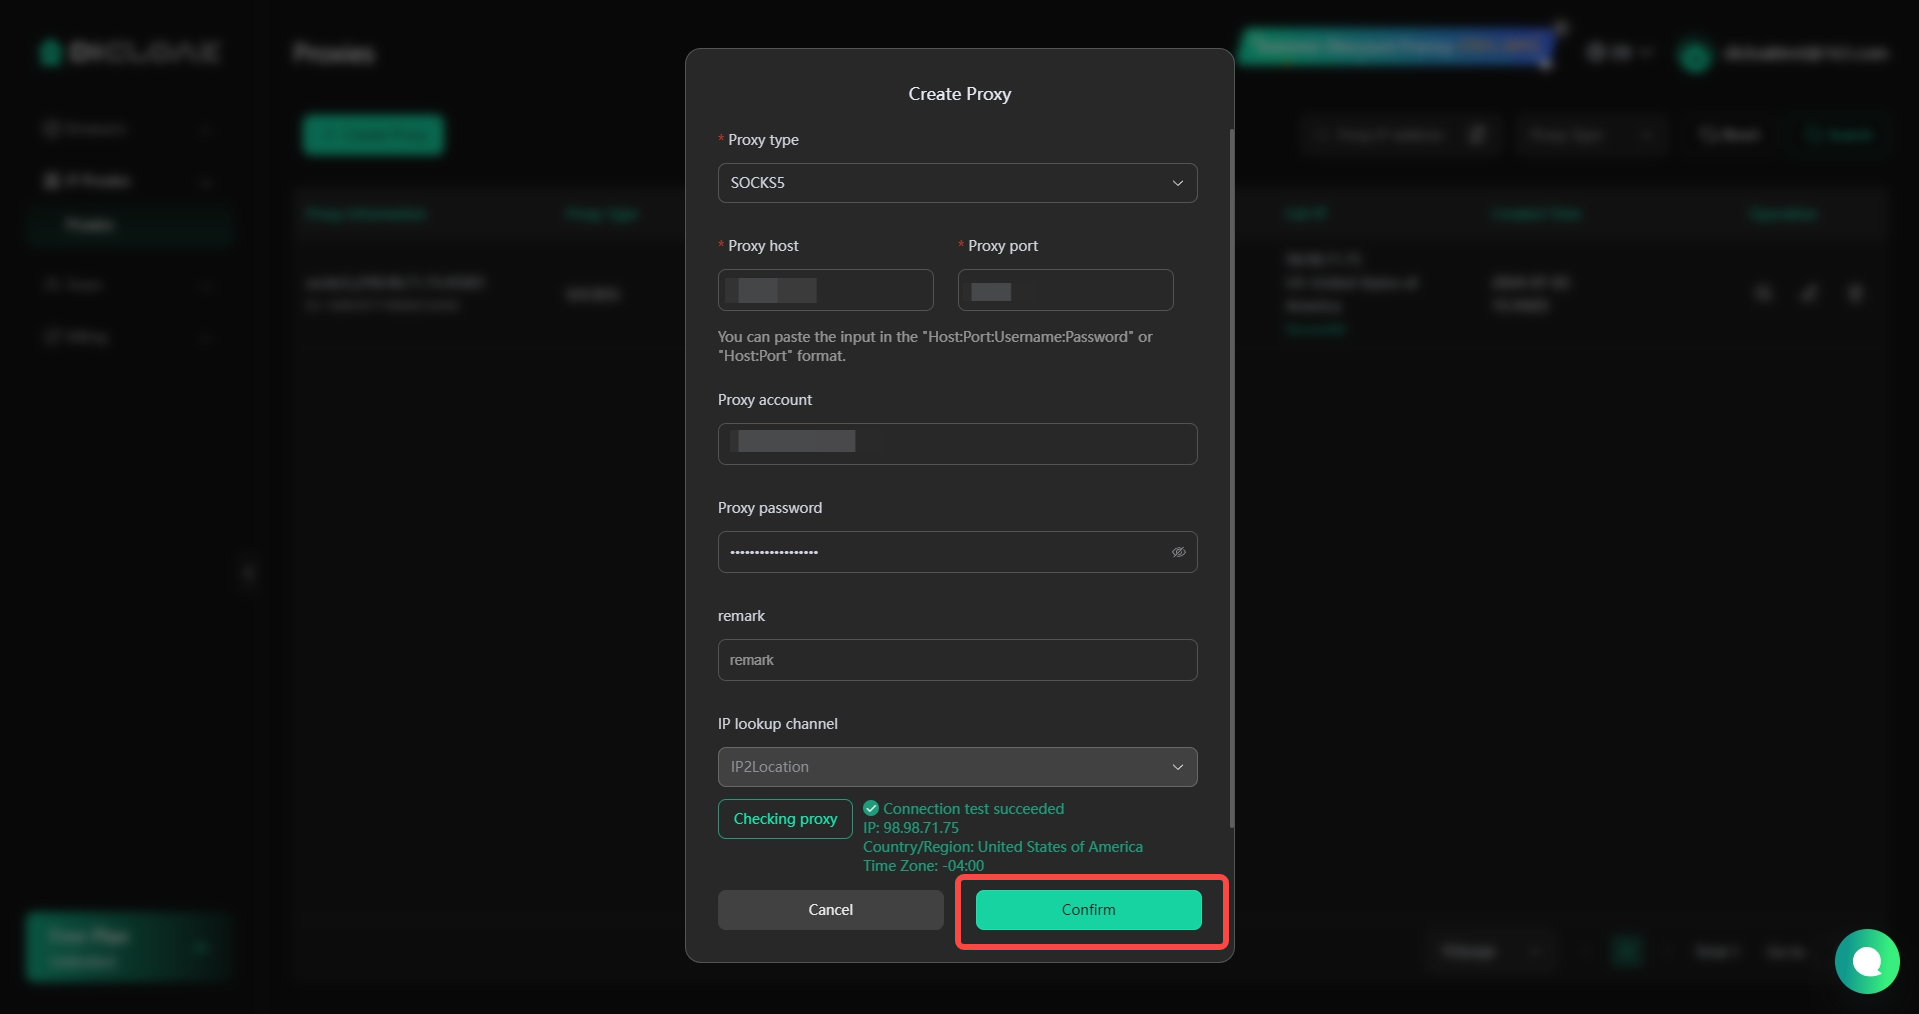
3.Check Proxy
- After filling in the proxy details, click “Checking Proxy” to verify if the proxy connection is successful. If not, review the entered proxy information for accuracy and ensure the purchased proxy is active.
4.Confirm Proxy Creation
- Click the “Confirm” button to complete the proxy creation.
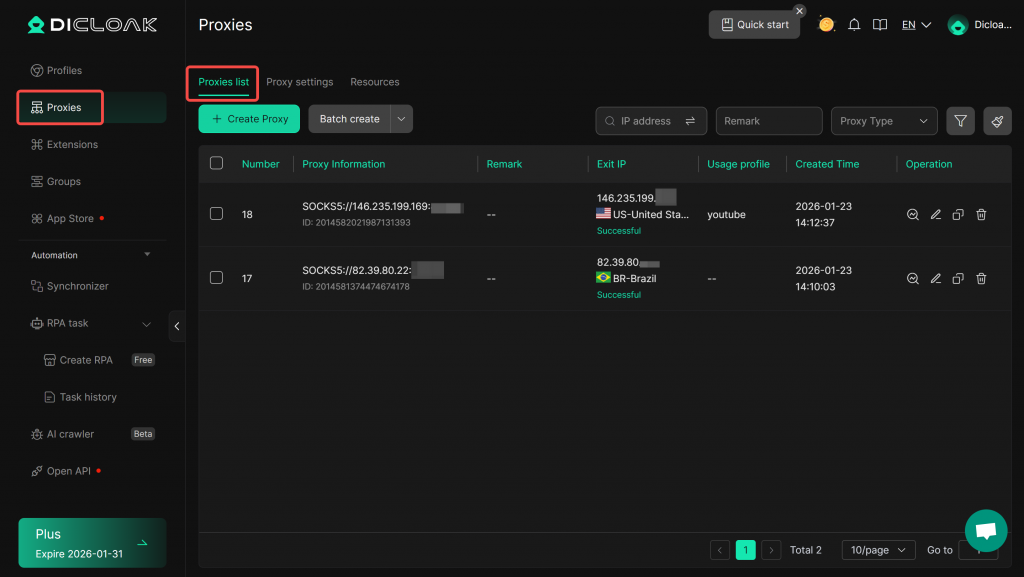
5.View Created Proxies
- After completing the proxy creation, you can return to “Proxies” page to view the information of the proxies you have created. Here you can perform the following actions on proxies: “Test Connection”, “Edit” , “Copy Information” and “Delete”.
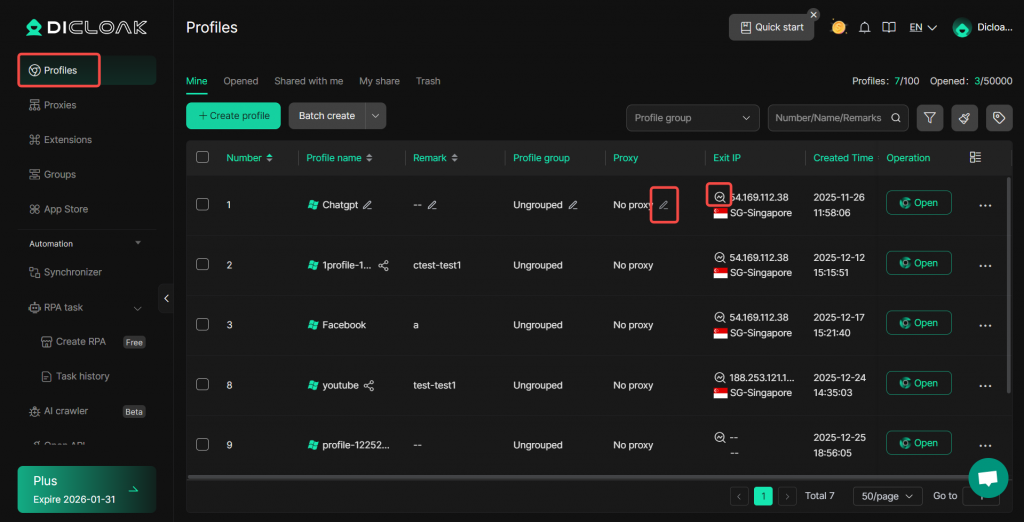
6. Assigning Proxies to profiles
Enter “Profiles“, you can directly edit a profile’s IP proxy settings or batch edit proxy information.
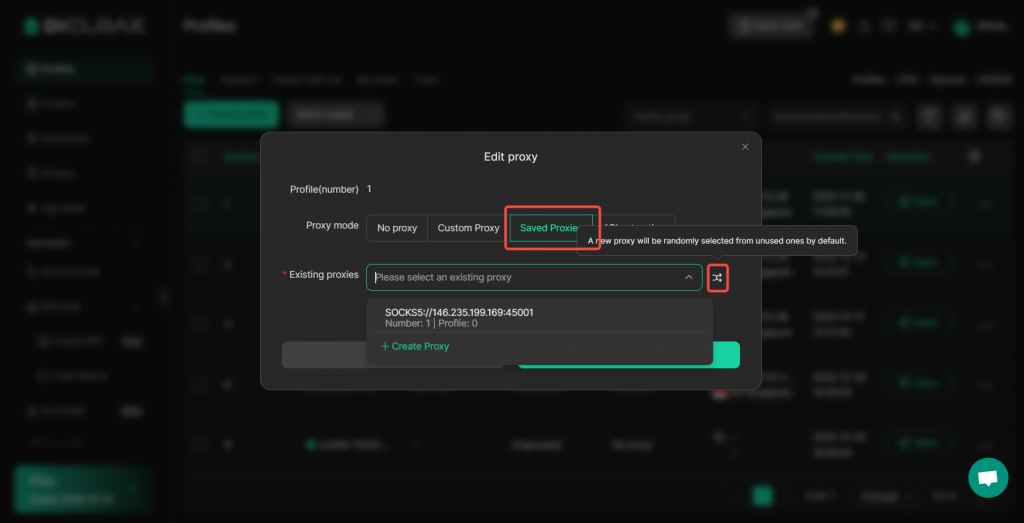
Click “Saved Proxies”, you can select proxies already created in the [Proxies], while also supporting priority random selection of unused proxies.
Frequently Asked Questions
1.Does DICloak provide proxy purchase services?
DICloak does not provide proxy purchase services. DICloak specializes in proxy configuration services. Therefore, you should purchase proxies from other proxy service providers first. Then configure them on DICloak and make full use of them. In the [proxies], we provide proxy resources.
2.How should I handle proxy connection failures?
If your proxy connection fails, please check the followings:
- Correctness of entered proxy information (such as port, host, account, password).
- Expiry status of the proxy. Renew if it expired before reconfiguring.
- For users in mainland China (excluding Hong Kong, Macau and Taiwan), please ensure your international network setup via VPS/international dedicated lines/VPN for accessing overseas IPs on DICloak.
If issues persist, you can contact customer support within the application for assistance.
3.Can I configure the same proxy across different browser profiles?
Yes, you can. However, it’s recommended to configure different proxy IPs for each browser profile in order to achieve better performance.