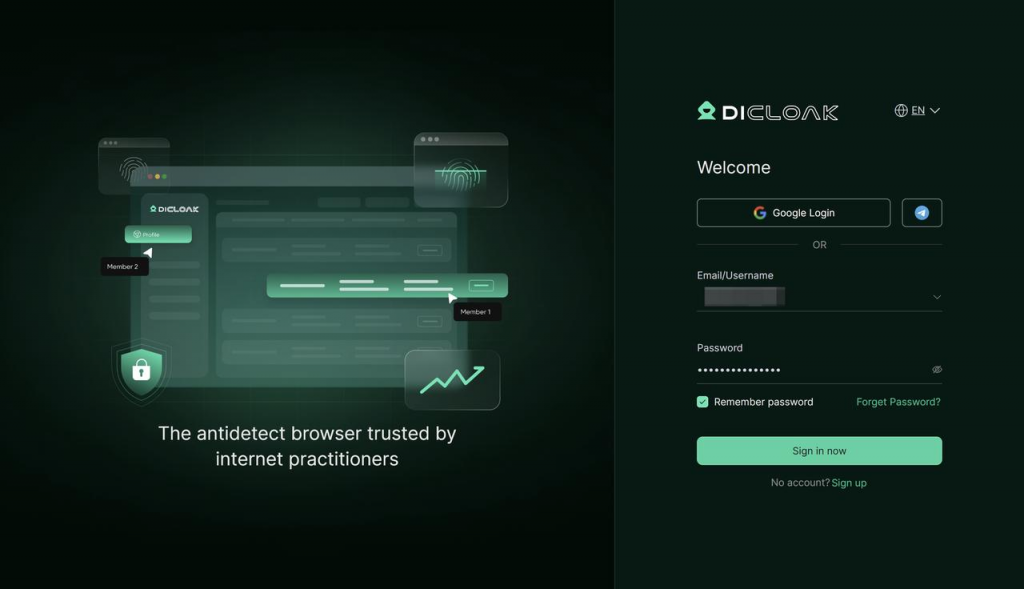
DICloak antidetect browser allows you to create independent browser profiles and IP addresses for each Facebook account. This way, you can easily manage multiple Facebook accounts. At the same time, DICloak’s anti-linking feature significantly reduces the risk of your Facebook accounts being banned.
1 Preparation Before Managing Multiple Facebook Accounts
1.1 Download and Register DICloak Antidetect Browser
- Visit the official DICloak antidetect browser websiteto download the software. Currently, DICloak supports running on computer devices (Windows, macOS and Linux systems).
- Register and log in to your DICloak account.
1.2 Subscribe to the Appropriate DICloak Paid Plan
Before using DICloak to manage your Facebook accounts, you need to select the appropriate paid plan based on your team size and the number of Facebook accounts.
1.2.1 Confirm Team Details:
- How many people are in your team – buy as many members in the plan as there are people.
- How many Facebook accounts do you need to manage – buy as many browser profiles as there are Facebook accounts in the plan.
1.2.2 Subscribe to a Paid Plan:
It is currently recommended that users subscribe to the Plus plan for Facebook account management. The Plus plan offers more automation features and supports internal member accounts logging in on multiple devices simultaneously. For more details, please visit the DICloak pricing page.
1.3 It’s Recommended to Purchase Static Residential Proxies
To ensure the stability and security of your Facebook accounts and to achieve IP isolation for each account, it’s recommended to configure static residential proxies for your browser profiles. Important Note: The above is a suggestion; please determine whether to purchase proxies based on your actual situation.
1.3.1 Why Do You Need Static Residential Proxies?
When you use data center IPs or low-quality proxy IPs to log in to Facebook, frequently change the login IP addresses, or access multiple Facebook accounts through the same IP, these behaviors can increase the risk of your Facebook accounts being banned. Important Note: It’s advised to choose static residential proxies corresponding to the country or region of your Facebook account. For example, if your Facebook account is based in the U.S., it is recommended to configure a U.S. static residential proxy IP . Please note that if you do not configure a proxy, the profile will use your local device’s network and will not achieve IP isolation.
1.3.2 Where Can You Purchase Static Residential Proxies?
DICloak antidetect browser does not provide any proxy services, so we suggest:
- You can search for proxy service providers online to purchase proxies.
- You can visit the DICloak antidetect browser software’s [Proxies] – [Resources] page to check out DICloak’s partnered proxy service providers. Important Note: The [Proxy Resources] page shows third-party proxy resources. Please assess the quality of the IPs yourself (IP quality affects webpage access experience, so it’s suggested to test), and if you encounter any issues, contact the corresponding proxy service provider’s customer service for assistance.
1.3.3 How Many Static Residential Proxies Do You Need to Purchase?
Normally, one static residential proxy is needed for each Facebook account. For example, if you have 99 Facebook accounts, it’s recommended to purchase 99 static residential proxy IPs.
2 Necessary Configuration Steps for Managing Multiple Facebook Accounts in DICloak
2.1 Pre-Configuration Settings
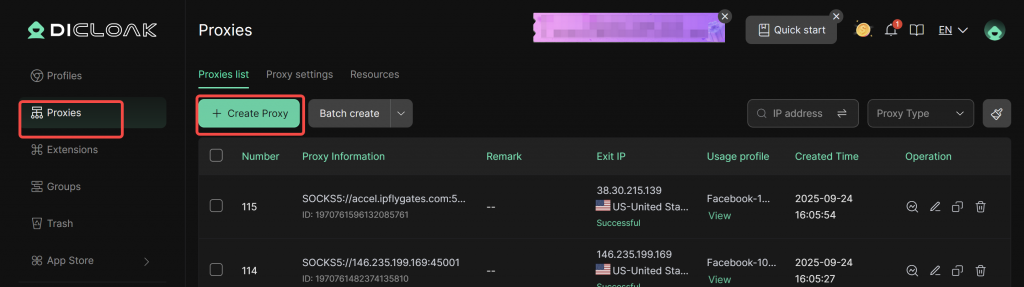
- Create Proxy: Go to [Proxies] to create a proxy.
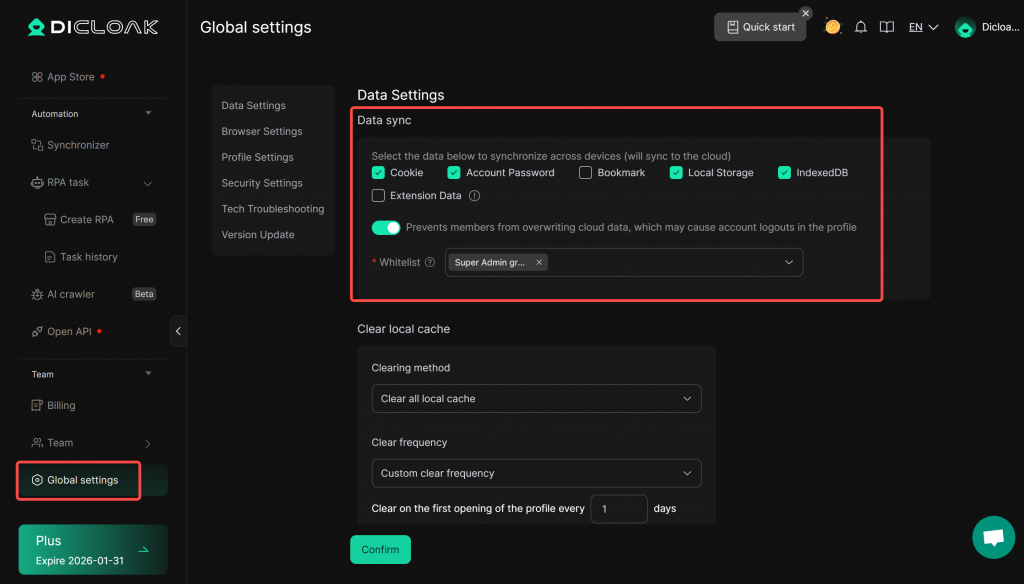
- Enable Data Sync Feature: Go to [Global Settings] and enable the data sync feature.
2.2 Configure Facebook Account Browser Profiles
DICloak currently supports creating individual Facebook browser profiles and importing Facebook profiles in bulk. You can choose the method that best suits your situation.
2.2.1 Create a Single Facebook Browser Profile
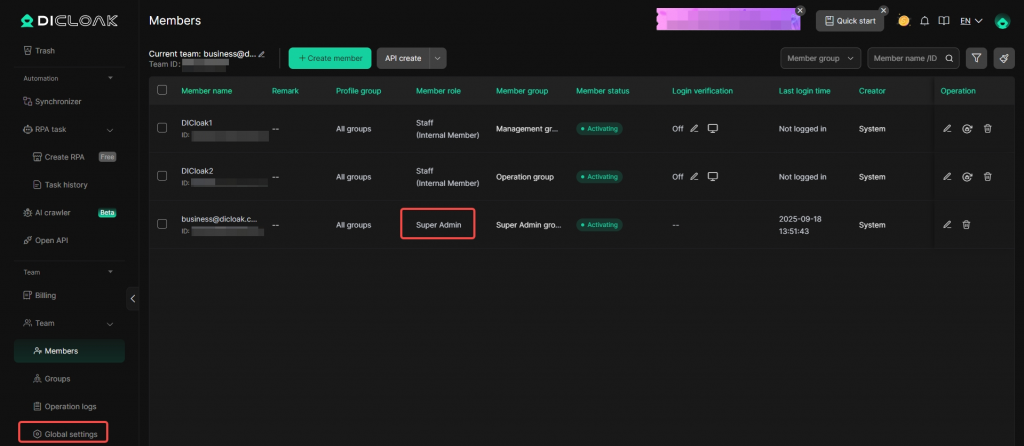
Important Note: The following operations should be performed using the super admin account (you can check the admin account in the member list).
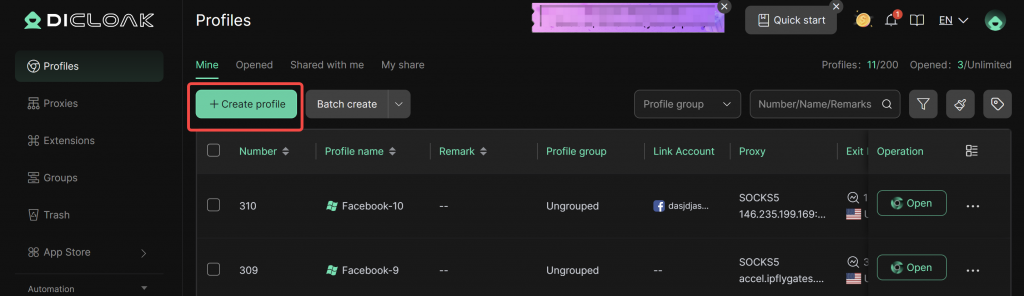
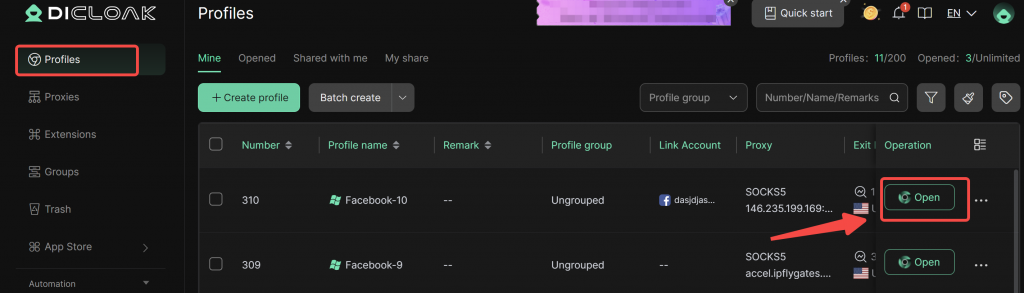
- Create Profile: In the main interface, find and click [Profiles], then click the [Create Profile] button. The system will pop up a configuration page for creating a profile.
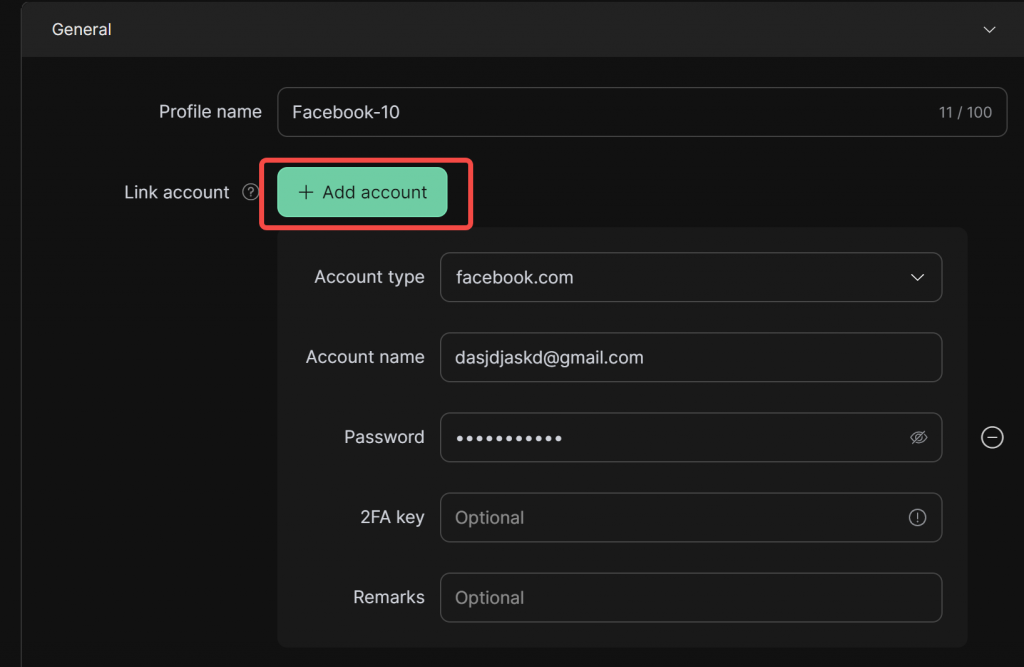
- Add Account: Click [Add Account], select the Facebook platform, and enter the Facebook account password to bind the Facebook account.
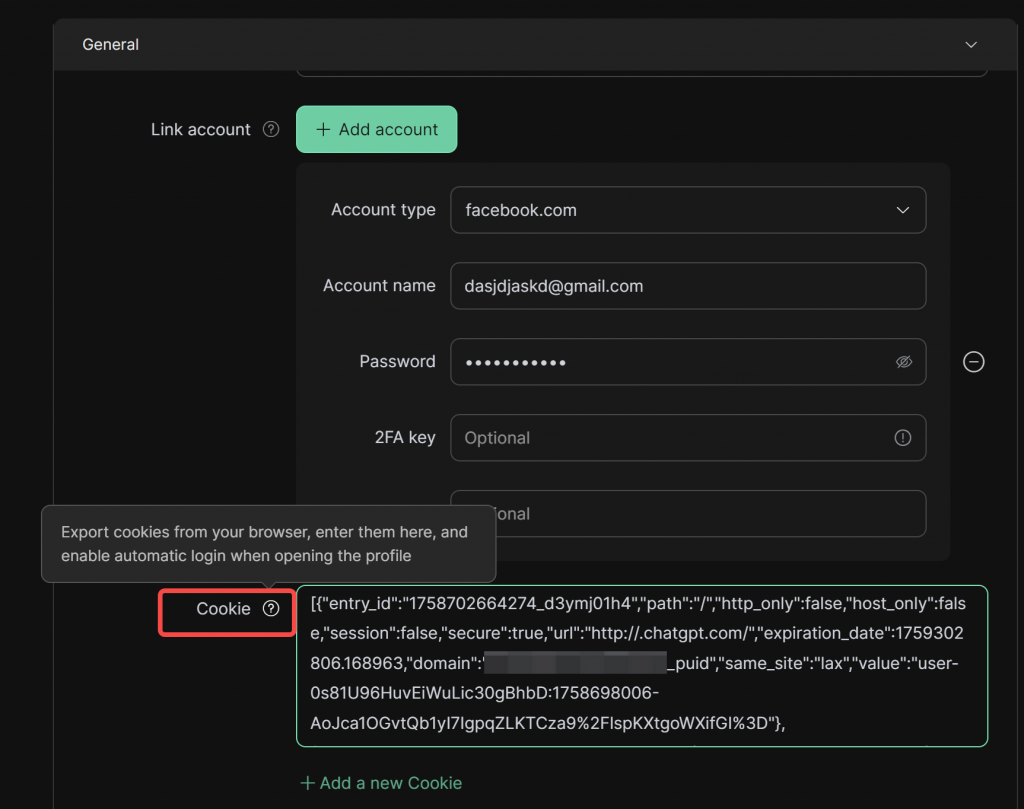
- Import Cookie Data: If you do not bind an account and password, you can also import the cookie data of an already logged-in Facebook account to make the Facebook website in your browser appear logged in.
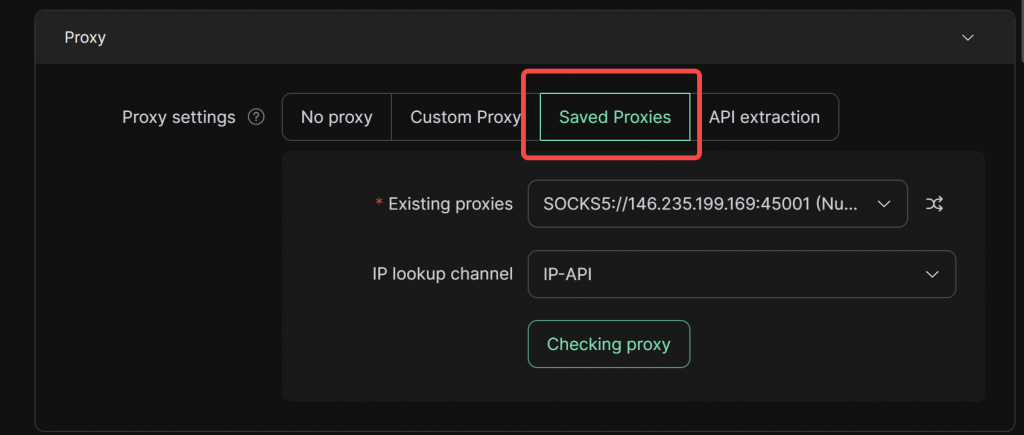
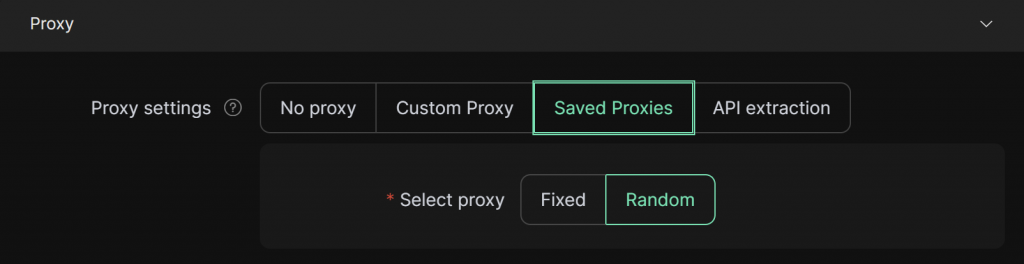
- Configure Proxy: Select [Saved Proxies].
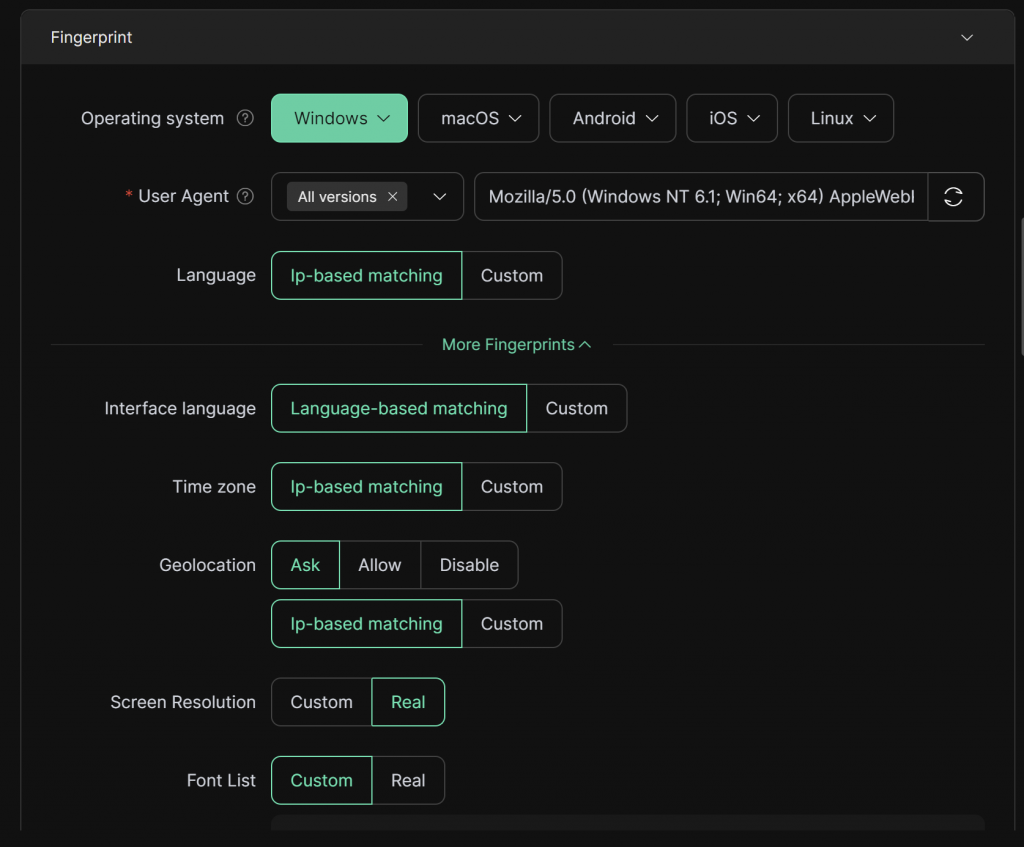
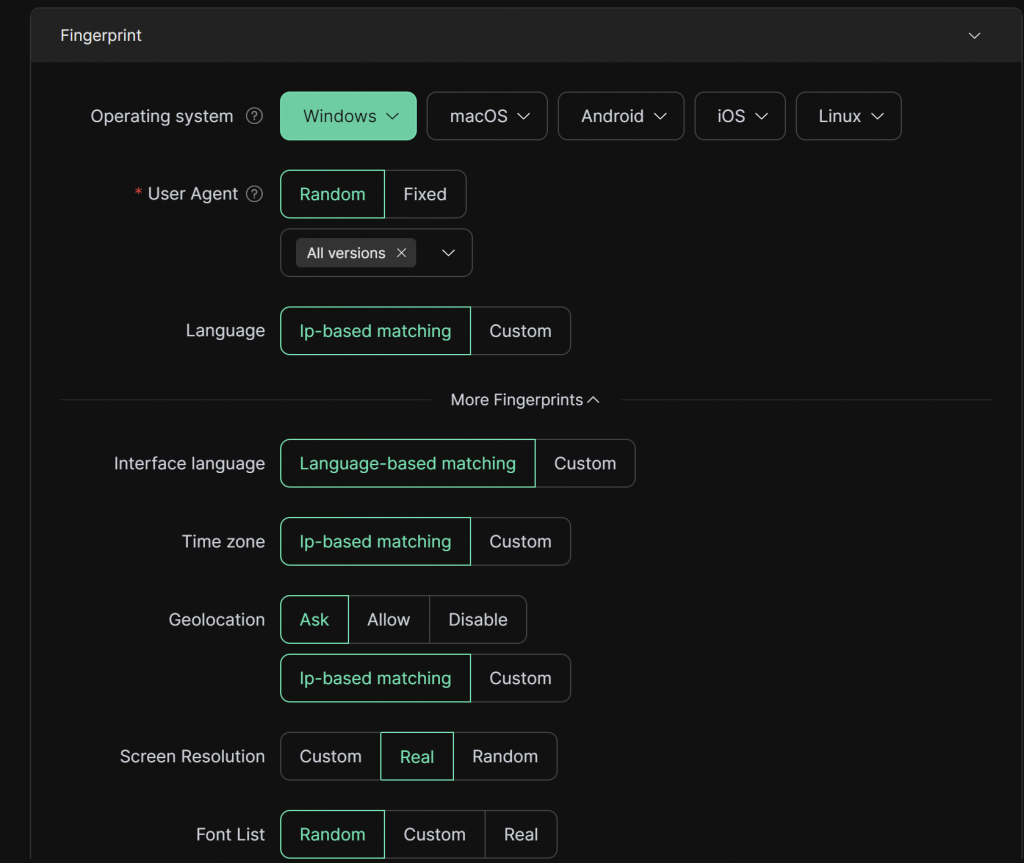
- Configure Fingerprint: Adjust the fingerprint as needed, such as the operating system/UA, etc. (The default fingerprint is sufficient and does not require special modification).
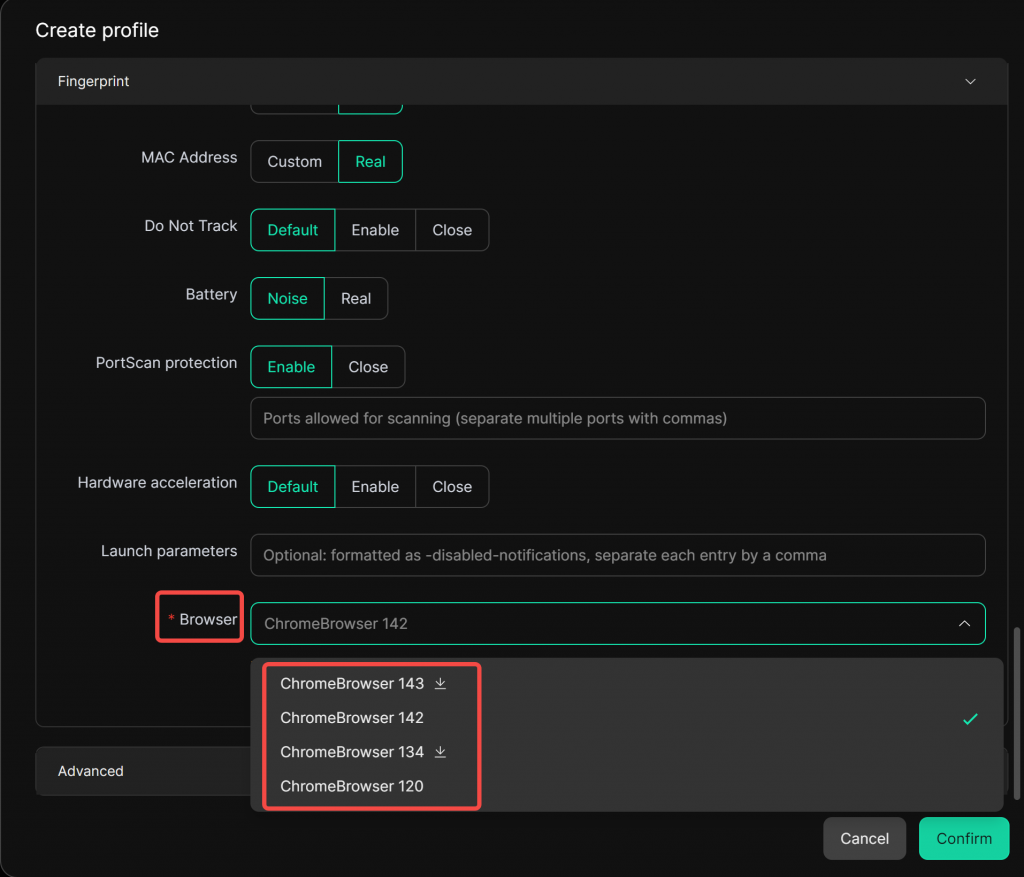
- Choose Browser Kernel Version: The default choice is kernel 142. If you prefer a newer version, select kernel 143.
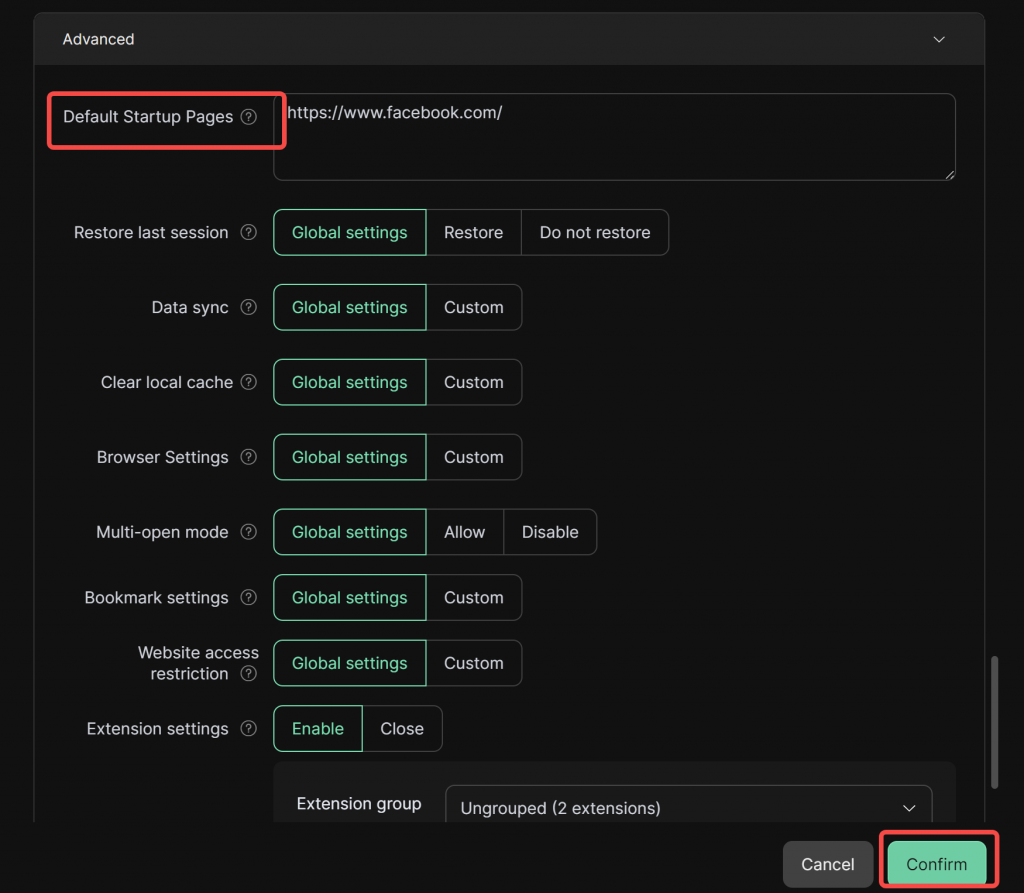
- Set Default Startup Page: Enter the Facebook URL into the [Default Startup Pages] field so that every time you open the profile, it will directly open Facebook. Then, save the settings.
- Open the Profile to Access Facebook: Go to the [Profiles] list and click [Open] to access the Facebook account.

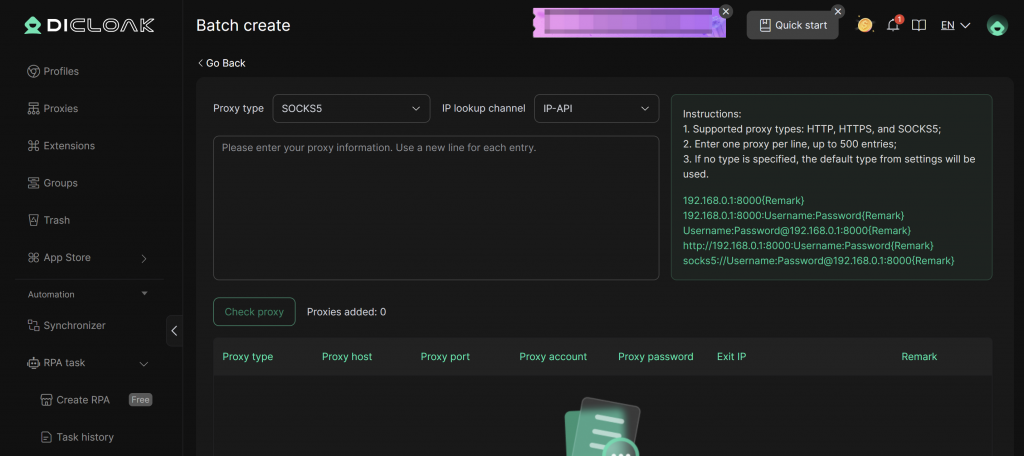
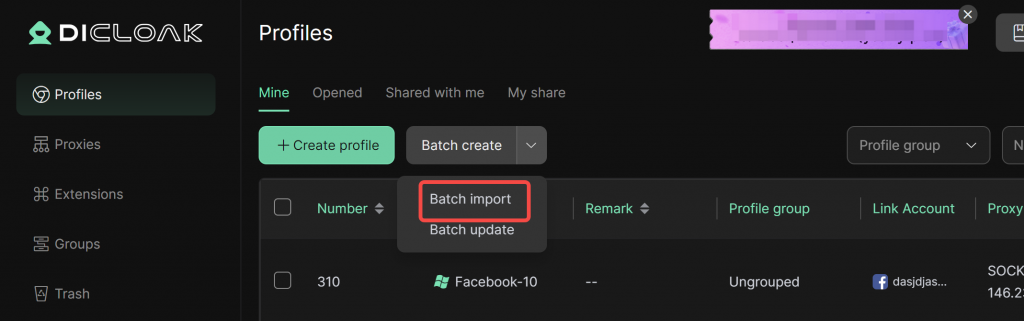
2.2.2 Bulk Import Facebook Accounts
If you have purchased a large number of Facebook accounts from a Facebook account provider and need to import them into DICloak, follow the steps below:
- Bulk Import Facebook Accounts: In the main interface, find and click [Profiles], then click the [Bulk Import] button. The system will pop up a bulk import profile configuration page.
- Import Social Media Template: Choose [Social Media Template], process the existing account information according to the template content, and then click upload to upload the corresponding document.
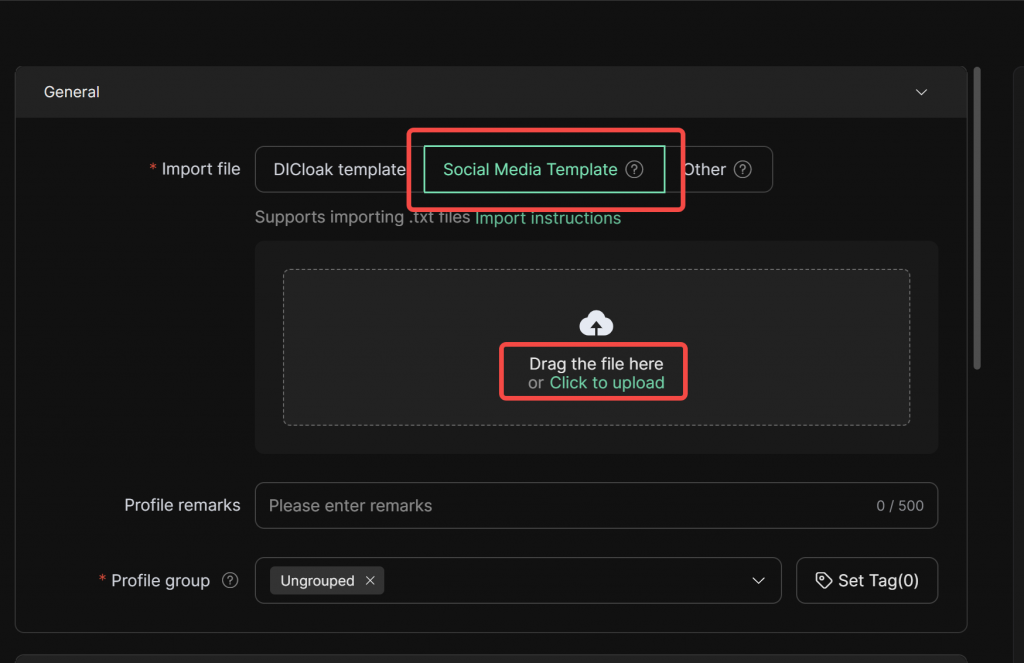
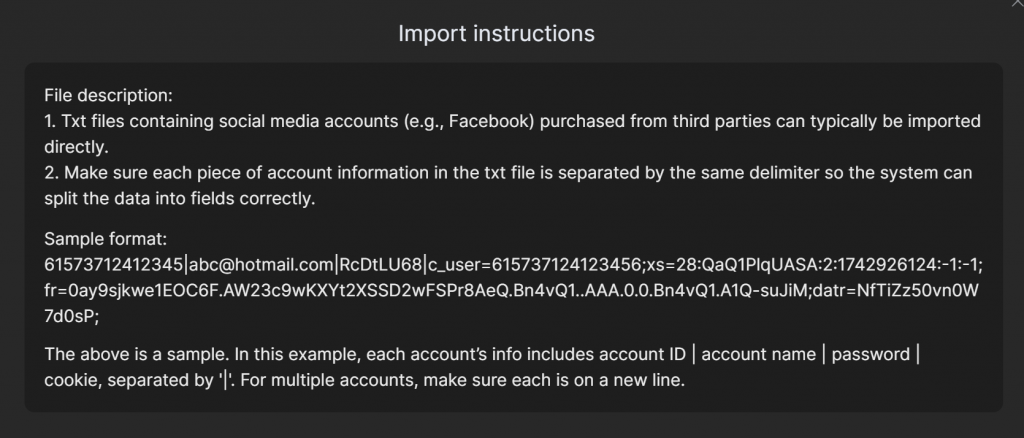
Important Note: Please refer to the tips below for processing the imported document.
- Configure Proxy: Choose [Random] to configure proxies. Important Note: If you select [Random] to configure proxies, the system will prioritize matching unused proxies to the Facebook profiles. If your number of proxies is insufficient to match each Facebook profile, some profiles may be matched with the same proxy. Therefore, it is recommended to save the settings and confirm that each profile has a unique proxy to avoid multiple Facebook profiles using the same proxy.
- Configure Fingerprint: Configure the fingerprint as needed. Additionally, it’s recommended to randomly select the UA.
- Set Default Startup Page: Enter the Facebook URL into the [Default Startup Pages] field so that every time you open the profile, it will directly open Facebook.Then, save the settings to complete the Facebook account import.

- Open the Profile to Access Facebook: Go to the [Profile Management] list and click [Open] to access the Facebook account.

3 Advanced Features for Managing Multiple Facebook Accounts
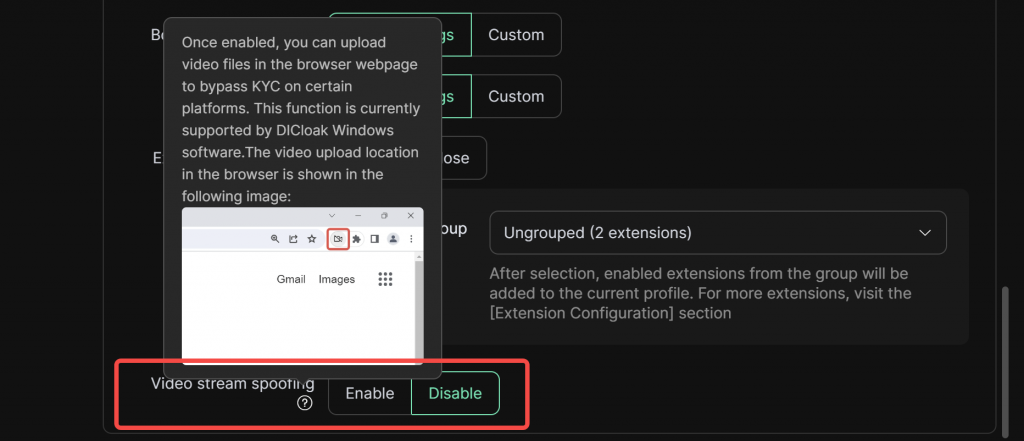
3.1 Video Stream Spoofing Feature
You can easily upload a video to complete Facebook’s face verification process.
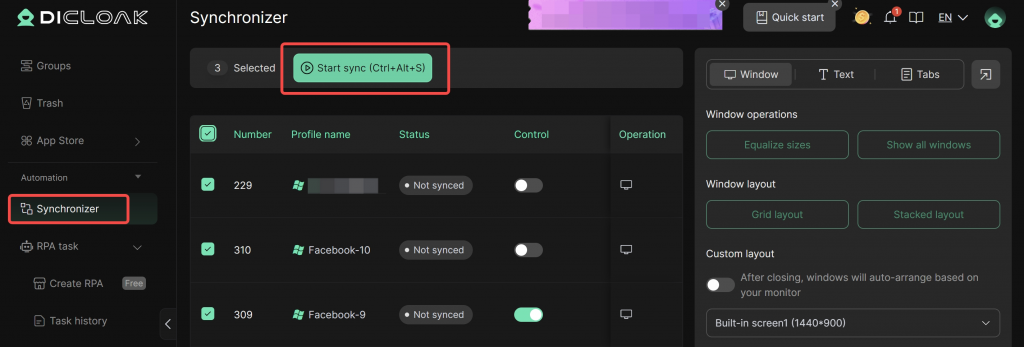
3.2 Window Synchronization Feature
You can use the window synchronization feature to operate multiple Facebook browser profiles at the same time, avoiding repetitive tasks.
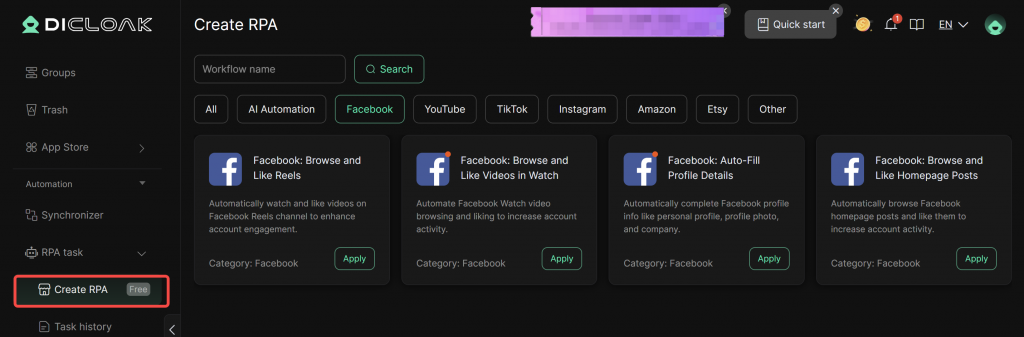
3.3 RPA Feature
You can use the RPA template to automate Facebook account nurturing, reducing labor and time investment while improving the efficiency of account nurturing (You can contact DICloak customer service to customize related RPA workflows).
4 Other Common Settings
4.1 Remove Kernel Page
If you want to remove the following page, go to [Global Settings] and check [Do not show homepage (check page) when opening the profile].
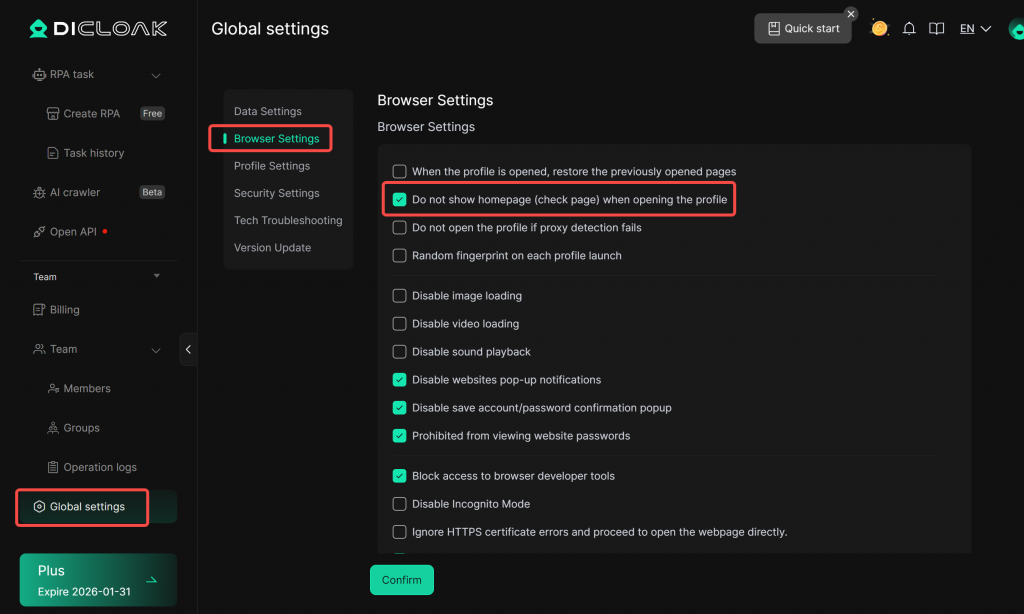
4.2 Disable Restore Page
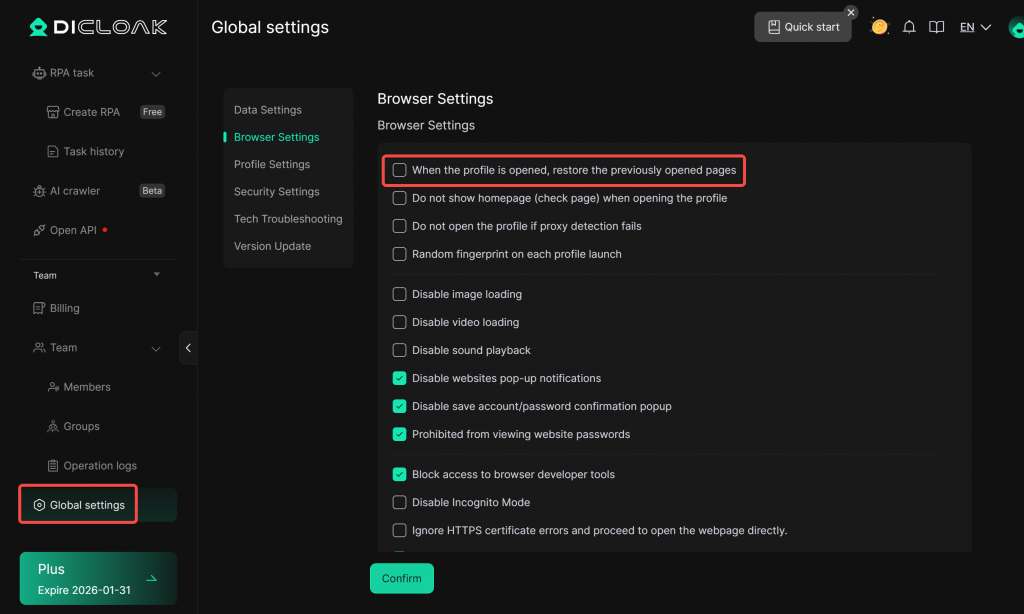
If you do not want the previously visited pages in the profile to appear each time you open a profile, go to [Global Settings] and uncheck [When the profile is opened, restore the previously opened page].
4.3 Disable opening the browser profile when proxy detection fails
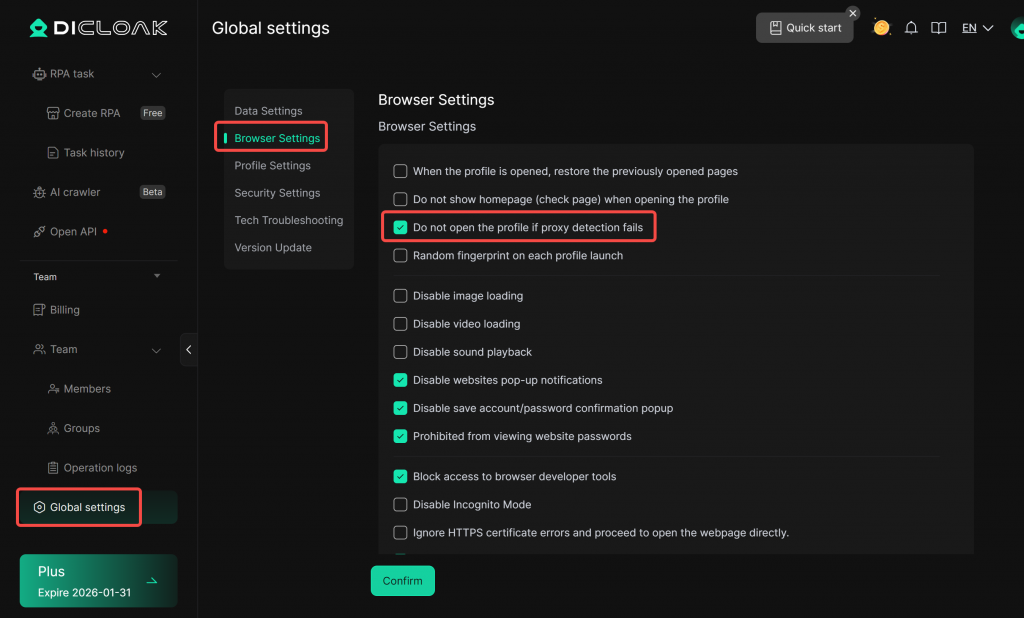
To maintain account stability and avoid risks posed by proxy IP address changes, please go to [Global Settings] and uncheck [Do not open the profile if proxy detection fails].
5 Contact Customer Service
If you have any questions during the setup process, you can contact DICloak’s customer service for assistance.