The Notification Assistant is an extension designed for Super Admins to send notifications and reminders to their members, supporting the setting of announcements, daily notifications, and reminders for member account expiration. When a member opens the profile, a message pop-up will automatically appear, effectively improving the efficiency of message delivery.
1. Open [Extensions]
Open and log in to DICloak software, find [Extensions] in the left navigation bar, enter the [Marketplace] page, search and “Add” Notification Assistant.
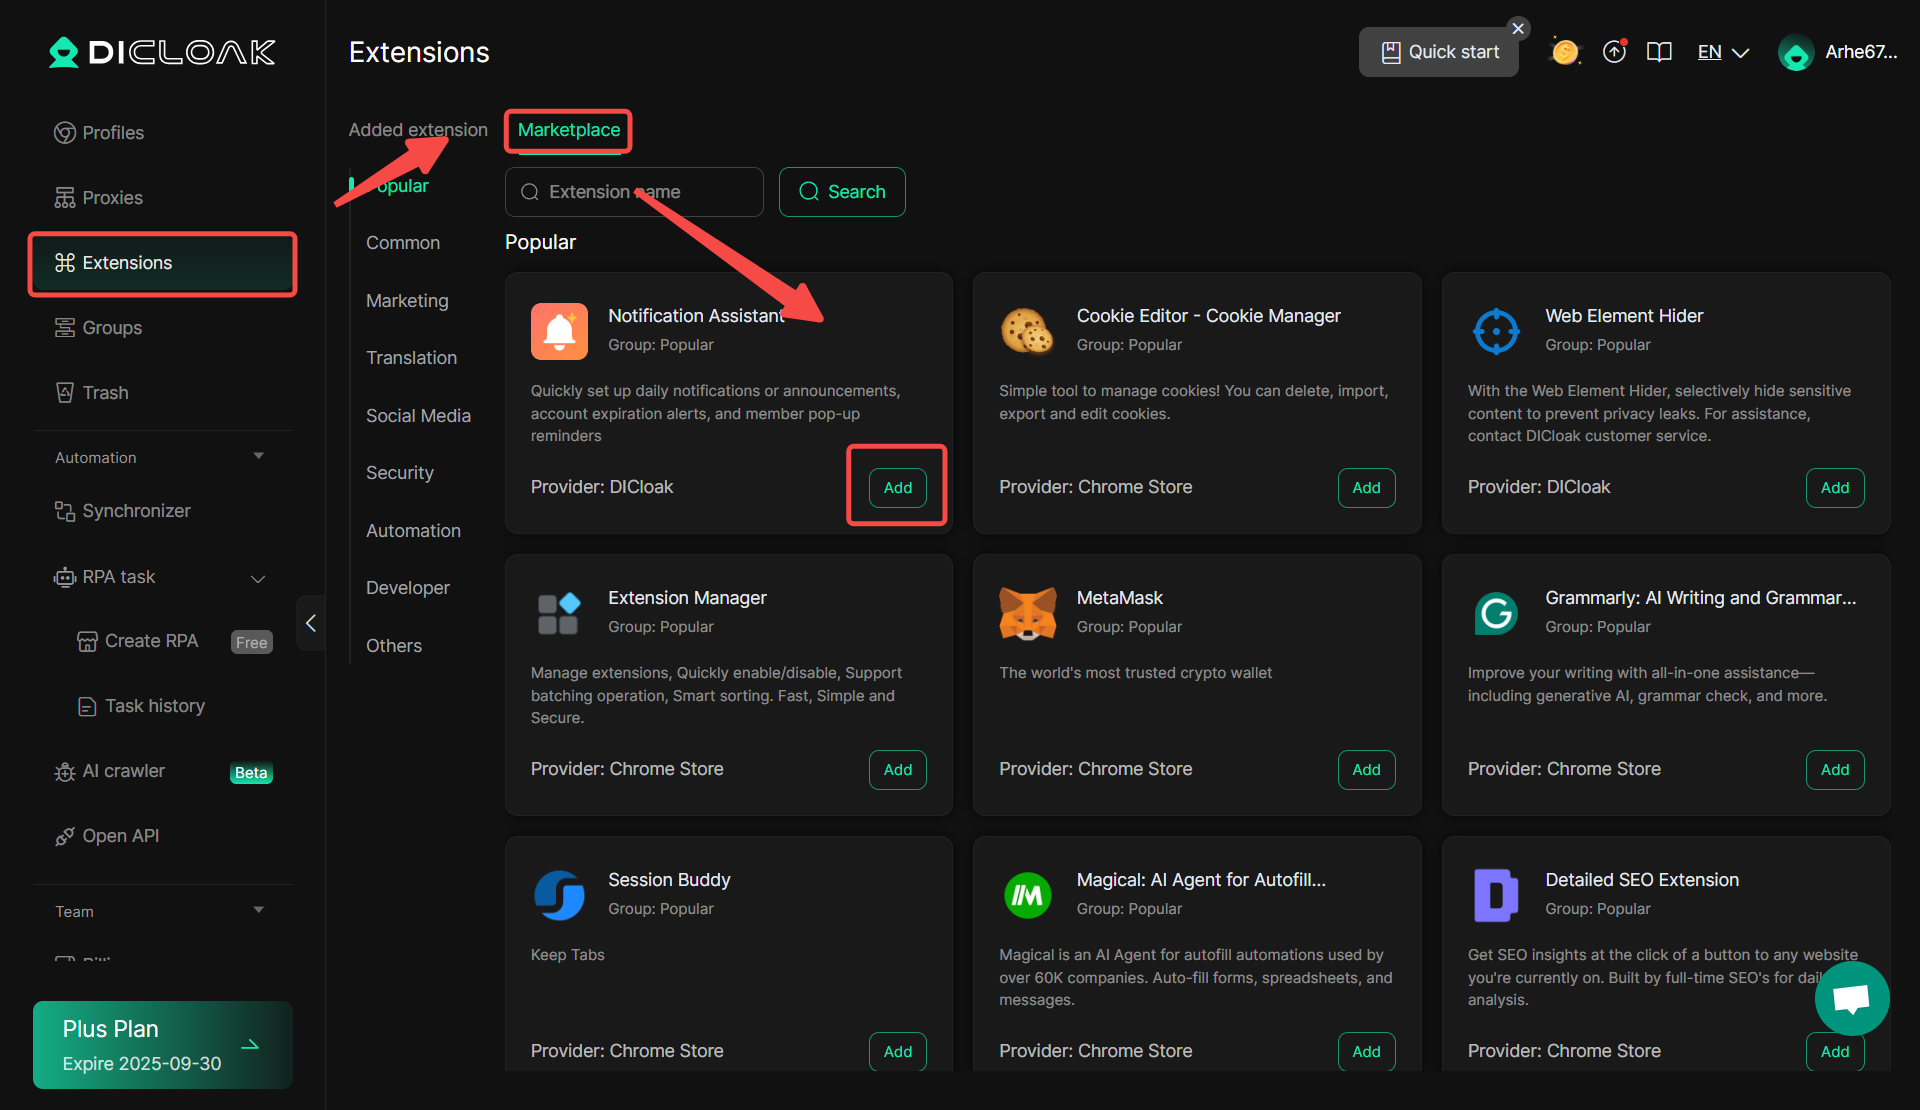
2. Add “Notification Assistant”
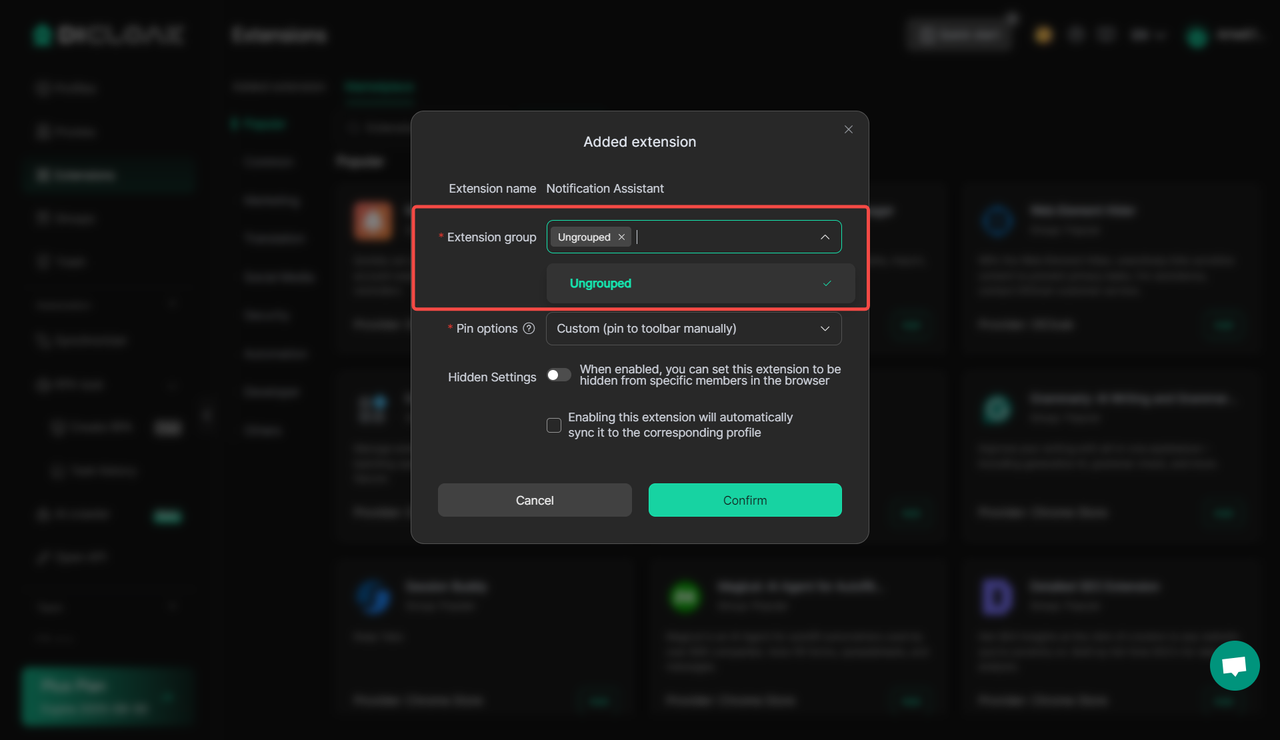
Click “Add” , then select “Extended Group” , after which you can configure this extended group in the profile where you need to install the “Notification Assistant” extension tool, and message notifications will only be pushed in the browser of that profile.
Set “Pinn options” , where you can choose whether to always keep the extension tool fixed in the toolbar of the browser or allow members to customize the fixed mode of the tool.
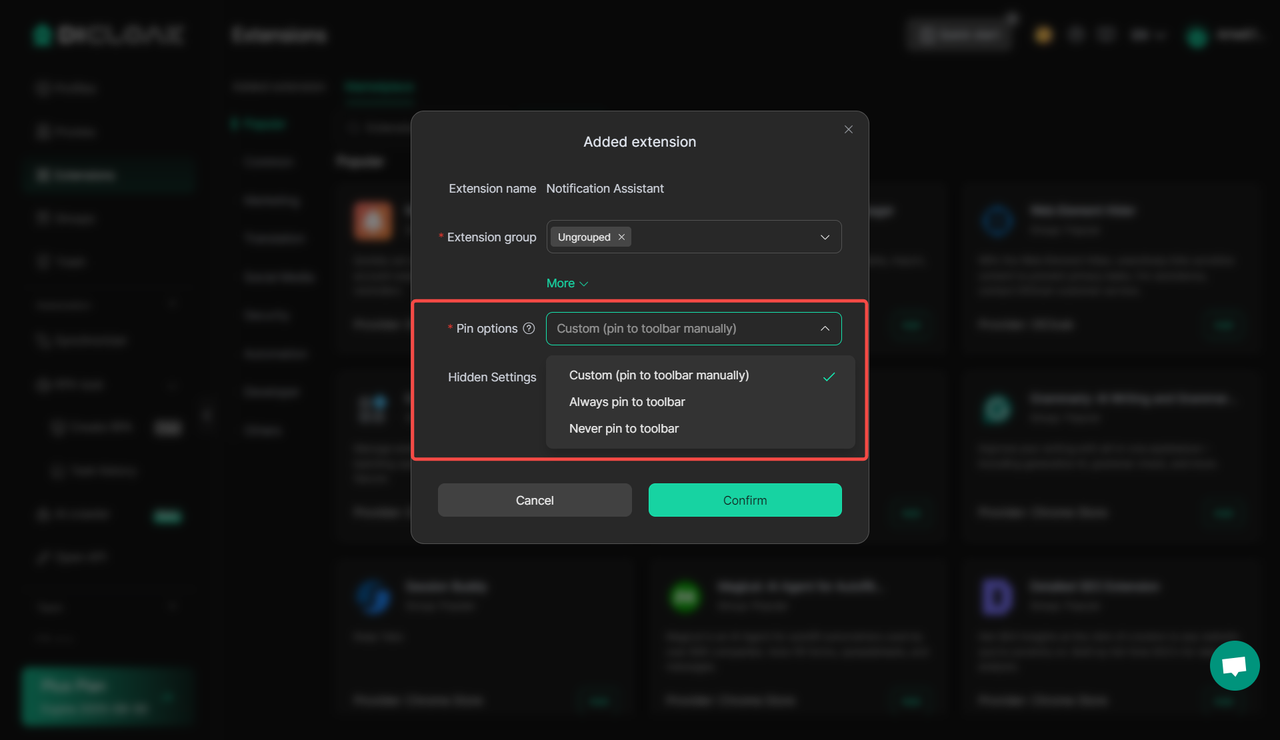
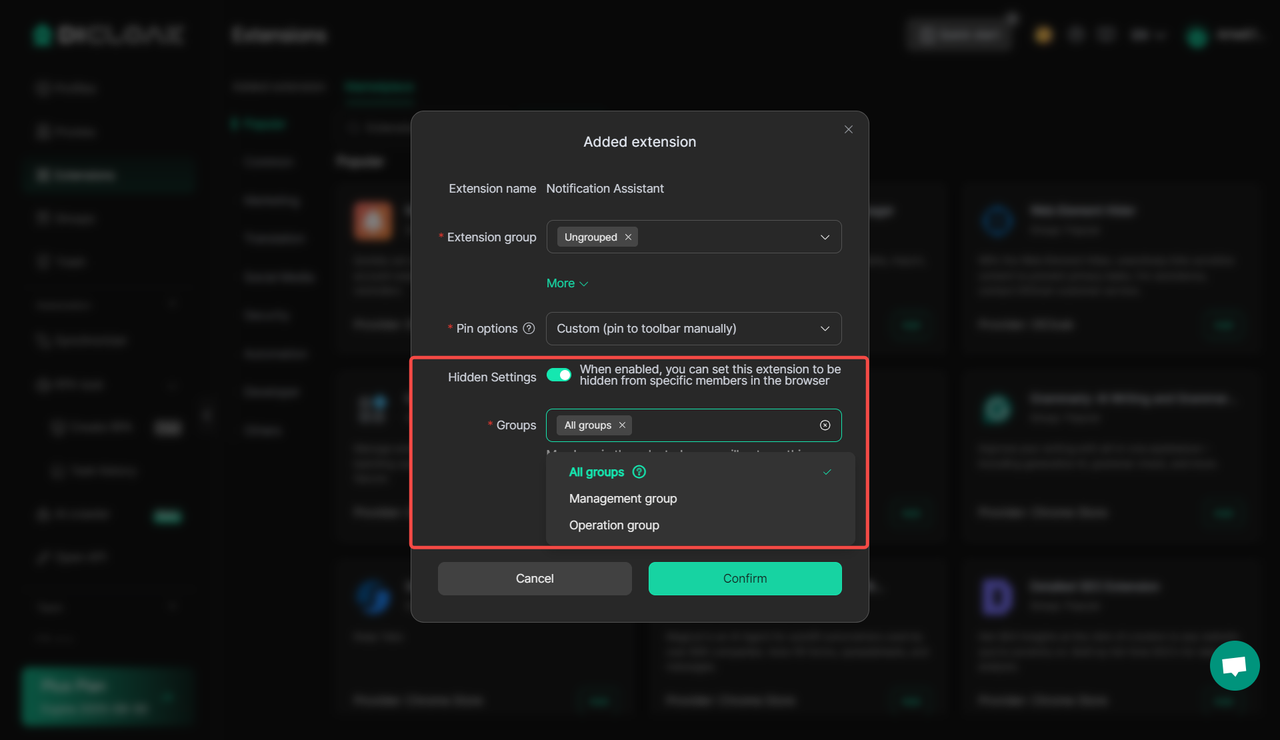
It is recommended to enable “Hidden Settings” , select the “Groups” of members to be hidden, which will prevent members of this group from viewing and managing (such as closing, enabling, or removing) this extension tool in the browser.
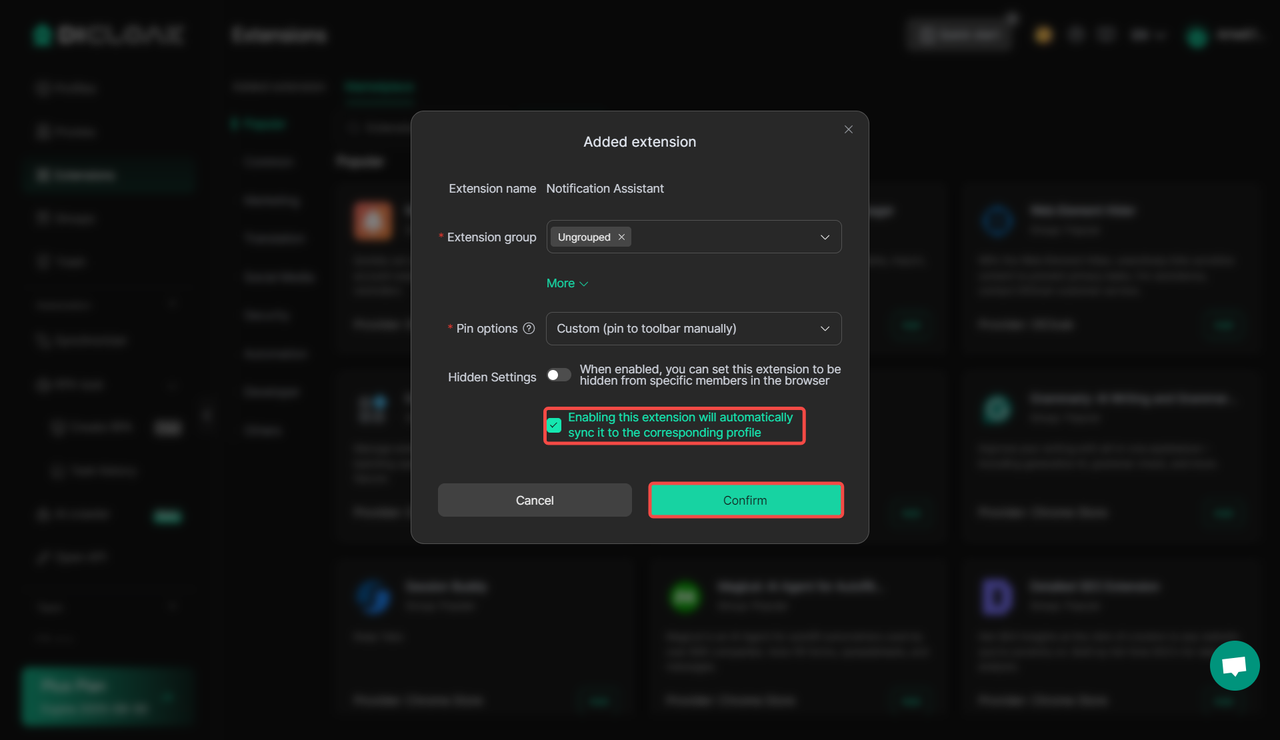
Click after completing the settings“Confirm”, it is recommended to check“Enabling this extension will automatically sync it to the corresponding profile”.
3. Configure the Extension Group to the Corresponding Profile
In [profileal] > [Mine], click “Edit” .

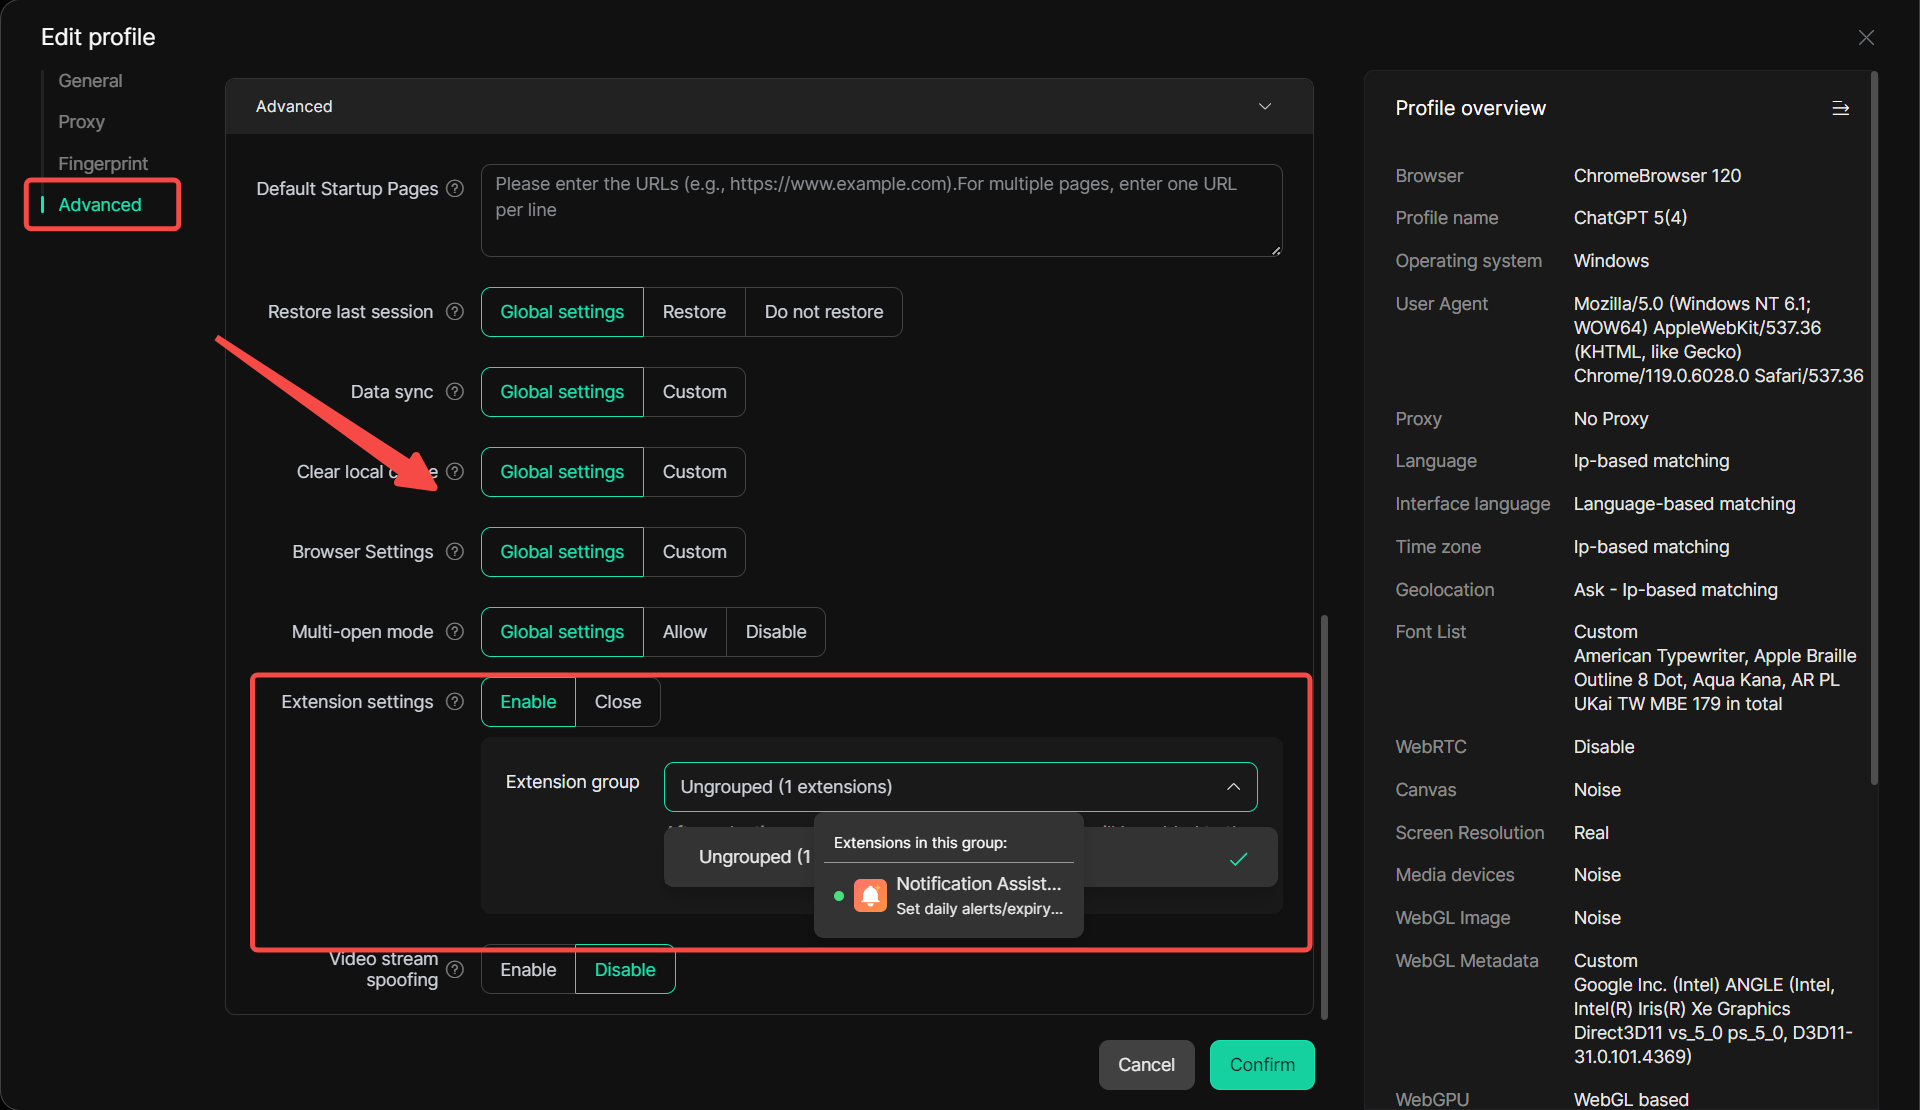
Go to the [Advanced] in the editing profile page, enable the “Extended settings” function, and select the “Extension Group” where the Notification Assistant is located.
Finally, click “Confirm” After saving the edit, the message notification function can be used normally in this profile.
4. Set up Message Notifications
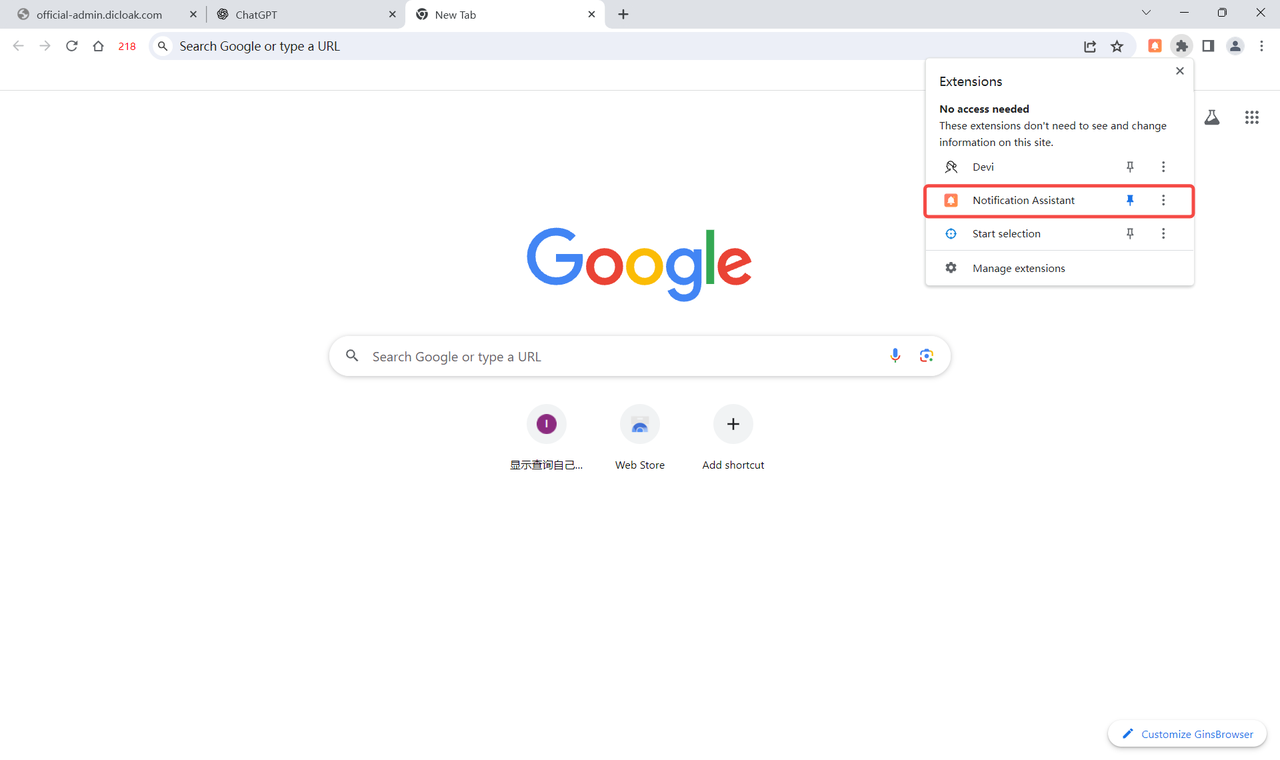
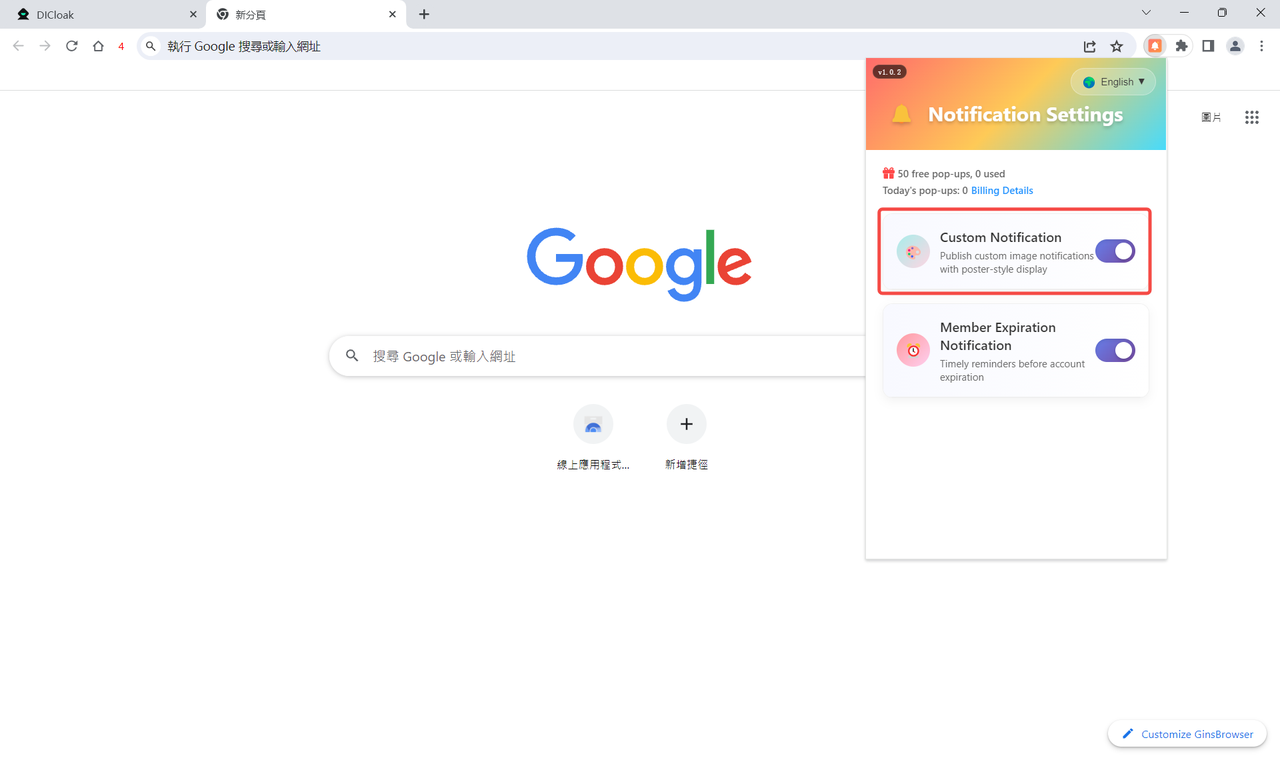
After enabling the “Notification Assistant” , in the browsing profile where this extension has been enabled, click the extension icon in the upper right corner to open the “Notification Assistant” and set up message notifications.
- Only super admin accounts can open this extension for configuration. Other members clicking it will not expand the settings interface.
- Extension settings are synchronized across different profiles within the team. Configure the extension in all profiles requiring message notifications. Simply enter one profile to set it up, and other profiles already configured with this extension will synchronize the settings to deliver notifications accordingly.
5. Set Up “Custom Notifications”
Click on the “Custom Notification” component to edit the content and noticing method of custom notifications.
“Upload Image” , select the image you need to display in the message pop-up window.
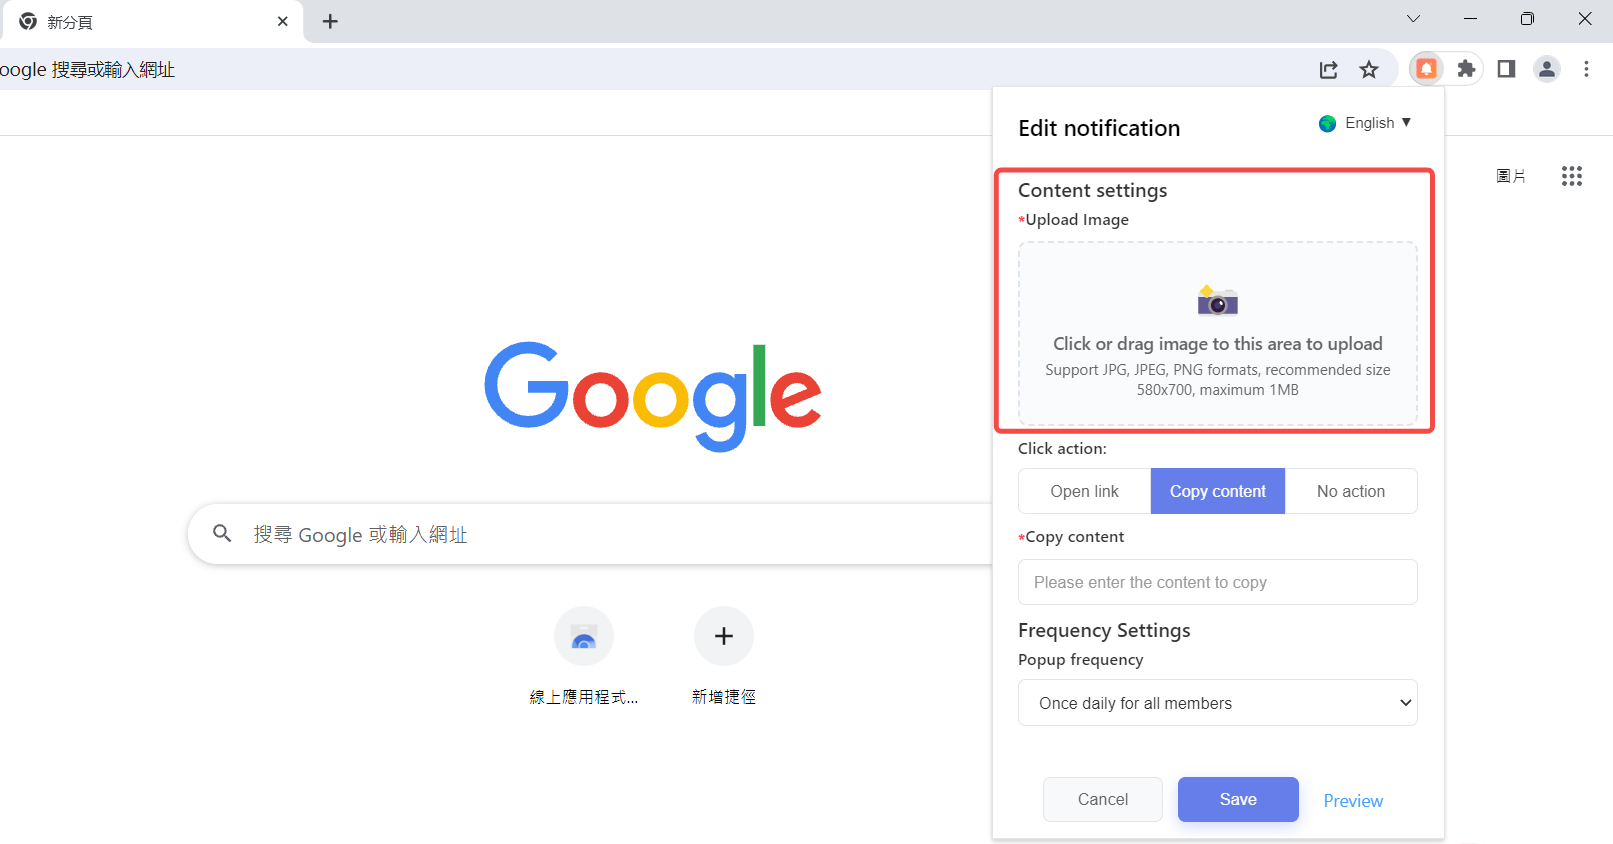
Select the “Click action” that occurs when a member clicks on an image in a message in the “Click action” column.
- Select “Open link” , and when a member clicks on the image in the message pop-up window, the link you entered will automatically open;
- Select “Copy content” , then when a member clicks on the image in the message notification pop-up window, the content you entered will be automatically copied;
- Select “No action” , and members will experience no interaction effect after clicking on the image in the message pop-up window.

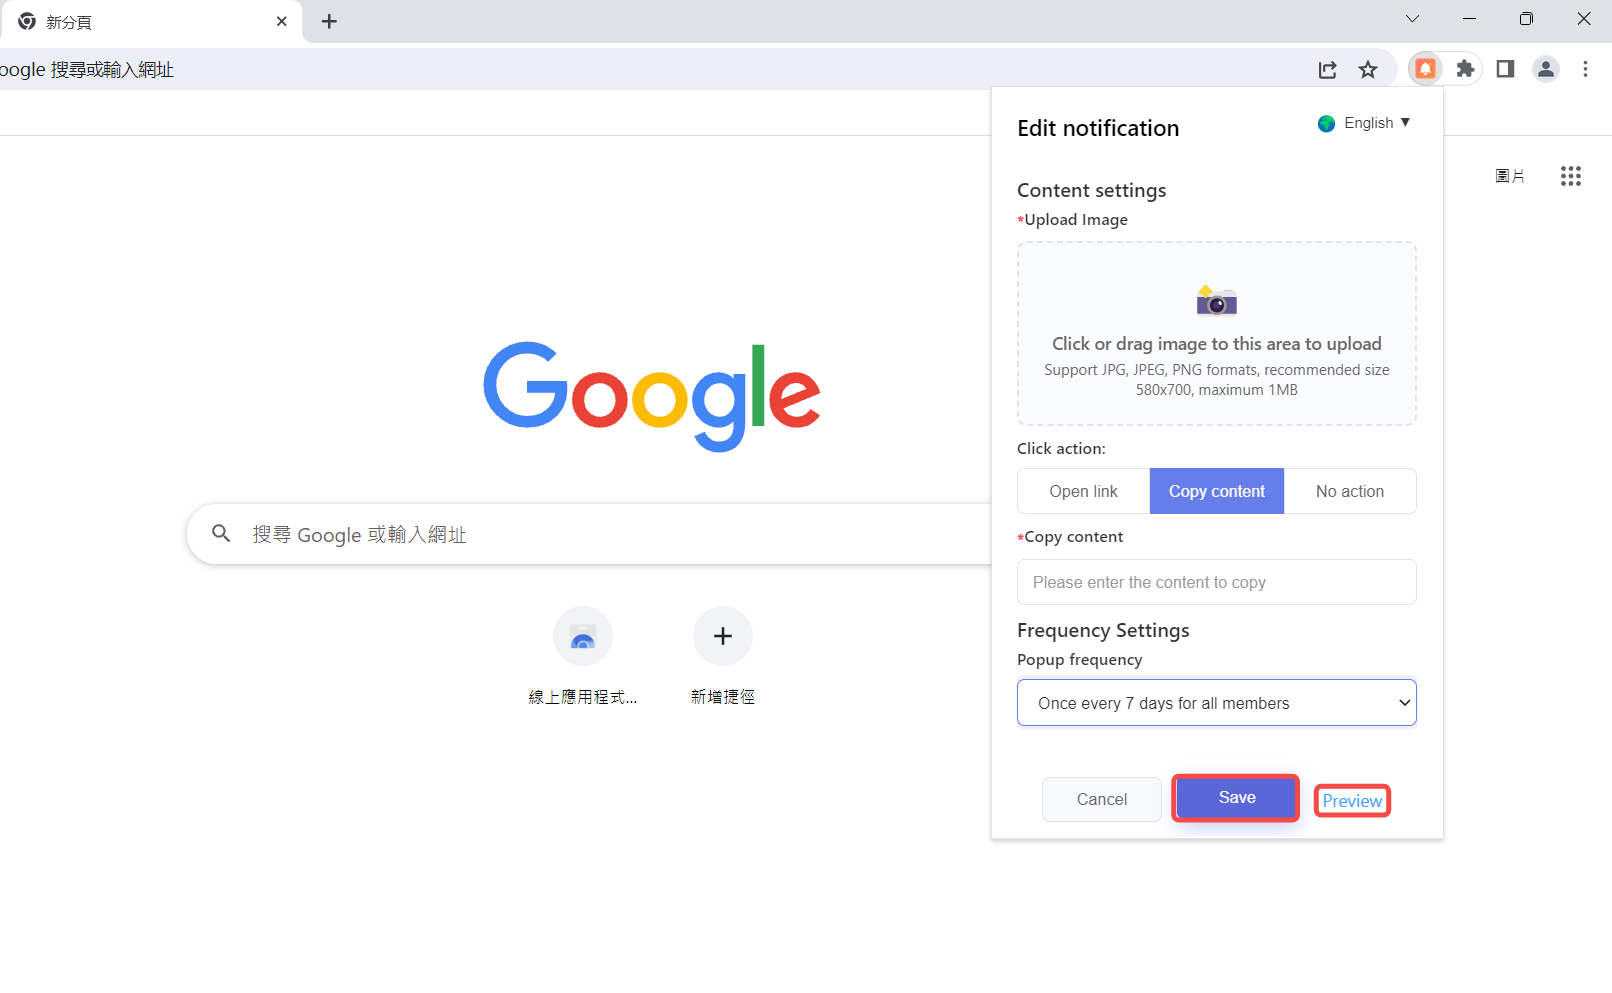
In “Frequency Settings”, you can choose to send a message to members once every 1/3/7 days.

After completing the above settings, click “Preview” to view the effect of the message pop-up window; click “Save” to indicate successful setup of “Custom Notification”, means the message will be pushed to members in the content and manner you have set.
6. Set “Member Expiration Notification”
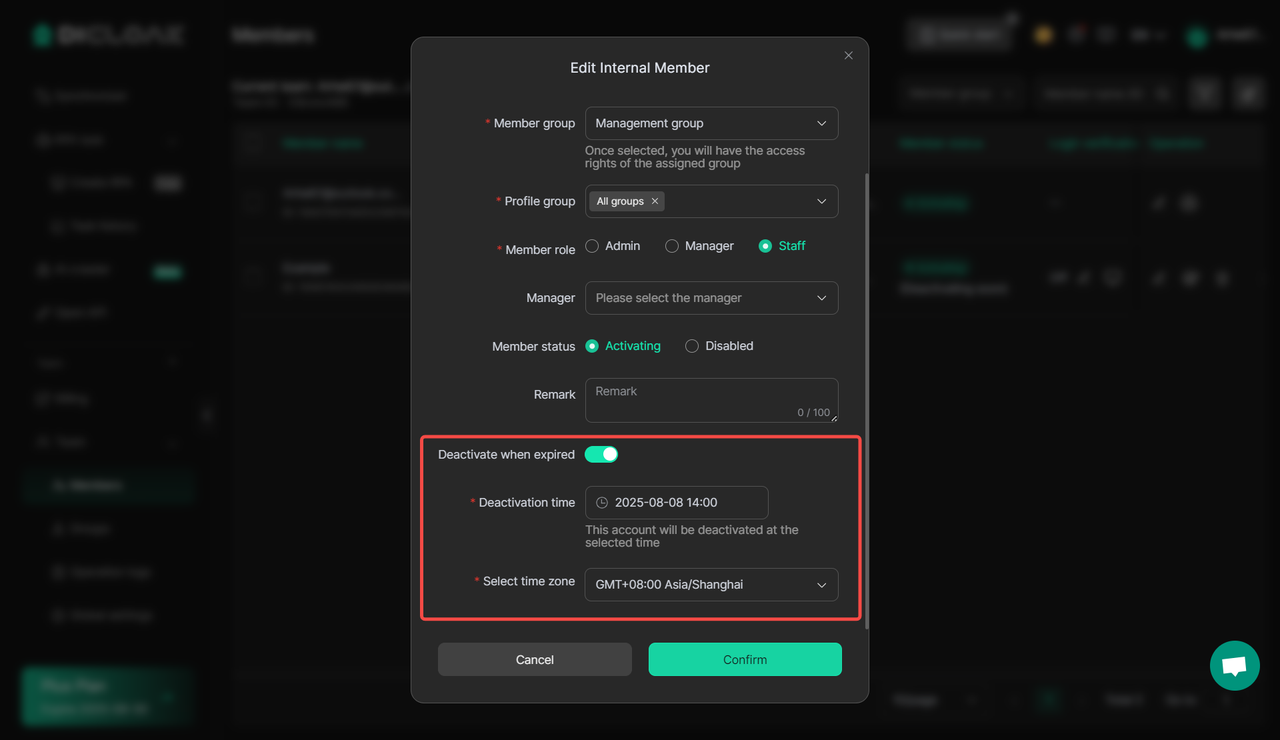
At[Team] > [Members], set the account deactivation time for members, and the entry is shown in the figure below.
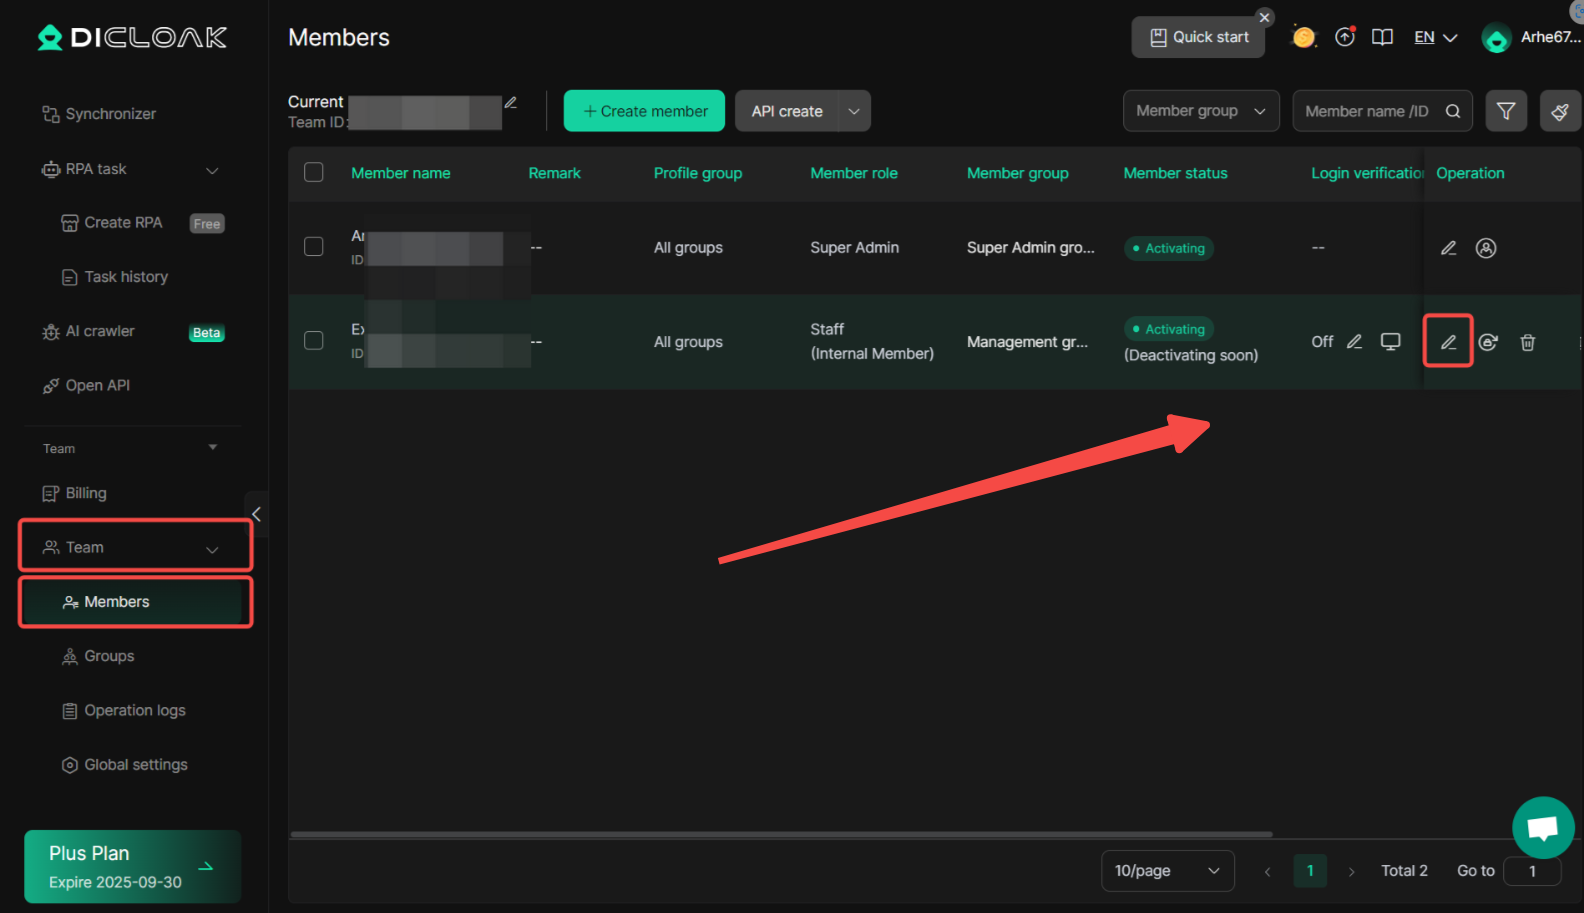
After enabling “Deactivate when expired” , select the member account “Deactivation Time” , and you can choose the corresponding time zone.
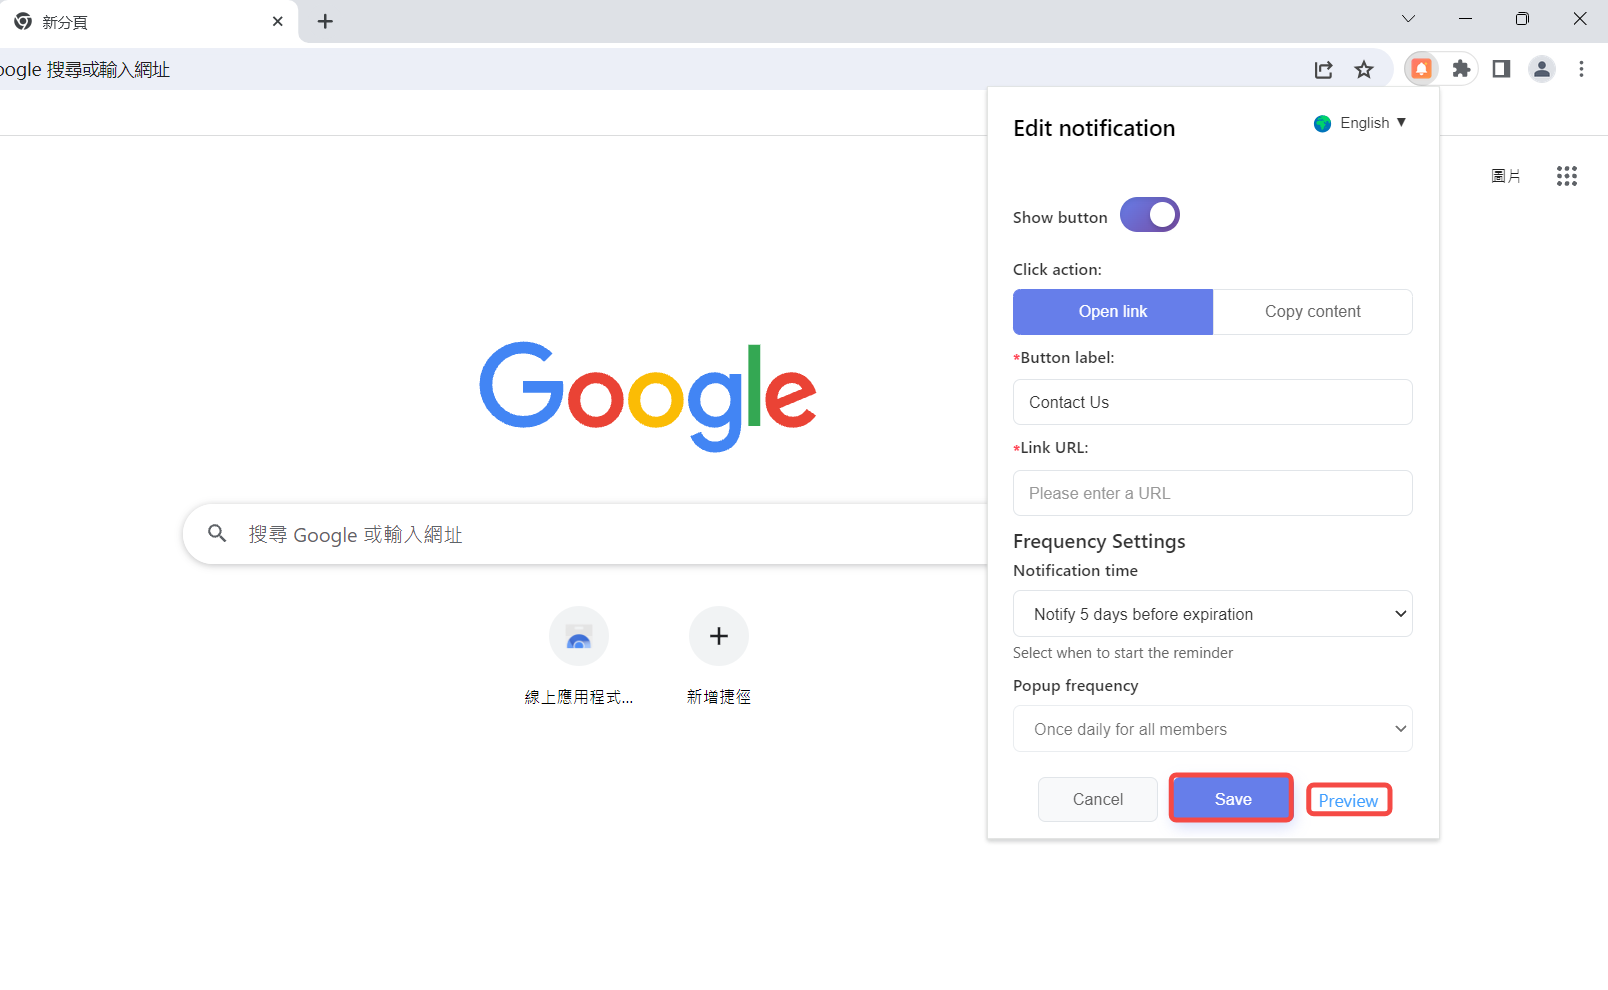
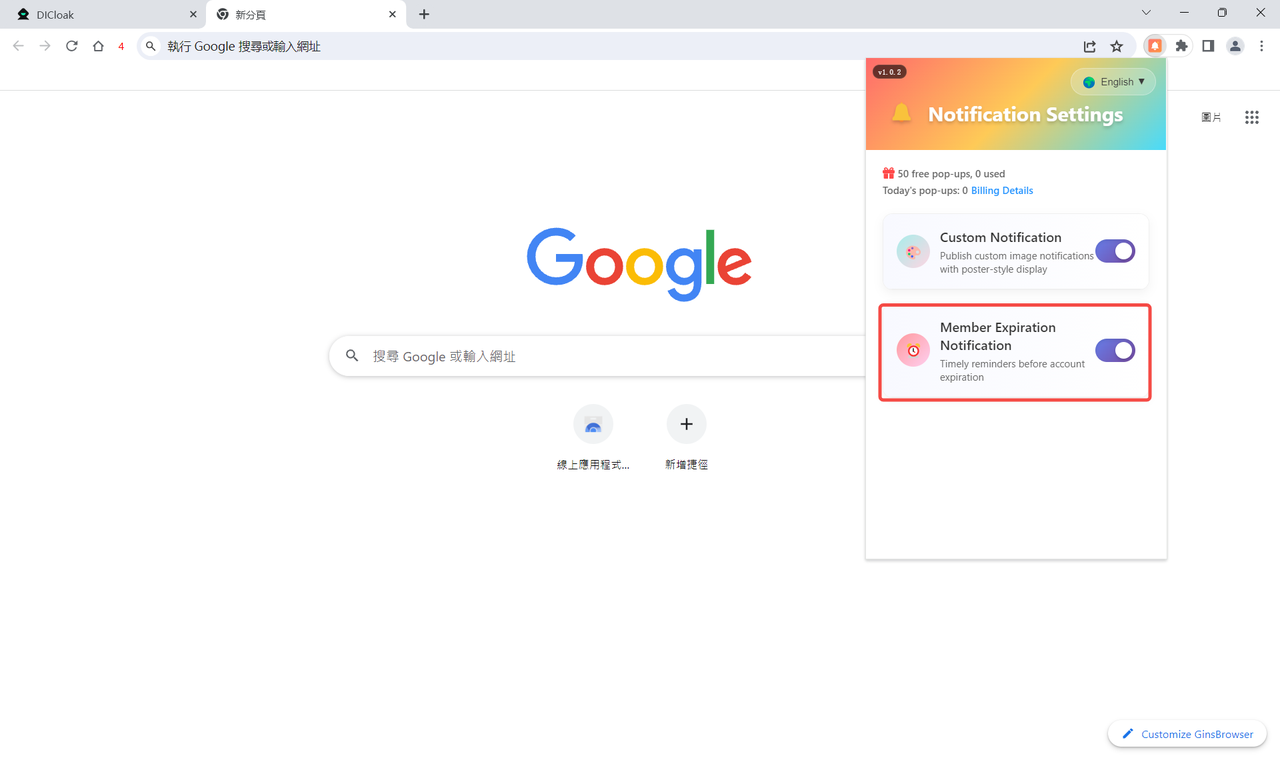
Click on the “Member Expiration Notification” widget to set notification preferences.
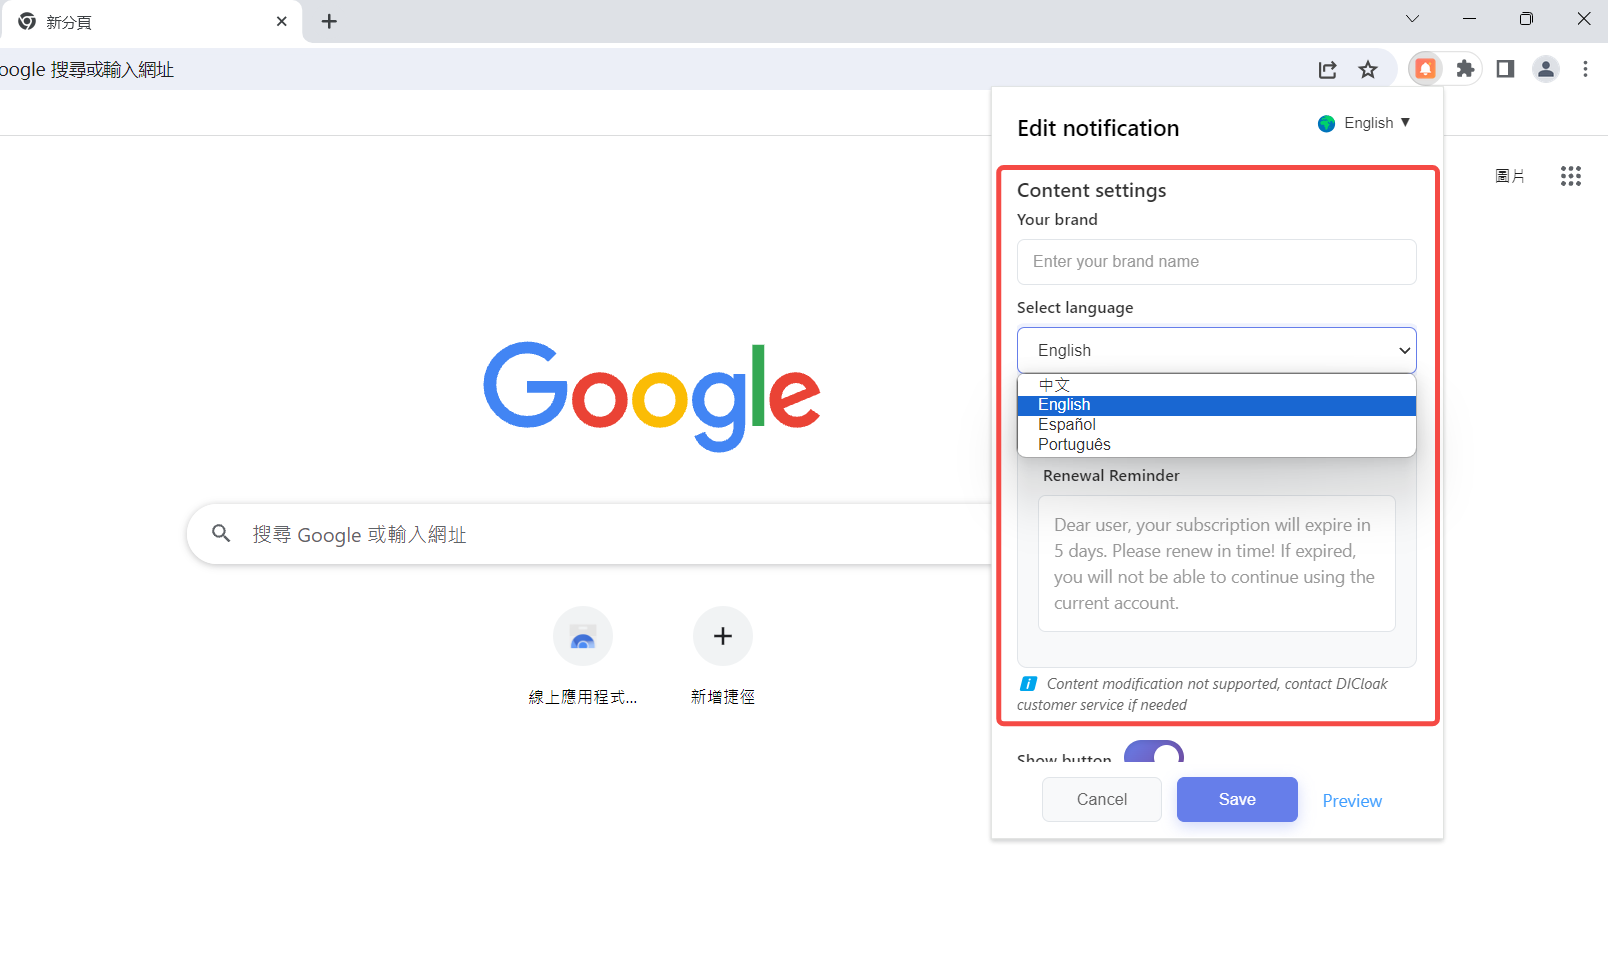
Enter “Your Brand” , then “Select language” for the content in the message pop-up window. The content of the pop-up window does not currently support modification. If you need to modify it, please contact DICloak customer service.
If you need members to interact with the message pop-up, please scroll down, find “Show button” and enable it, then select “Click action” method:
- Select the “Open Link” , you need to set the button name to be displayed in the message pop-up window and enter the link that will automatically open after members click the button.
- Selectthe “Copy Content”, you need to set the button name to be displayed in the message pop-up window and input the content that will be automatically copied after members click the button.
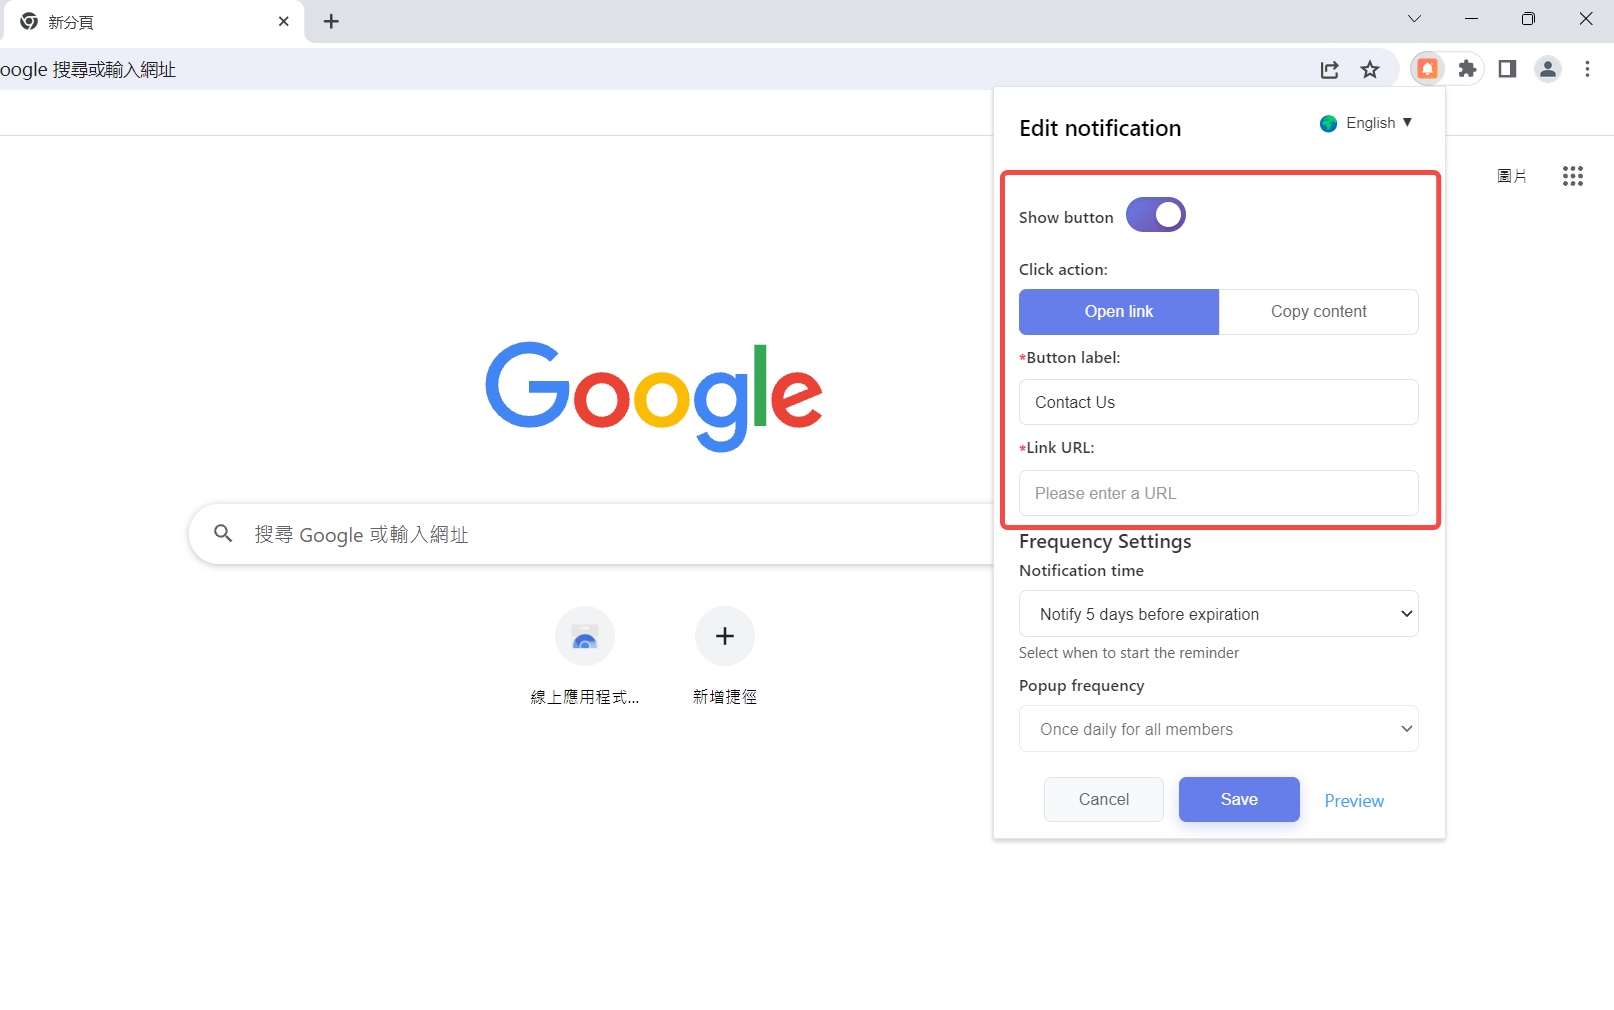
In “Frequency Settings” , you can set the “Notification Time” for member account expiration ,with three time options: starting to notify 3/5/7 days before expiration .
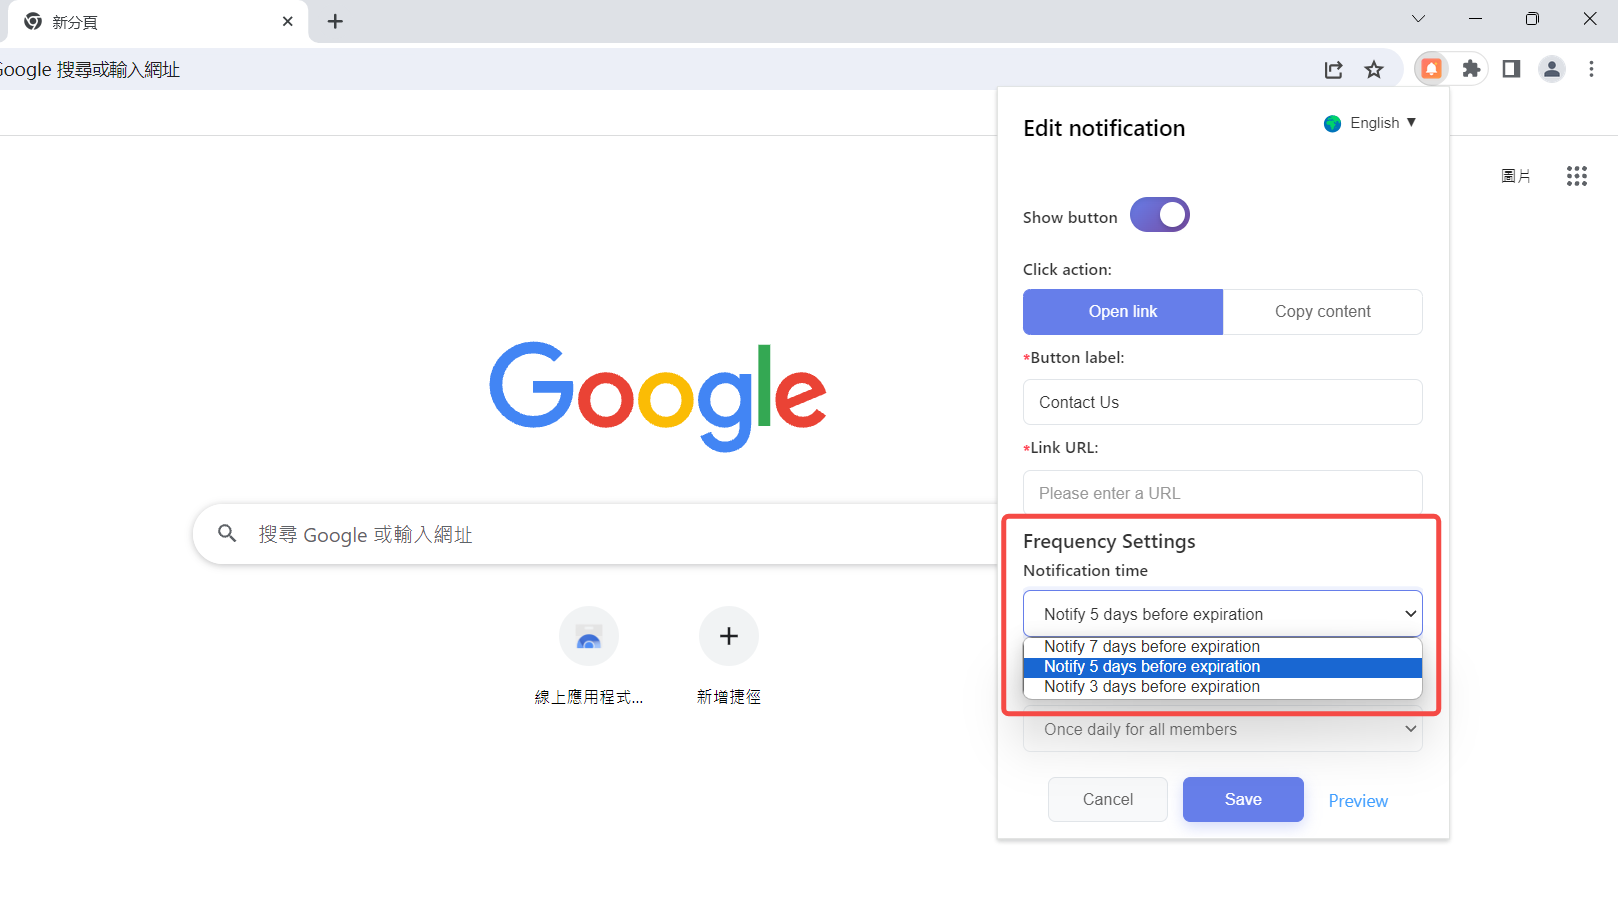
The “Popup frequency” of the member expiration notice only supports “Once daily for all members” .

After completing the above settings, click “Preview” to view the effect of the message pop-up window; click “Save” to indicate successful setup of “Custom Notification”, and the message will be pushed to members in the content and manner you have set.