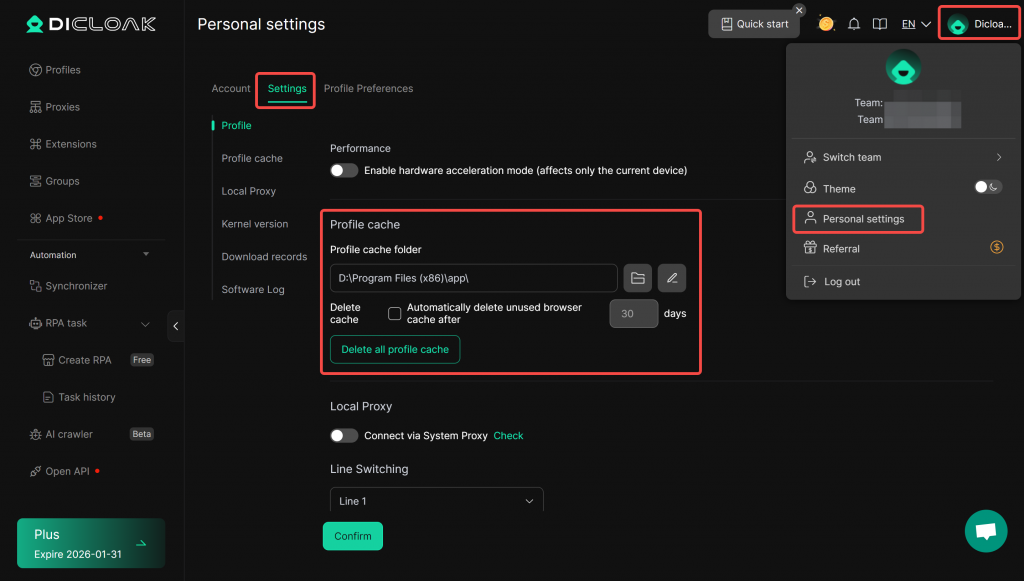
In Profile Cache Settings, you can modify the cache file path, set up automatic periodic cache cleanup, or delete all profile cache with one click.
1. Open [Personal settings]
- Click your avatar in the top-right corner, then click [Personal Settings].
- Navigate to [Settings] → [Profile Cache] to view the current profile cache folder.
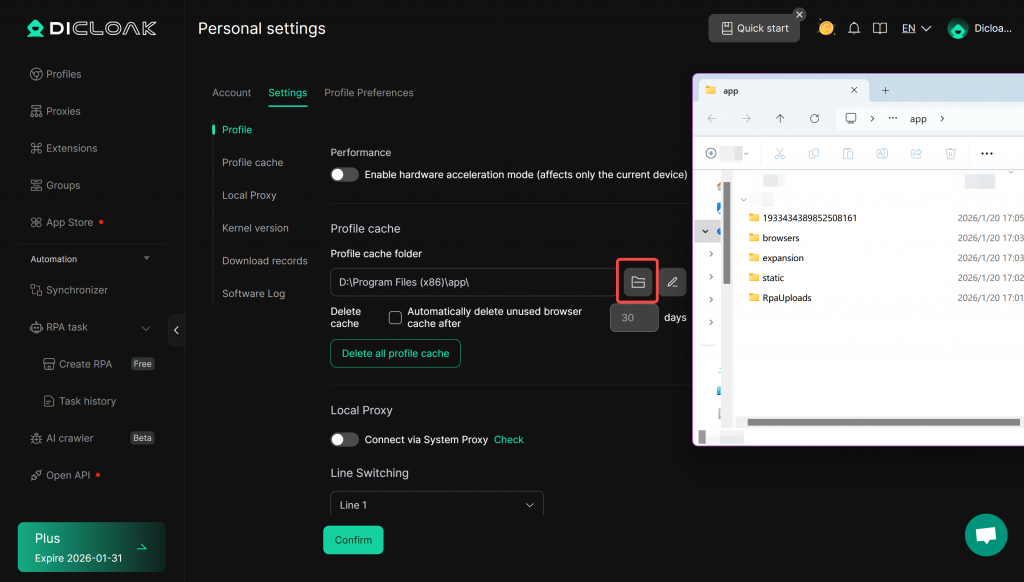
3. Check the Profile cache folder
- Click the folder icon on the right to open your computer’s file explorer and browse the profile cache files. You can delete the browser cache for specific profiles directly in the system folder.
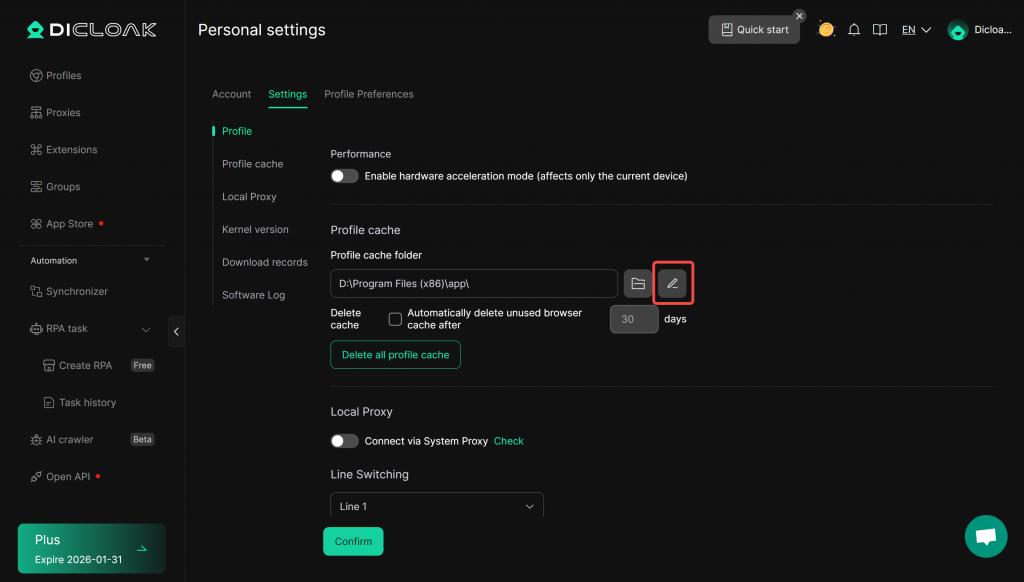
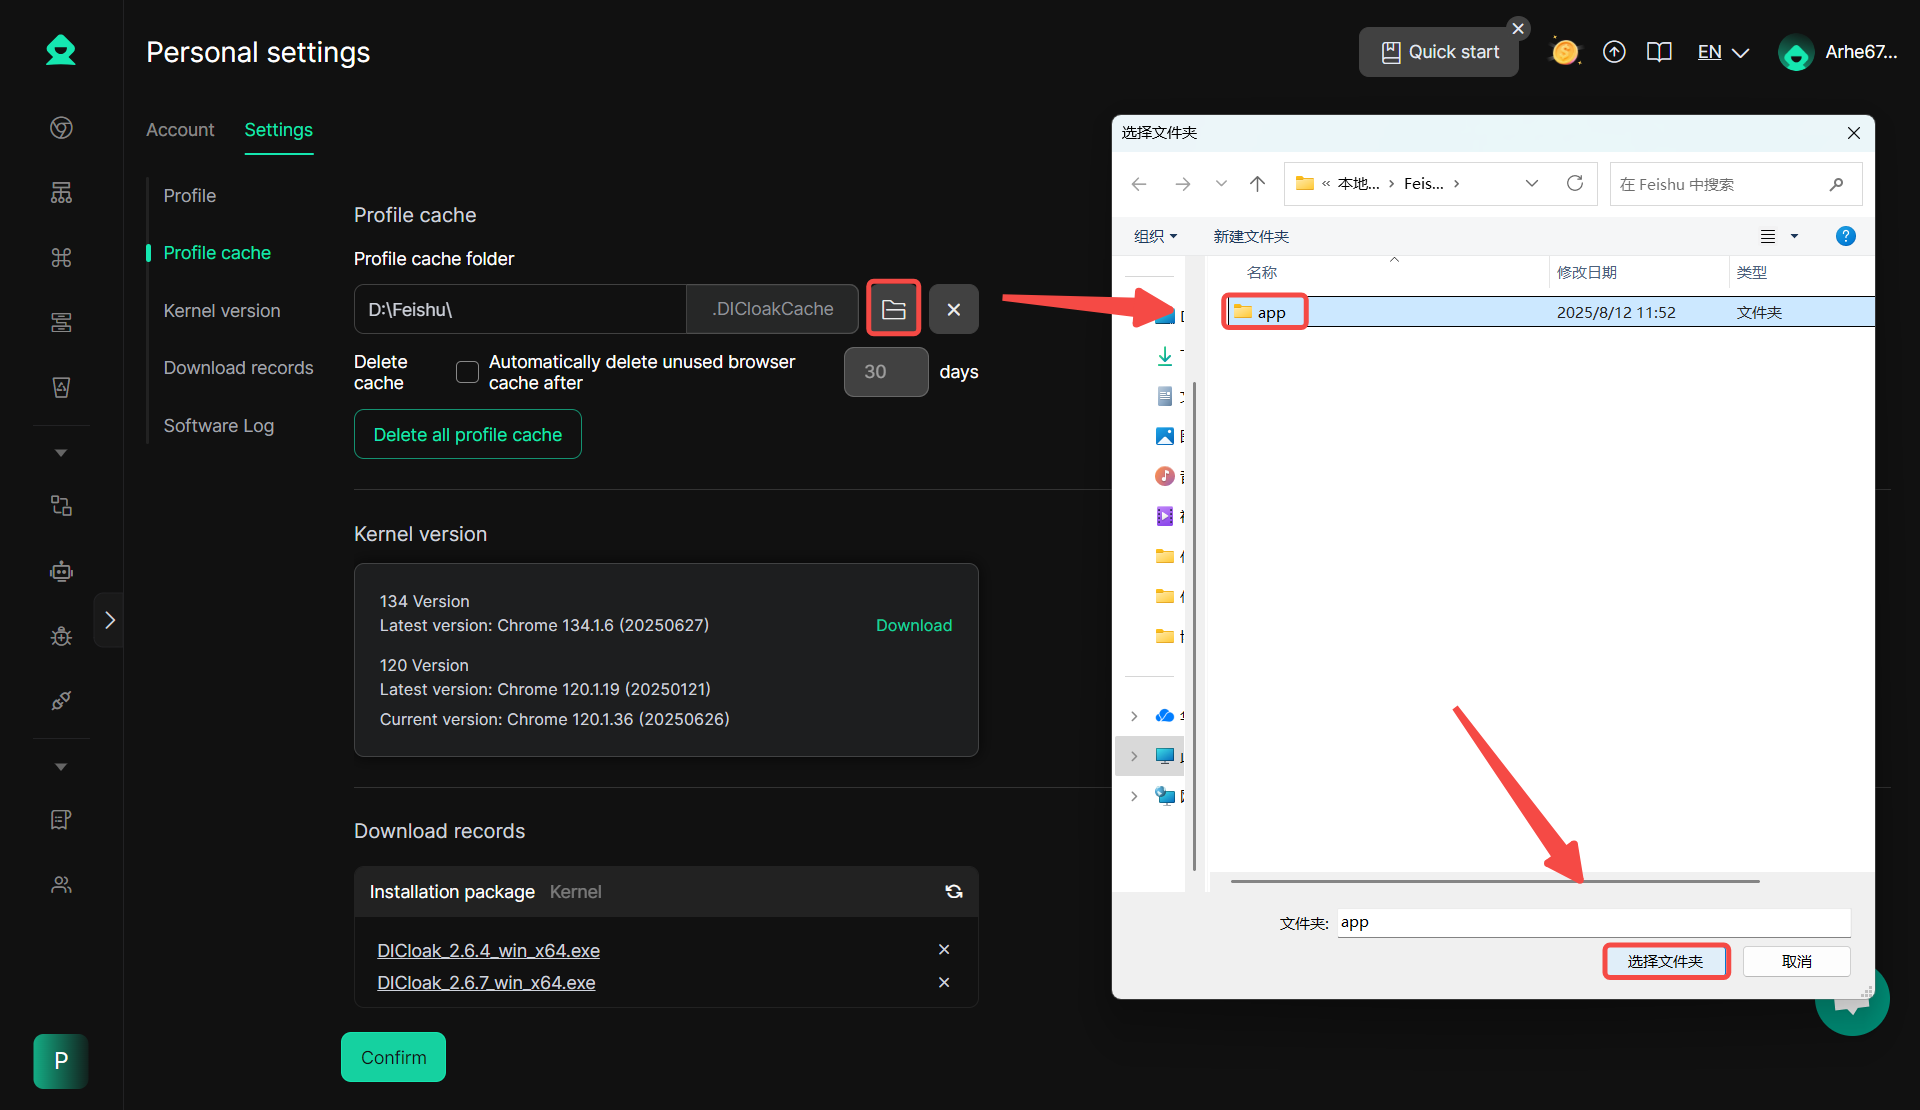
4. Modify the Profile cache folder
- First, click the edit icon on the right and confirm by clicking “Confirm”.
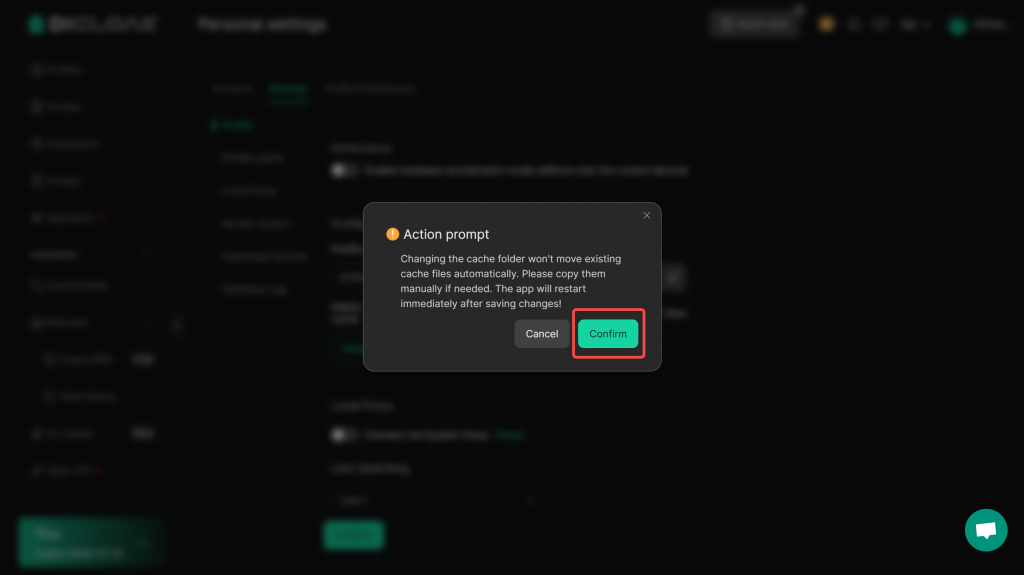
- Click the folder icon again, enter the computer’s file explorer, and find the folder “Select” where you store the Profile cache.
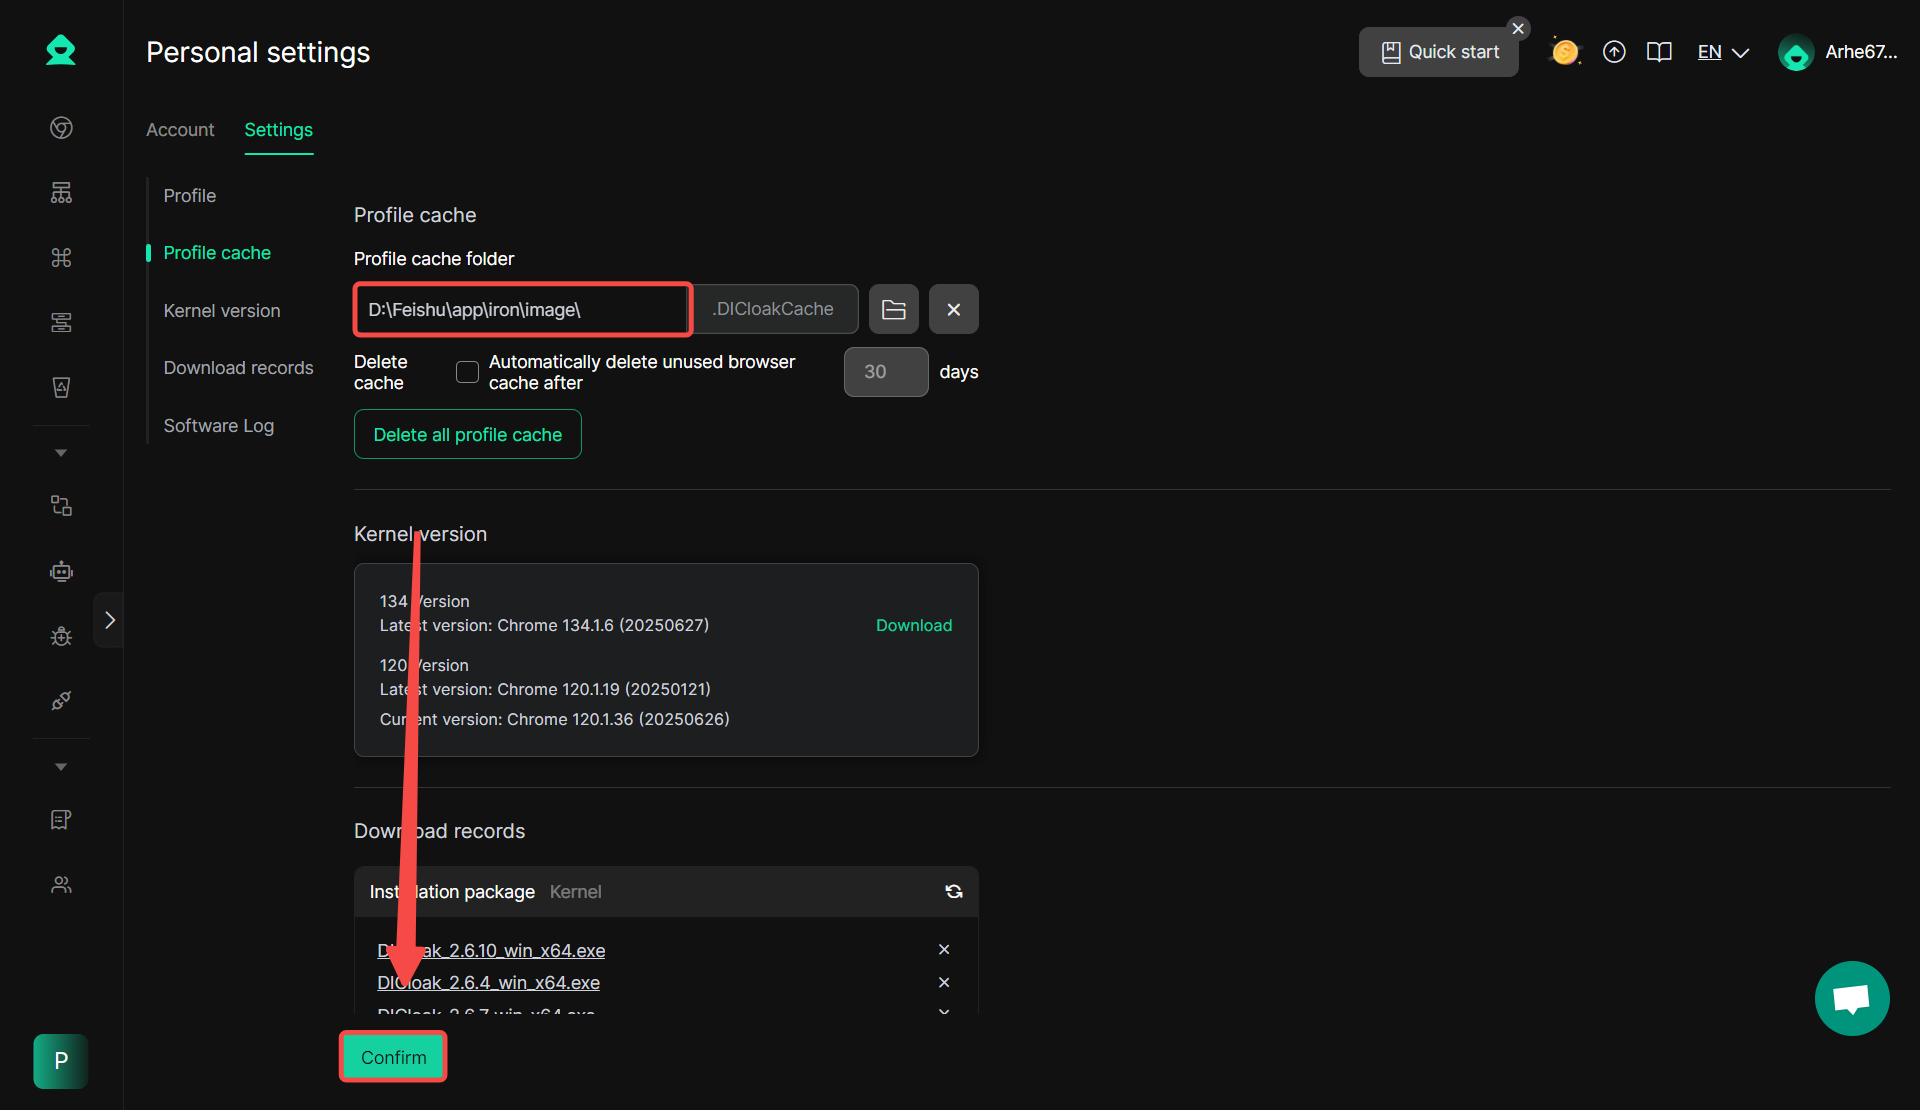
Confirm the folder where you want to store the Profile cache, and click “Confirm” to complete the change of the Profile cache folder.
5. Automatically delete/Delete all Profile caches
- You can enable the “Automatically delete unused browser caches after N days” , and modify the number of days. Then click “Confirm” to save the settings.
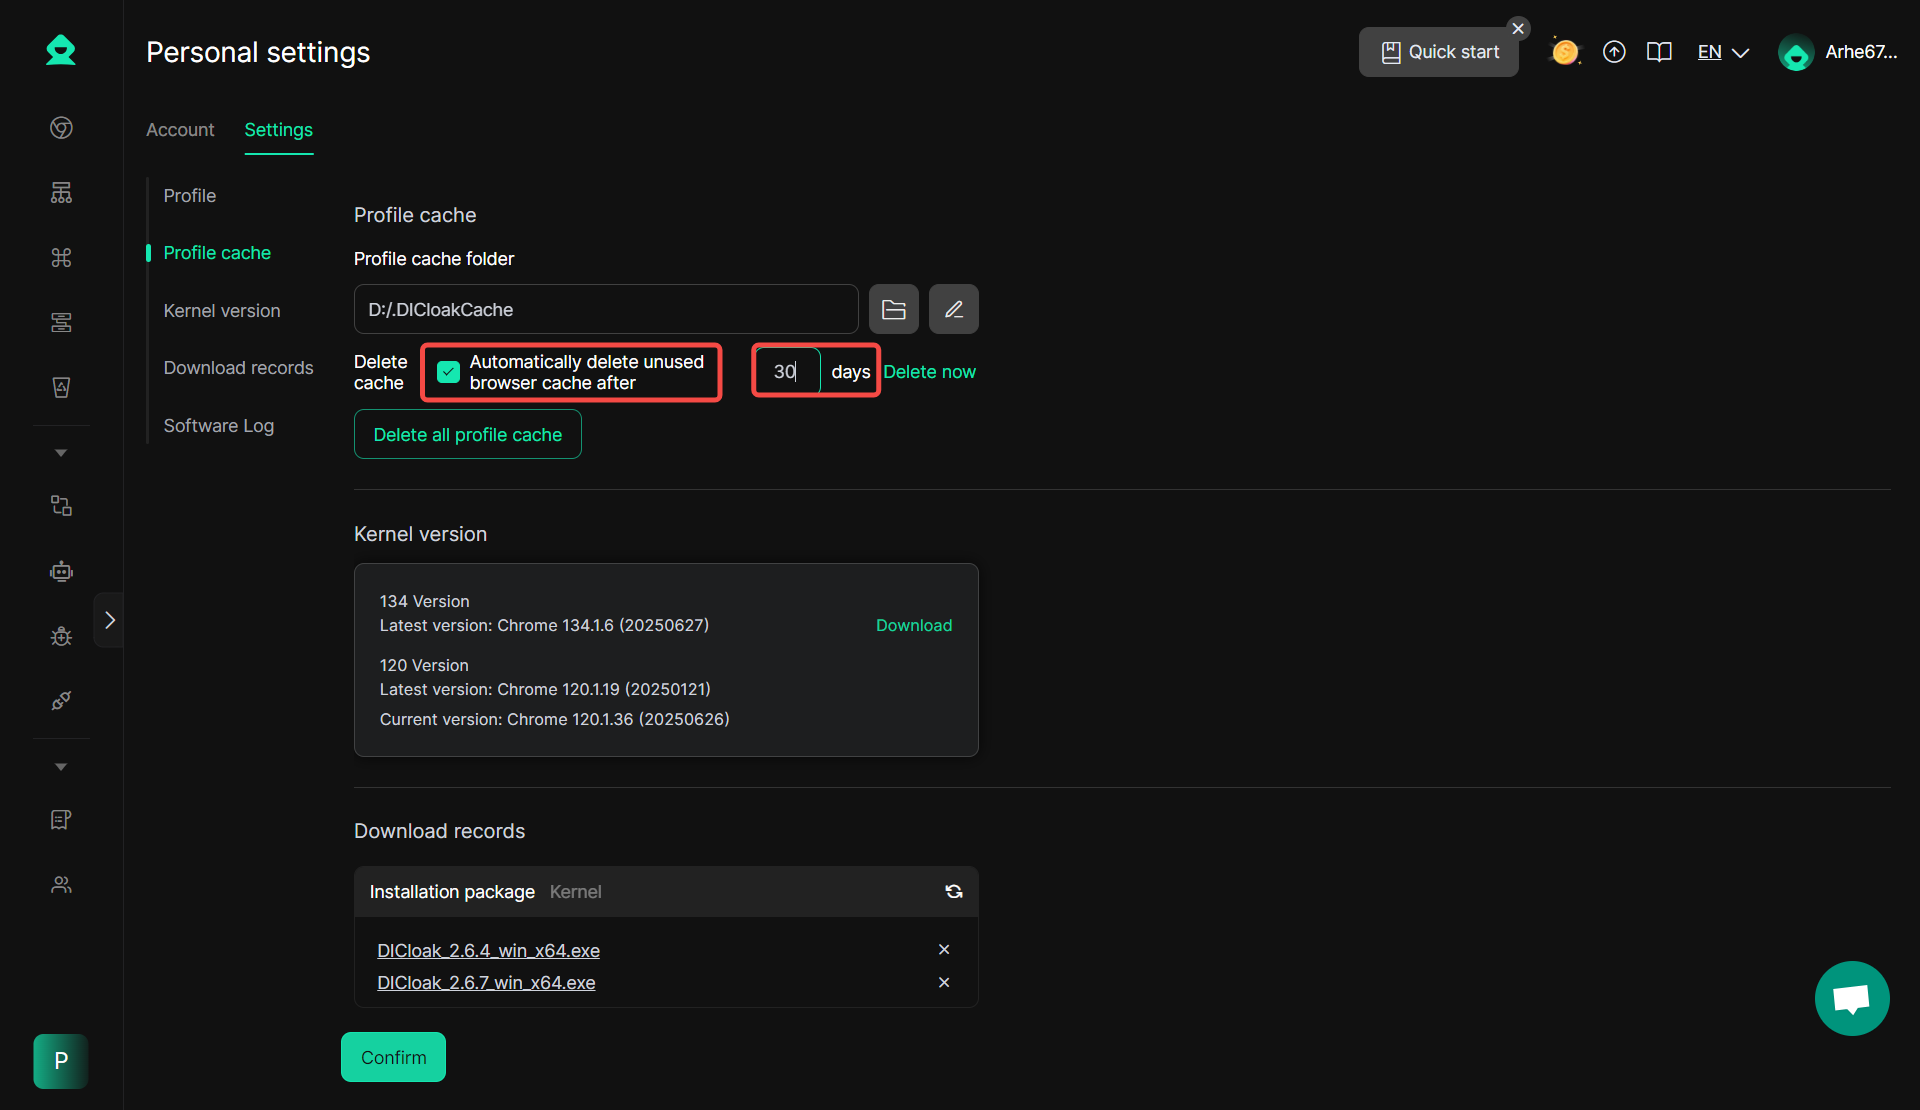
(Choose carefully) You can “Delete all Profile caches” here.
