Introduction of Swiftproxy
Swiftproxy is a reliable company providing global proxy services, including residential proxies and static (ISP) proxies. It has over 80 million IPs covering more than 195 countries and regions, and supports multiple protocols such as HTTP/HTTPS/SOCKS.
With its excellent speed and reliability, it ensures efficient public network data collection, and is suitable for various fields including web crawlers, ad verification, and social media management. Its intelligent console allows you to fully control functions such as IP whitelisting, rotation, endpoint establishment, and geolocation, meeting your business management needs.
Swiftproxy Proxy Configuration
Step 1: Get Swiftproxy Proxy Information and Download
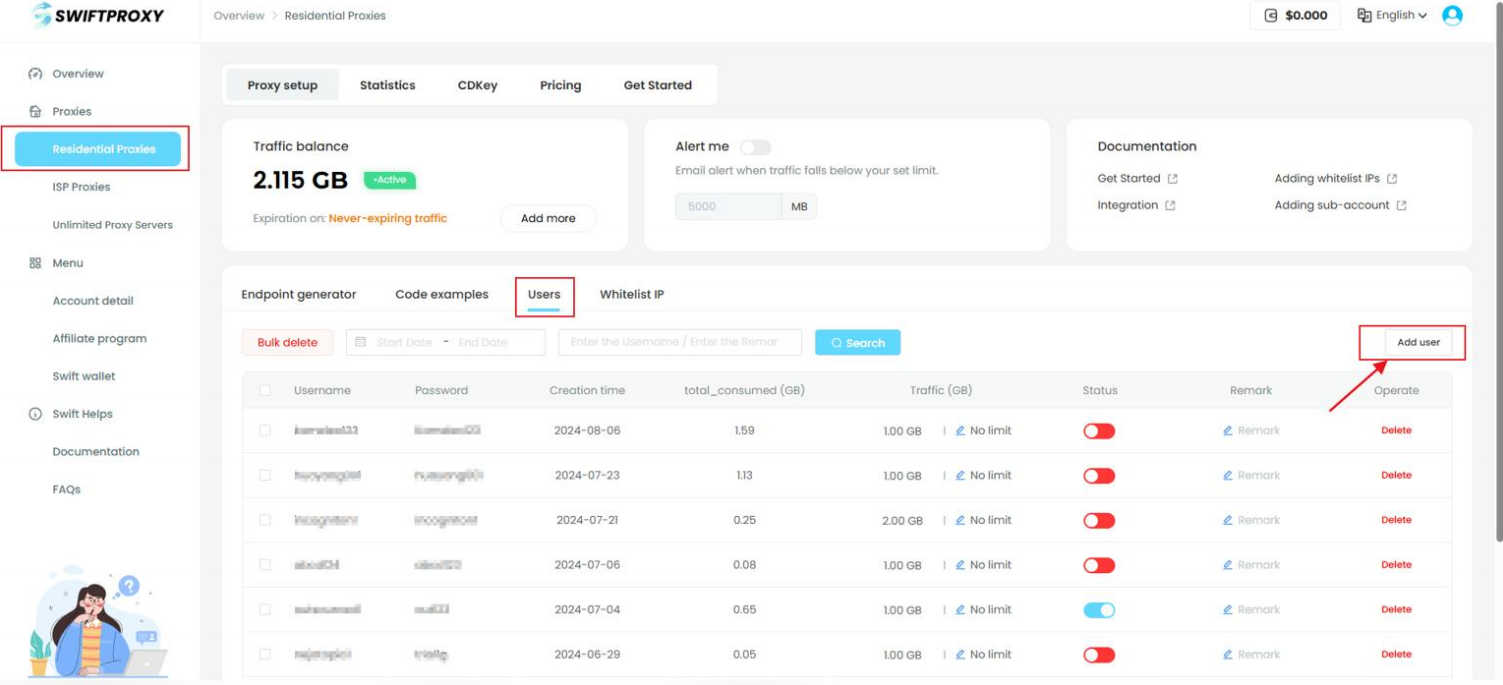
1.Create a Sub-Account
- After logging into your account, click “Residential Proxies” → “Users” → “Add user” to create a sub-account.
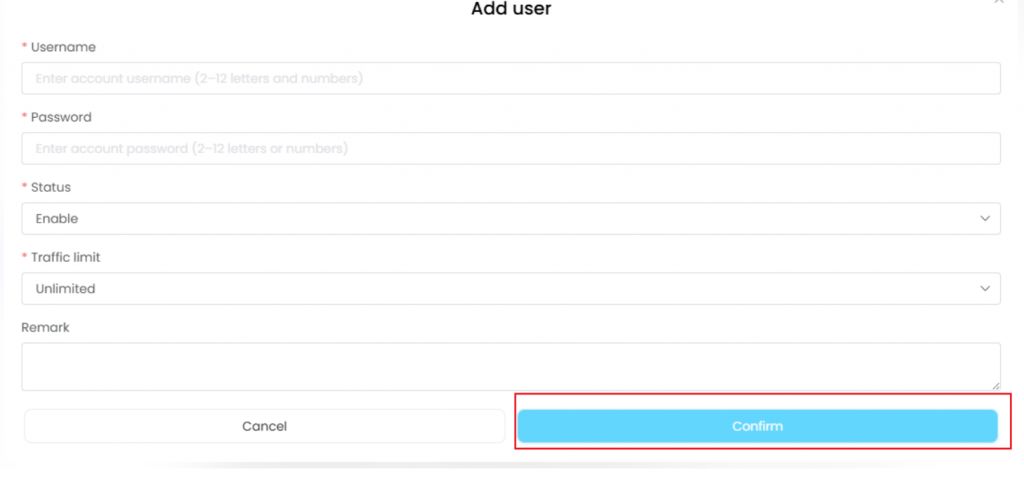
- Please be sure to change the sub-account status from “Paused” to “Enabled” and set a data usage limit (traffic limit) to prevent accidental overuse of data.
- Click “Confirm” to complete the sub-account creation.
2.Access “Get Proxy” and Configure Settings
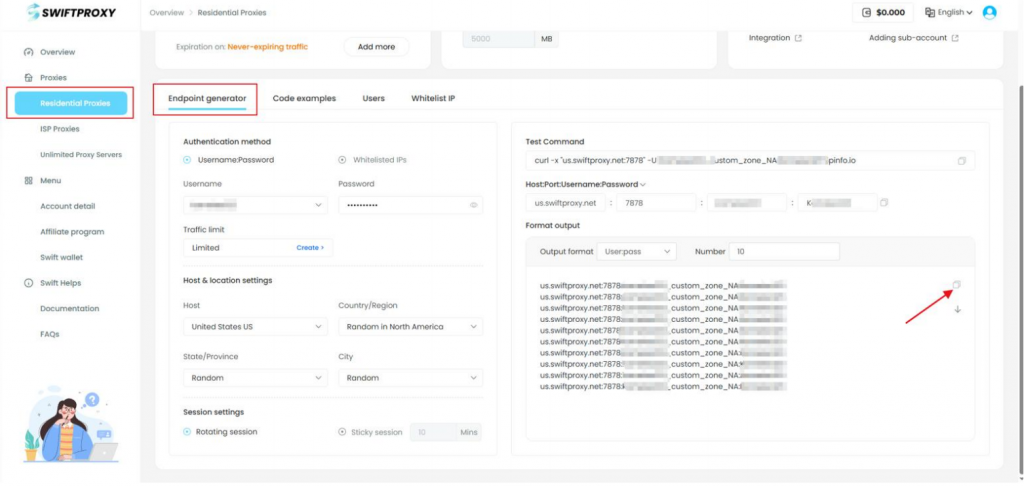
- Click “Residential Proxies” → “Endpoint generator”.
- Click “Residential Proxies” → “Endpoint generator”.
- You can choose the host according to your needs. Next, configure the residential agent according to your requirements. For example, select “Random in North America”.
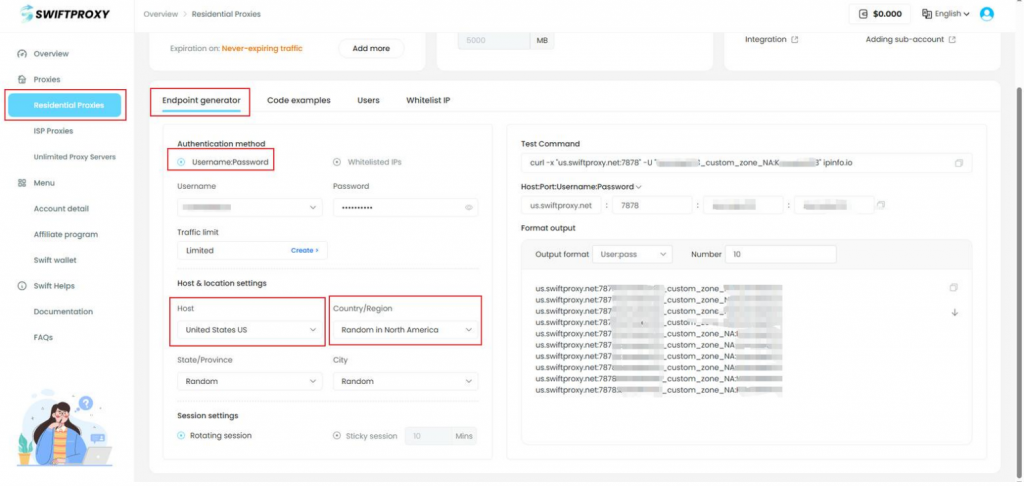
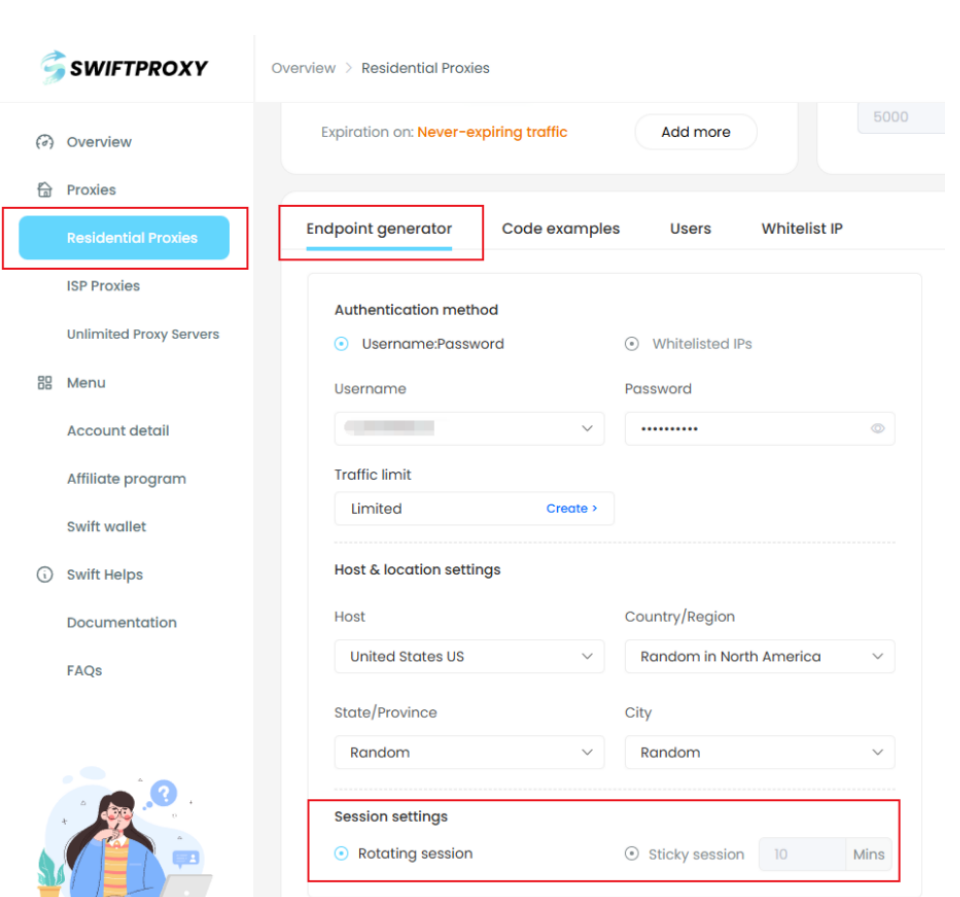
Note: Swiftproxy offers two IP types:
- Sticky Session: For sticky IP, select the IP stabilization time (e.g., if set to 3 minutes, the IP will change every 3 minutes).
- Rotation Mode: IPs will change every time we make a new request to the web.
3.Finish Proxy Extraction
Tap “Copy link” or “Batch Generation” to finish the proxy extraction
Step 2: Configure Swiftproxy in DICloak Browser
Note: Internet connections within mainland China (excluding Hong Kong, Macau and Taiwan) generally cannot directly access foreign IPs. Therefore, if you are trying to configure an overseas IP proxy in DICloak within mainland China (excluding Hong Kong, Macau and Taiwan), you need to set up an overseas network through a VPS, a dedicated international line, or a VPN service first. Then you will be able to connect and access the overseas IP in DICloak properly.
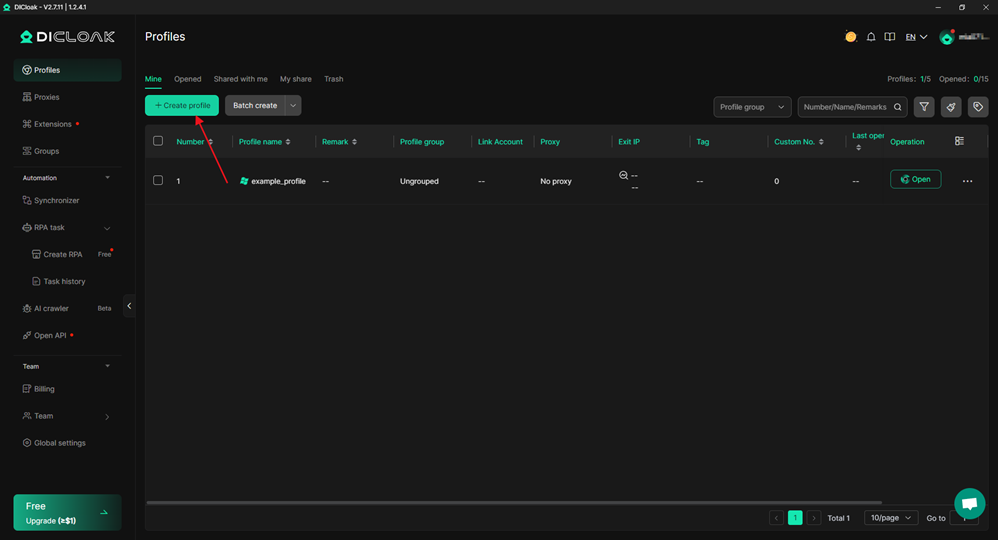
1.Double-click to open the DICloak client, and click 【Create profile】 to start creating a browser.
2.After entering a name, proceed to the proxy settings. In the proxy section, select “Custom Proxy.” Next, enter the information according to the example format. Set the proxy protocol according to your needs; here, we’ll use HTTP for demonstration. After pasting, click “Analyze” to automatically fill in the proxy information.

3.Click on “Checking proxy” to check if the proxy connection is working properly. If the connection is successful, you can see the proxy information.
4.Next, configure the other browser options according to your needs, and finally click “Confirm” to complete browser creation.

5.Click “Open” to begin using the browser.
